 wrteam.in
WRTeam is a company built with the ideology of customers first. We are a team of enthusiastic individuals, with foresight for innovation and a passion for solving everyday problems using the latest technology.
We trust in your ideas and want to help you bring them to life, so you can focus on your long term vision while we do all the hard work. As a service providing company, we understand your needs and strive hard to provide you with the best possible quality of service whether it is the development of your app, logo design or branding, or UI/UX improvements.
To achieve the above, we have handpicked our people and recruited a team of multi-talented individuals, each of whom adds a unique skill to our team of service providers. We ensure quality by imparting strict testing of all our products, listening to the customer complaints, and solving their problems on a priority basis.
How to Setup Flutter in Android Studio
- Download Lastest Flutter SDK from below link.in that click on flutter_window_xxx.zip button.
- Flutter sdk Here
- Extract the zip file and copy flutter folder into your desired installation location for the Flutter SDK (eg. C:\src\flutter; do not install Flutter in a directory like C:\Program Files\).
- Inside Flutter folder find flutter_console.bat. Start it by double-clicking.
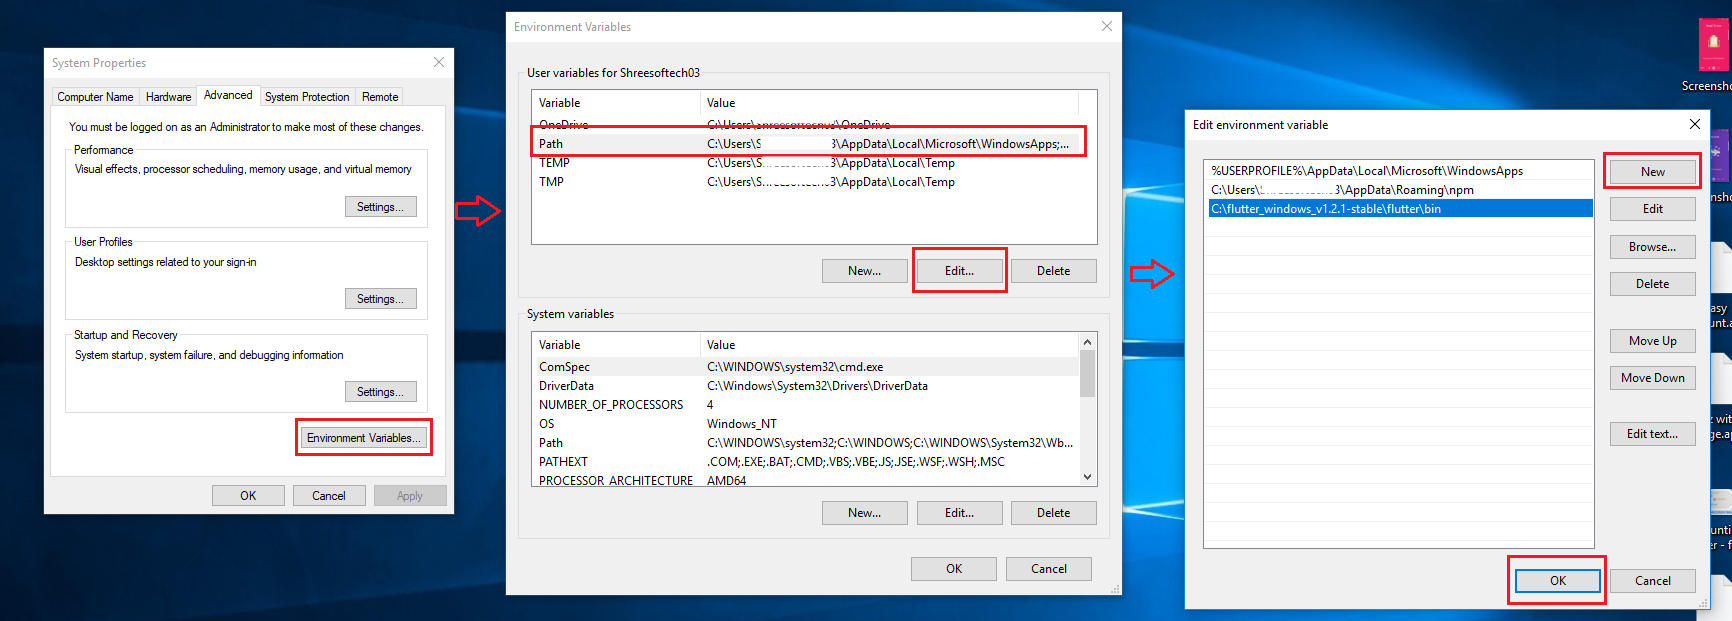
- Now set your enviournment variable
- From the Start search bar in , type 'env' and select Edit environment variables for your account
- Under User variables check if there is an entry called Path:
- Click on Edit.new Dialog open from it click on new and copy full path to flutter\bin as its value
- Now Restart your pc for changes to take effect
- Now check everything is ok or not
- open cmd and do following shown in below picture
- Now open Android Studio and create new flutter project then select your flutter sdk file to the location where we have downloaded earlier and that's it




Setup Project on MacOS
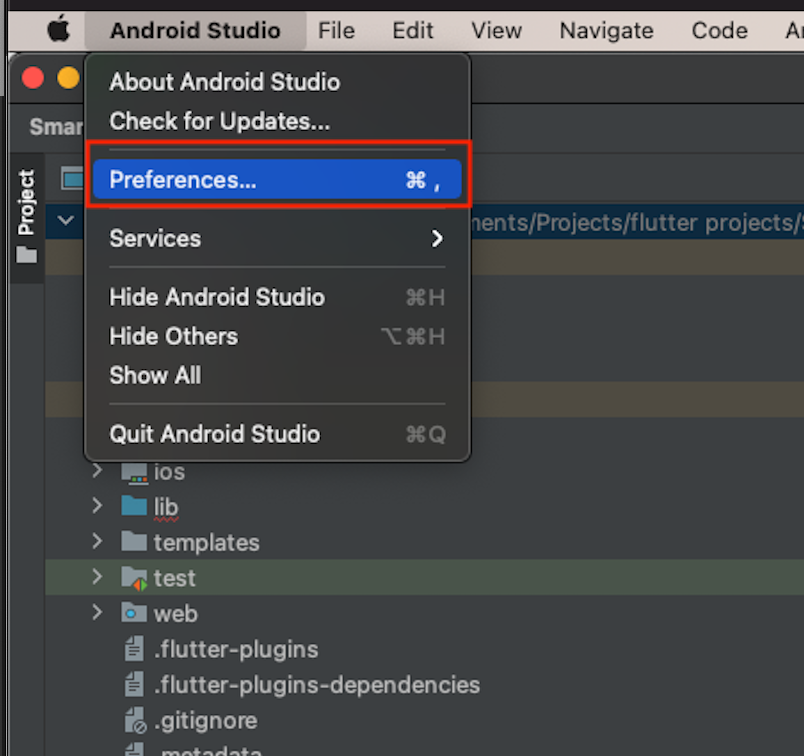
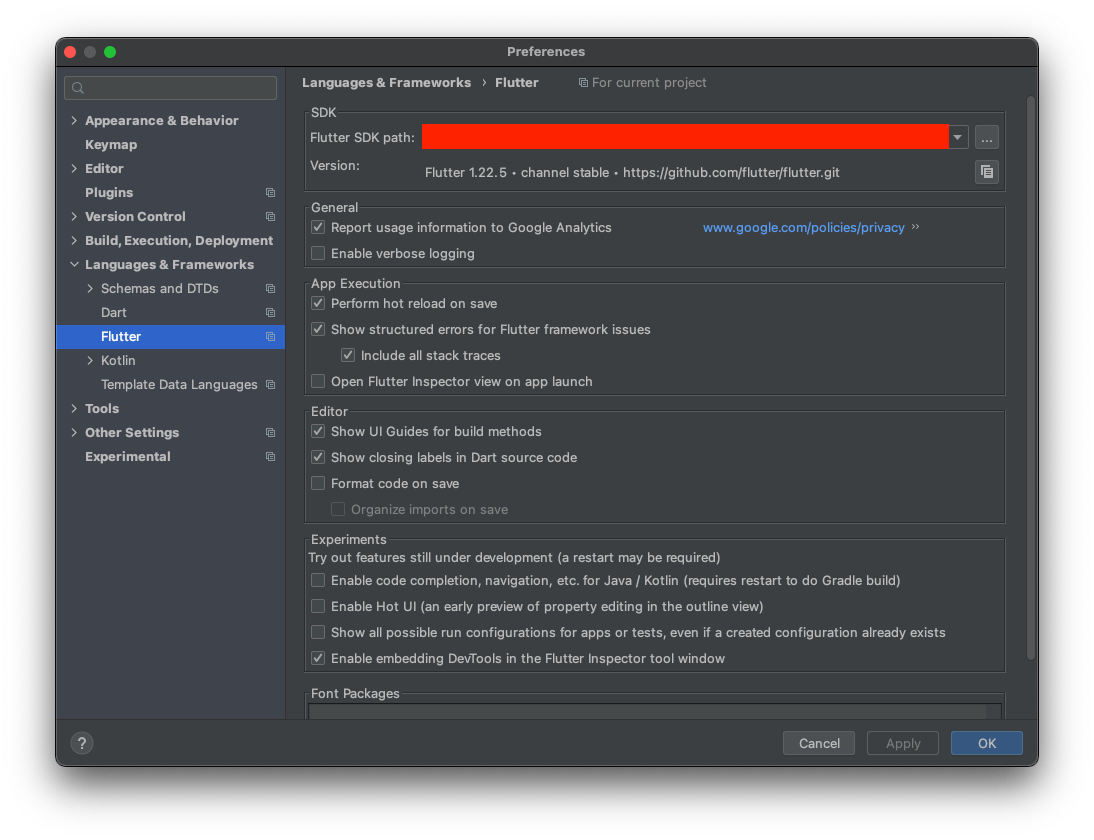
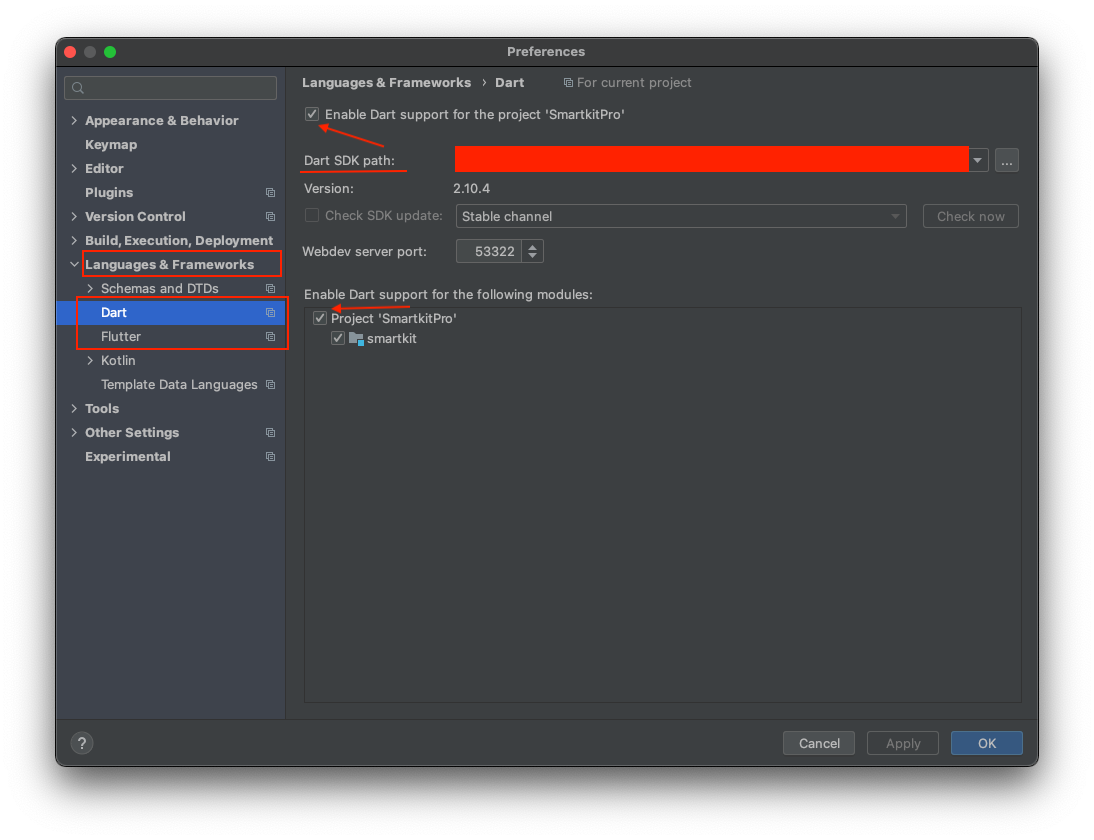
- Open Project folder in Android Studio. Go to Preferences > Language & Frameworks > Flutter and Set Flutter SDK Path & Enable Dart support for Project and Apply and OK.
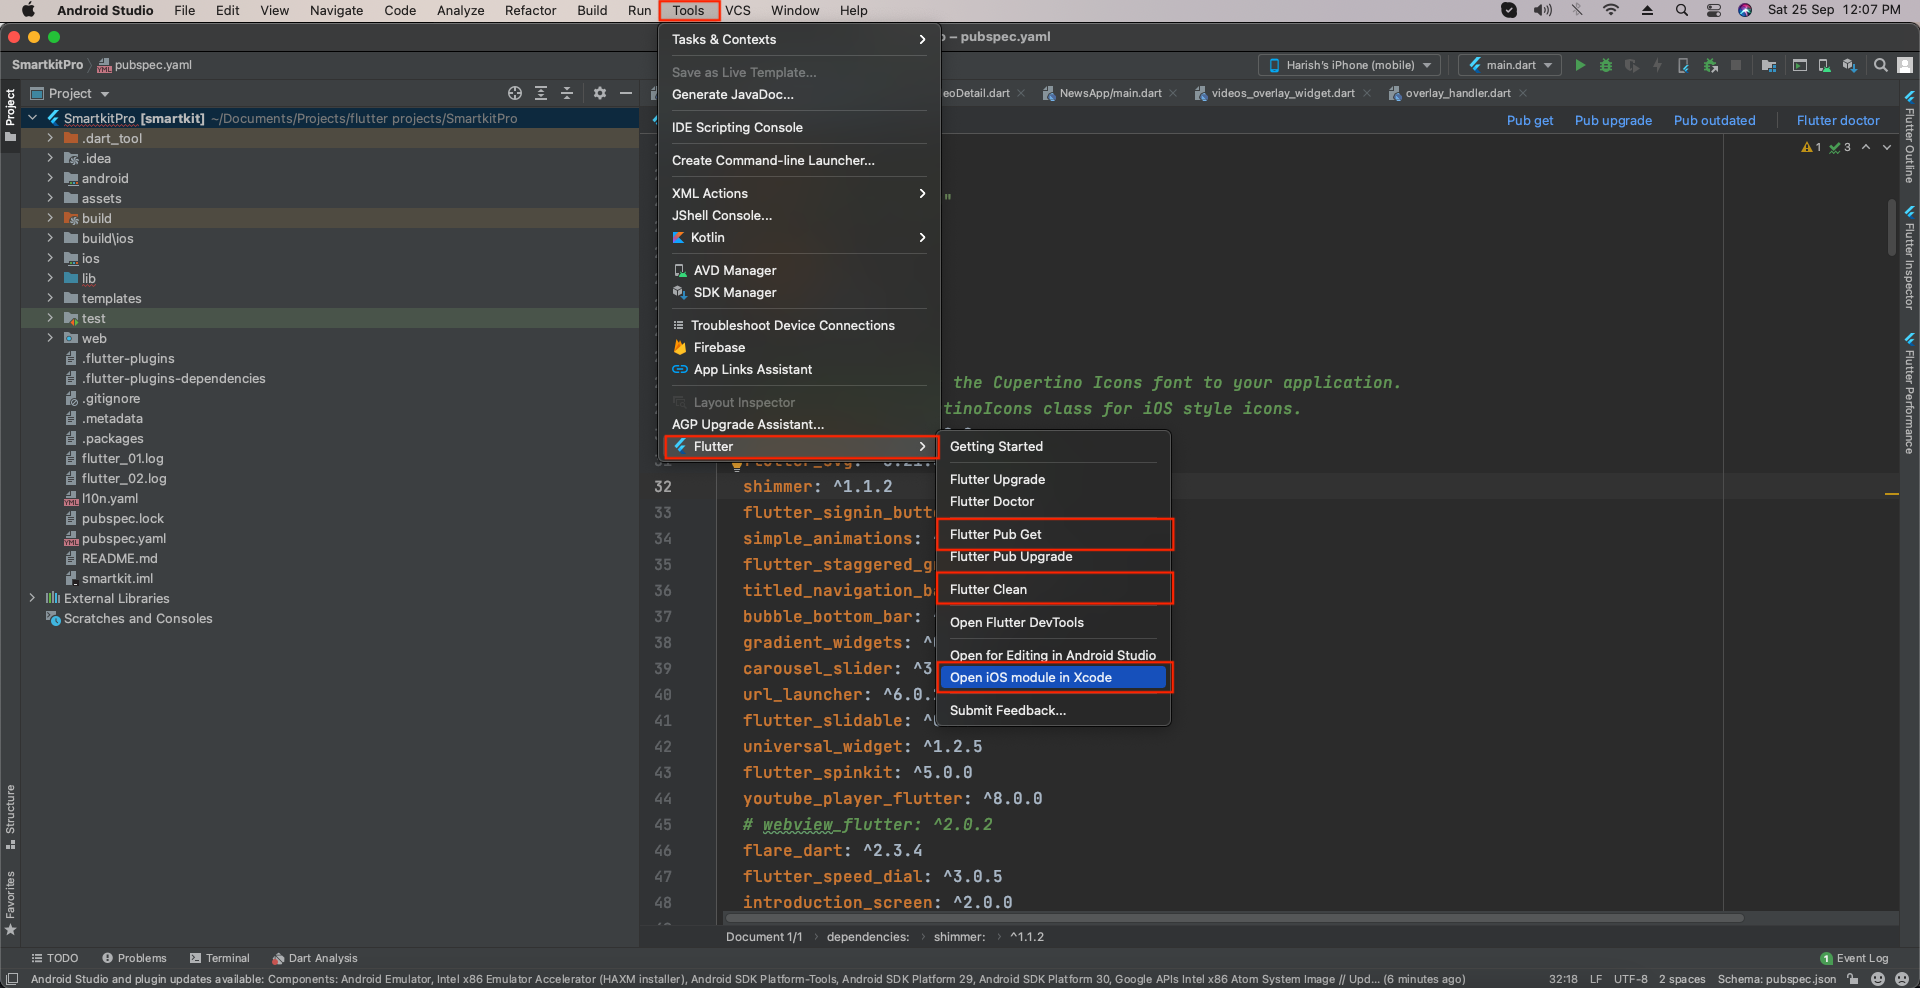
- Next: Go to Flutter > Clean Flutter > Flutter Pub Get.
- Go to Terminal > write command -> cd iOS and press enter key and then write command pod install. After finishing pods installation.
- Go to Flutter > Open iOS module in Xcode
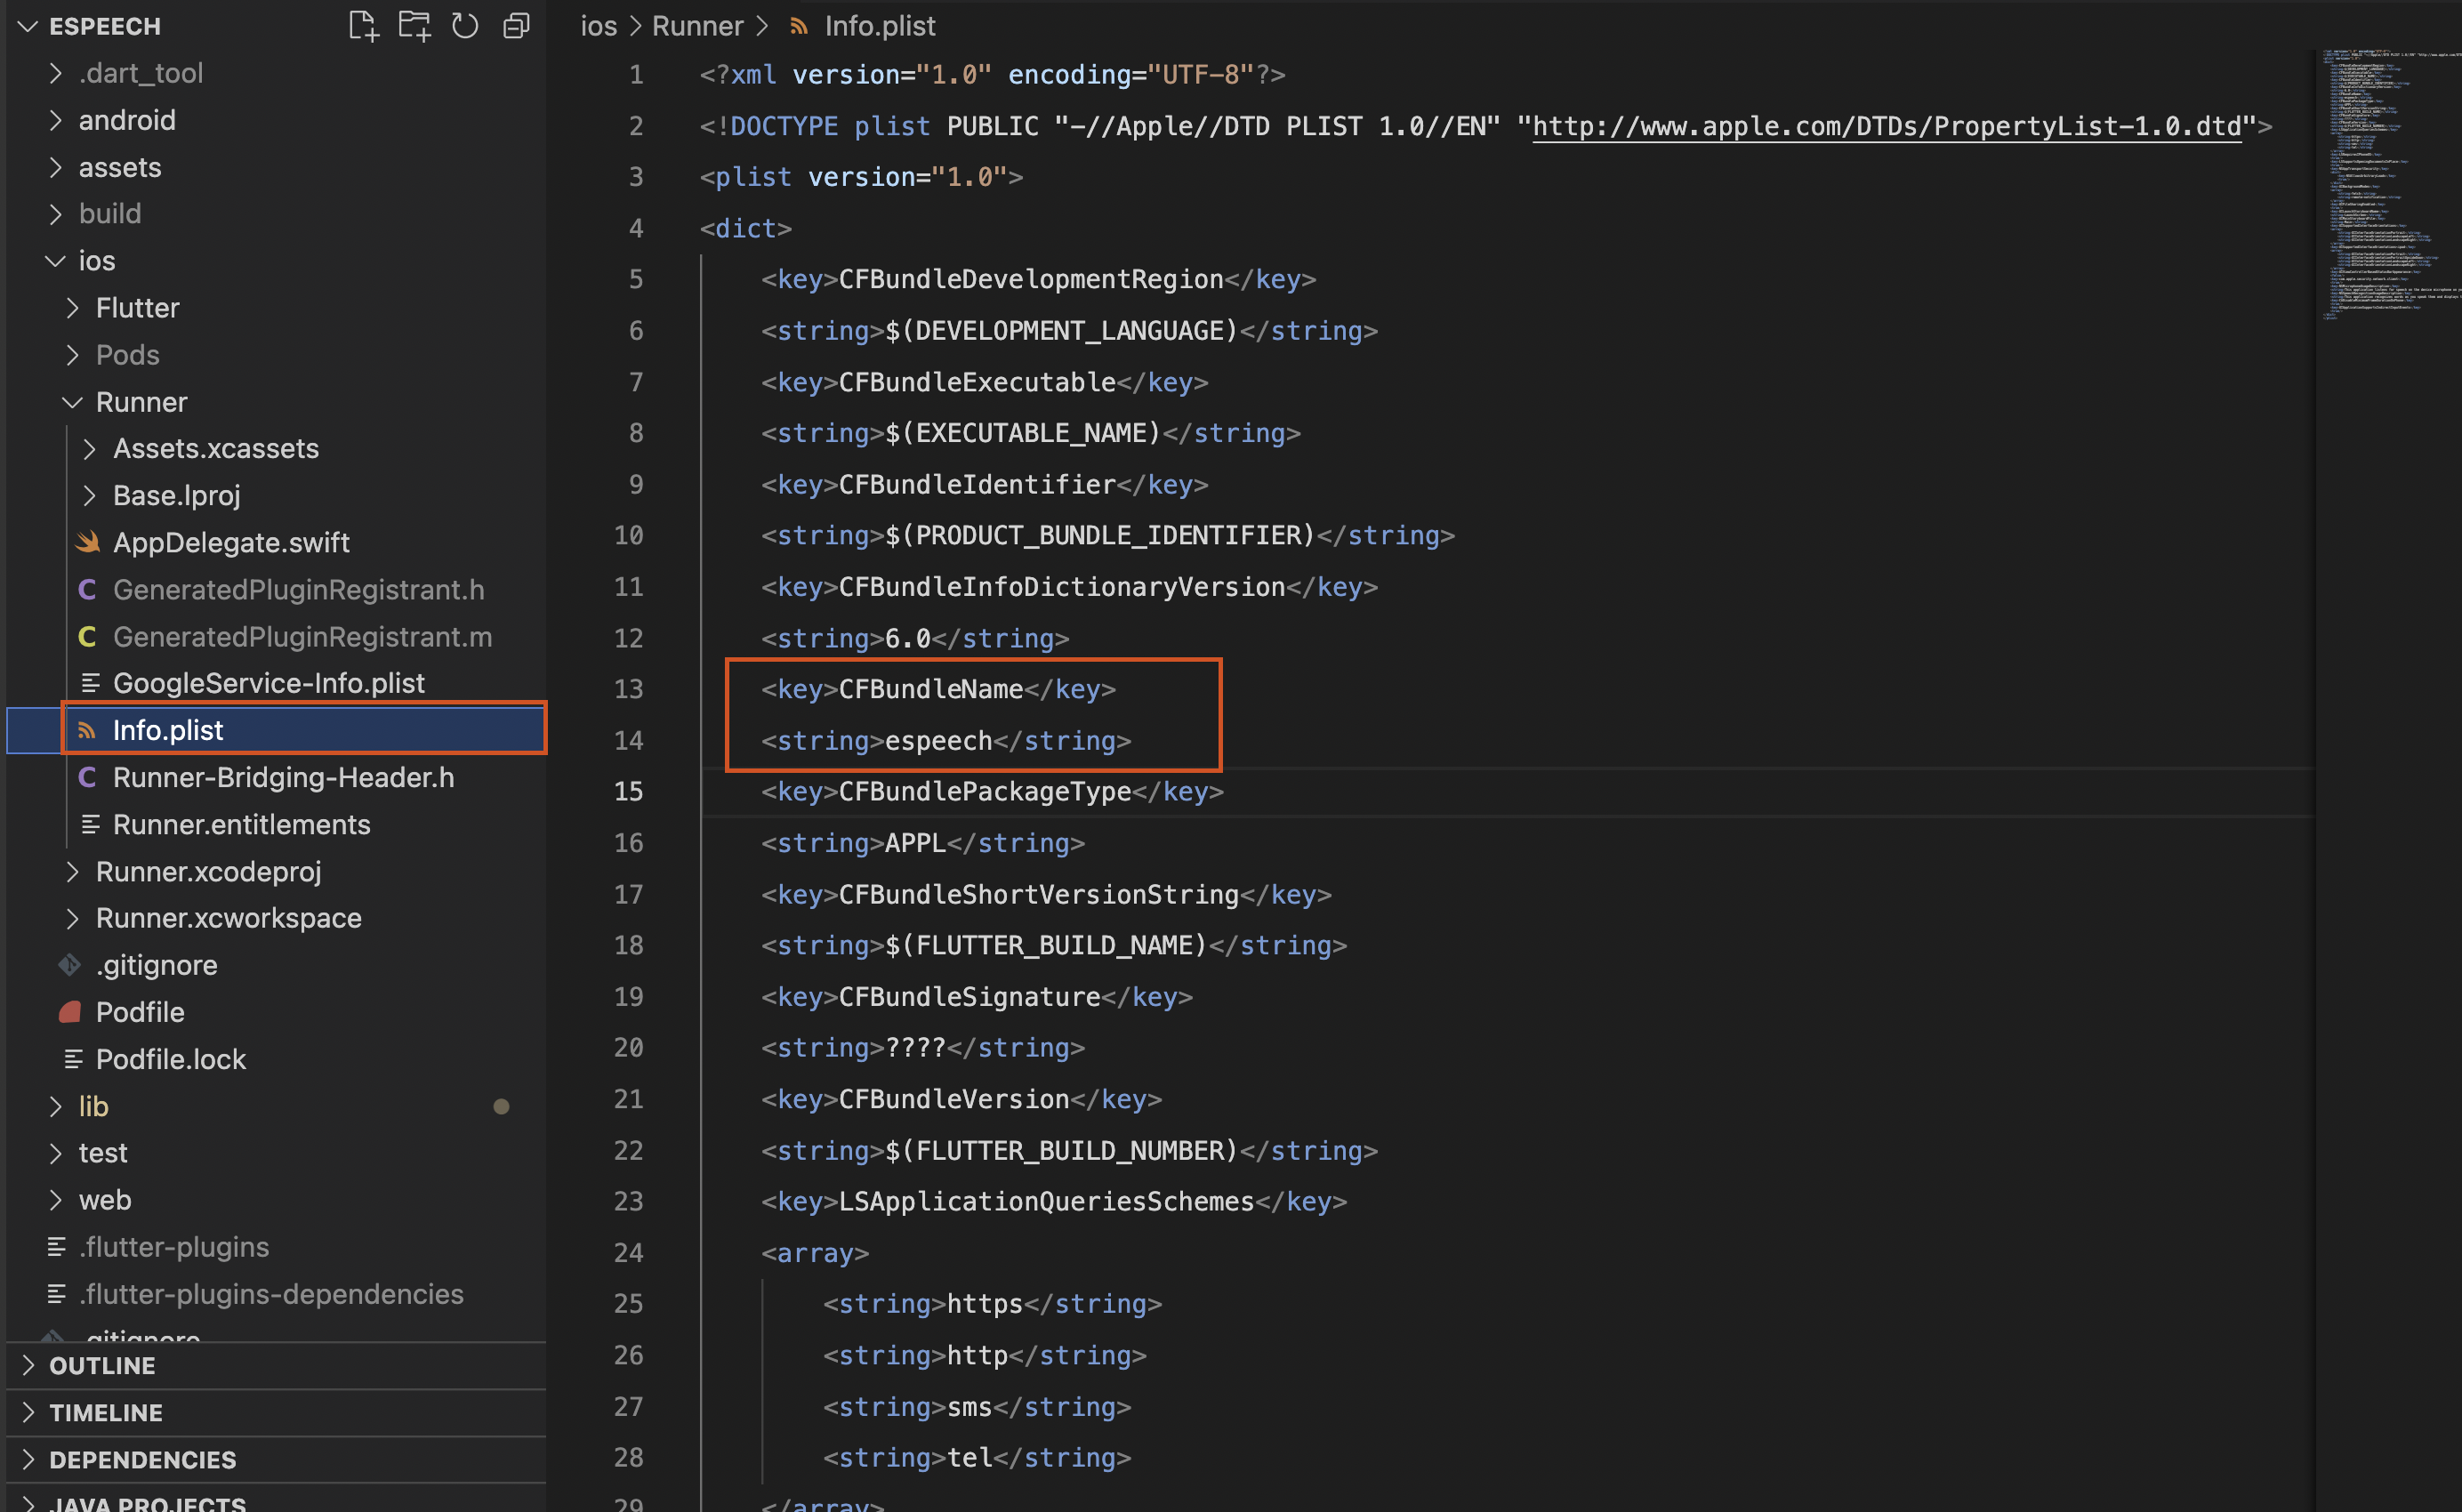
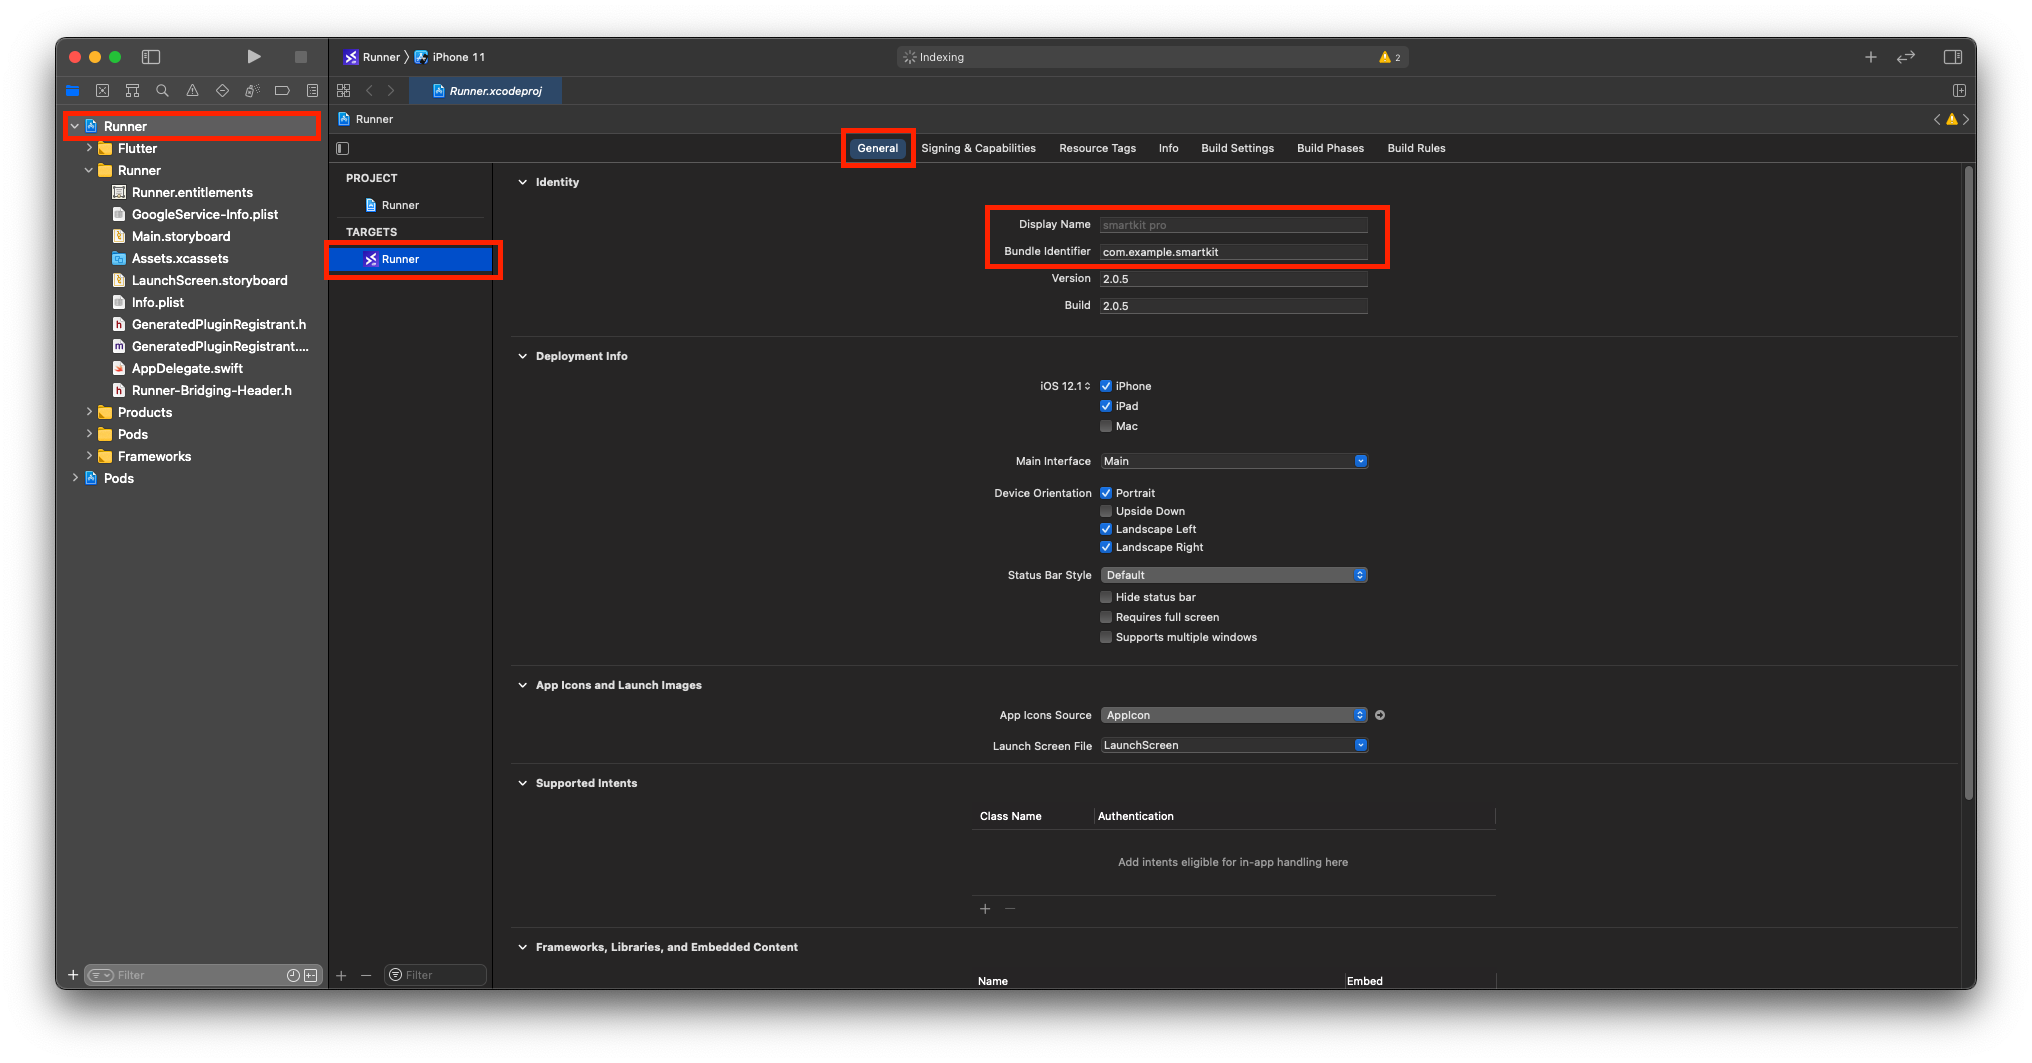
- Select Project > Target > Check For Display Name and Bundle Identifier in General Tab.
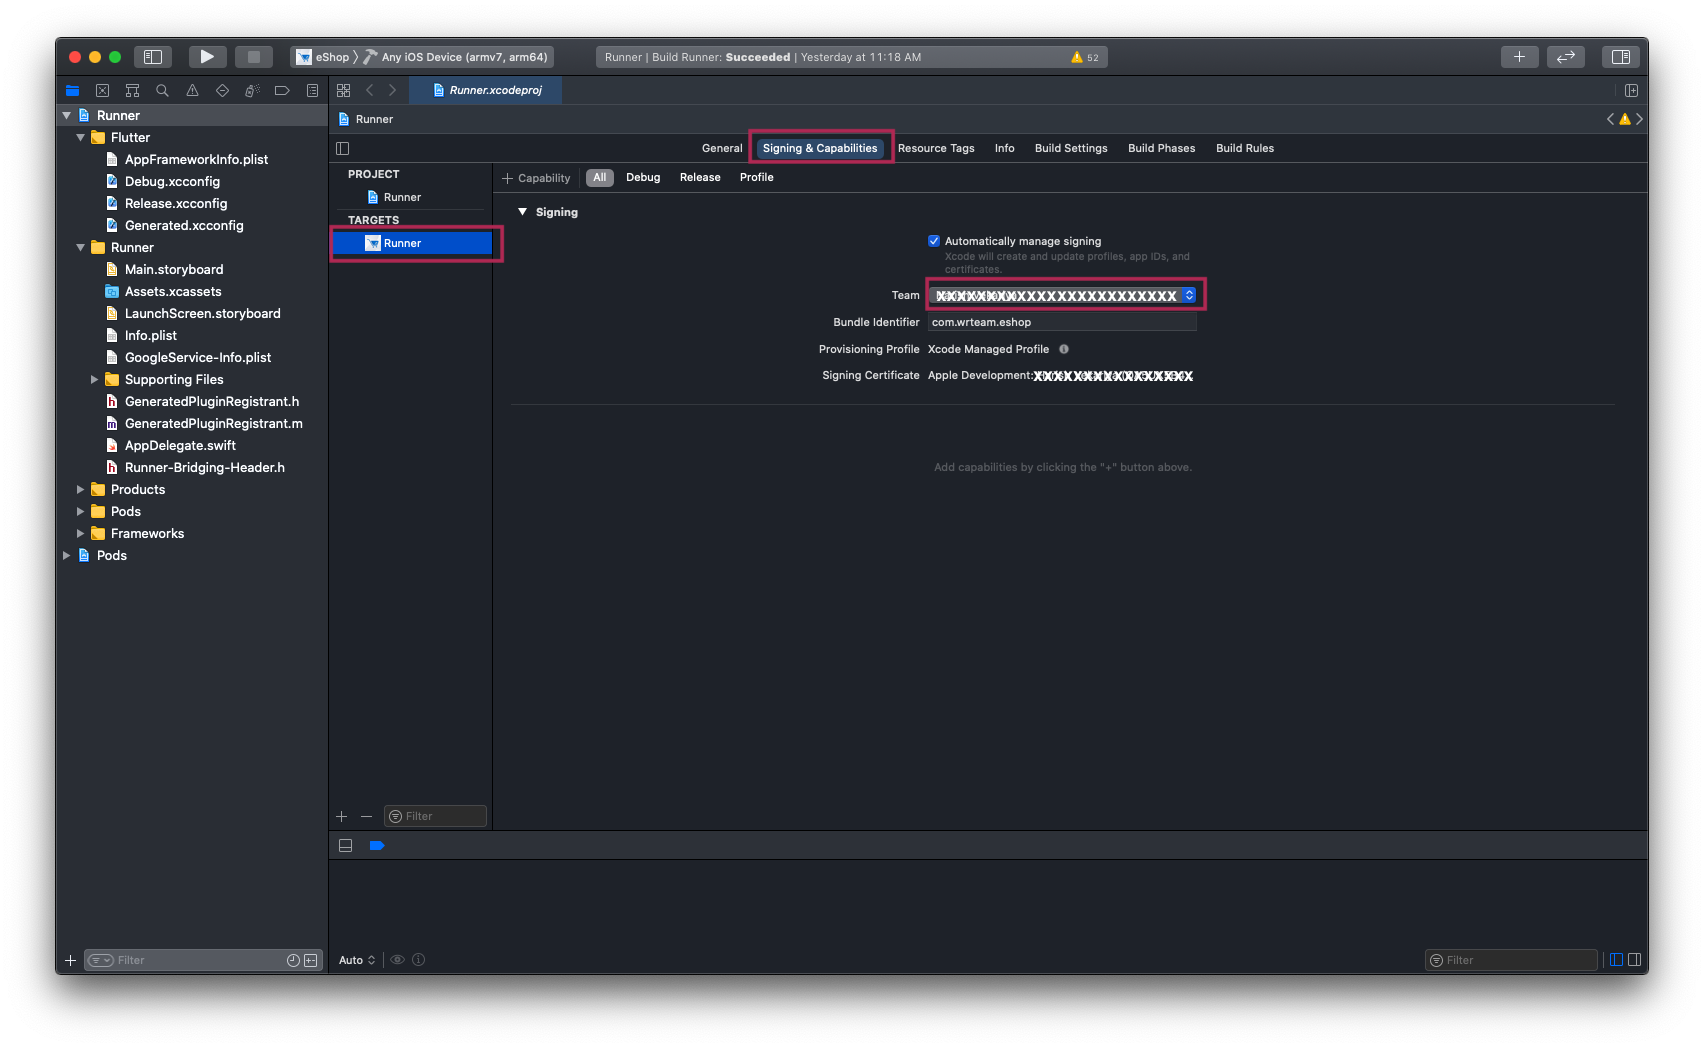
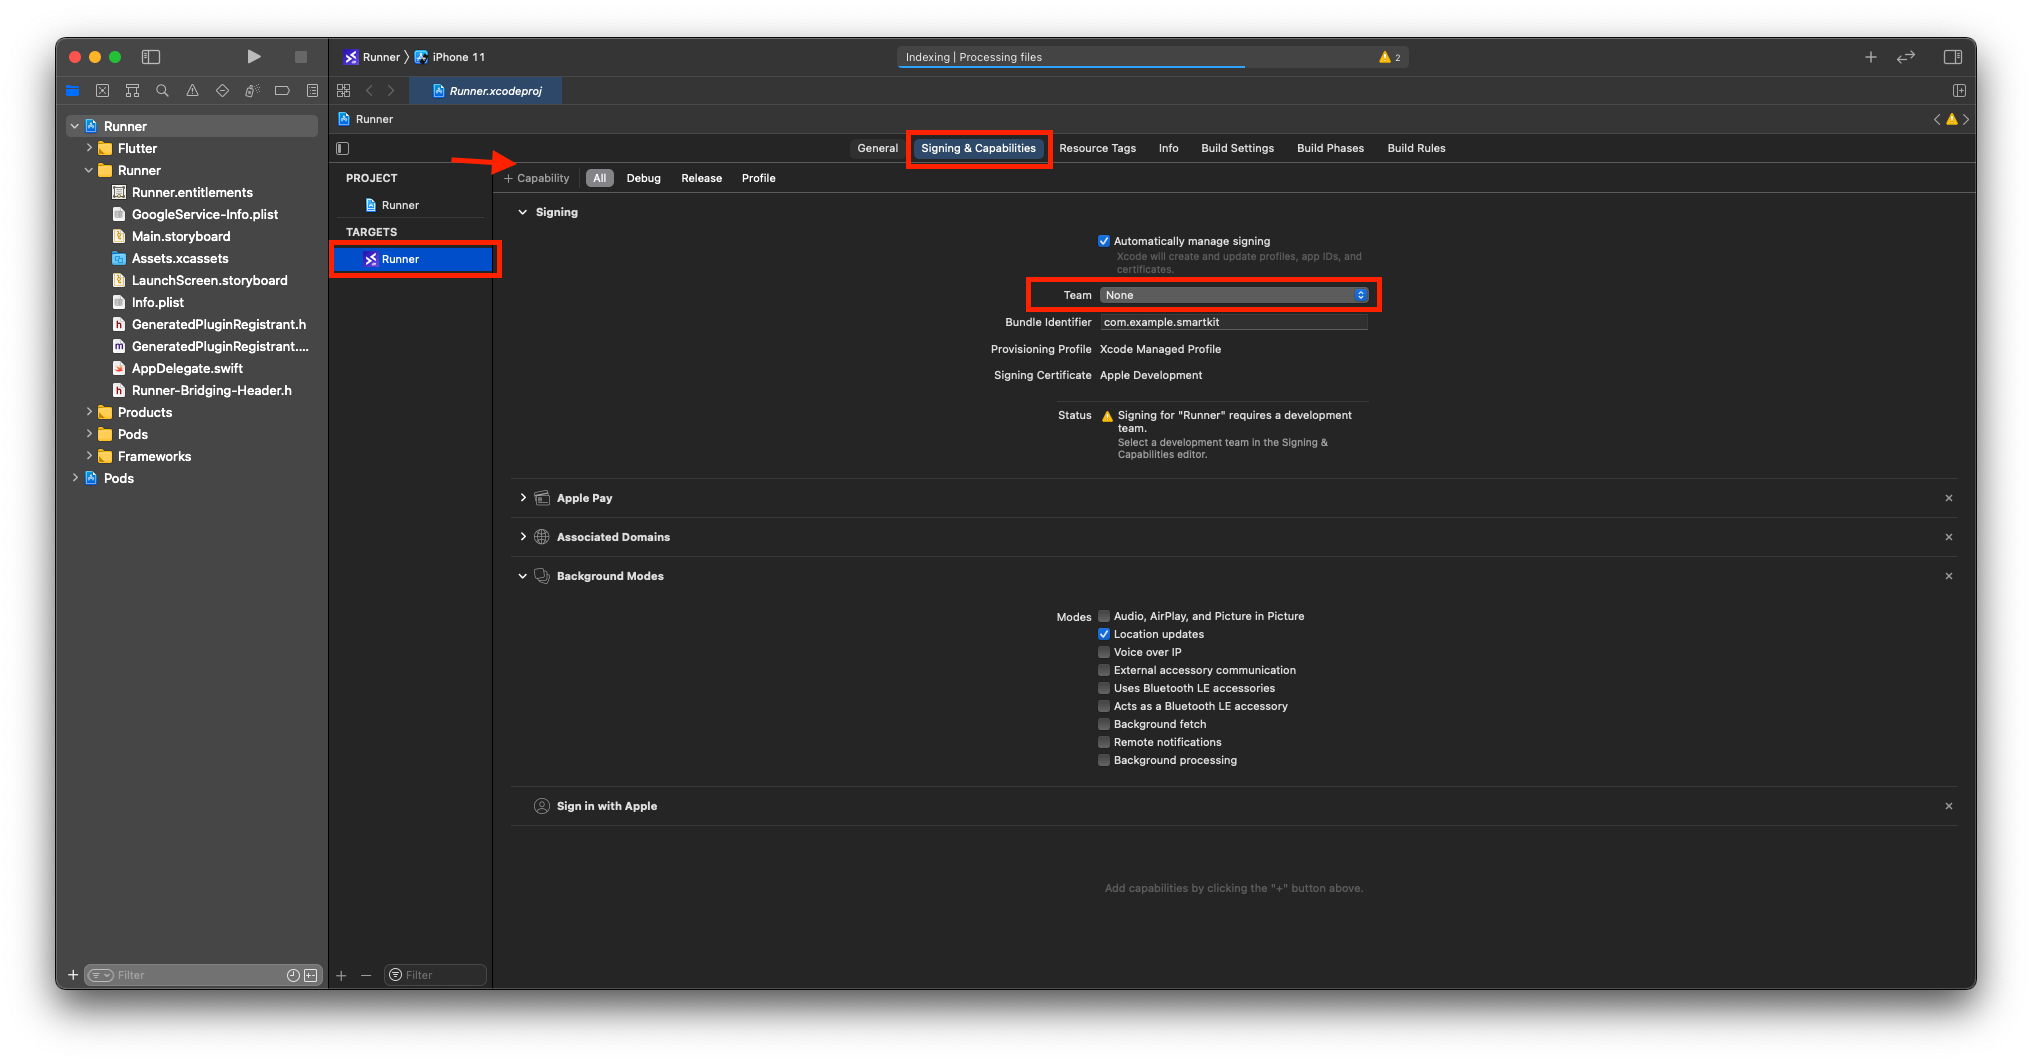
- Now go to Signing & Capabilities >Signing > Team - Add Your Team / Apple Developer Account here.
- Add Following Capabilities according to Requirement of your Project & Respected Packages From Pubspec.yaml file.
- Sign in with Apple
- Apple Pay > Add Your merchant ID incase you want to use Apple Pay.
- Associated Domains > add applinks of your Domain.
- Background Modes > Location updates
Generate Release APK
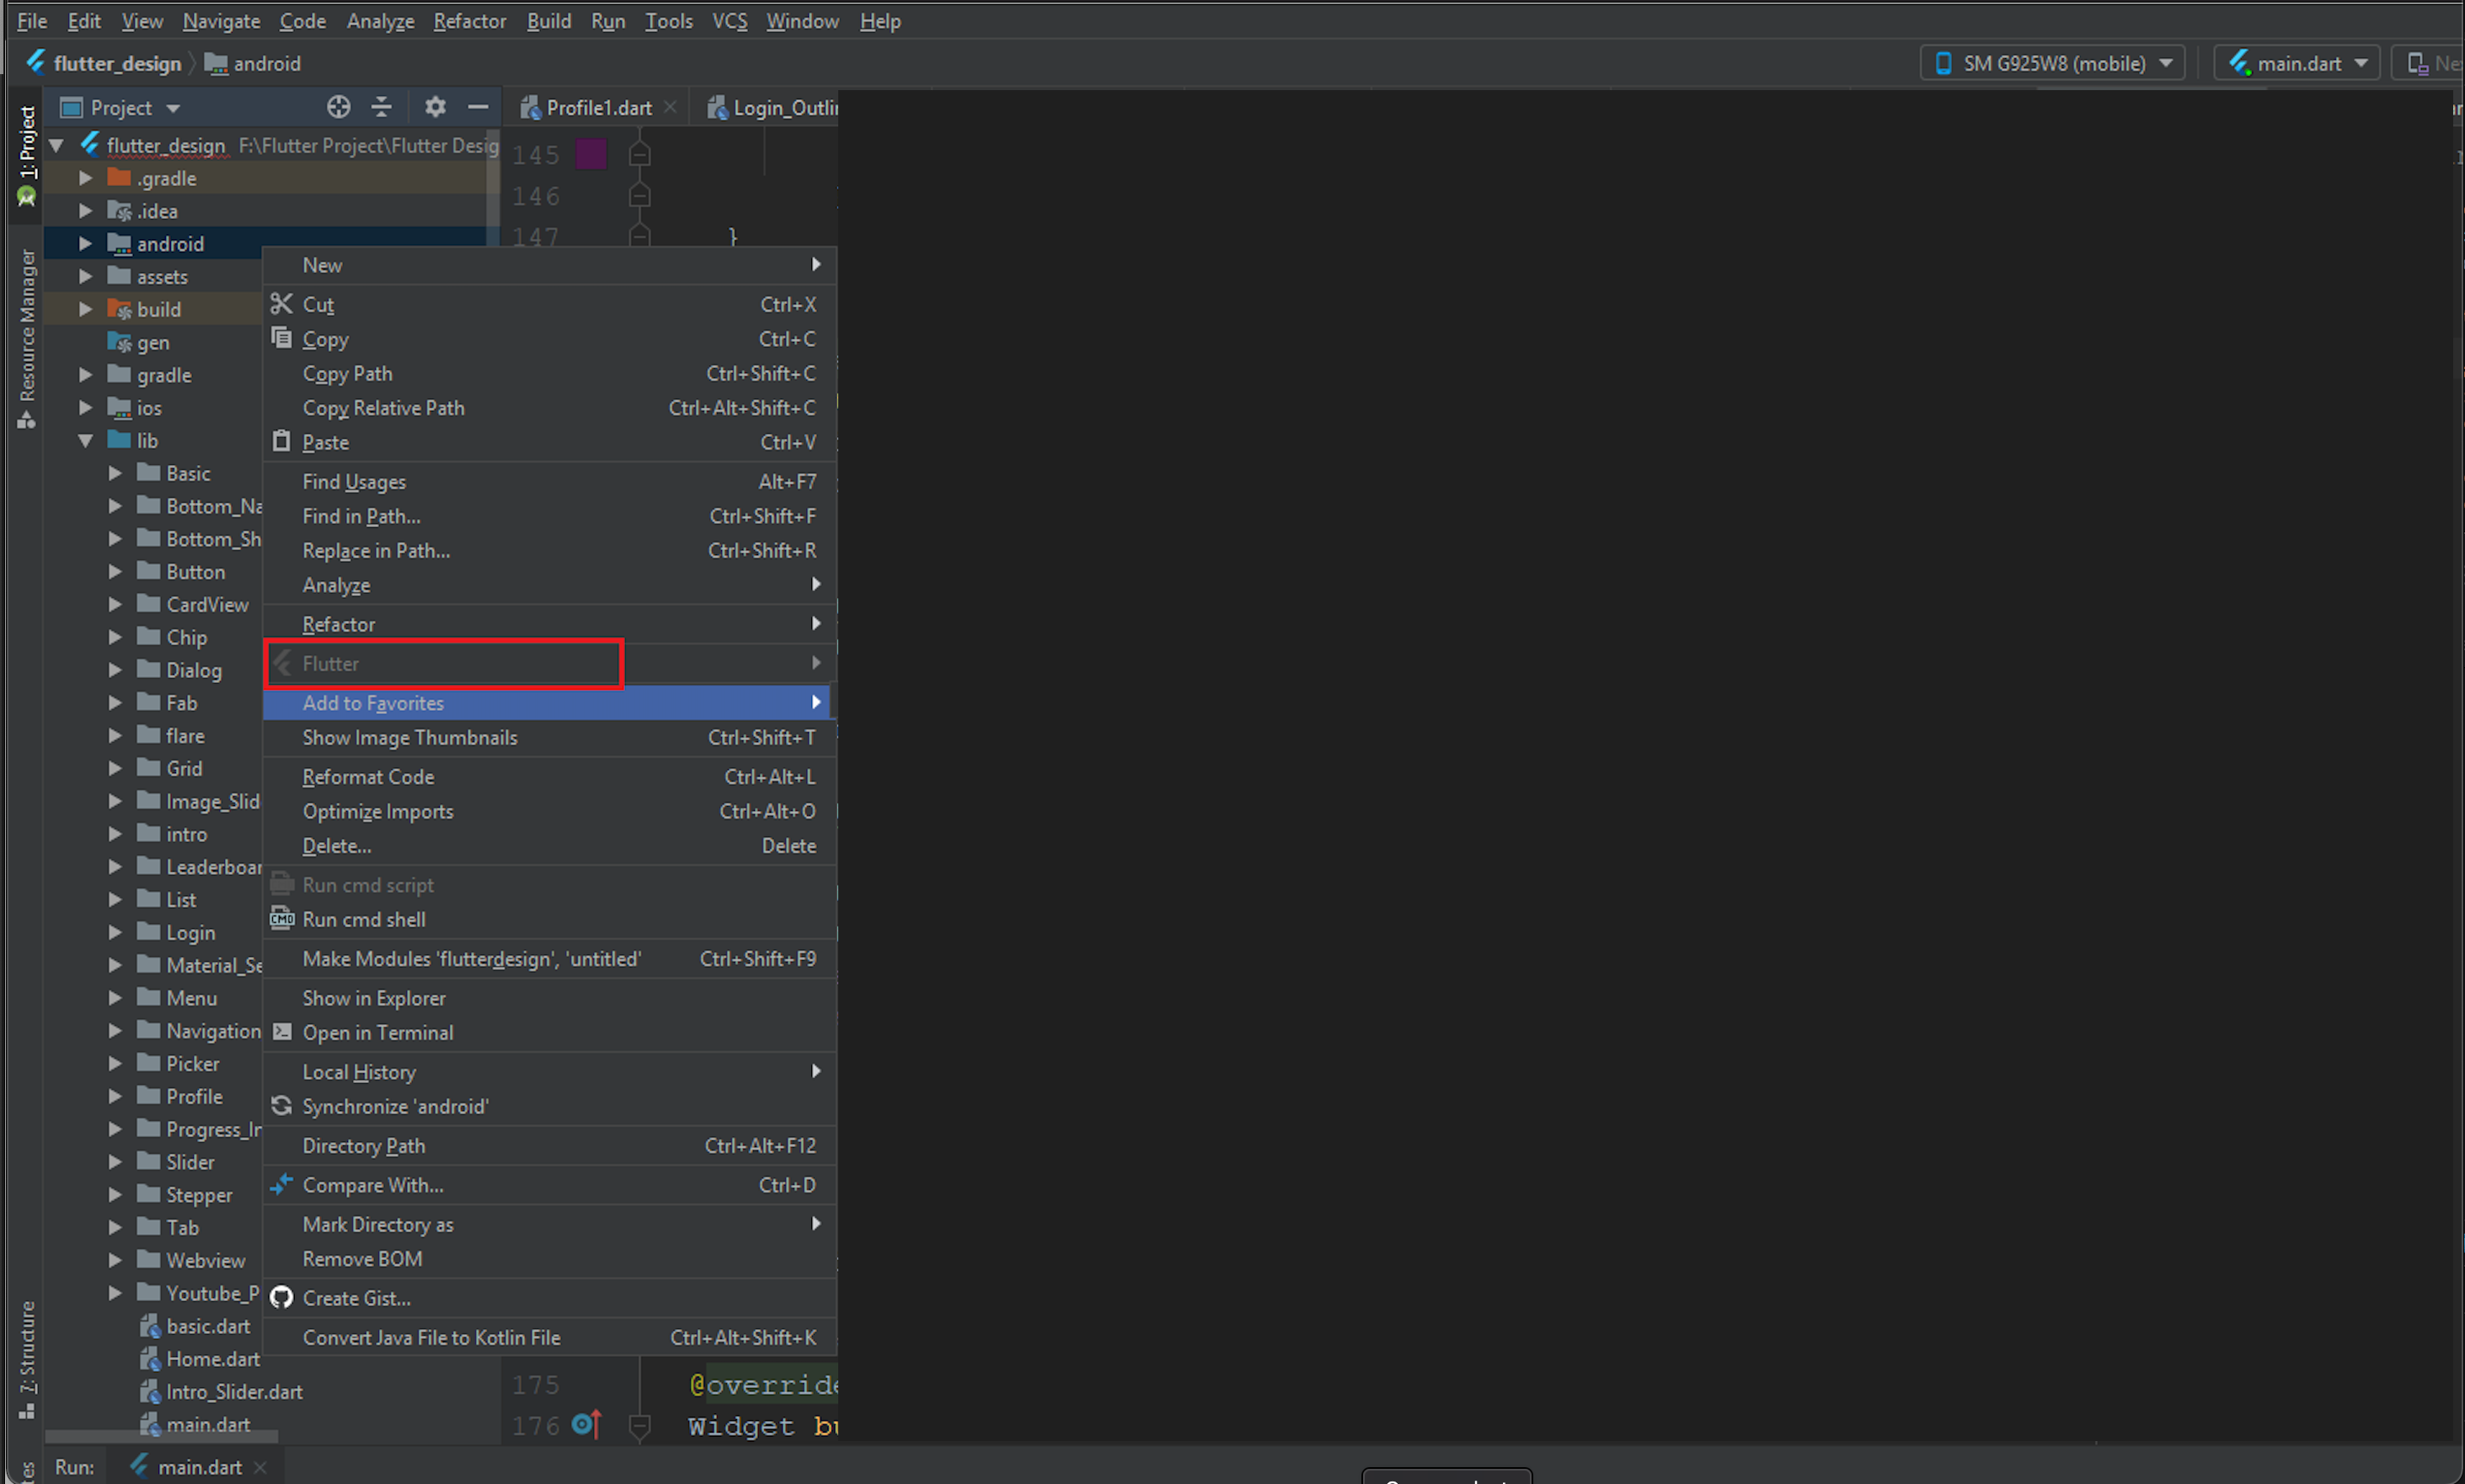
- In you android studio, right click on you android module of you flutter project.there is option flutter, click on that inside open in new module.then generate release apk from that new module.
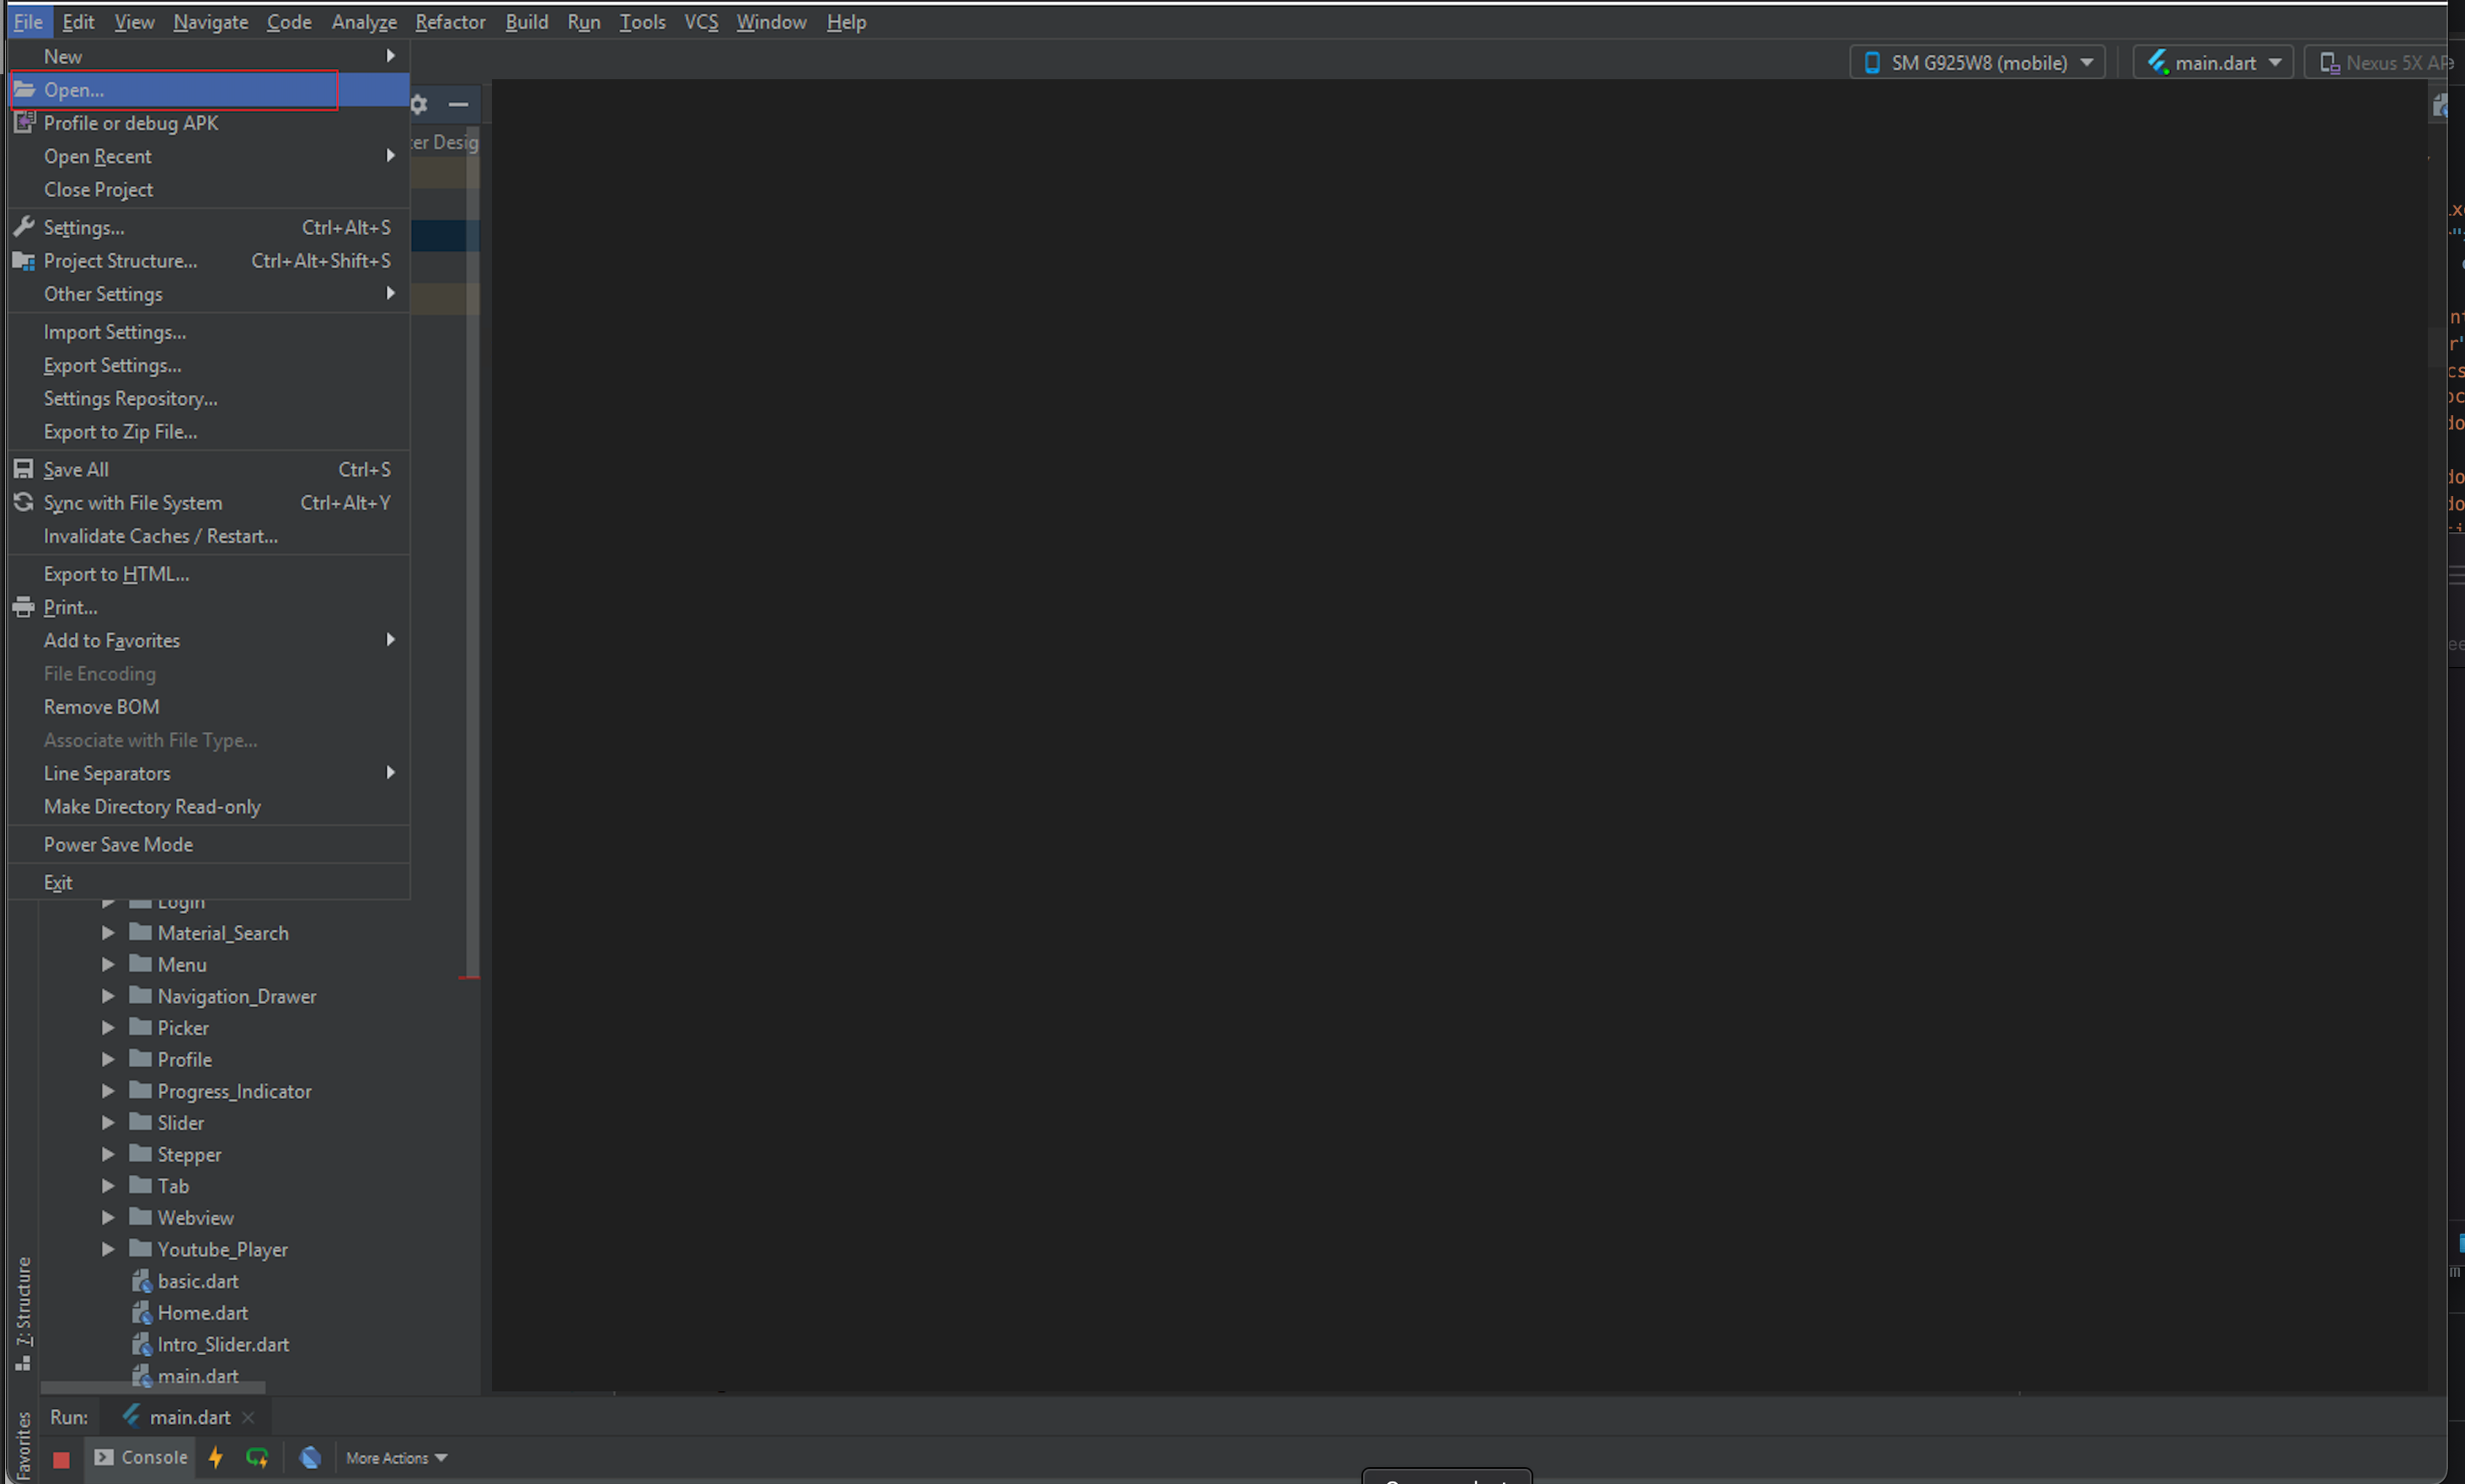
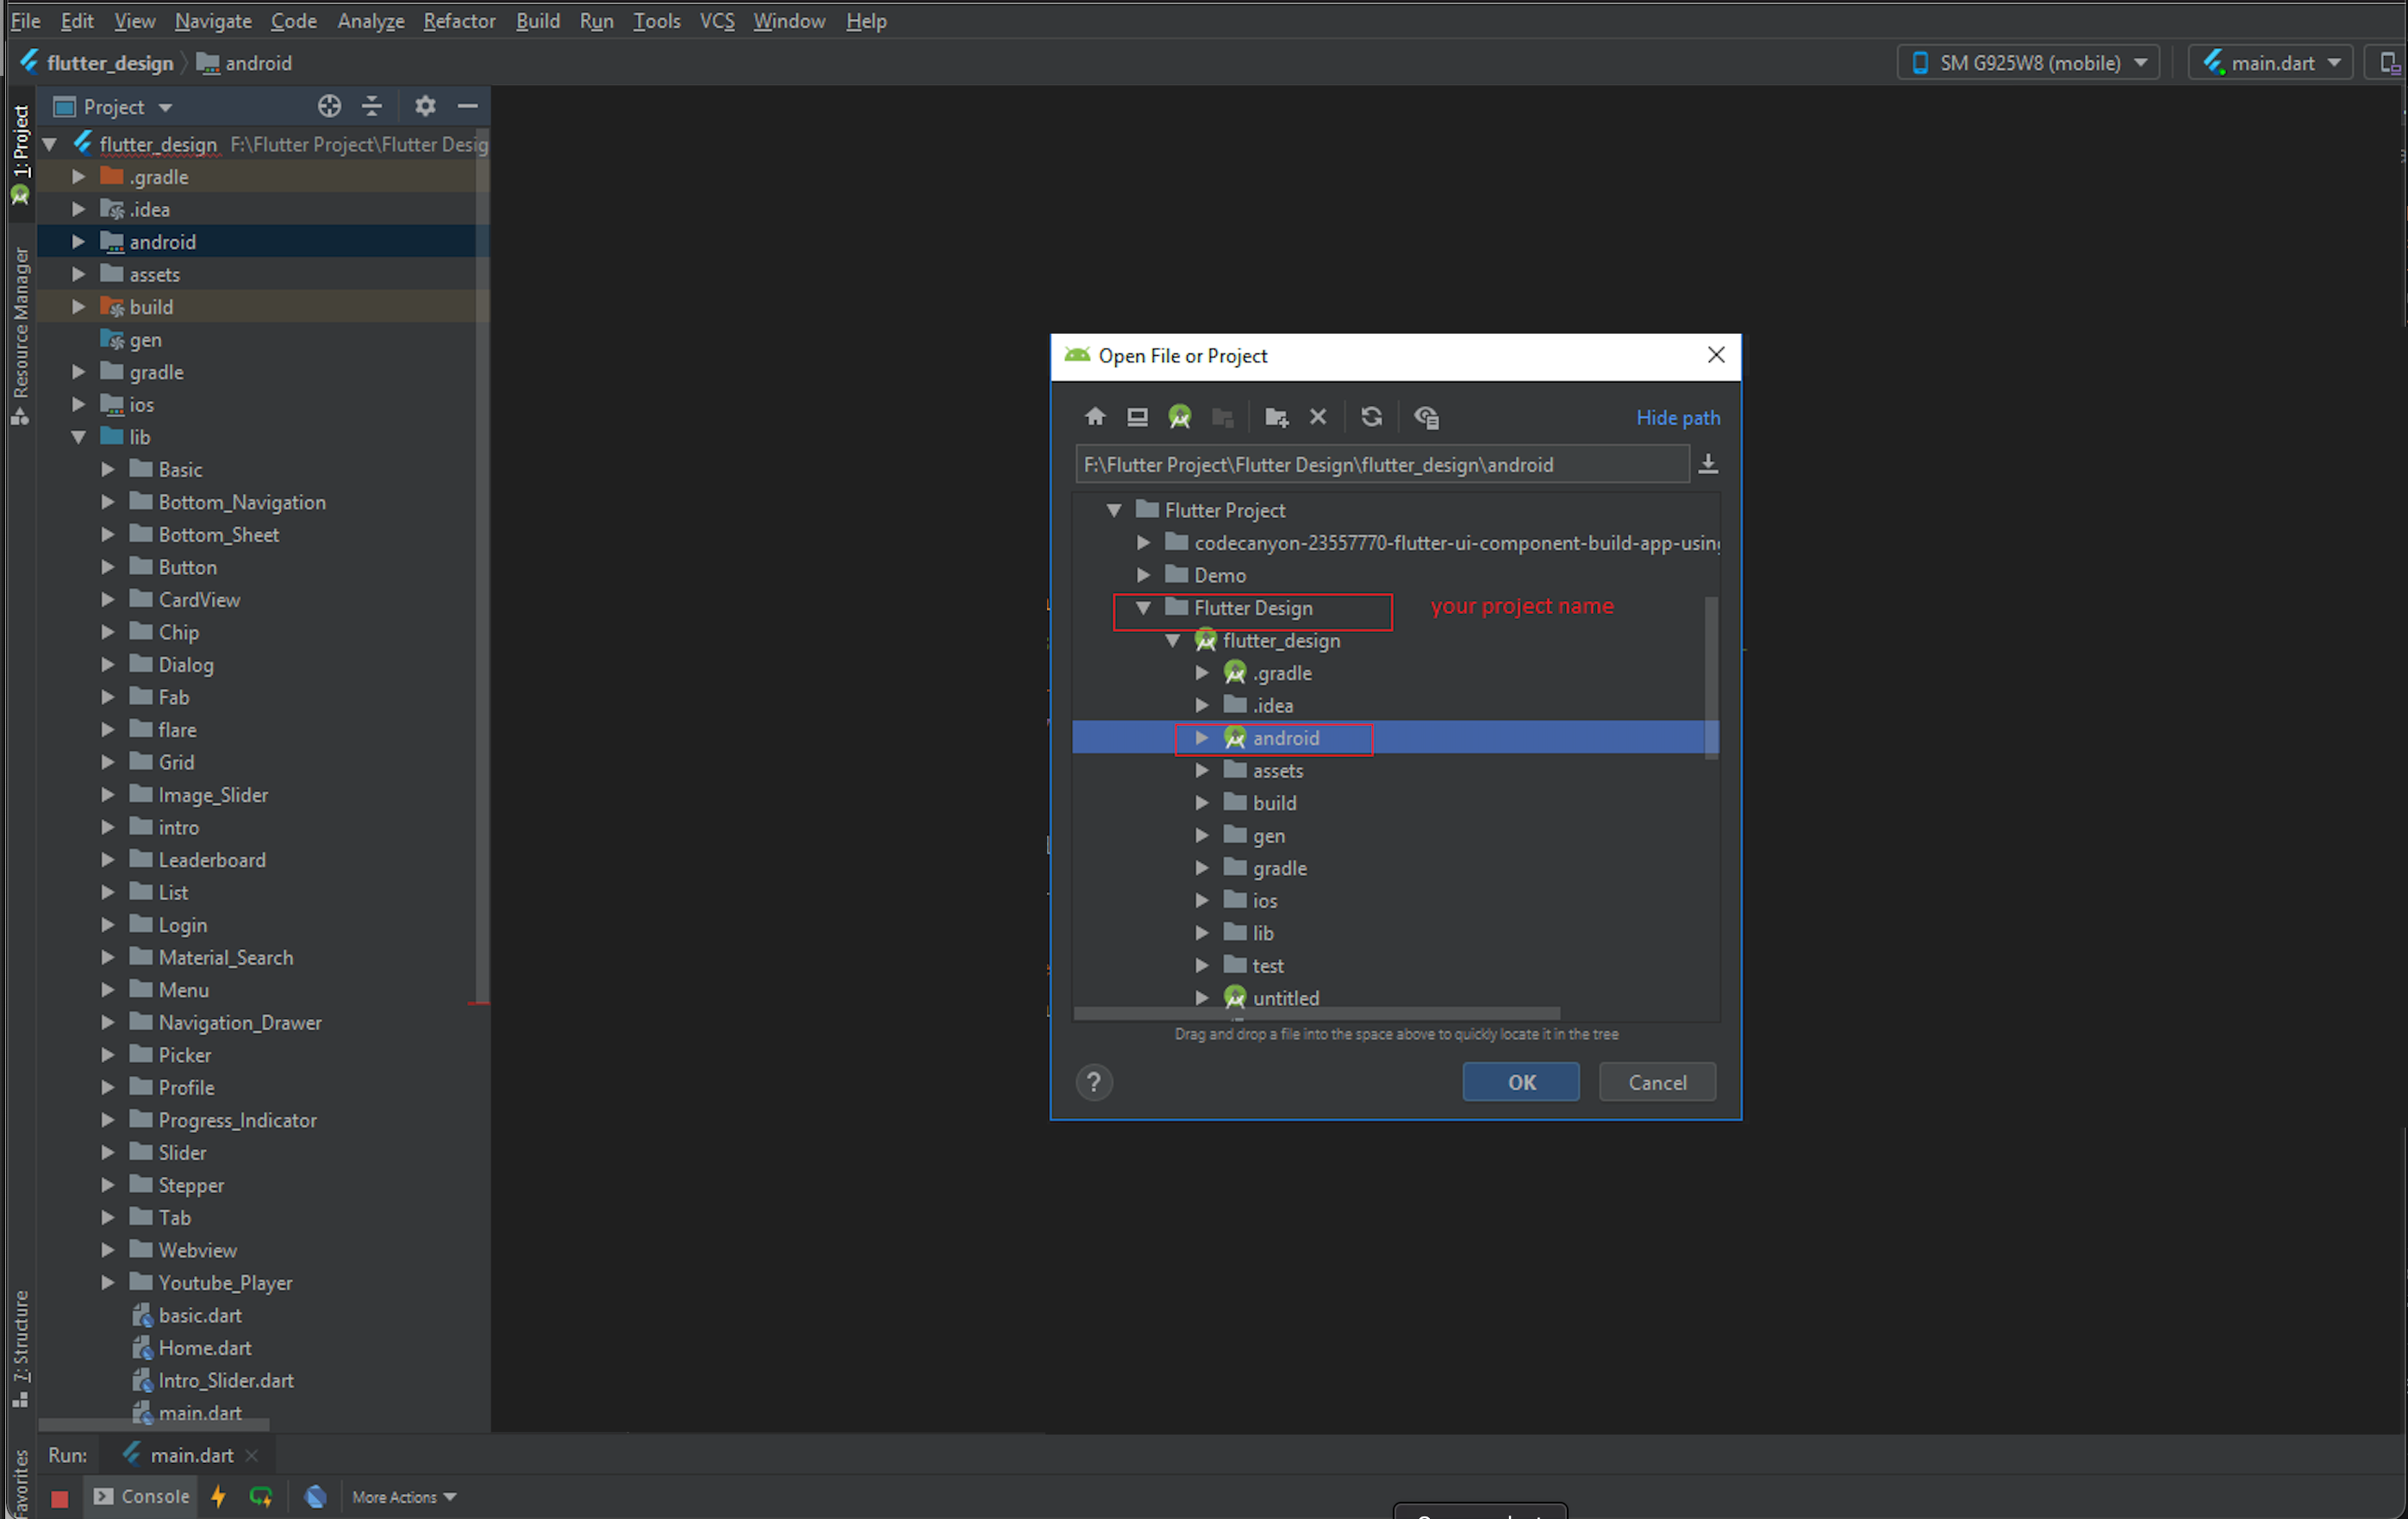
- and if in your android studio if flutter option is disable then go to file option in your android studio inside open then locate your flutter project's android module and open it.now generate relase apk from that new module.
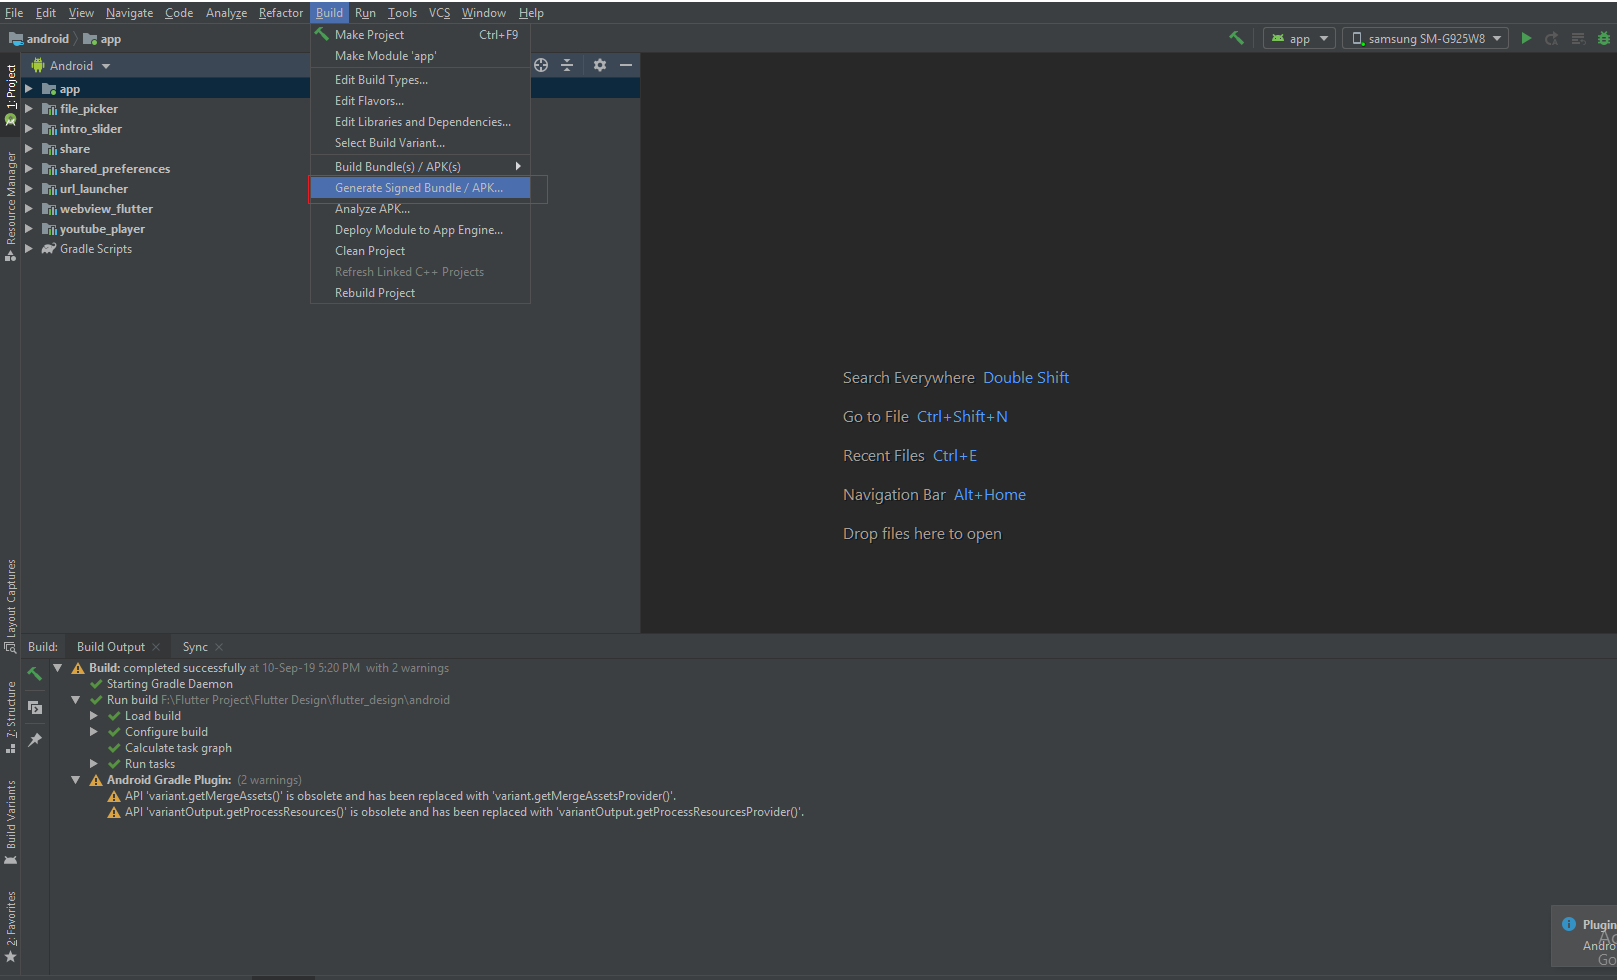
- In Build menu there is option generate signed bundle/apk.
Steps to Publish iOS App to App Store
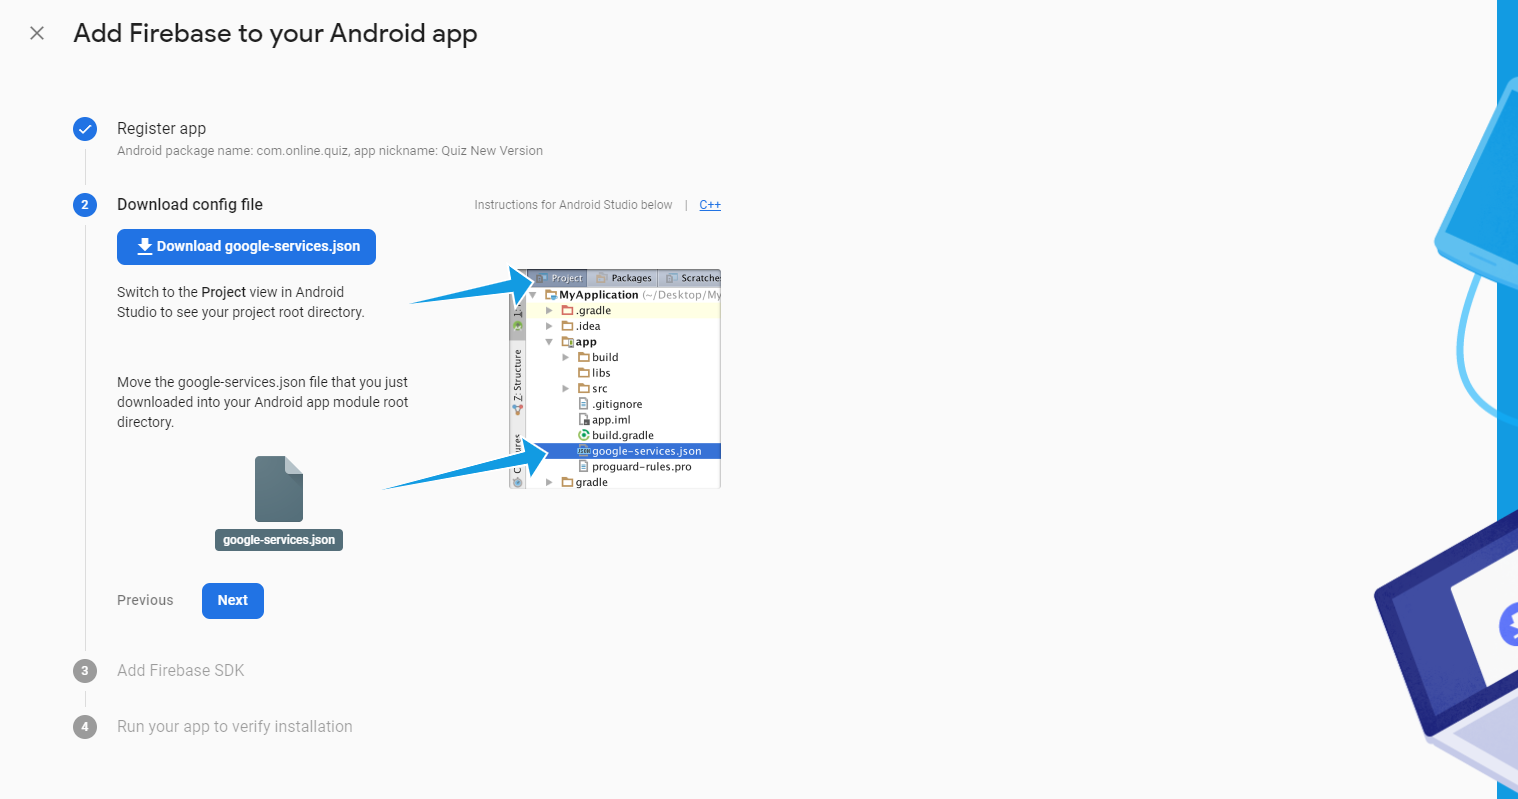
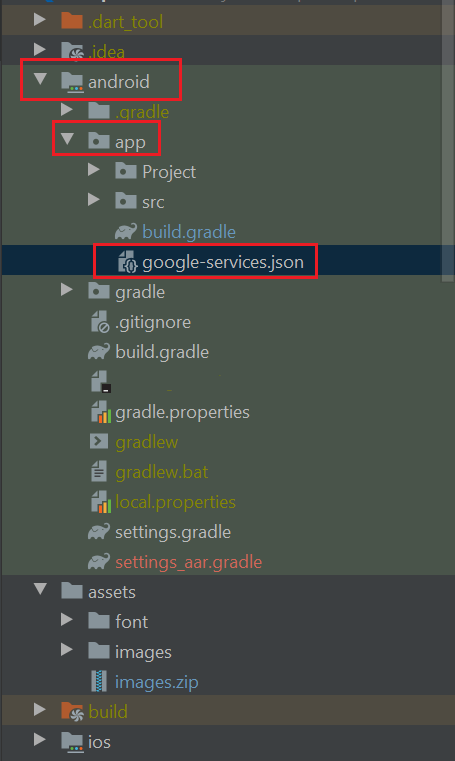
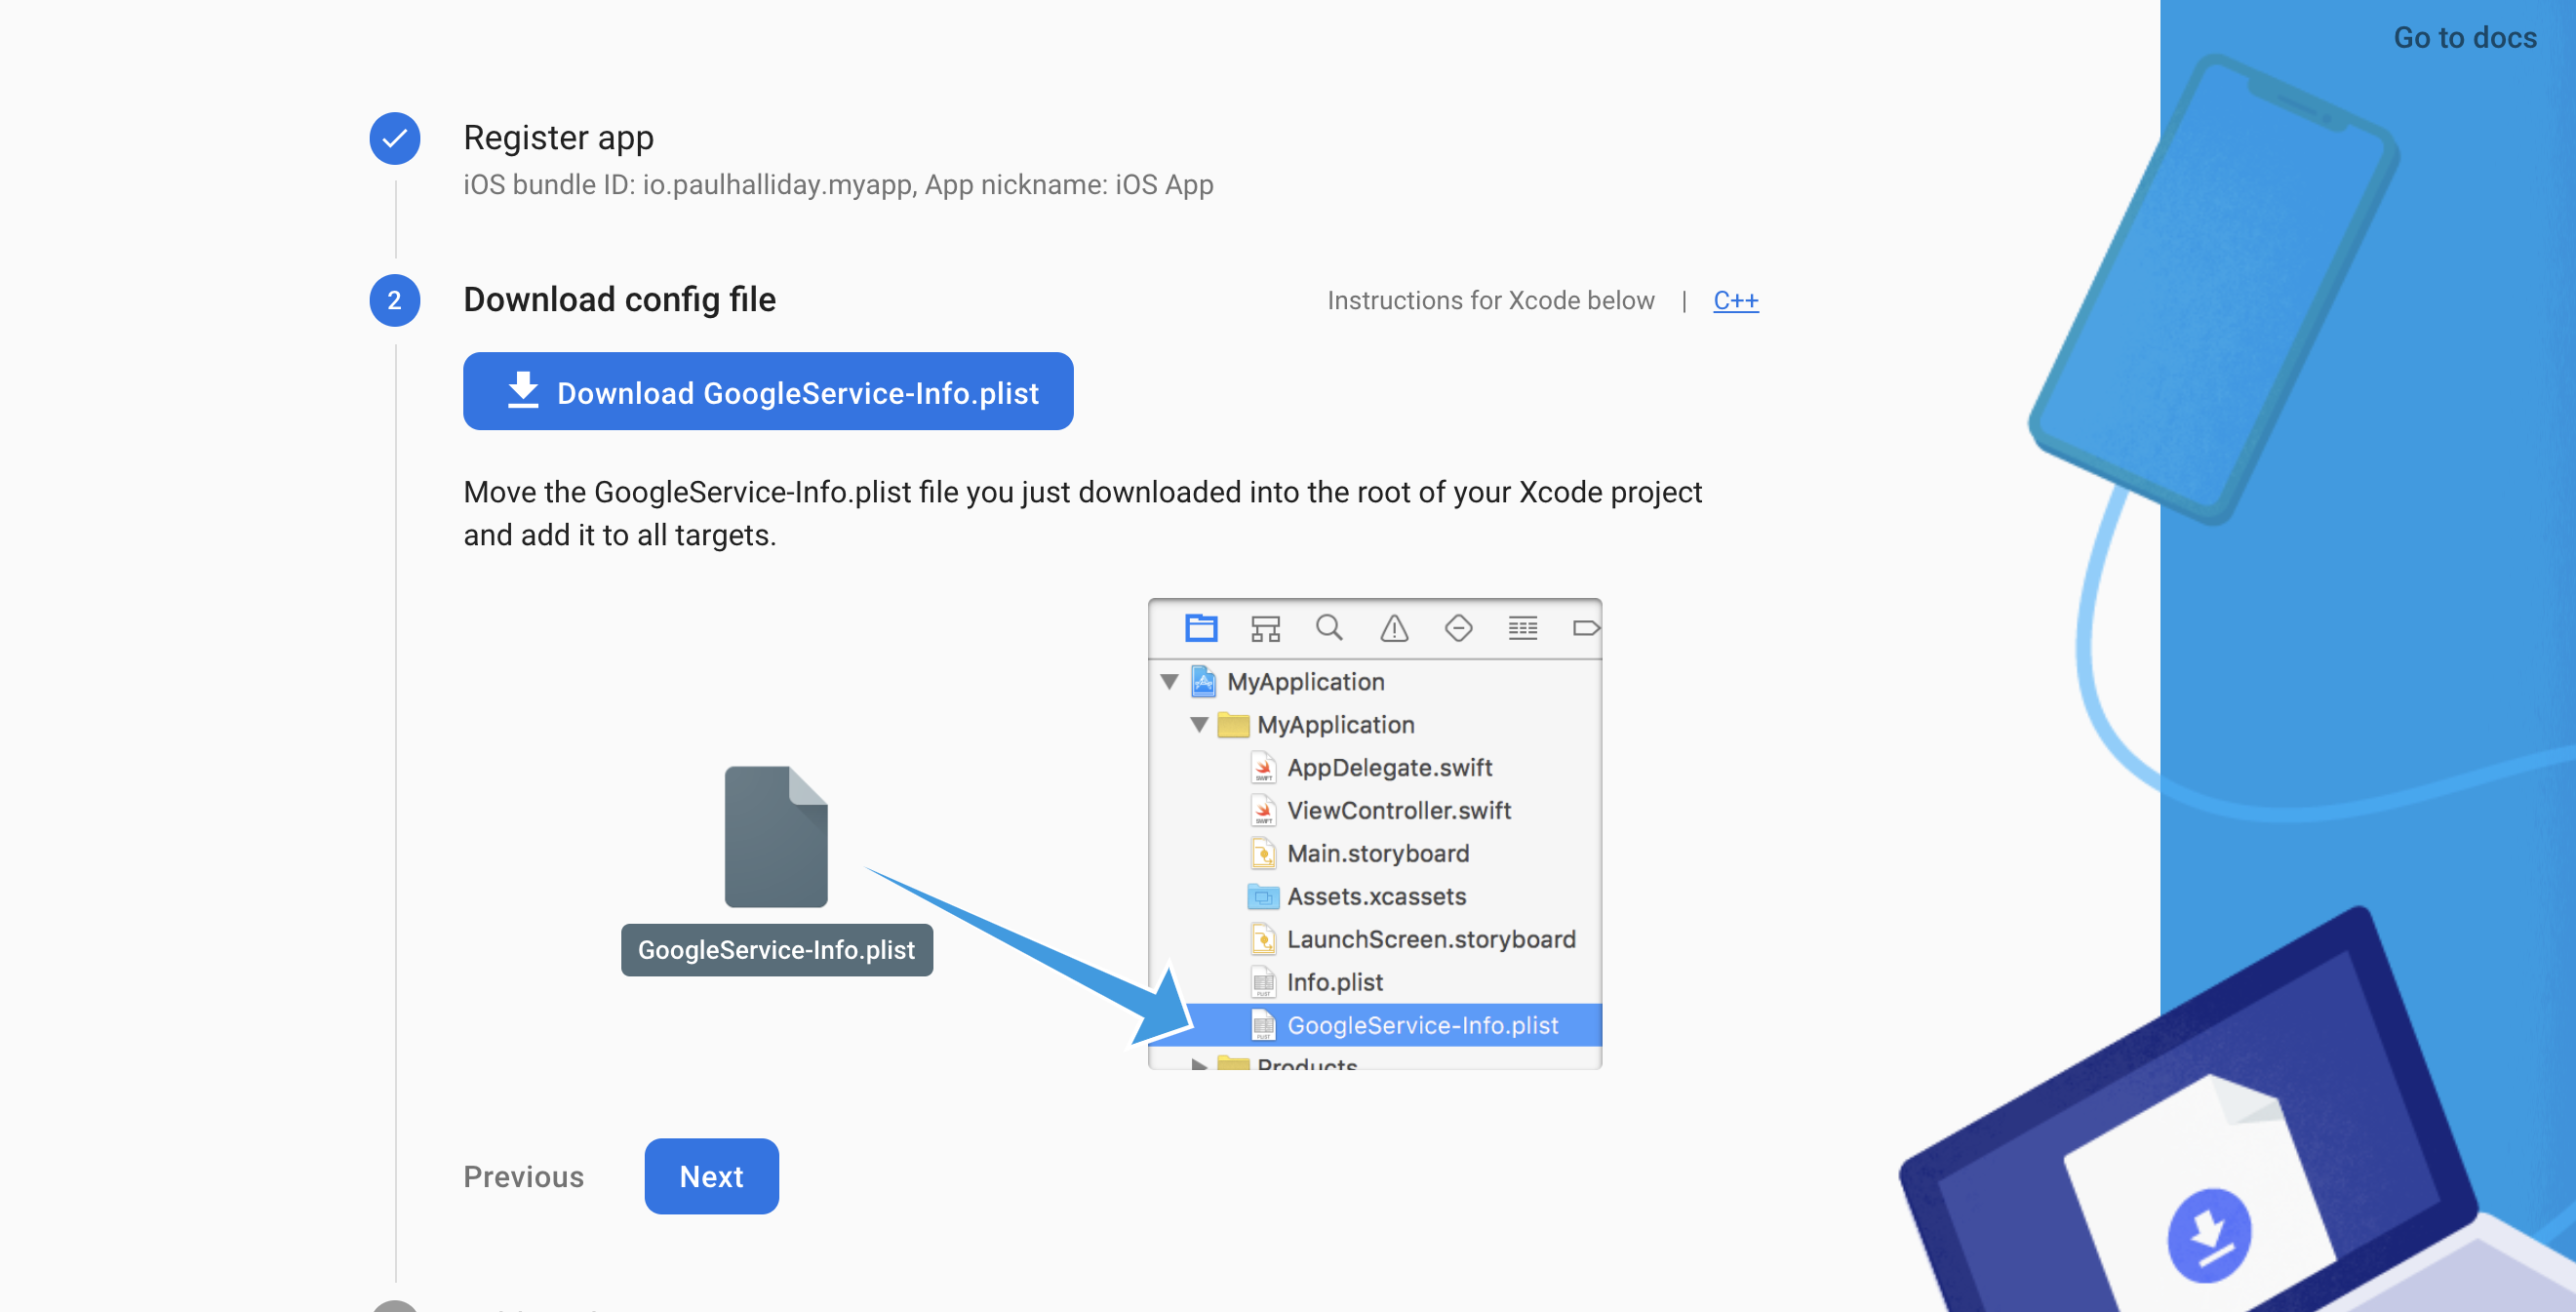
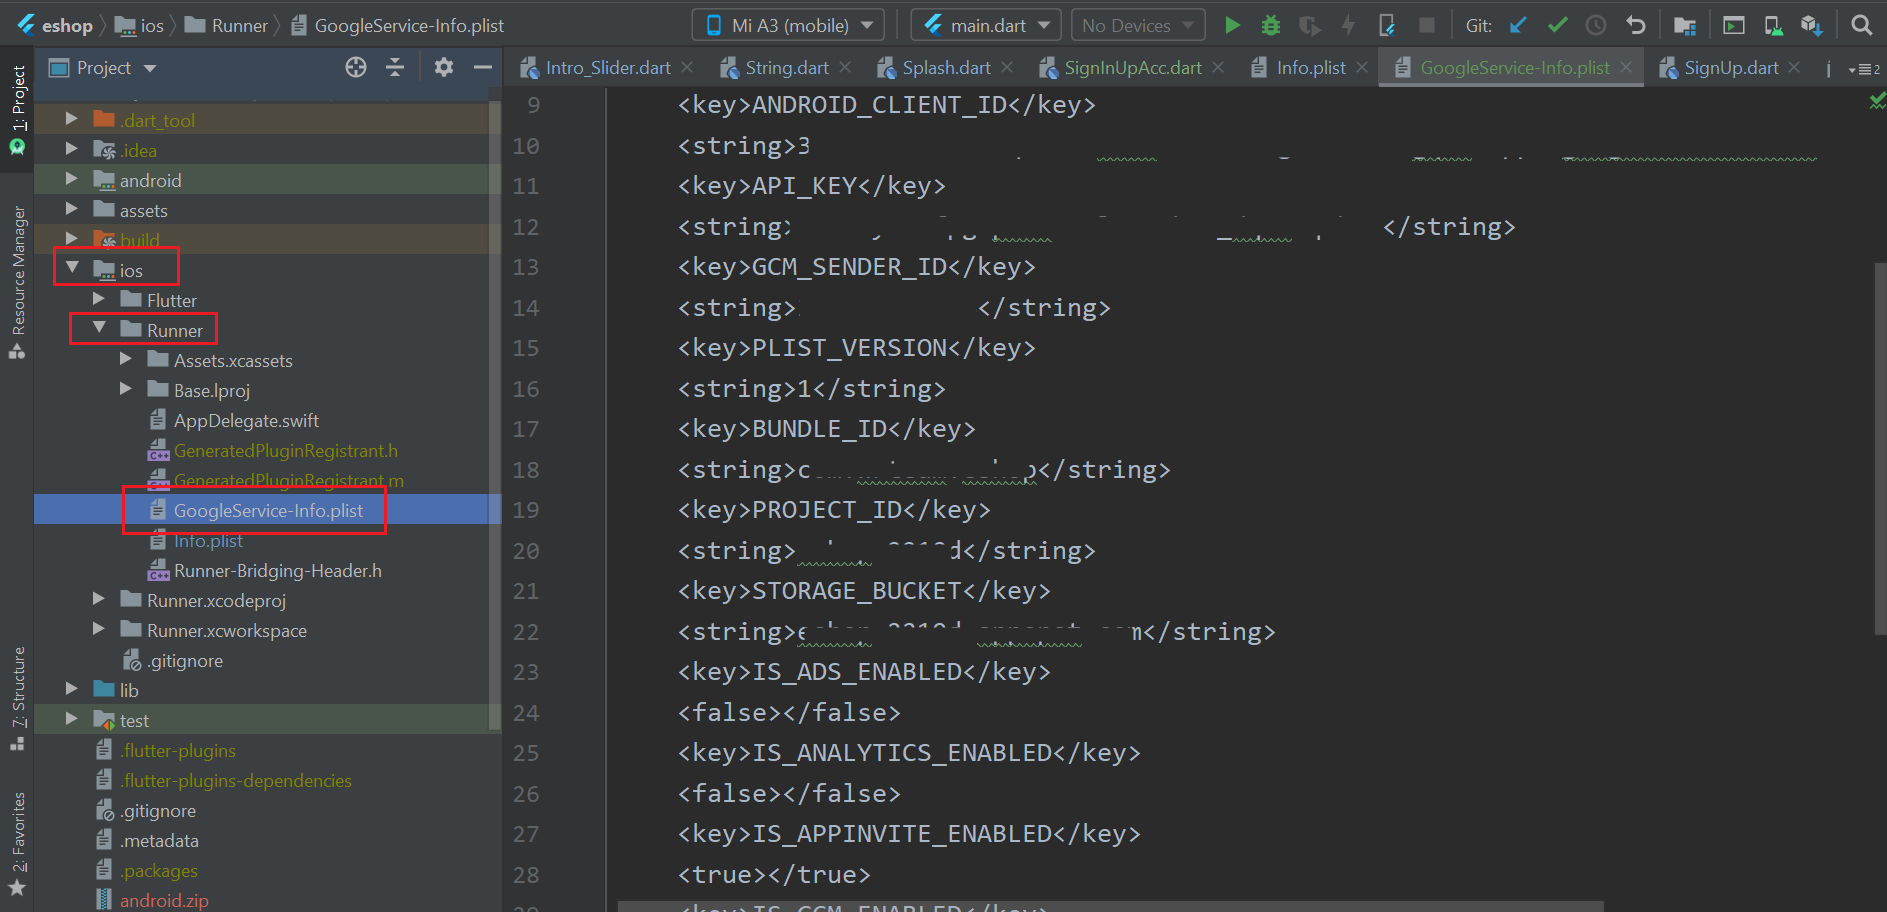
- Open your Project's Runner.xcworkspace file in Xcode, and Add your Team [Your Apple Developer ID] and also Insert GoogleService-Info.plist file [Downloaded From Firebase Project] inside folder named Runner.
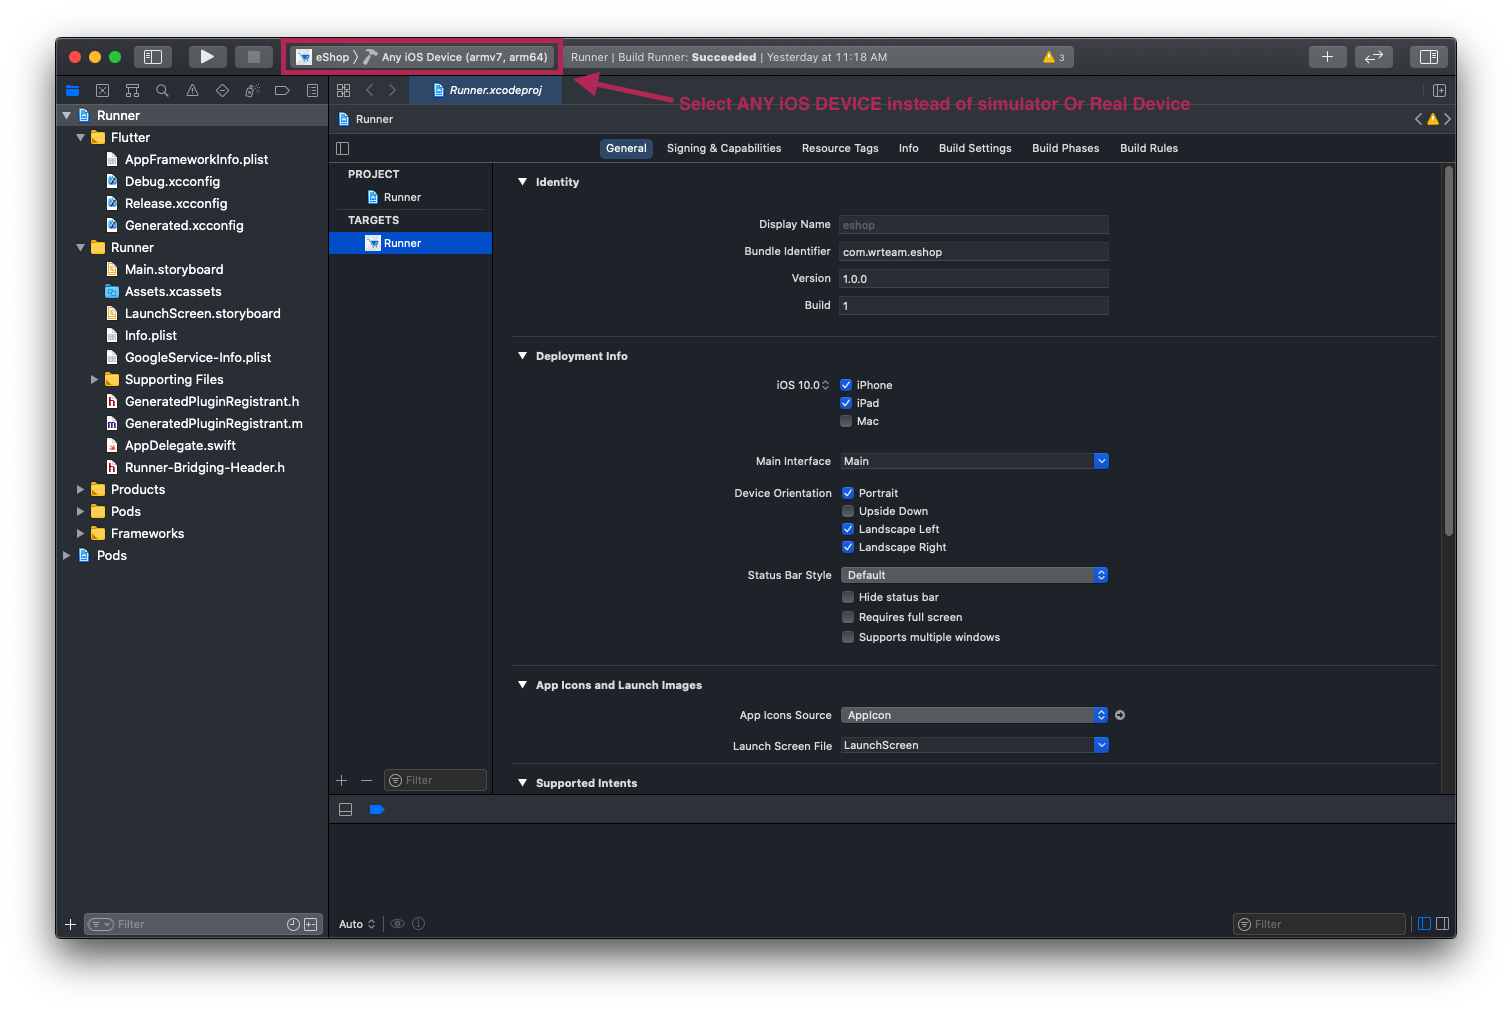
- and then Select Any iOS Device (armv7,arm64) as shown in image below.
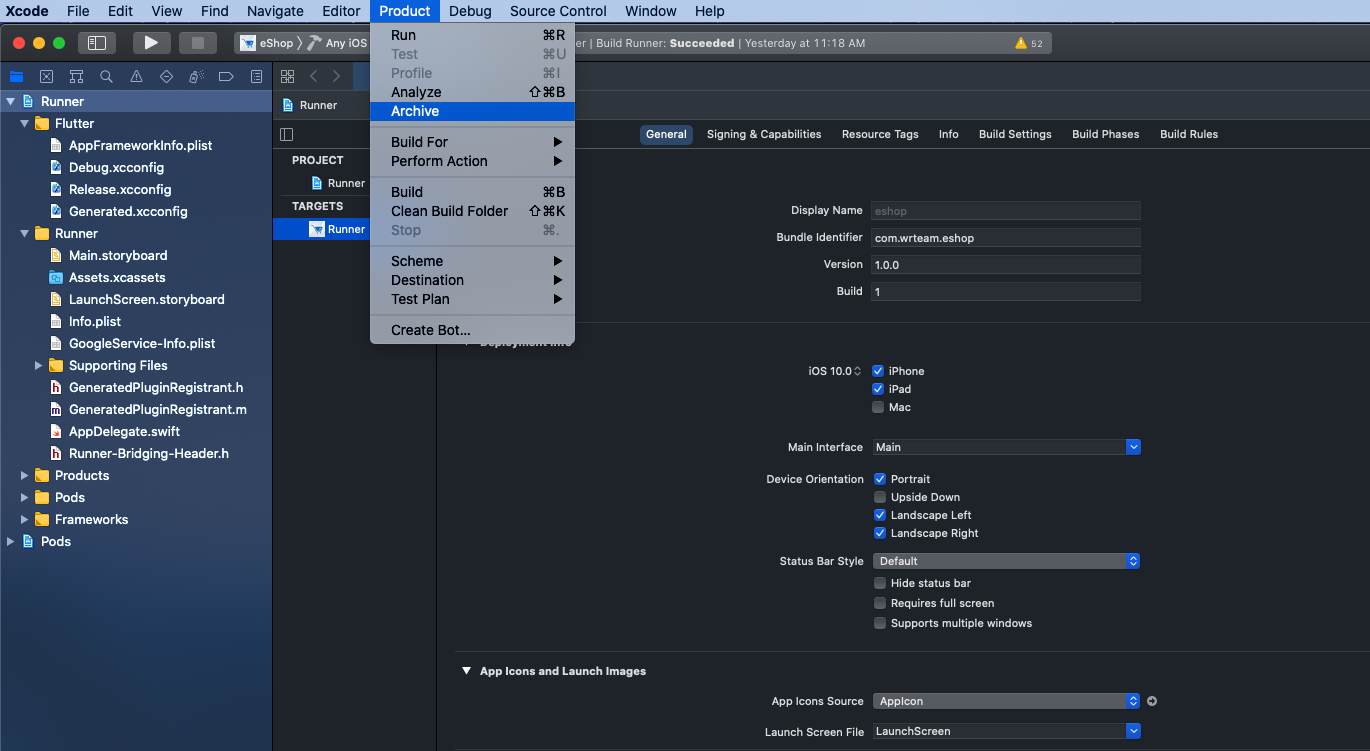
- After that Select Archive From Product Menu of Xcode as shown below.
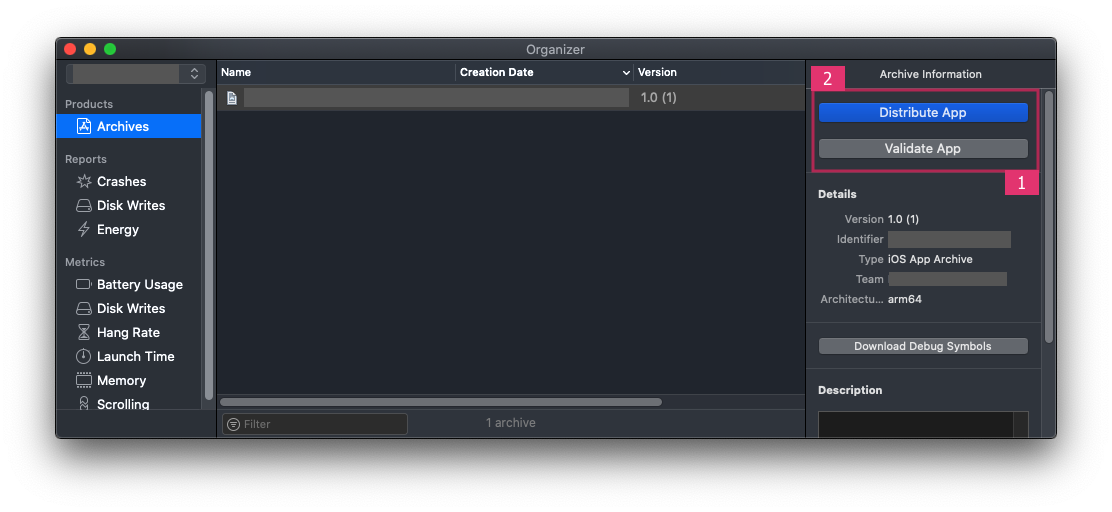
- Once Build / Archive Generated, pop up window will be shown. Validate app First, and After Successfull Validation of App, You Can Distribute App to AppStore.
- After SuccessFull Submission of Build File, it will be Reflected to your Apple Developer Account in which we have created app with same Bundle ID. Click here for Detailed Help
