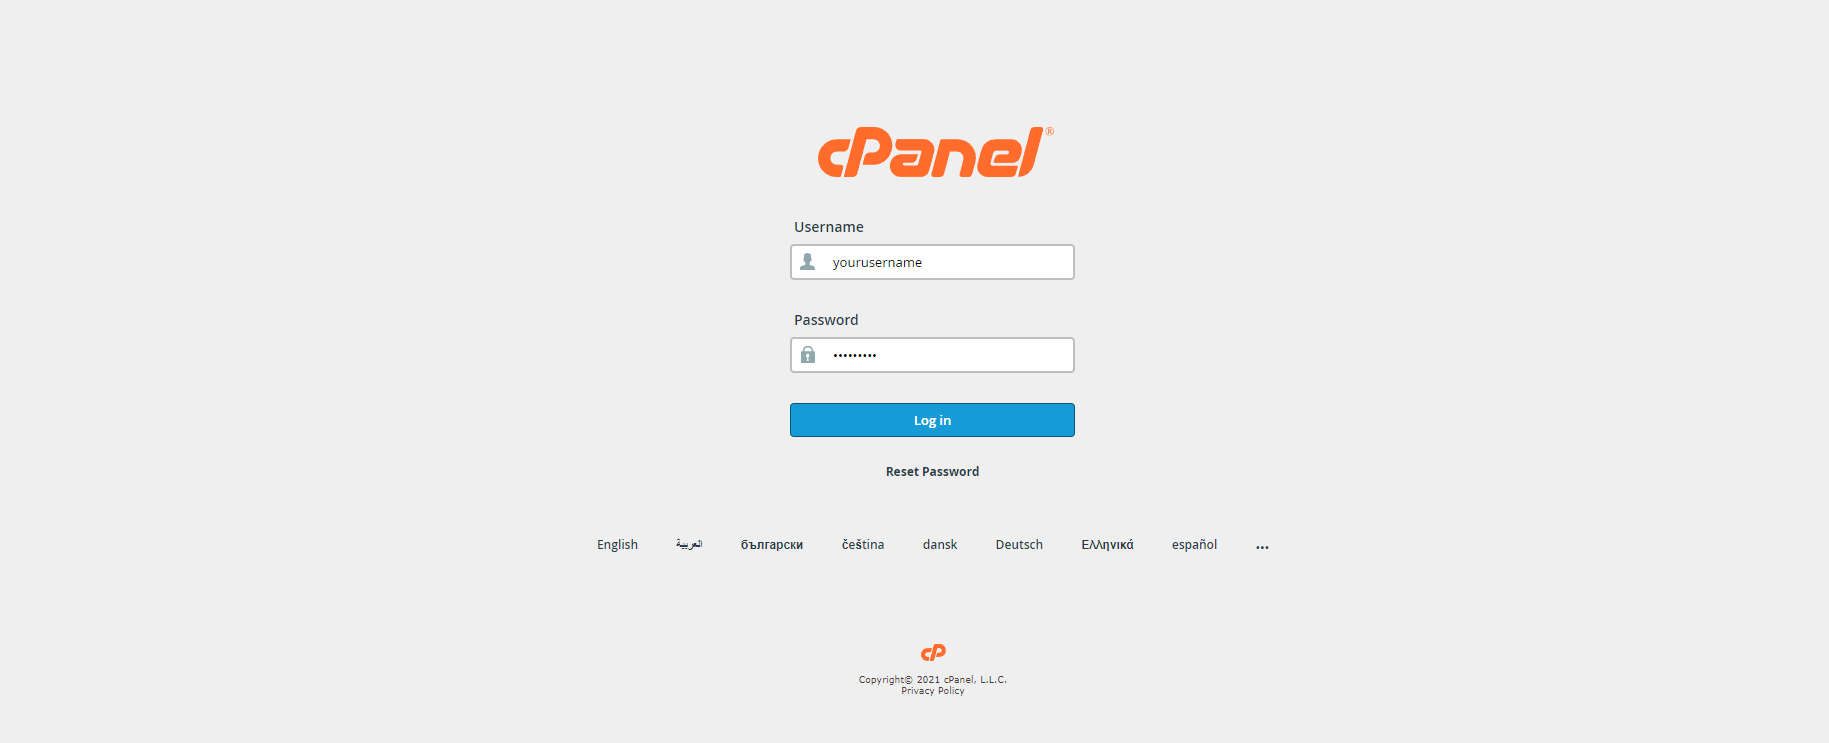
- Login into your cPanel.
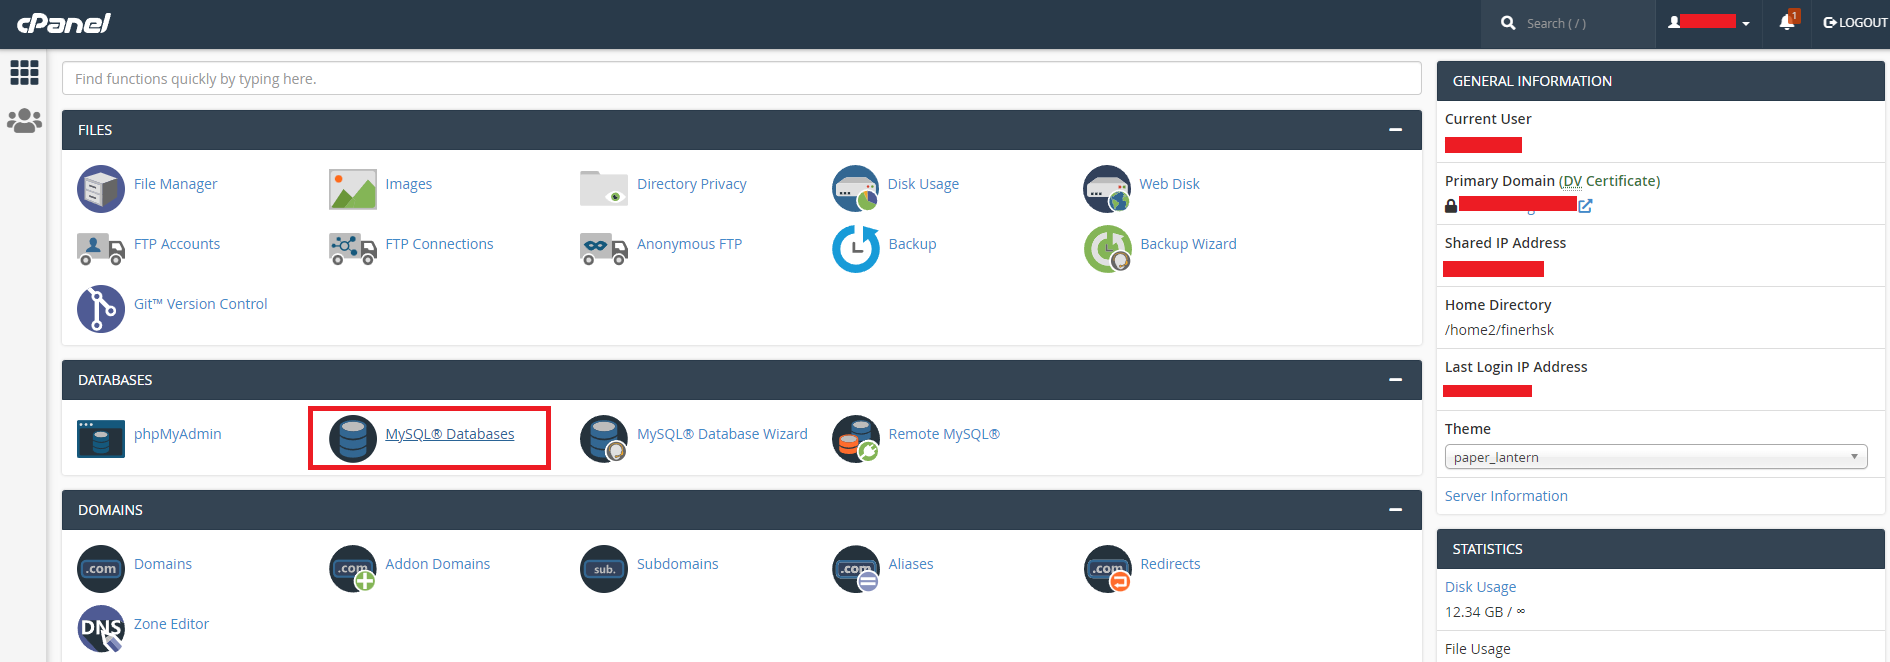
- Go to database in your cPanel
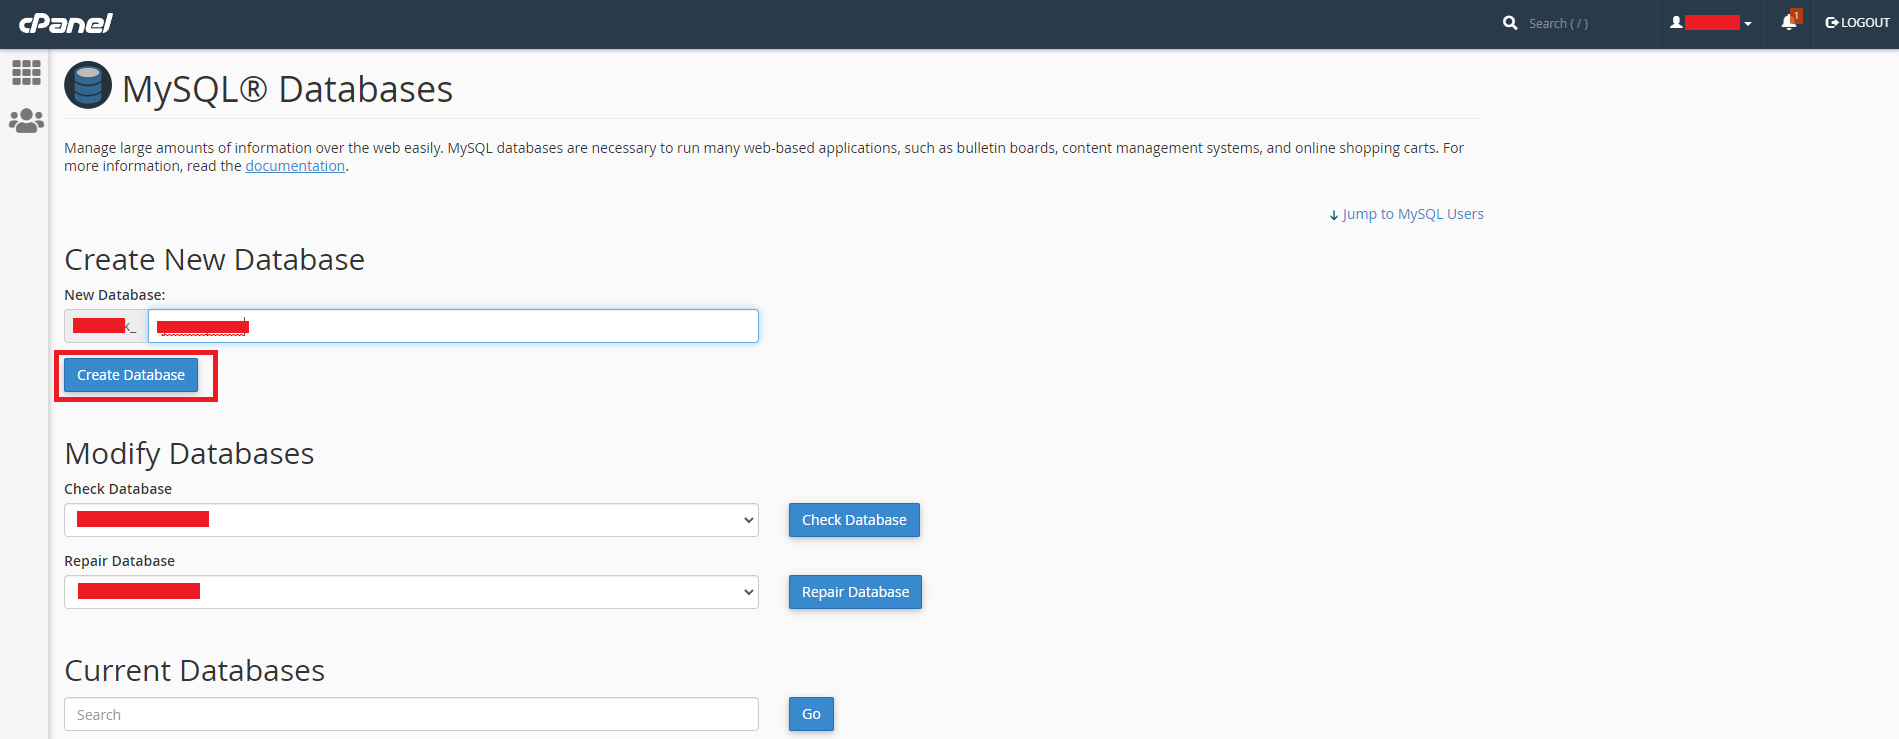
- Enter database name and Create a new database.
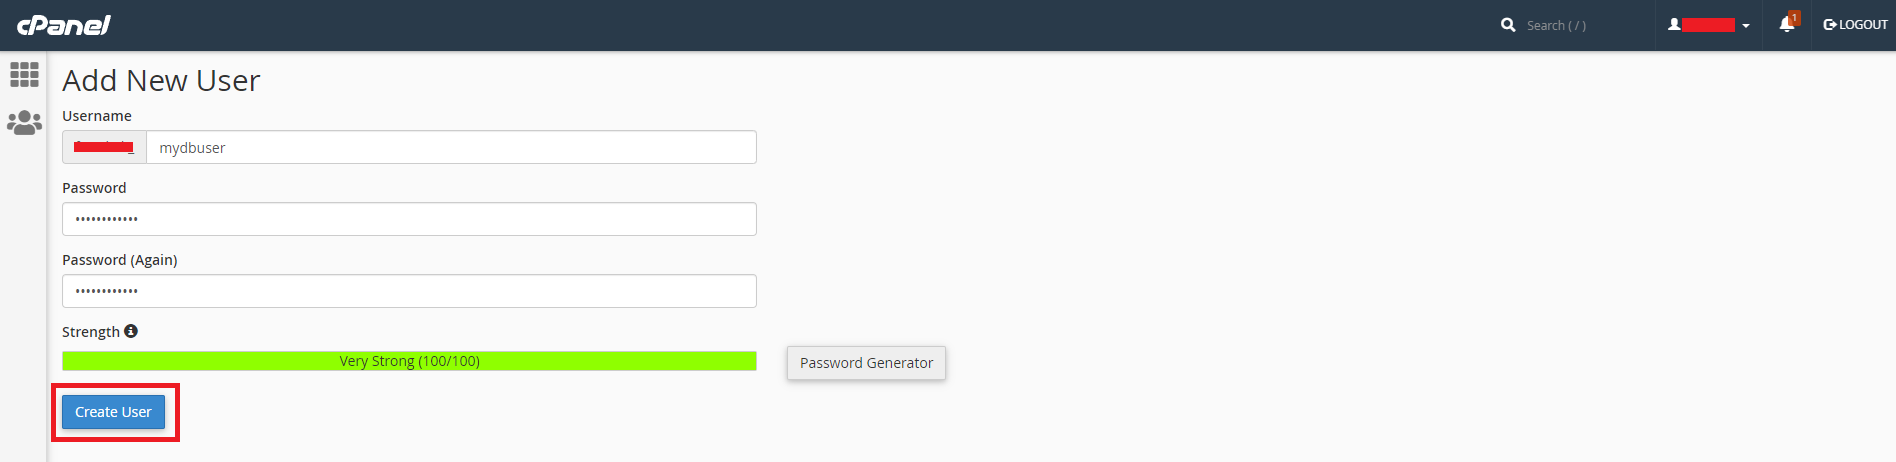
- Create Database user.
- Assign Database to the user.
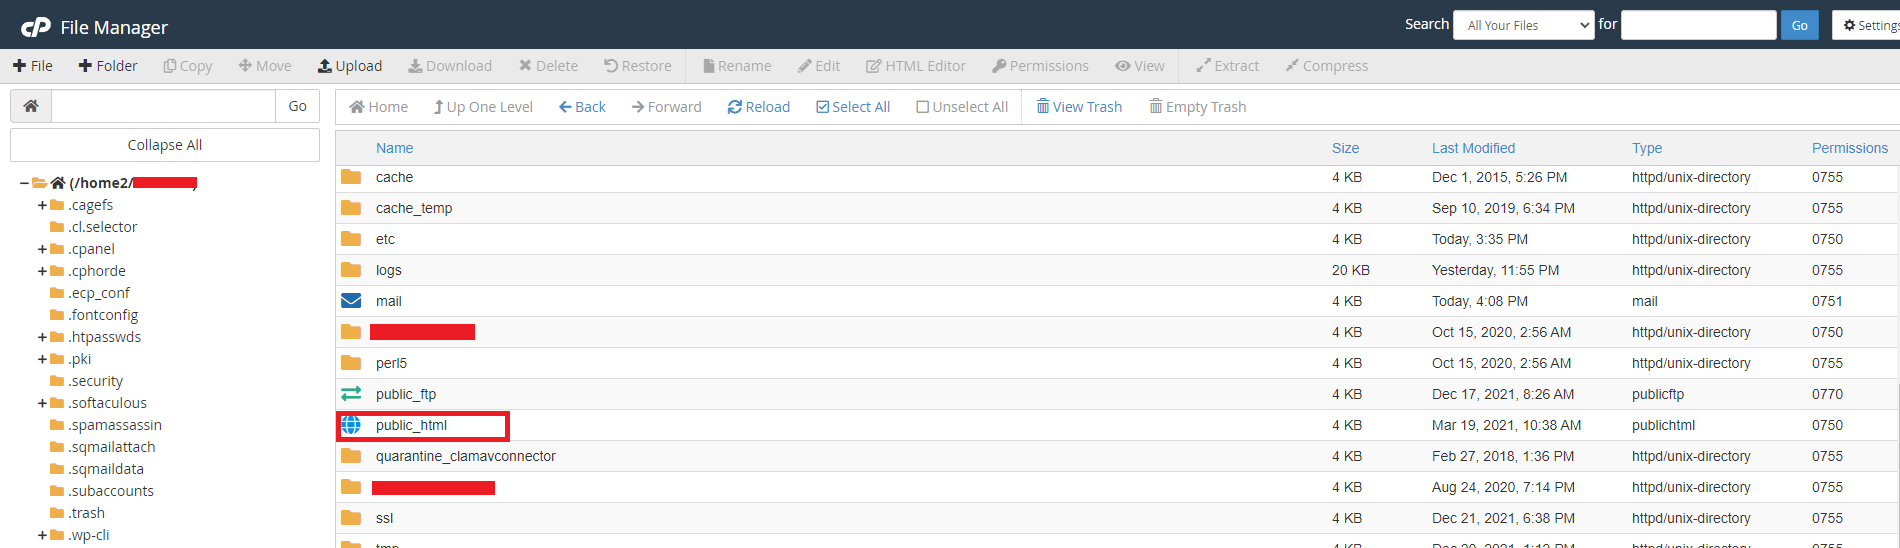
- Open File manager now.
- Go to public_html or public_html/yourDomain.in folder in the file manager, whichever folder your domain points to.
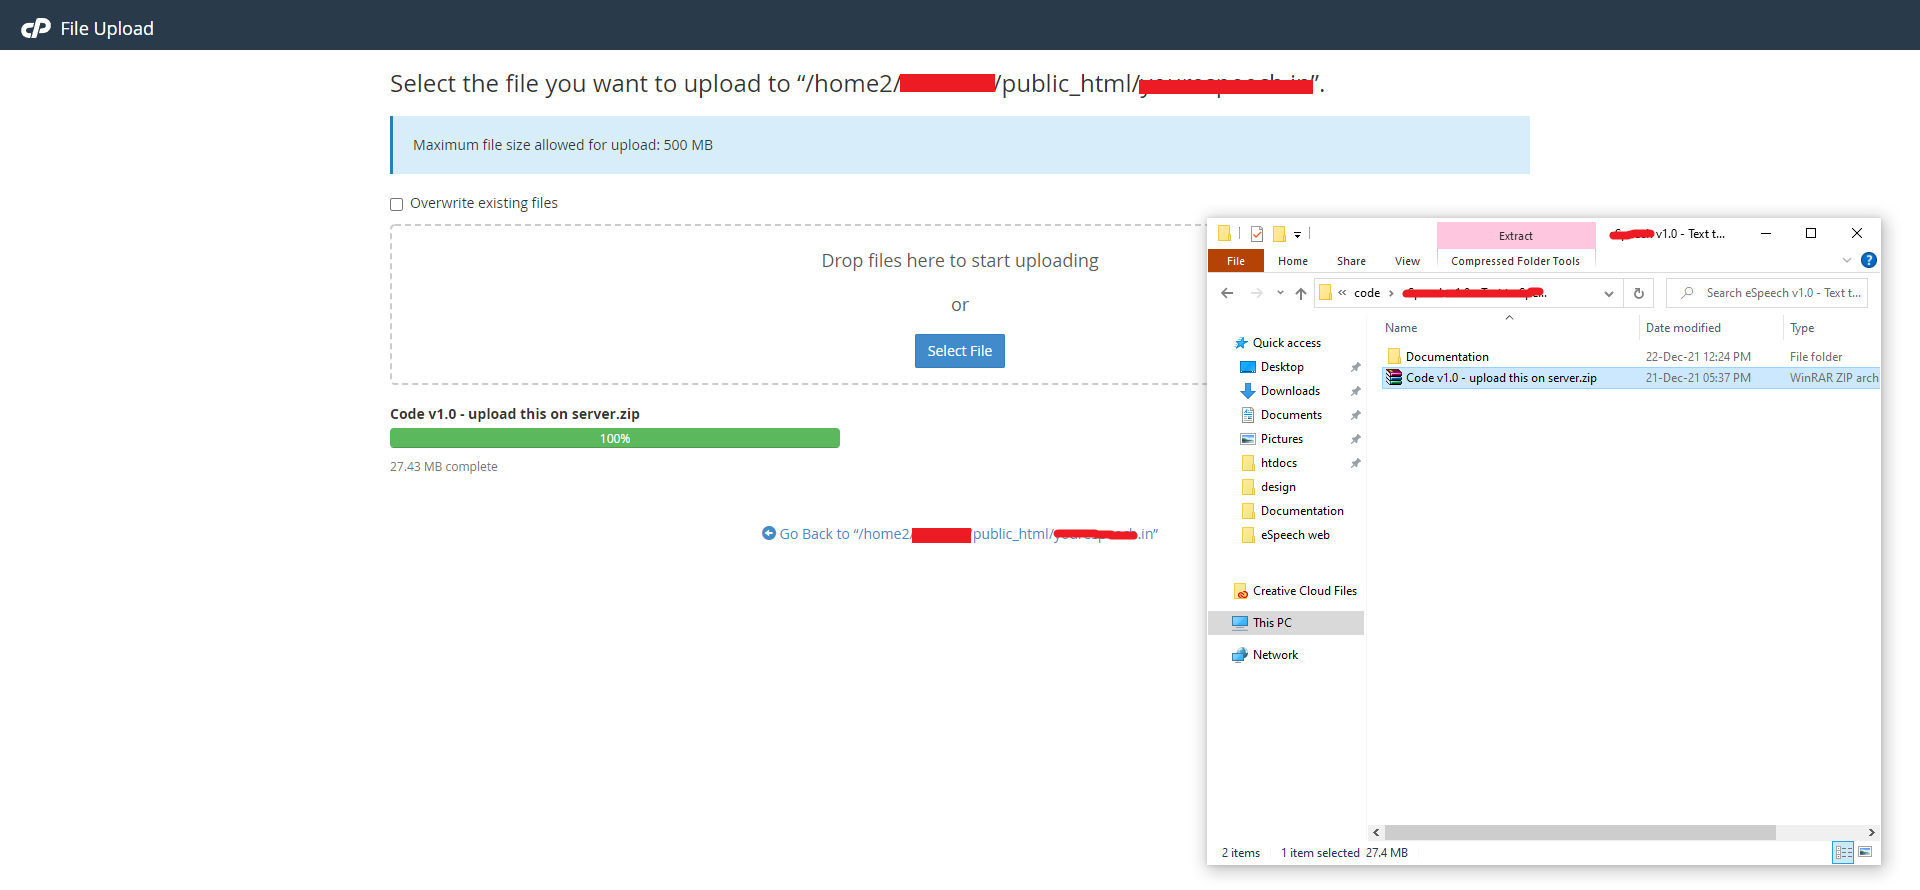
- Upload the downloaded zip in public_html or public_html/yourDomain.in folder.
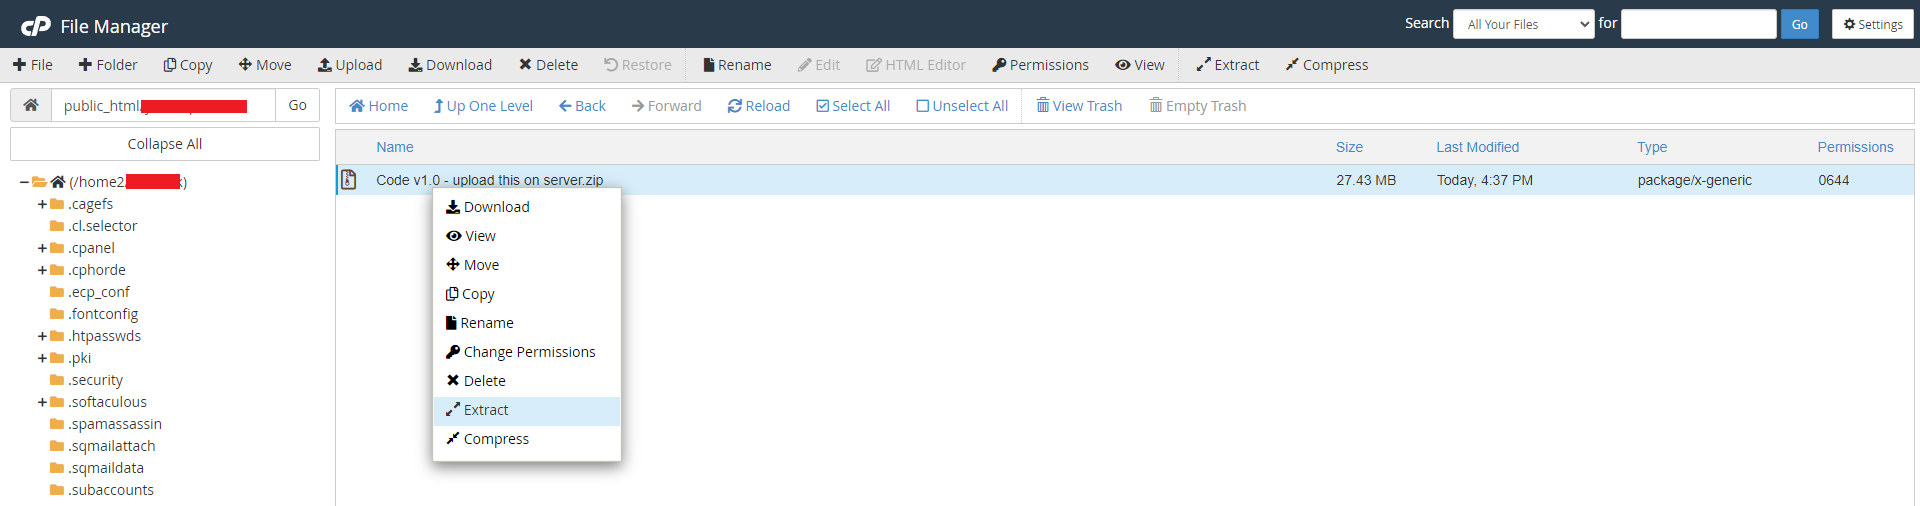
- unzip or extract the Code vX.X - upload this on server.zip file that you have just uploaded.
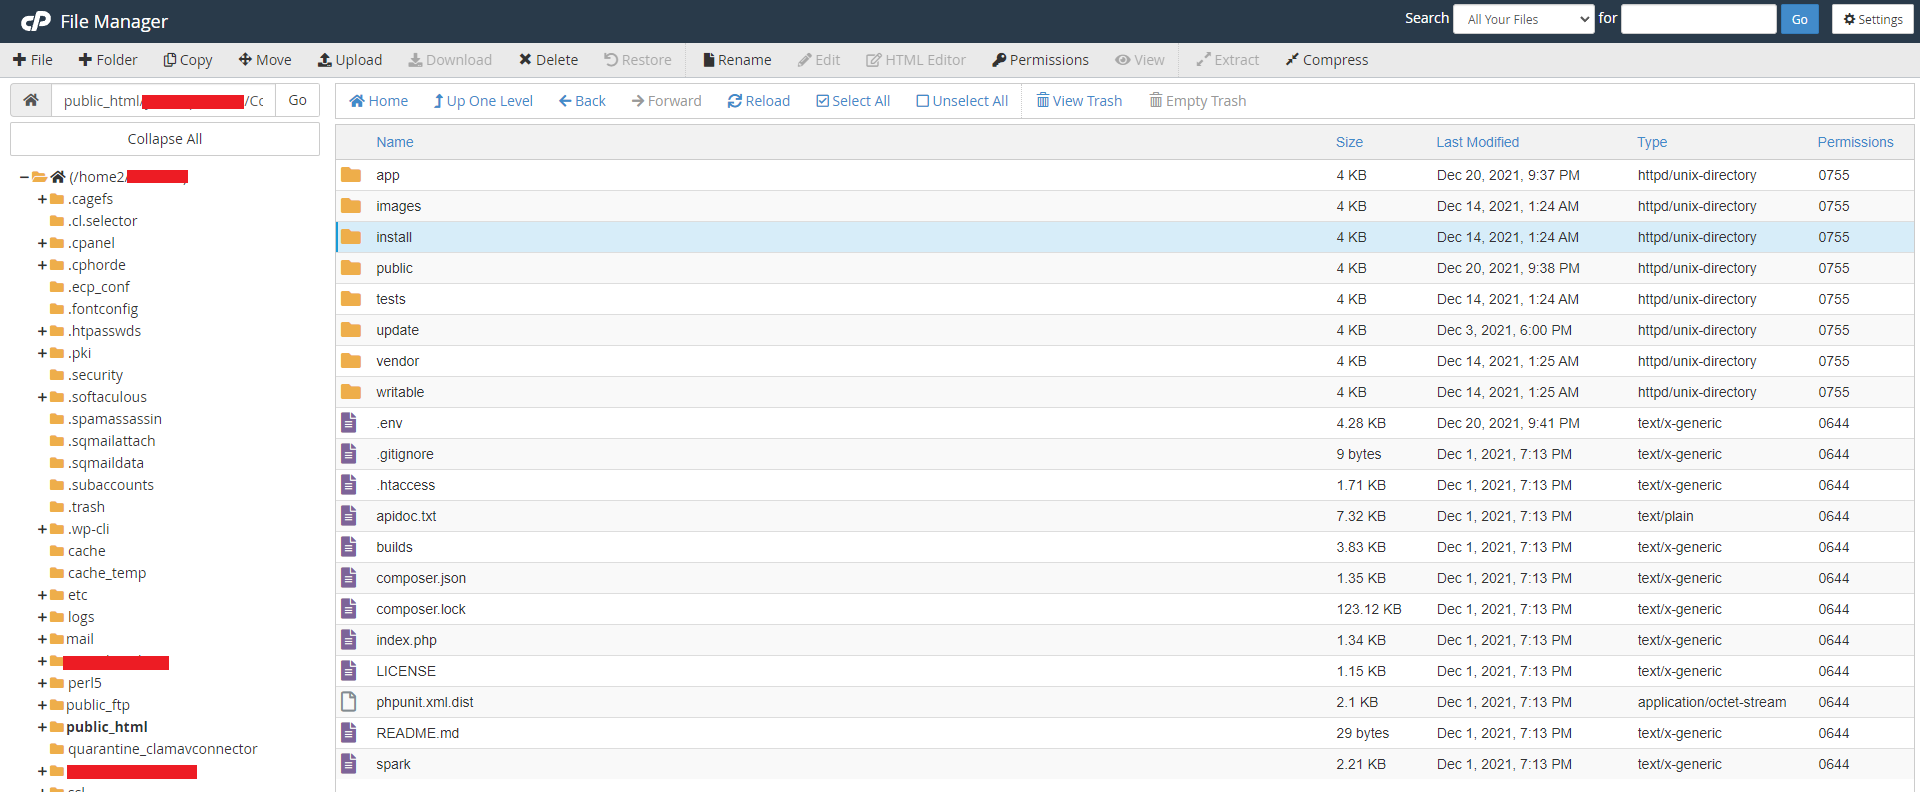
- verify that all these files are in public_html or public_html/yourDomain.in folder.
- First of all find the eShop folder from the PHP code folder from the downloaded package and upload the code to your server on your desired domain or subdomain. Like for example, You have https://eshop.com domain with you
- Create a new database from cPanel
- Create new user for the database & give all the privileges to the user
- Afrer creation of user visit
https://eshop.com/install - Database Hostname : Enter the hostname.
- Database Username : Enter the username that have access to the database.
- Database Password : Enter the password.
- Database Name : Enter the name of database.
- Admin Mobile : Enter the mobile number (The mobile number will be used further for user authentication)
- Admin Password : Enter the password number(The password will be used further for user authentication)
- App Url : Enter the your app / domain url. Make sure you enter the complete URL with the correct protocol say http:// or https://


Step 1. How install the eshop backend and / or web version code on your server by using installation wizard?
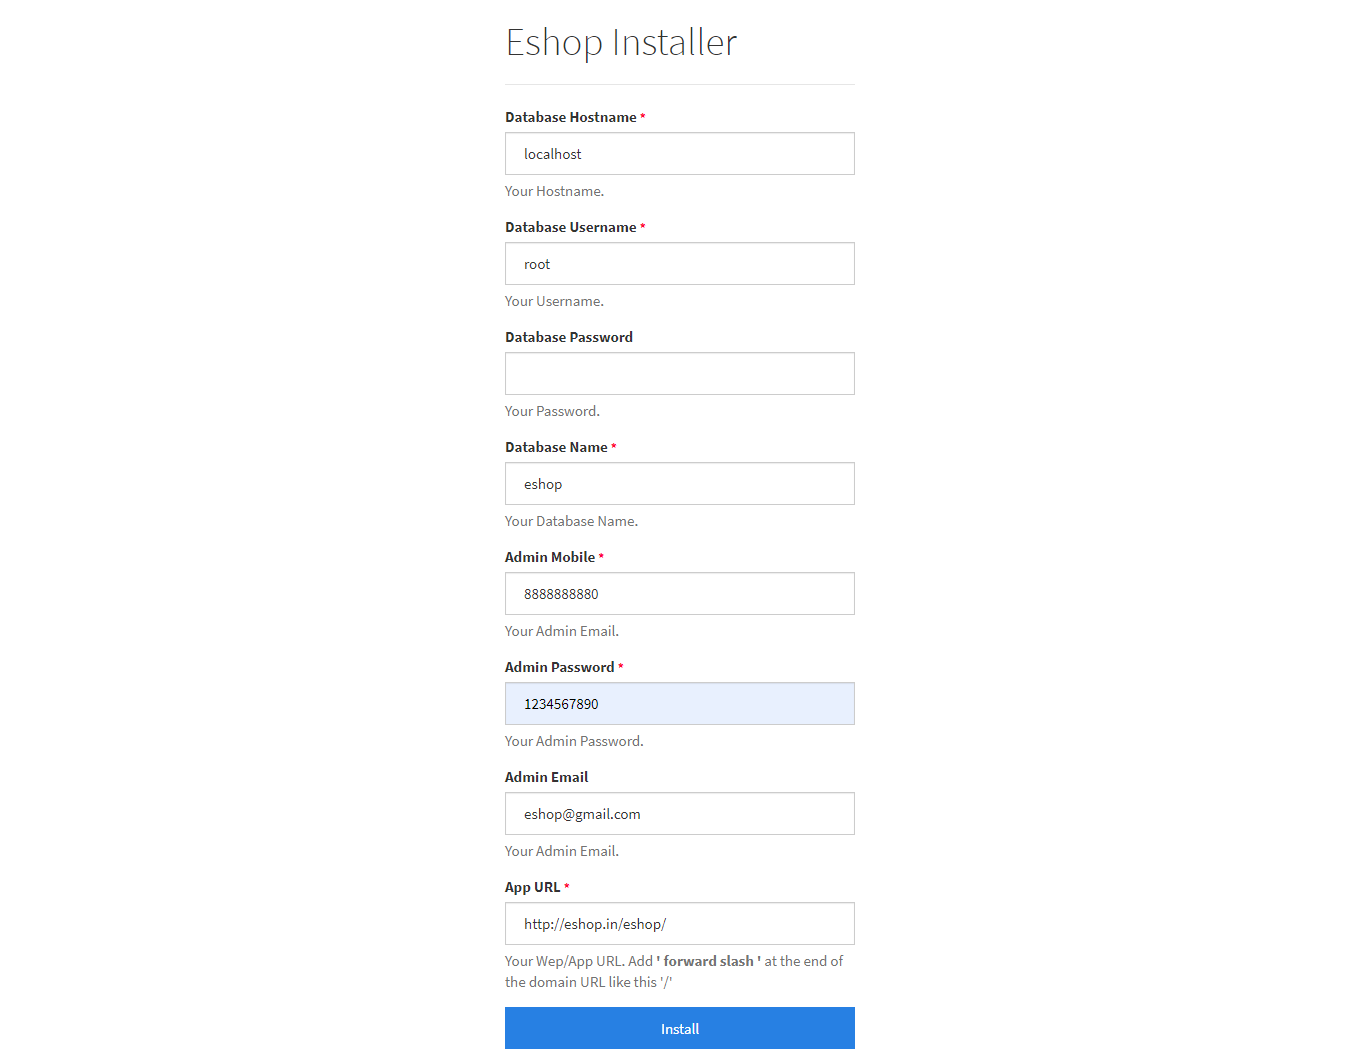
Sample image
Now click Install. Thats it! You are ready to run your first ecommerce App : https://eshop.com/
Generate Client API Secret Key to be used in api requests from mobile apps.
- Client API Secret Key will be used in Application side. Once generated you have to set this key in the application as a JWT secret code.
- Goto http://eshopweb.store/admin/client-api-keys/
- You can generate secret as per image below.
- Set the secret on the app side as JWT Secret Key.
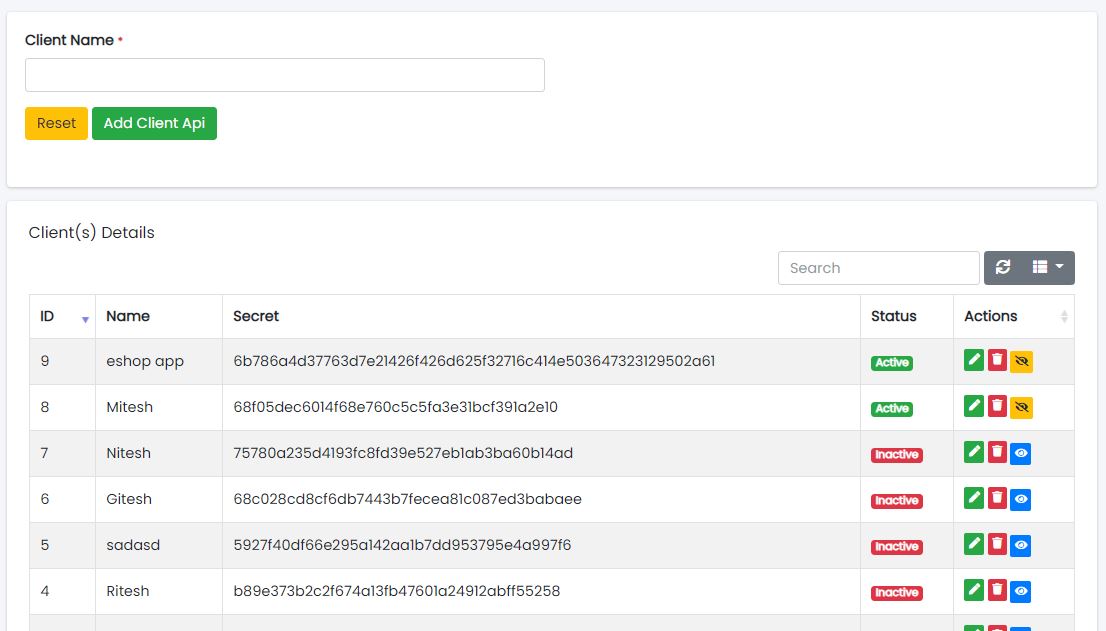
Sample image
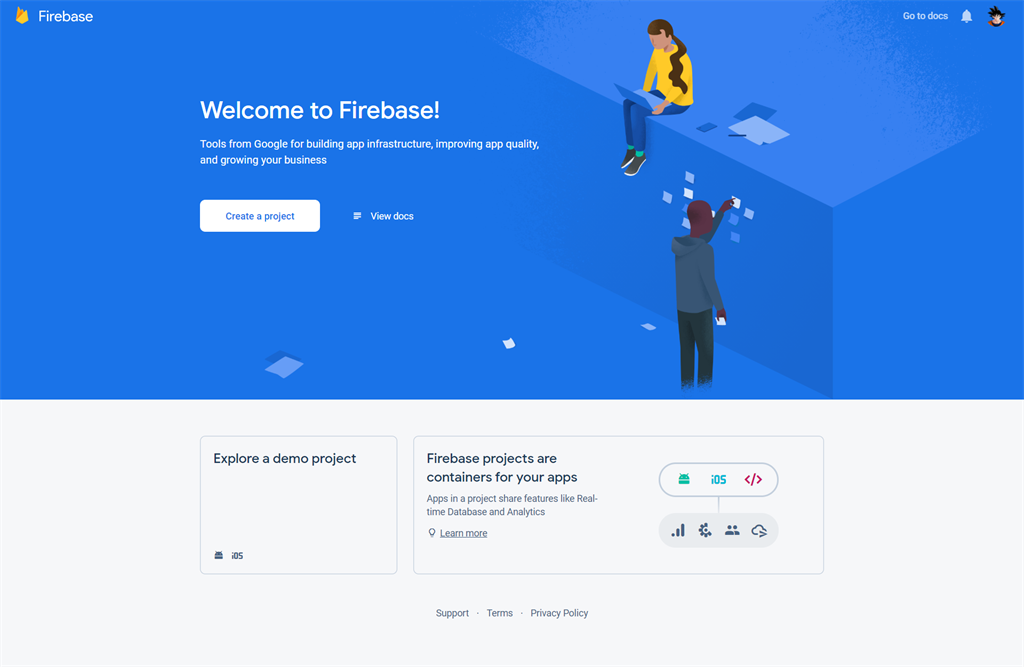
Configure the firebase setup for login web version
- Create Firebase Project
- Goto >> Firebase console << .
- Register a new account or try to log in with existing google accout.
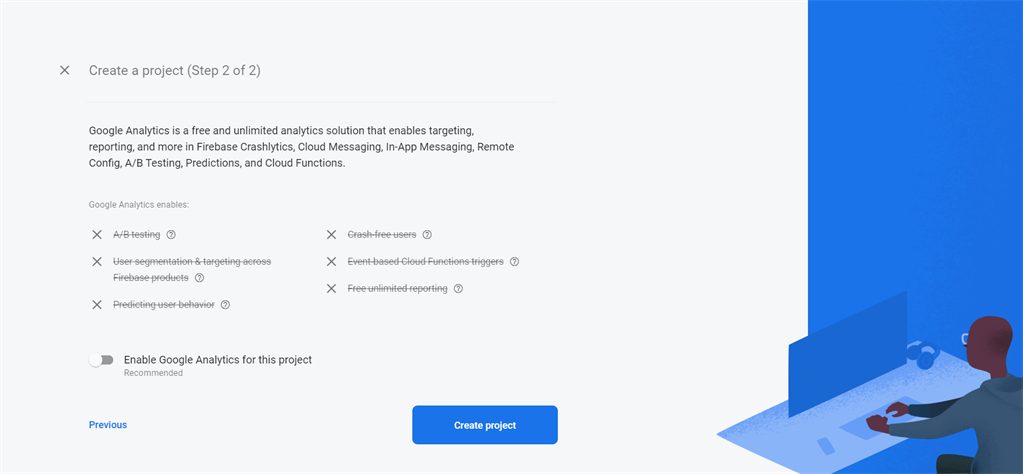
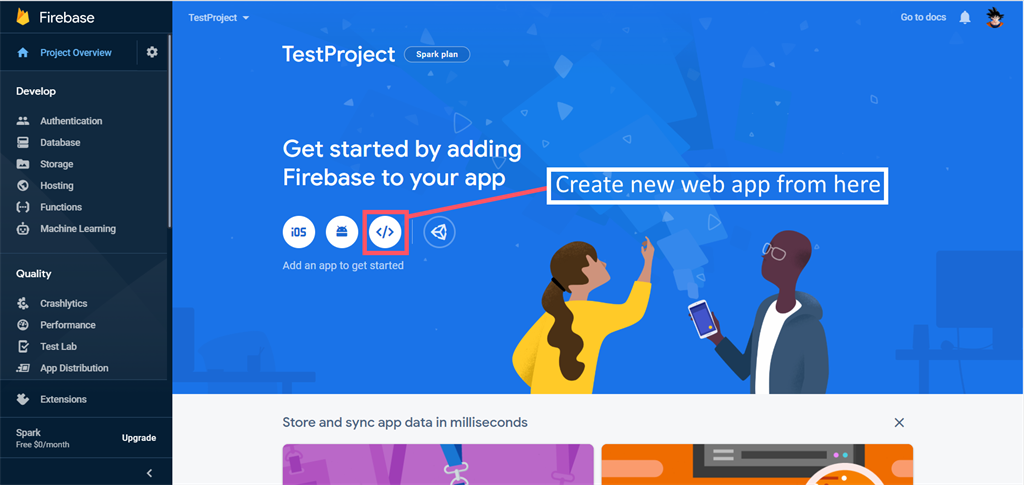
- Once logged in, you can see firebase console dashboard. Click on Add Project. Provide a project name, and then select country and then after that click on Create Project. For example, see the below image.
- Once the project has been created, it will automatically redirect to Firebase dashboard screen.
- As eShop Front End(Web version) is a web project, you need to add web project/application to the firebase project.
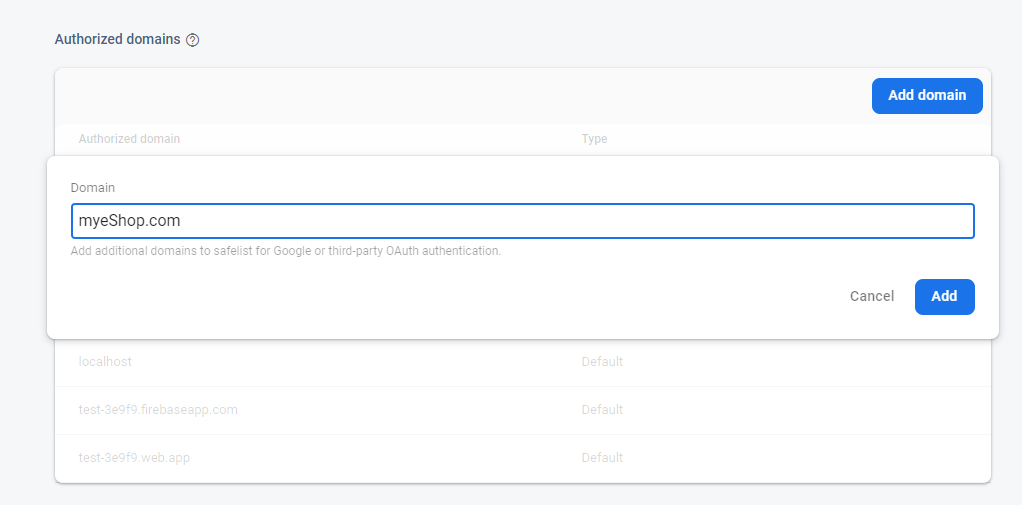
- Goto Authentication and open " Sign-in method " Tab
- Now at the bottom of the page, in "Authorized domains", localhost and a Firebase domain are automatically added. Here we've to add domain name without http:// and https:// whever eShop Front End(Web Version) Website will get hosted. If you're using www as prefix of domain name then you must have to add that.
- Now add your domain with www. as prefix like www.myeShop.com
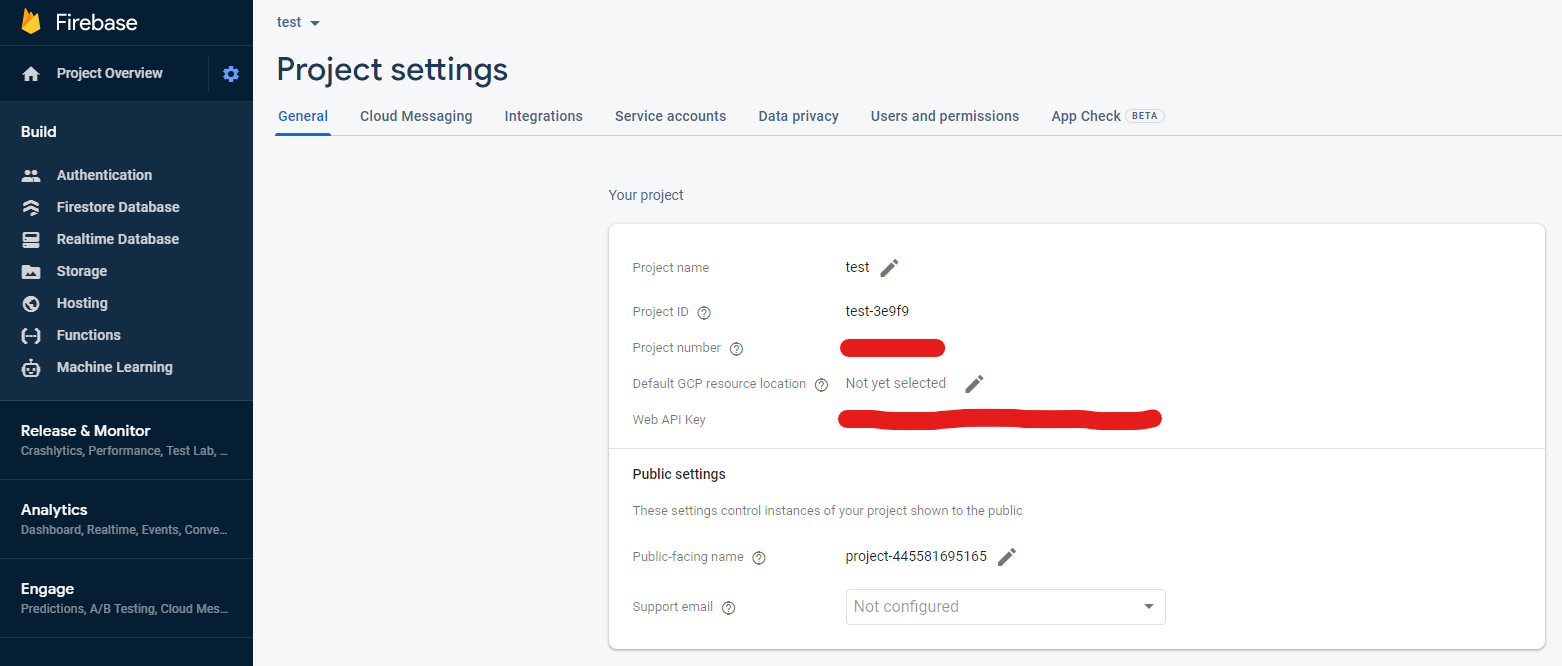
- Goto Project settings in firebase dashboard option.
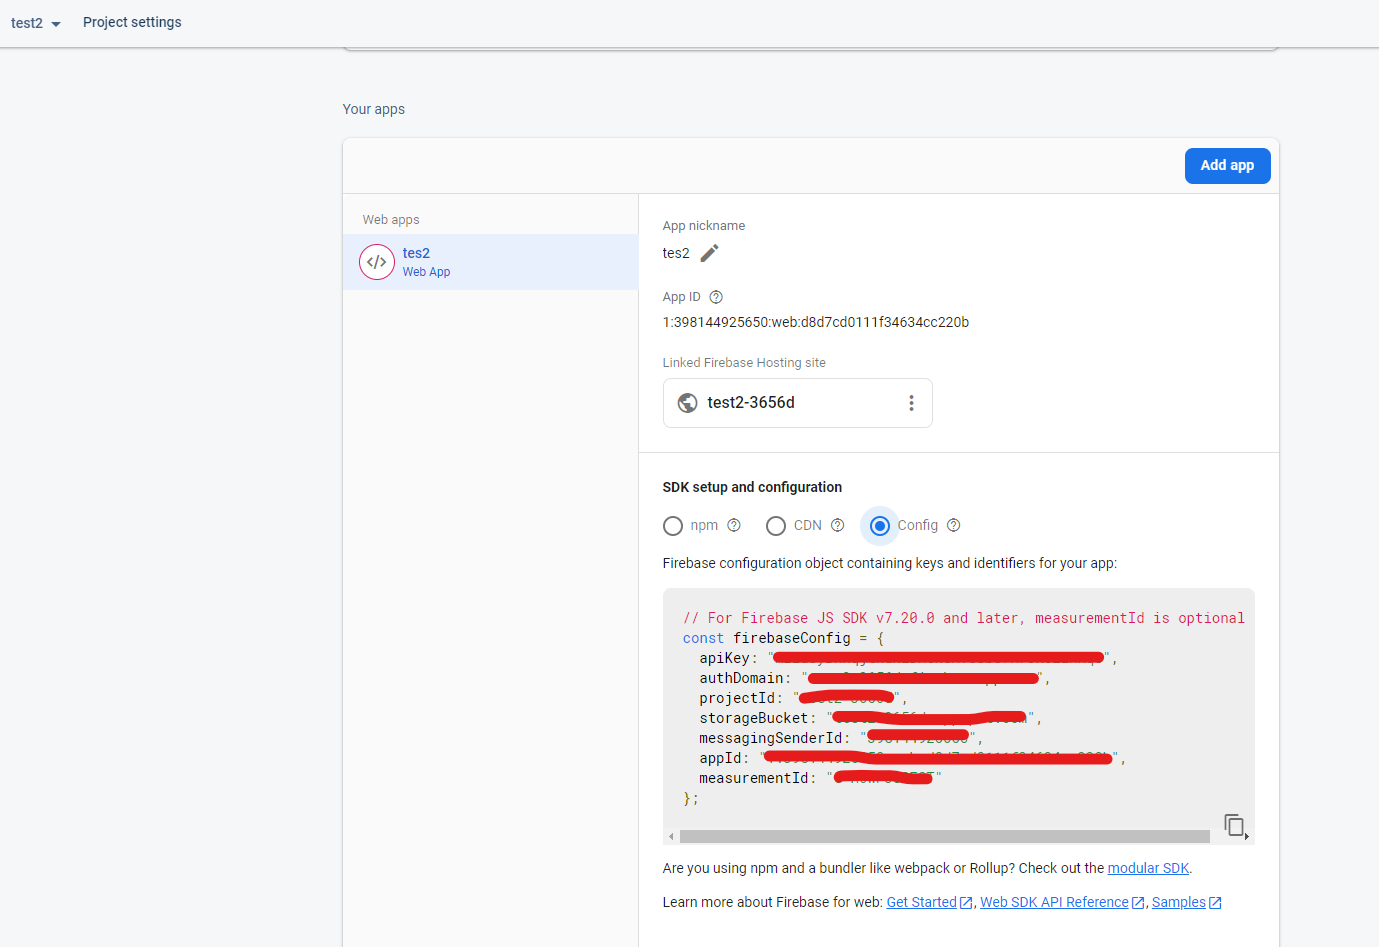
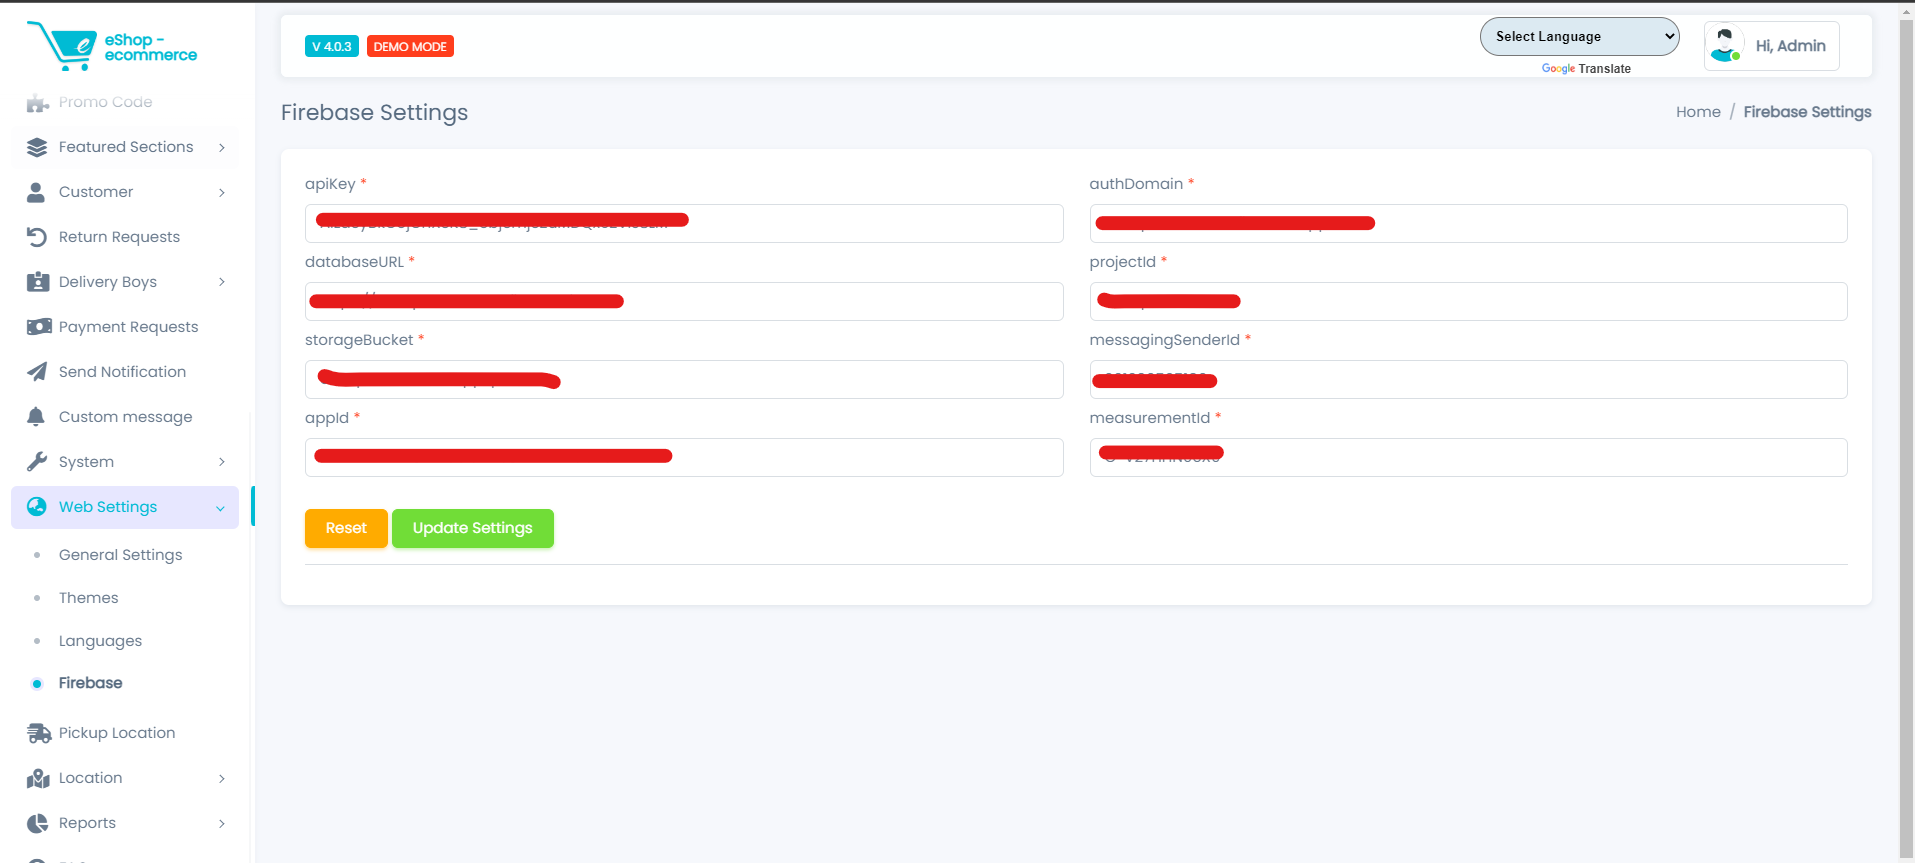
- Goto Project settings and scroll down you will find created web App there you find config option that will have firebase settings for front end.
- here you have to set all details except the two fields 1. databaseURL & 2. measurementId. Here you can set only test word.
- You need to set this details in eShop admin panel -> Web Settings page from this Project settings page in firebase dashboard option
Sample image

Sample image
Sample image

Sample image
Sample image

Sample image
Sample image
Sample image
Sample image
Sample image
Auto Update
How to auto update your admin panel or web version to latest version?
- Find update from vX.X to vX.X.X.zip file from downloded PHP source code.
- Visit
http://eshop.com/admin/updater - You will see simple instructions, current version to latest version information and "Update The System" button.
- Upload update.zip file.
- Click on that Update Button.
- That's all. You have successfully updated your system from older version to newer one.
Support
If you are facing any technical issues or challanges while using our system. You can contact us on skype.We are available for technical support from 9.00AM to 6.00PM Indian Standard Time Monday to Friday.
For Web or backend related issues contact here : Foram Shah
Microsoft Teams: Foram Shah
For Mobile related issues contact here : Nitin Pindoriya
Microsoft Teams: Nitin Pindoriya
Website Overview
Sample image
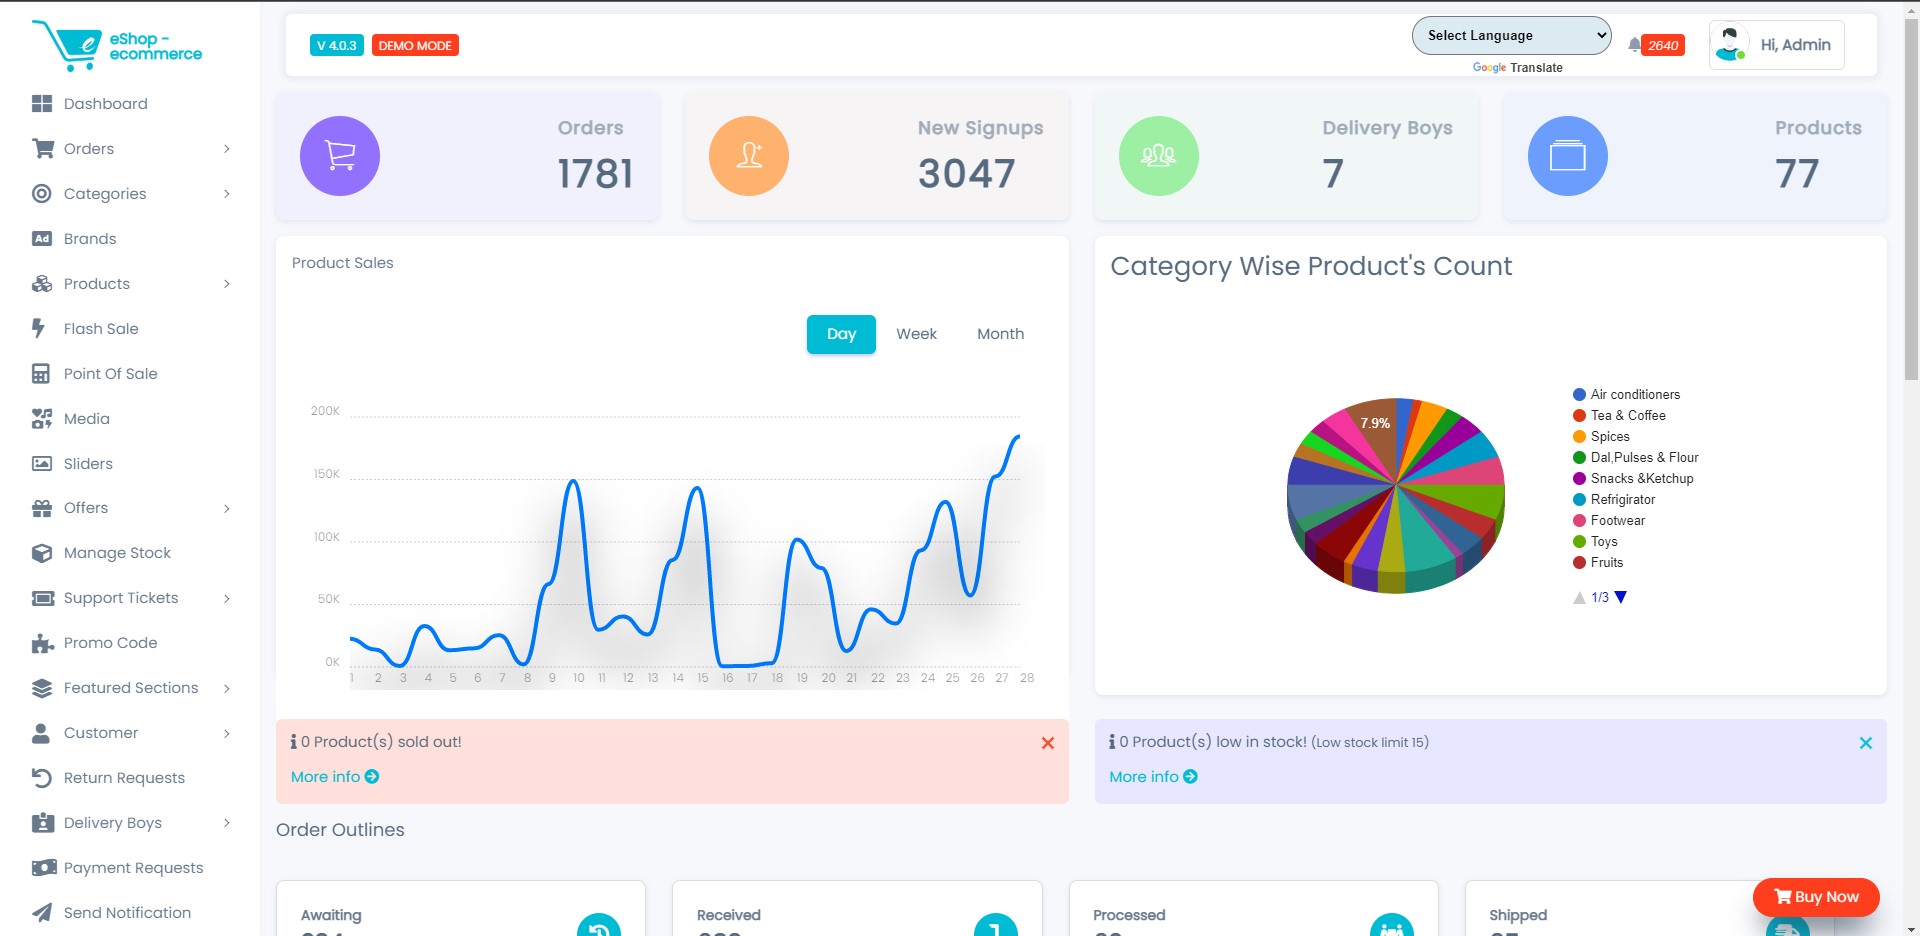
The Above web page contains tabs on the left panel like Home,Orders,Categories,Product, Home Slider Images,New Offers Images,Promo code,Featured Sections,Customer,Return Requests,Delivery Boys,Send Notification,System,Location,Reports and FAQs to manage the whole website
Home Panel
Sample image
It Mainly contains 4 Items
- Orders:To view Orders Information
- New Signups:To view New Signups Information
- Delivery Boys:To view Delivery Boys Information
- Products:To view Product Information
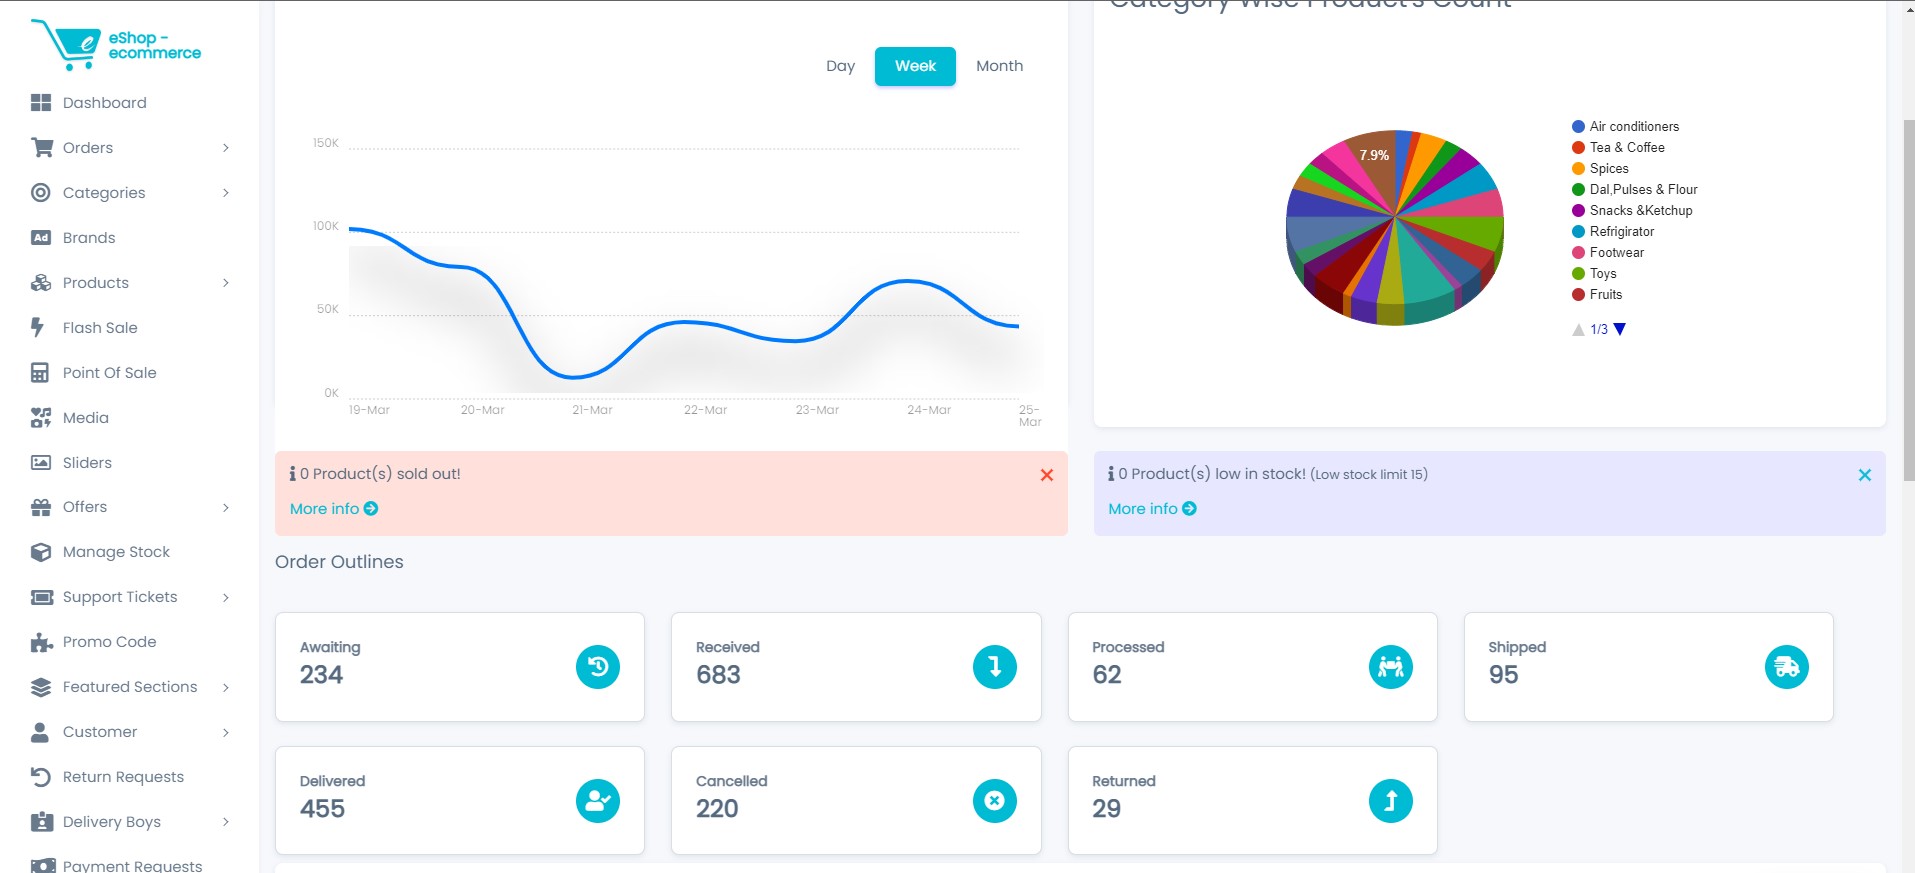
And Two charts
- Products Sales:To summarize sale in last days,weeks and months
- Category Wise Product:To summarize category wise product count
The Above web page contains Customize The Theme on the right panel like No Navbar border,Body small text,Navbar small text,Sidebar nav small text,Footer small text,Sidebar nav flat style,Sidebar nav child indent,Navbar Variants,Dark Sidebar Variants,Dark Sidebar Variants to manage the whole website
Sample image
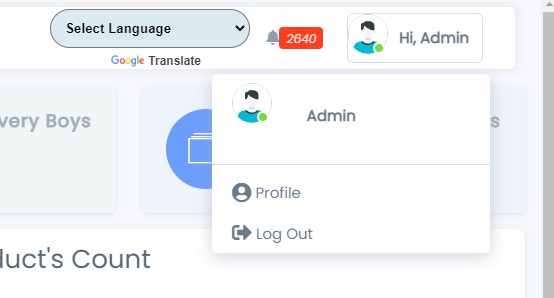
It Mainly contains 2 Items
- Profile:To Update the Admin Information
- Log Out:Log out the admin pannel
Order Panel
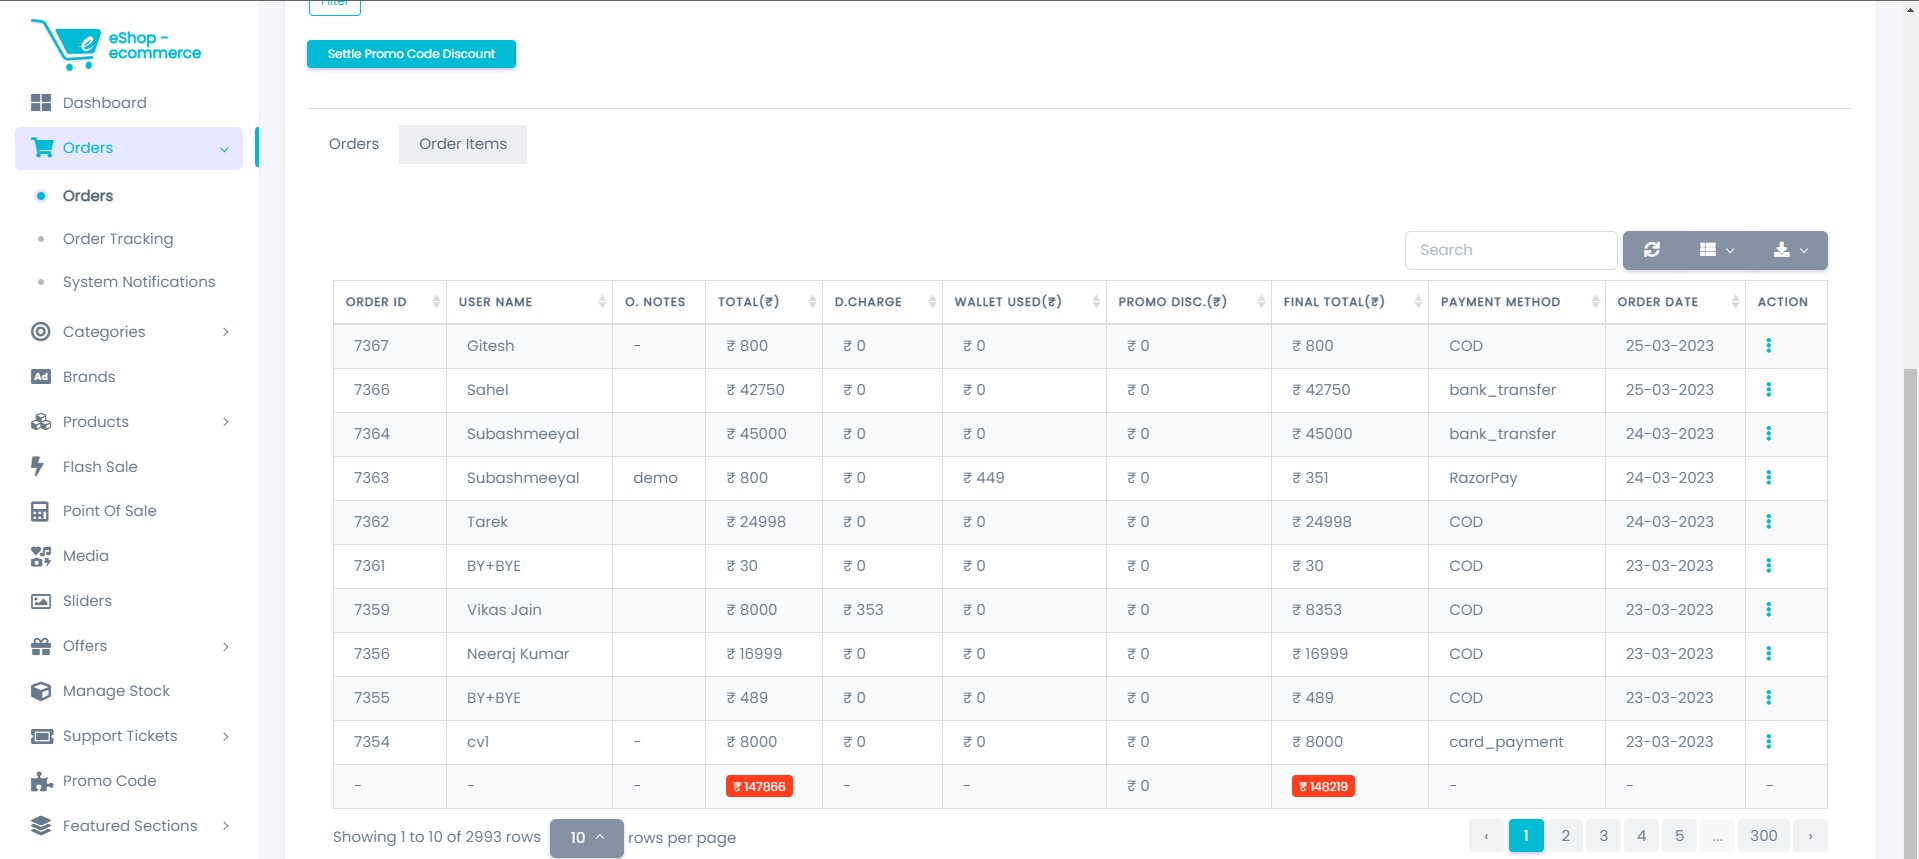
Here all the information related to order is displayed
Actions- Filters By Status
-
 Used to filter
the Order Status according to the criteria
Used to filter
the Order Status according to the criteria
- Search Order details
-
 To search the Order
Detail
To search the Order
Detail
- Refresh Orders list
-
 To Refresh Order
List
To Refresh Order
List
- Filters
-
 Used to filter the
Order details according to the criteria
Used to filter the
Order details according to the criteria
- View Order
-
 To View the Order
details
To View the Order
details
- Delete Order
-
 To delete the
Order
To delete the
Order
- Invoice Order
-
 To Invoice the
Order details
To Invoice the
Order details
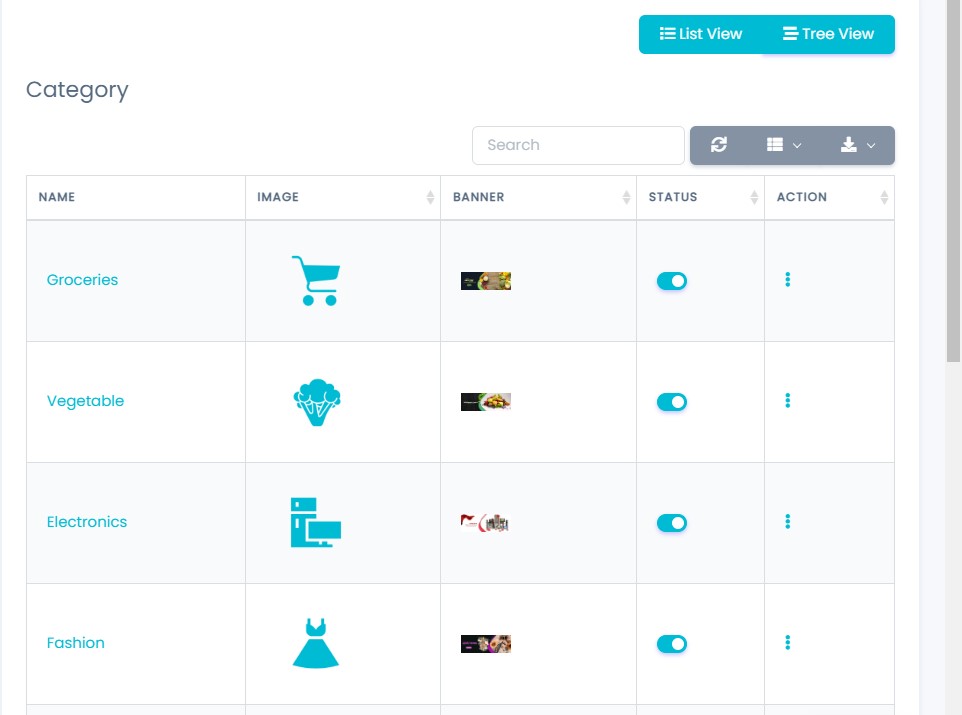
Categories Panel
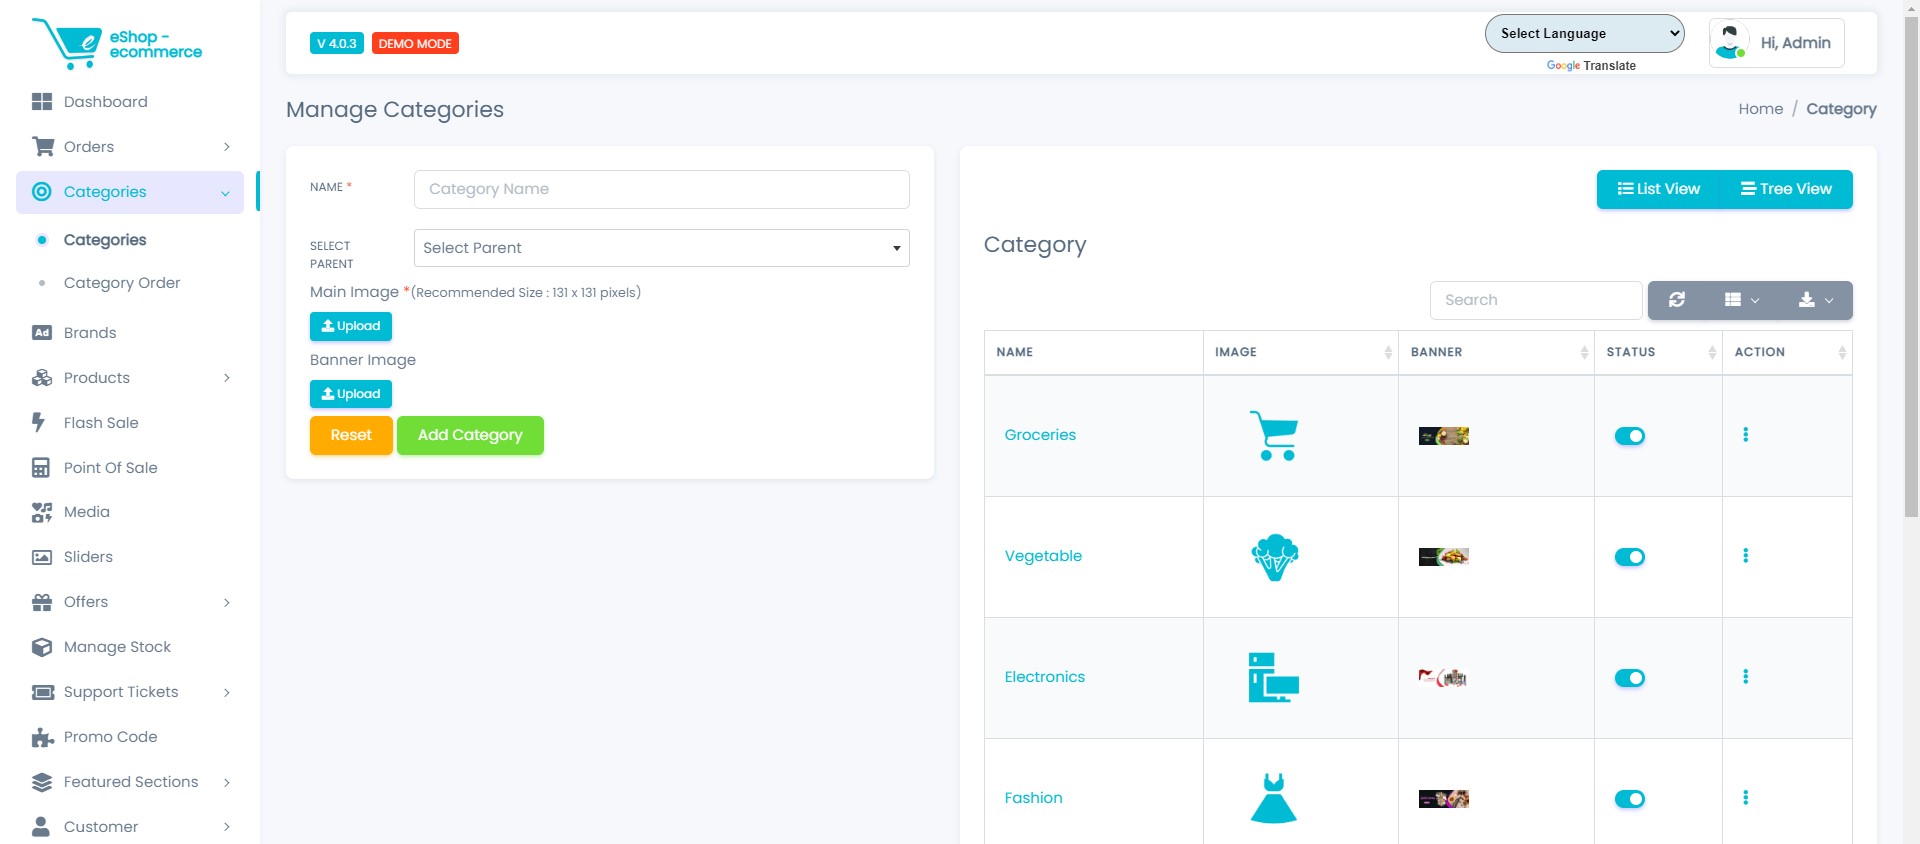
Here all the information related to Categories is display
Actions- Search Category details
-
To search the
Category Name or Any other Detail
- Refresh Category list
-
To Refresh
Category List
- Filters
-
Used to filter the
Category details according to the criteria
- Edit Category
-
 Used to Edit the
Category details
Used to Edit the
Category details
- Delete Category
-
Used to Delete the
Category details
- Category Status
-
 Used to Active And
Deactive the Category Status
Used to Active And
Deactive the Category Status
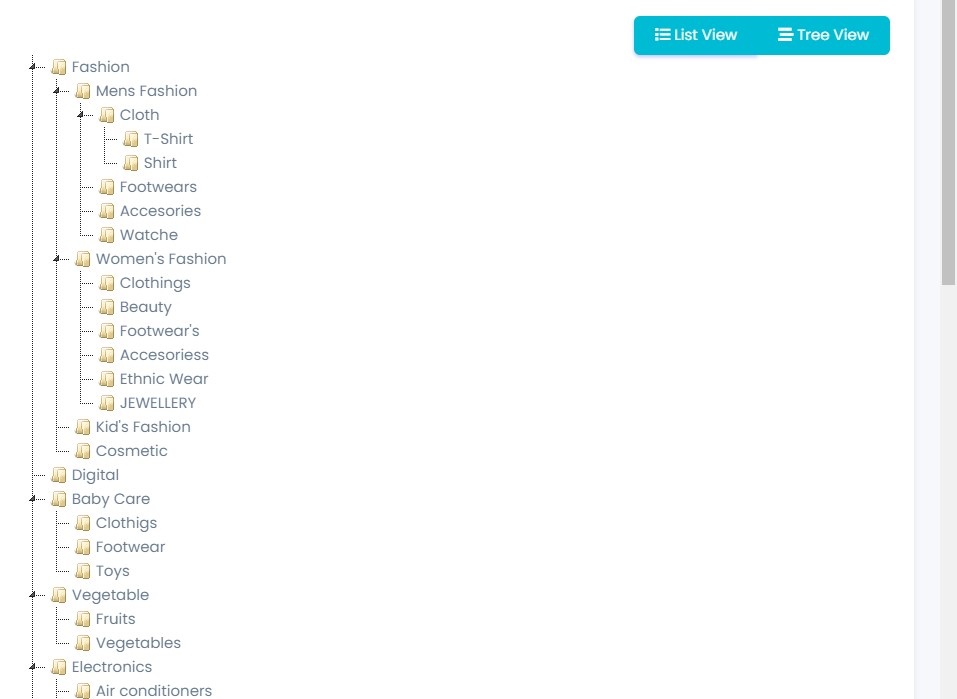
Here all the information related to Categories is display on Tree View
We Can add New categories and delete categories by following Steps :
Step 1:Adding New Category in the Category List
Click on Add Category Tab Present On The Right Side

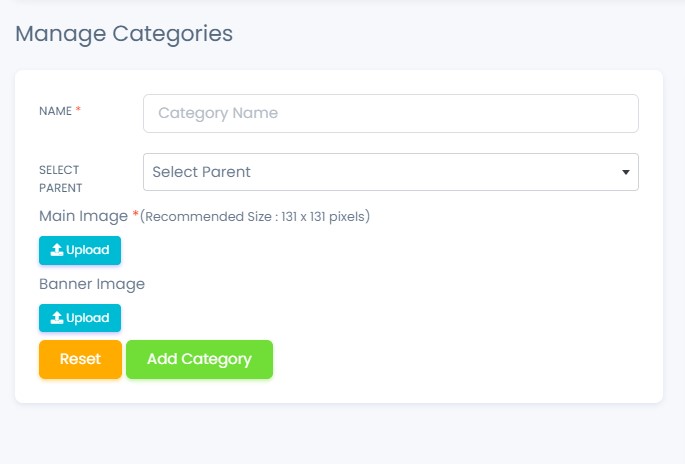
- In Category Name field Enter the Name of the Category.
- In Category tax field Enter the tax in Percentage(%) of the Category.
- To know how to upload image in the form click here.
- Click add Category to add Category or Reset to Reset the form.
The Category Added Successfully
Step 2:Delete Category from the List
For Deleting category we need to use as explained above
under Actions category.
Product Panel
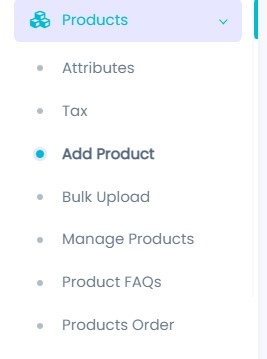
Add Product
Adding New Product in the Product List
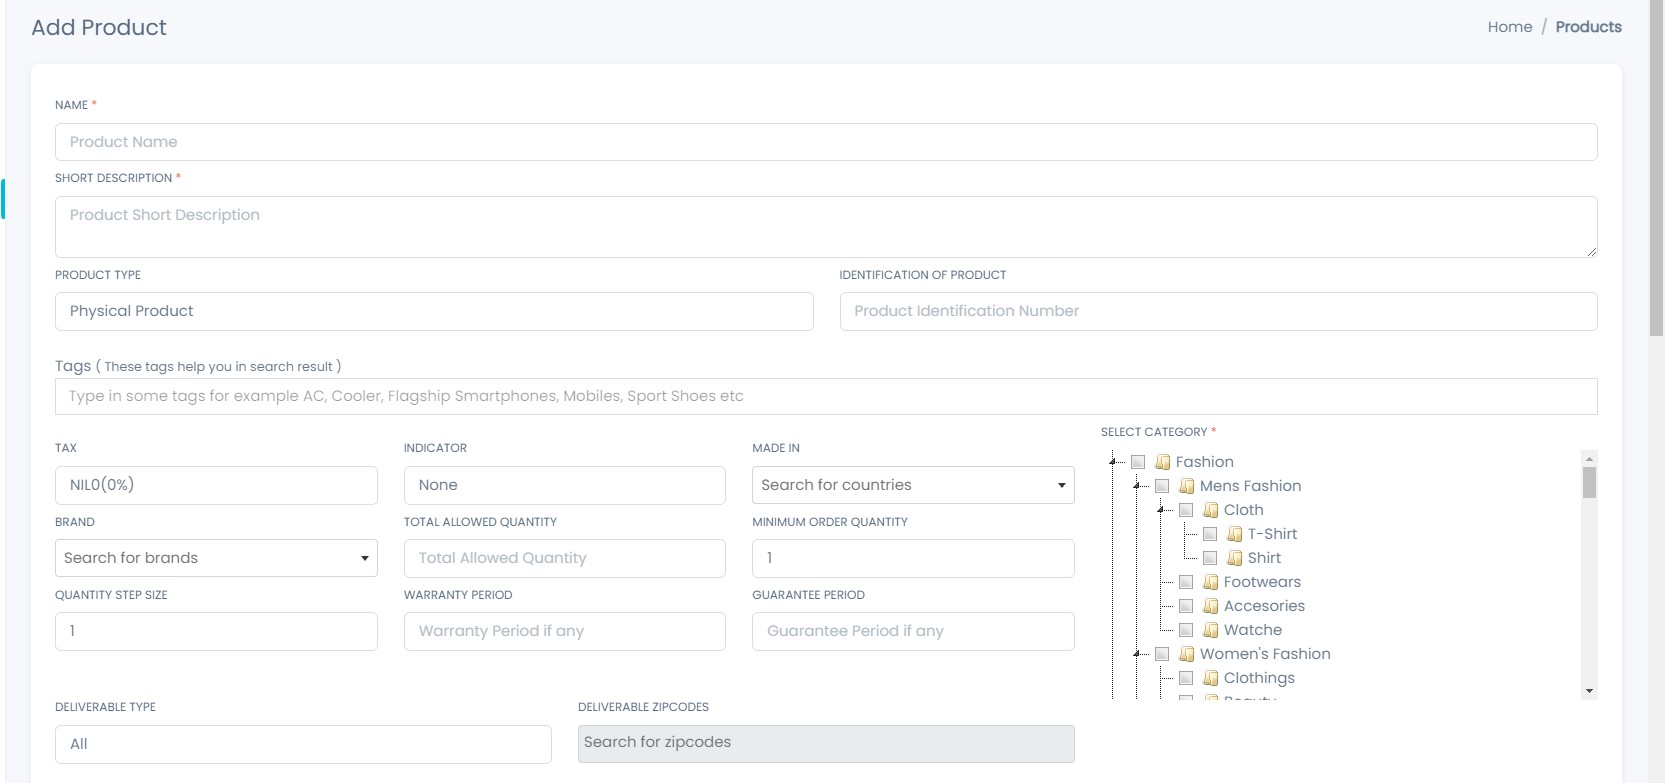
- In Product Name field Enter the Name of the Product.
- In Product Description field Enter the Description of the Product.
- In Tax field Enter the Tax of the Product.
- Select the Indicator(like Veg & Non-veg Type) of the Product.
- In Made In field Enter the Country Of Origin of the Product.
- Select the Category of the Products
- To know how to upload image in the form click here.
- Click add Product to add product or Reset to Reset the form.
Attributes
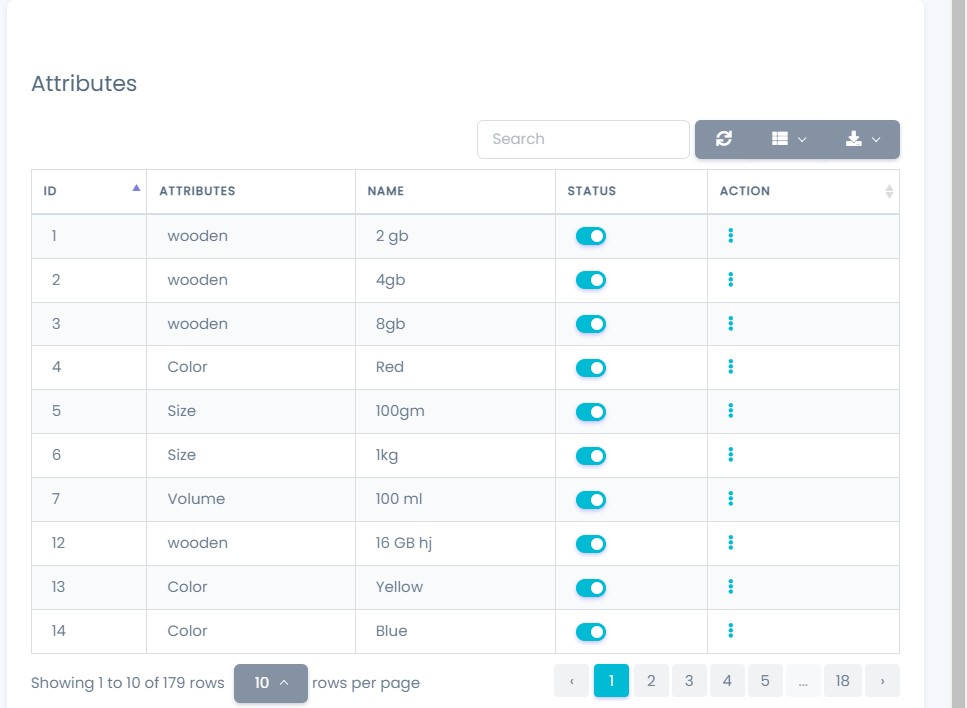
Here all the information related to Attributes is display
Actions- Search Attributes details
-
To search the
Attributes Name or Any other Detail
- Refresh Attributes list
-
To Refresh
Attributes List
- Filters
-
Used to filter the
Attributes details according to the criteria
- Edit Attributes
-
Used to Edit the
Attributes details
- Delete Attributes
-
Used to Delete the
Attributes details
- Attributes Status
-
Used to Active And
Deactive the Attributes Status
We Can add New Attributes and delete Attributes by following Steps :
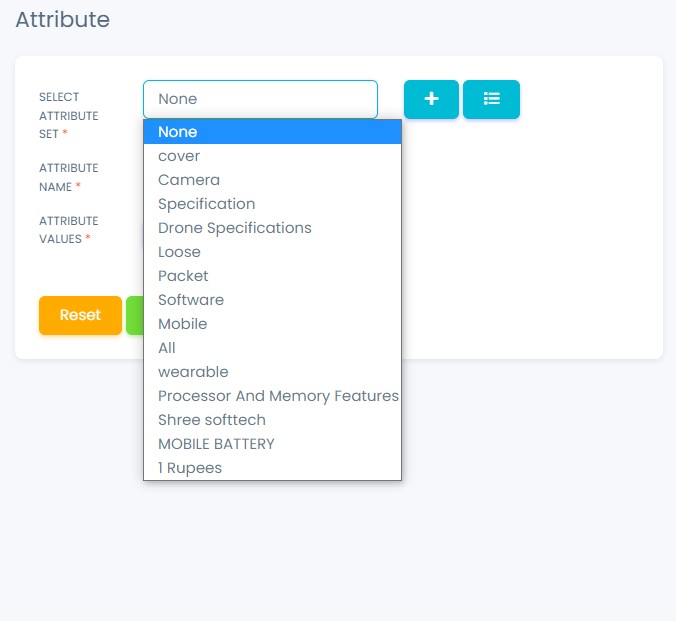
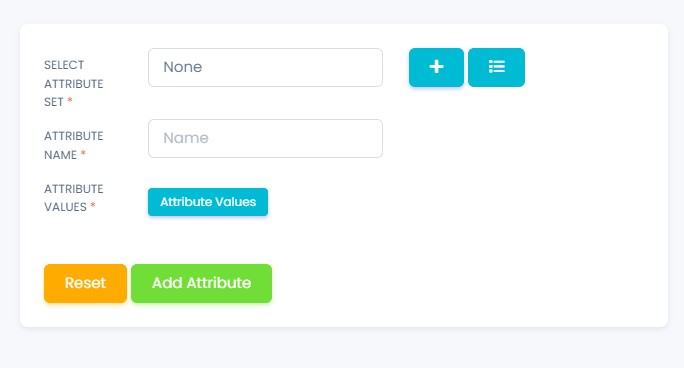
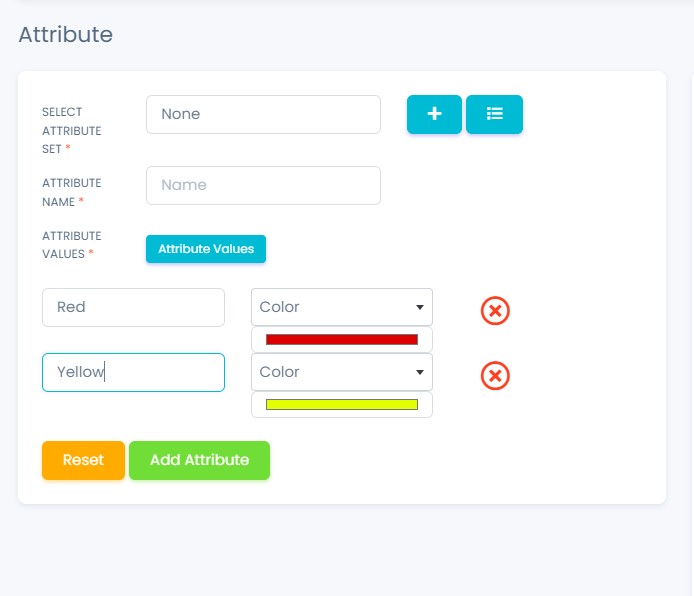
Step 1:Adding New Attributes in the Attributes List
Click on Add New Attributes Tab Present On The Right Side

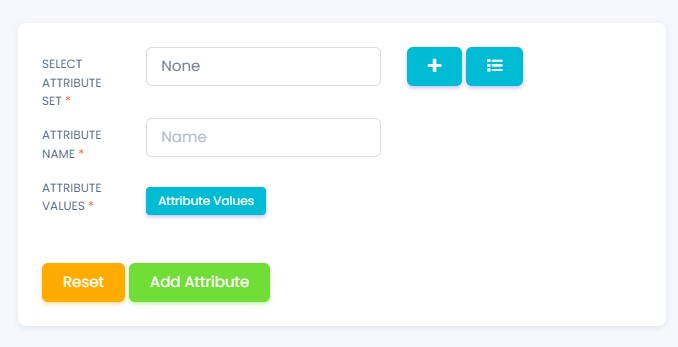
- Select Attributes Set field of the Attributes
- In Name field Enter the Name of the Attributes.
- Click add Attributes to add Attributes or Reset to Reset the form.
Step 3:Delete Attributes from the List
For Deleting Attributes we need to use as explained above
under Actions Attributes.
Attribute Sets
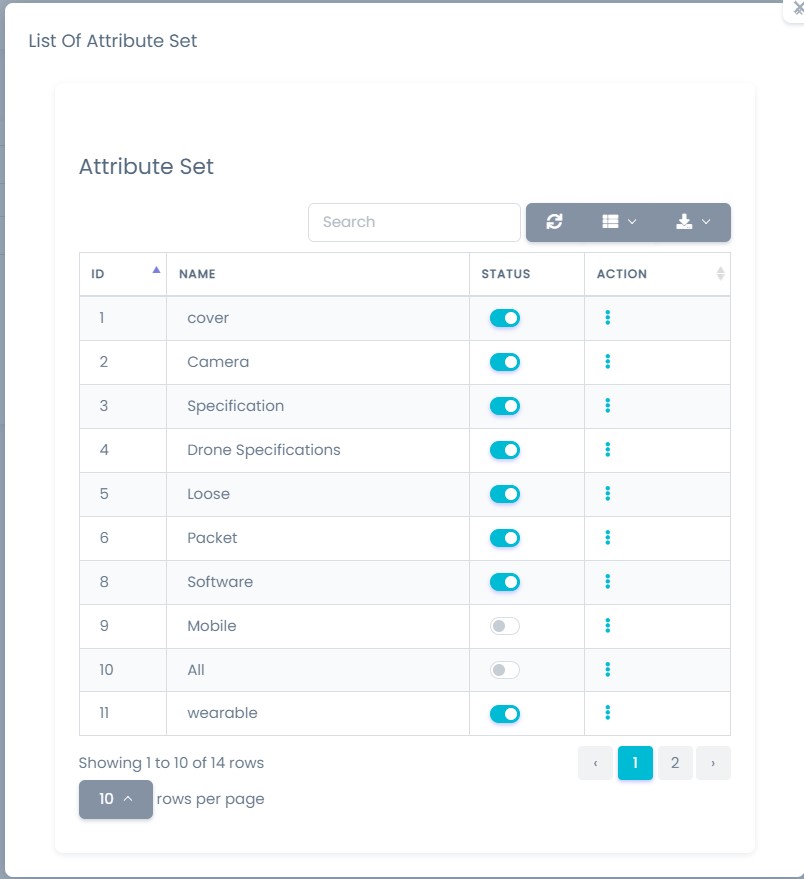
Here all the information related to Attribute Sets is display
Actions- Search Attribute Sets details
-
To search the
Attribute Sets Name or Any other Detail
- Refresh Attribute Sets list
-
To Refresh
Attribute Sets List
- Filters
-
Used to filter the
Attribute Sets details according to the criteria
- Edit Attribute Sets
-
Used to Edit the
Attribute Sets details
- Delete Attribute Sets
-
Used to Delete the
Attribute Sets details
- Attribute Sets Status
-
Used to Active And
Deactive the Attribute Sets Status
We Can add New Attribute Sets and delete Attribute Sets by following Steps :
Step 1:Adding New Attribute Sets in the Attribute Sets List
Click on Add Attribute Sets Tab Present On The Right Side

- In Attribute Sets Name field Enter the Name of the Attribute Sets.
- Click add Attribute Sets to add Attribute Sets or Reset to Reset the form.
Step 2:Delete Attribute Sets from the List
For Deleting Attribute Sets we need to use as explained
above under Actions Attribute Sets.
Attribute Values
Here all the information related to Attribute Values is display
Actions- Search Attribute Values details
-
To search the
Attribute Values Name or Any other Detail
- Refresh Attribute Values list
-
To Refresh
Attribute Values List
- Filters
-
Used to filter the
Attribute Values details according to the criteria
- Edit Attribute Values
-
Used to Edit the
Attribute Values details
- Delete Attribute Values
-
Used to Delete the
Attribute Values details
- Attribute Values Status
-
Used to Active And
Deactive the Attribute Values Status
We Can add New Attribute Values and delete Attribute Values by following Steps :
Step 1:Adding New Attribute Values in the Attribute Values List
Click on Add Attribute Values Tab Present On The Right Side

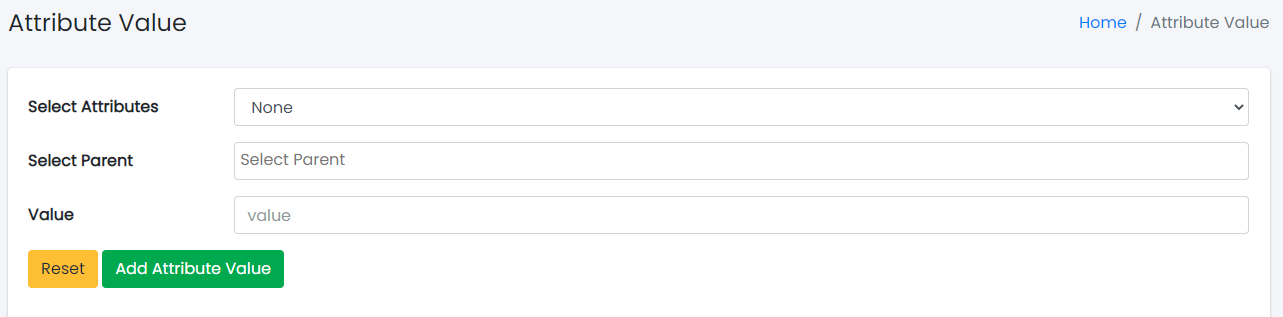
- Select the Attribute Values
- Select the Parent
- Click add Attribute Values to add Attribute Values or Reset to Reset the form.


Step 2:Delete Attribute Values from the List
For Deleting Attribute Values we need to use as explained
above under Actions Attribute Values.
Products Tax
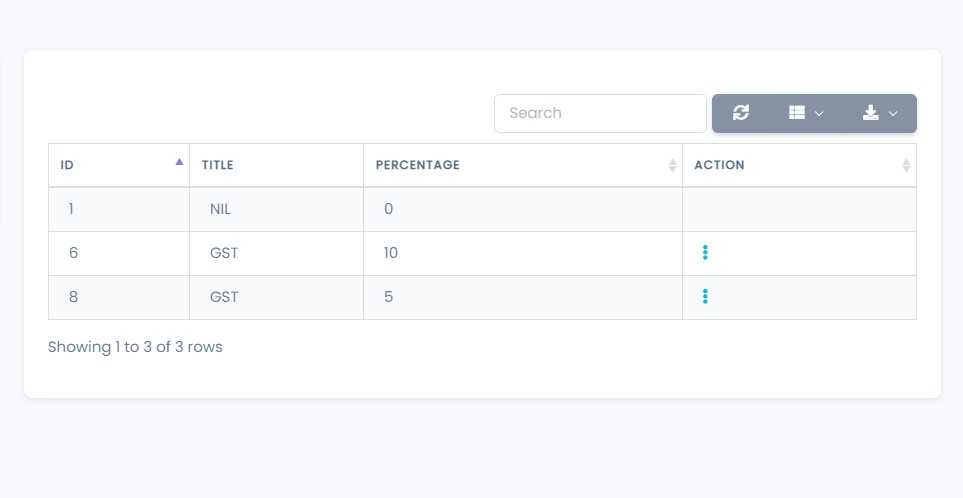
Here all the information related to Products Tax is display
Actions- Search Products Tax details
-
To search the
Products Tax title or Any other Detail
- Refresh Products Tax list
-
To Refresh
Products Tax List
- Filters
-
Used to filter the
Products Tax details according to the criteria
- Edit Products Tax
-
Used to Edit the
Products Tax details
- Delete Products Tax
-
Used to Delete the
Products Tax details
We Can add New Products Tax and delete Products Tax by following Steps :
Step 1:Adding New Tax in the Products Tax List
Click on Add Tax Tab Present On The Right Side

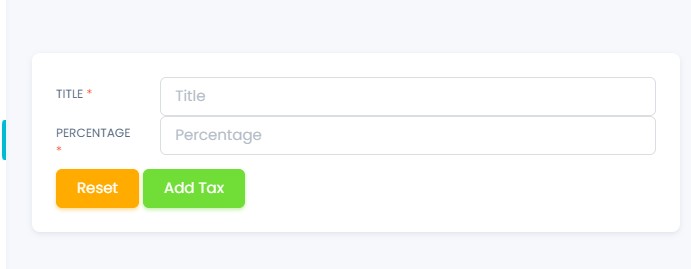
- In Products Tax Title field Enter the Title of the Products Tax.
- Click add Tax to add Tax or Reset to Reset the form.
Step 2:Delete Products Tax from the List
For Deleting Products Tax we need to use as explained
above under Actions Products Tax.
Manage Products
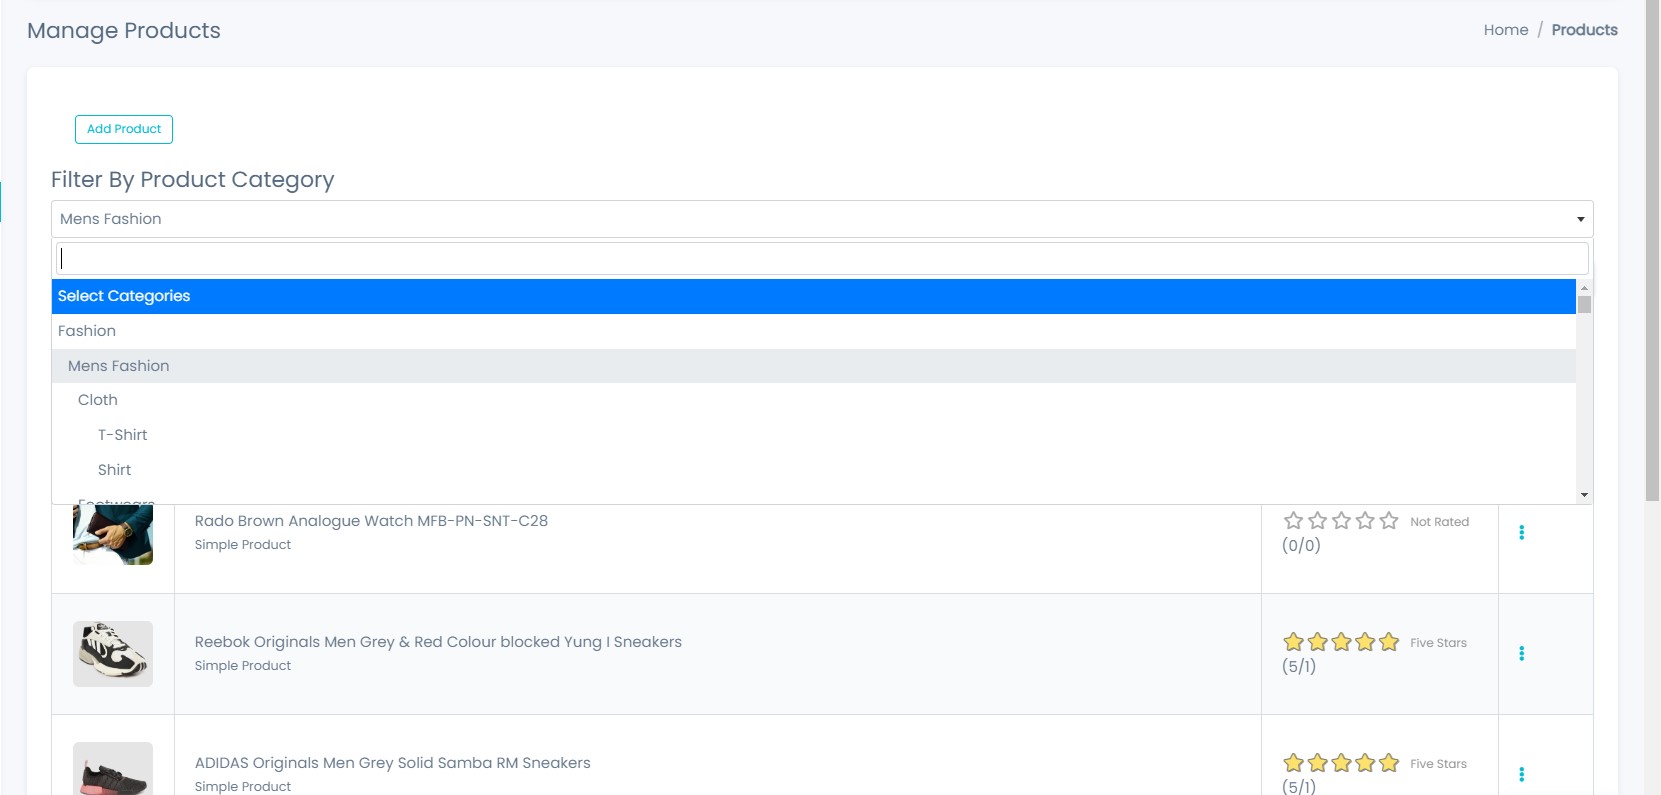
Here all the information related to Products is display
Actions- Search the Products details
-
To search the
Products Name or Any other Detail
- Refresh Manage Products list
-
To Refresh
Products List
- Filters
-
Used to filter the
Products details according to the criteria
- Edit the Products
-
Used to Edit the
Products details
- Delete the Products
-
Used to Delete the
Products details
We Can add New Products and delete Products by following Steps :
Step 1:Adding New Products in the Products List
Click on Add Products Tab Present On The Right Side

- In Product Name field Enter the Name of the Product.
- In Product Description field Enter the Description of the Product.
- In Tax field Enter the Tax of the Product.
- Select the Indicator(like Veg & Non-veg Type) of the Product.
- In Made In field Enter the Country Of Origin of the Product.
- Select the Category of the Products
- To know how to upload image in the form click here.
- Click add Product to add product or Reset to Reset the form.
Step 2:Delete Products from the List
For Deleting Products we need to use as explained above
under Actions Products.
Products Order
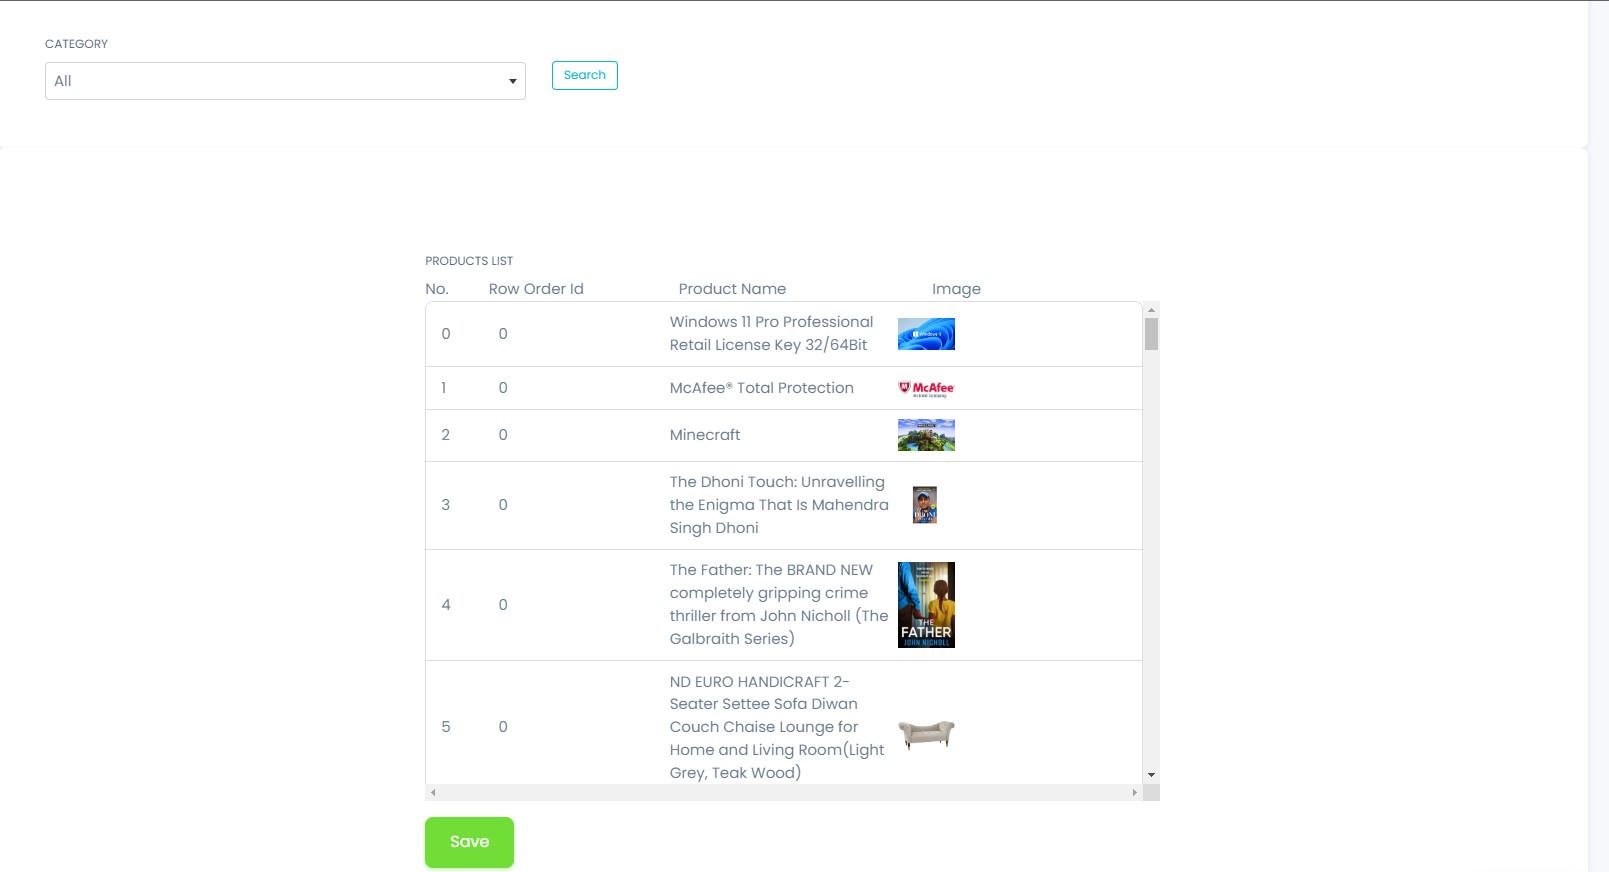
Here all the information related to Products Order is display
Media Management

Here all types of images/documents can be uploaded.
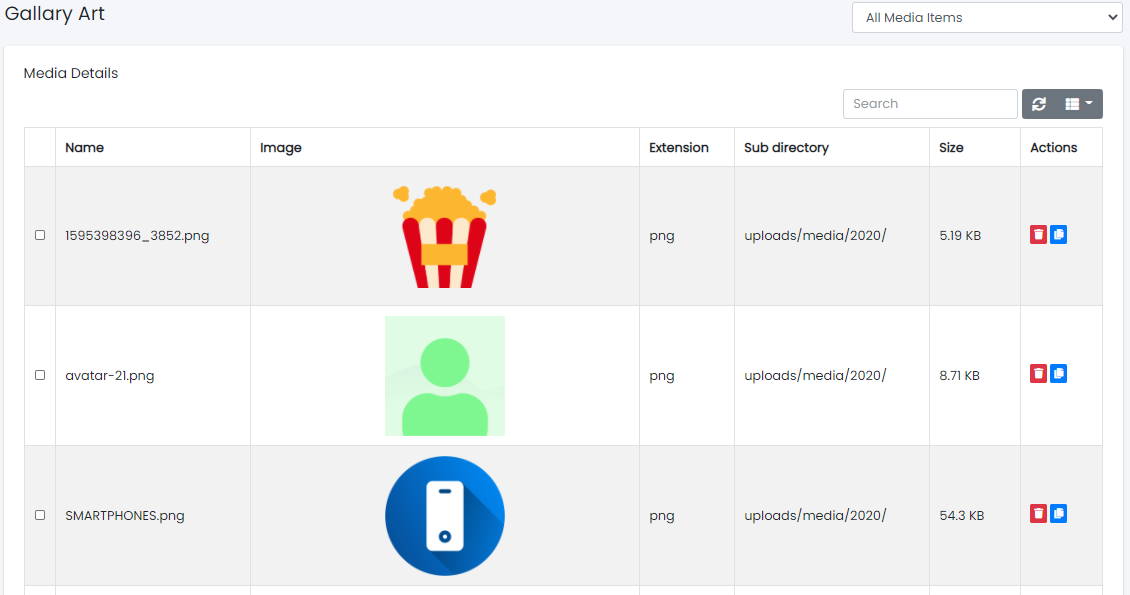
Here all types of images/documents can be viewed.
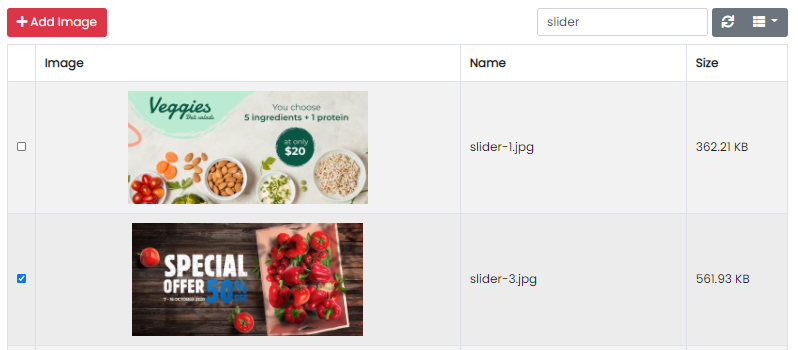
How to add image in a form
 : This button will appear in forms where image is required .
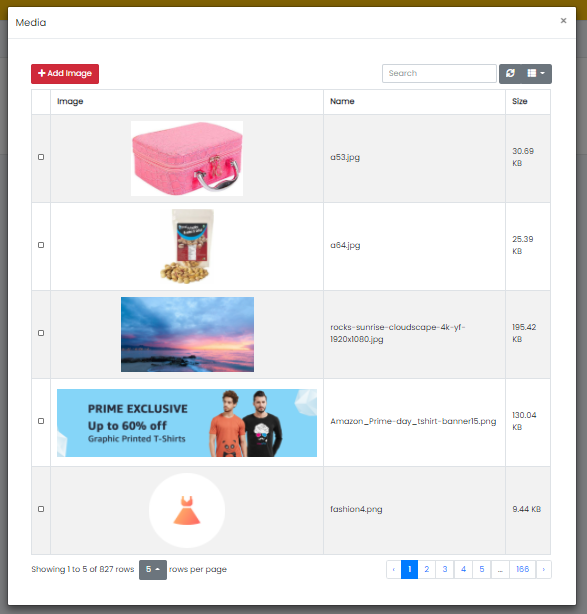

Home Slider Images
Here all the information related to Home Slider Images is display
Actions- Search slider image details
-
To search the
slider related Detail
- Refresh slider list
-
To Refresh slider
List
- Filters
-
Used to filter the
slider details according to the criteria
- Edit slider
-
Used to Edit the
slider image
- Delete slider
-
Used to Delete the
slider image.
We Can add New Slider and delete Slider by following Steps :
Step 1:Adding New Slider in the Home Image Slider
Click on Add slider Tab Present On The Right Side
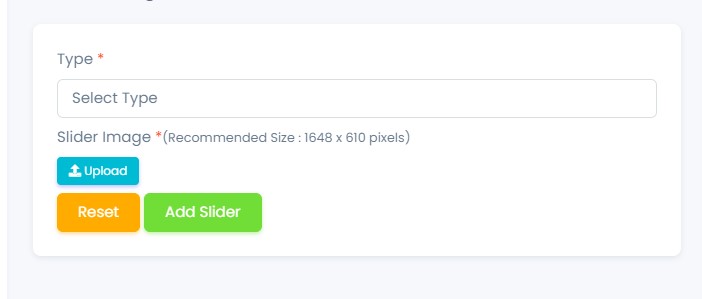
- In Type field Enter the Type of the Slider Images list.
- To know how to upload image in the form click here.
- Click add Slider to add Slider or Reset to Reset the form.
Step 2:Delete Slider from the List
For Deleting Slider Images we need to use as explained
above under Actions Slider Images.
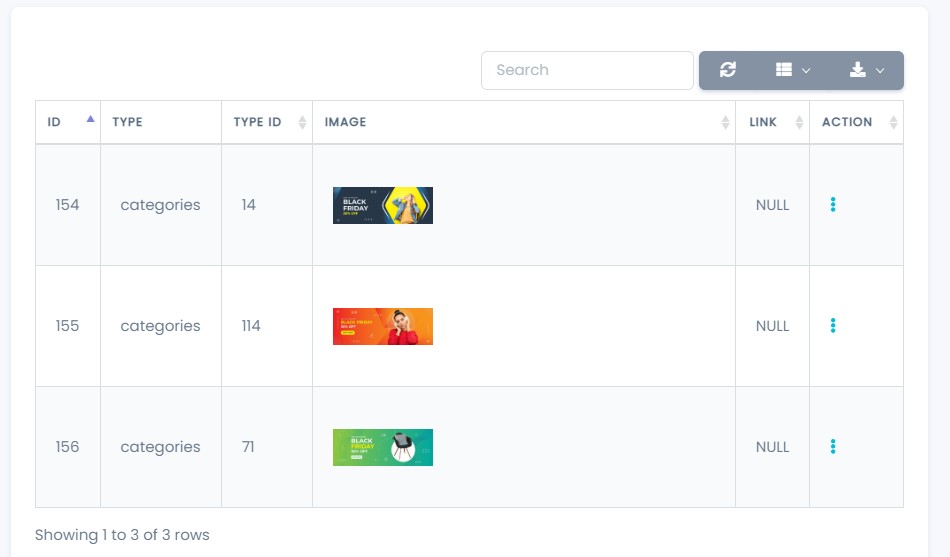
Offers Management
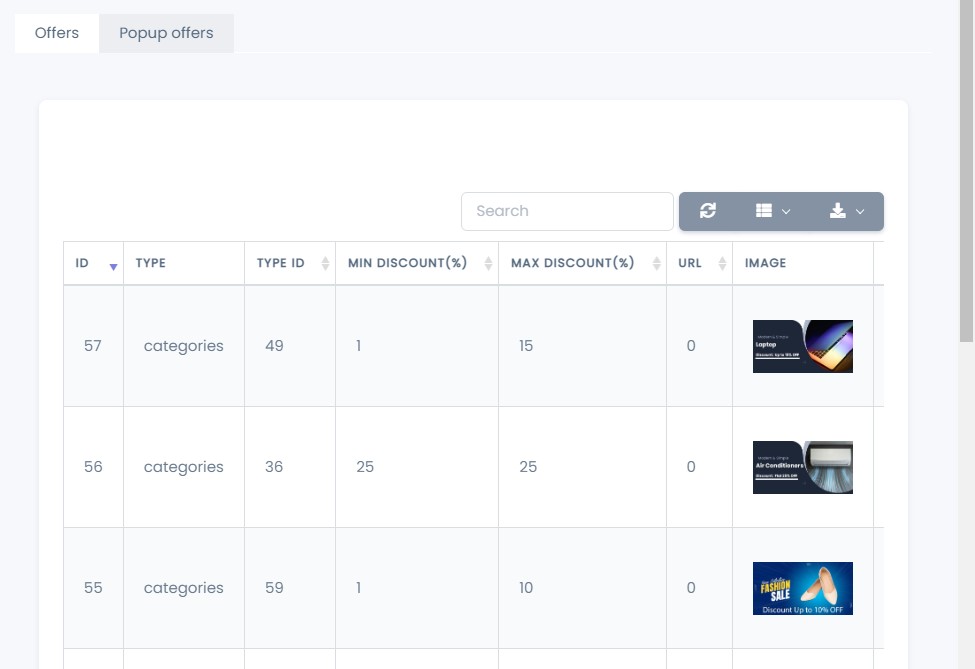
Here all the information related to New Offers Images is display
Actions- Search slider image details
-
To search the
slider related Detail
- Refresh slider list
-
To Refresh slider
List
- Filters
-
Used to filter the
slider details according to the criteria
- Delete slider
-
Used to Delete the
slider image.
We Can add New Offer Images and delete Offer by following Steps :
Step 1:Adding New Offers in the Offers Management
Click on Add Offer Tab Present On The Right Side

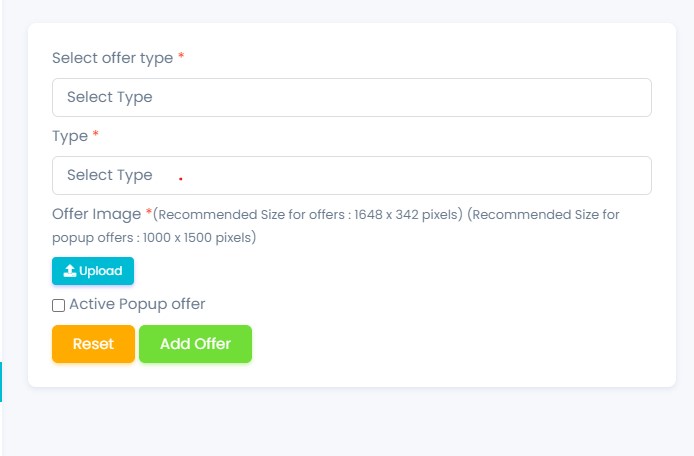
- To know how to upload image in the form click here.
- Click add Offer to add Offer or Reset to Reset the form.
Step 2:Delete Offer Images from the List
For Deleting Offer Images we need to use as explained
above under Actions Offer.
Promo Code

Here all the information related to Promo Code is display
Actions- Search Promo Code details
-
To search the Promo
Code related Detail
- Refresh Promo Code list
-
To Refresh Promo
Code List
- Filters
-
Used to filter the
Promo Code details according to the criteria
- Edit Promo Code Values
-
Used to Edit the
Promo Code Values details
- View Promo Code Details
-
Used to View The
Promo Code Details
- Delete Promo Code
-
Used to Delete the
Promo Code Details.
We Can add New Promo Code and delete Promo Code by following Steps :
Step 1:Adding New Promo Code in the Promo Code List
Click on Add Promo Code Tab Present On The Right Side
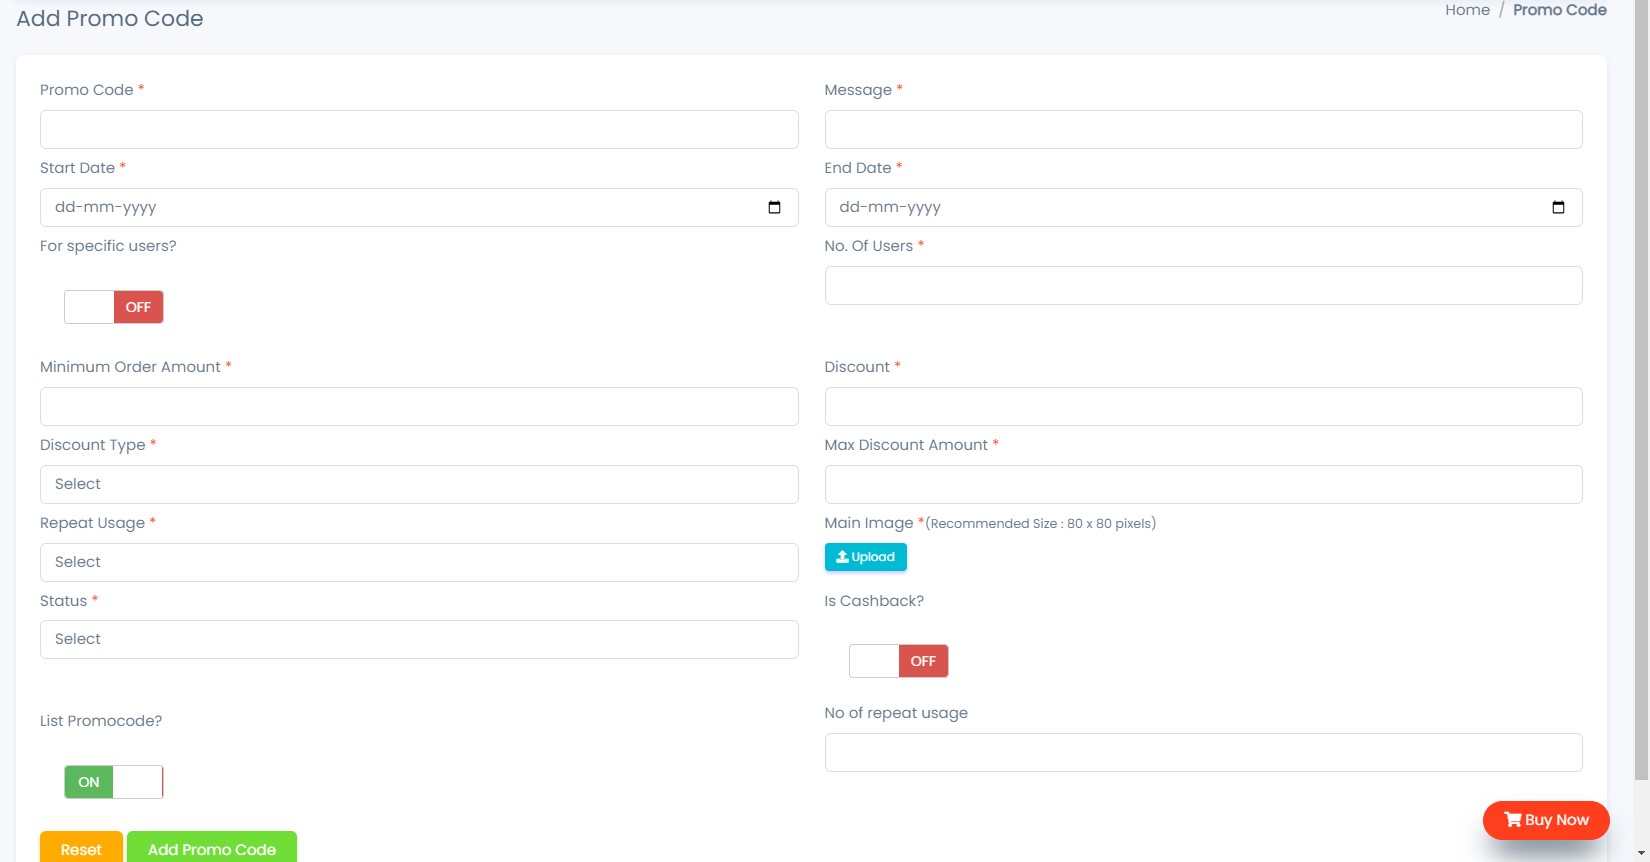
- To know how to upload image in the form click here.
- Click add Offer to Upload Images or Reset to Reset the form.
Step 2:Delete Promo Code from the List
For Deleting Promo Code we need to use as explained above
under Actions Promo Code.
Featured Sections Panel
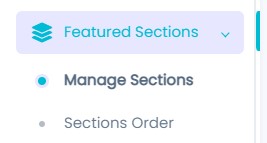
Manage Sections
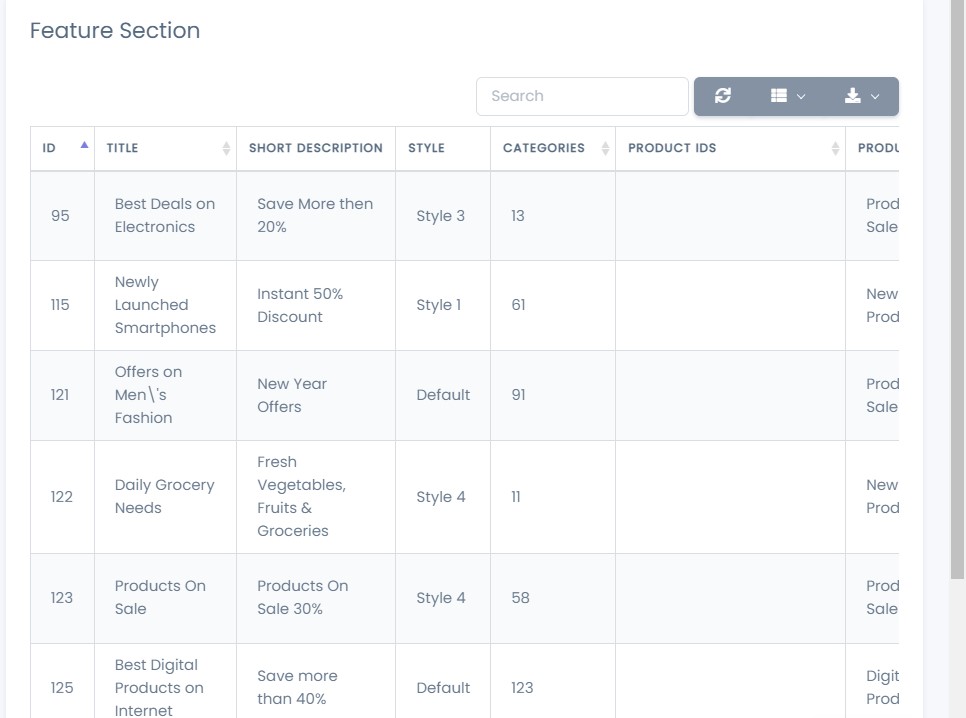
Here all the information related to Featured Sections is display
Actions- Search Featured Sections details
-
To search the
Featured Sections related Detail
- Refresh Featured Sections list
-
To Refresh
Featured Sections List
- Filters
-
Used to filter the
Featured Sections details according to the criteria
- Edit Featured Sections Values
-
Used to Edit the
Featured Sections Values details
- Delete Featured Sections
-
Used to Delete the
Featured Sections Details.
We Can add New Featured Sections and delete Featured Sections by following Steps :
Step 1:Adding New Featured Sections in the Featured Sections List
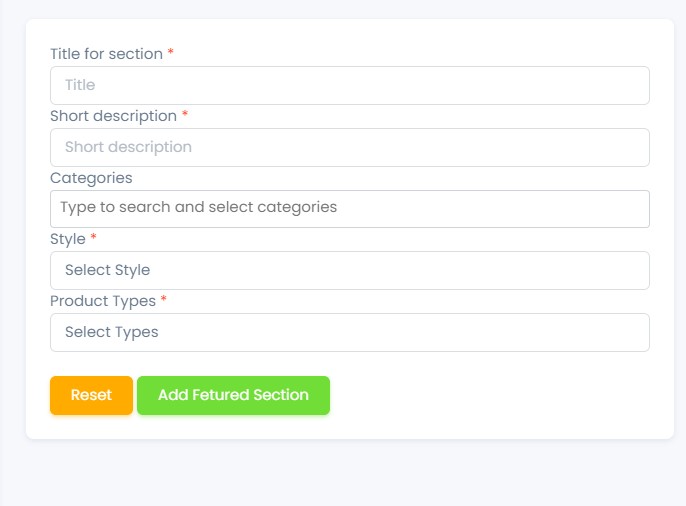
- In Title For Section field Enter the Title of the Sections list.
- In Short Description field Enter the Description of the Featured Sections list.
- Select Style field of the Featured Sections list.
- In Products field Enter the Products of the Featured Sections list.
- Click add Featured Sections to add Featured Sections or Reset to Reset the form.
Step 2:Delete Featured Sections from the List
For Deleting Featured Sections we need to use as explained
above under Actions Featured Sections.
Sections Order
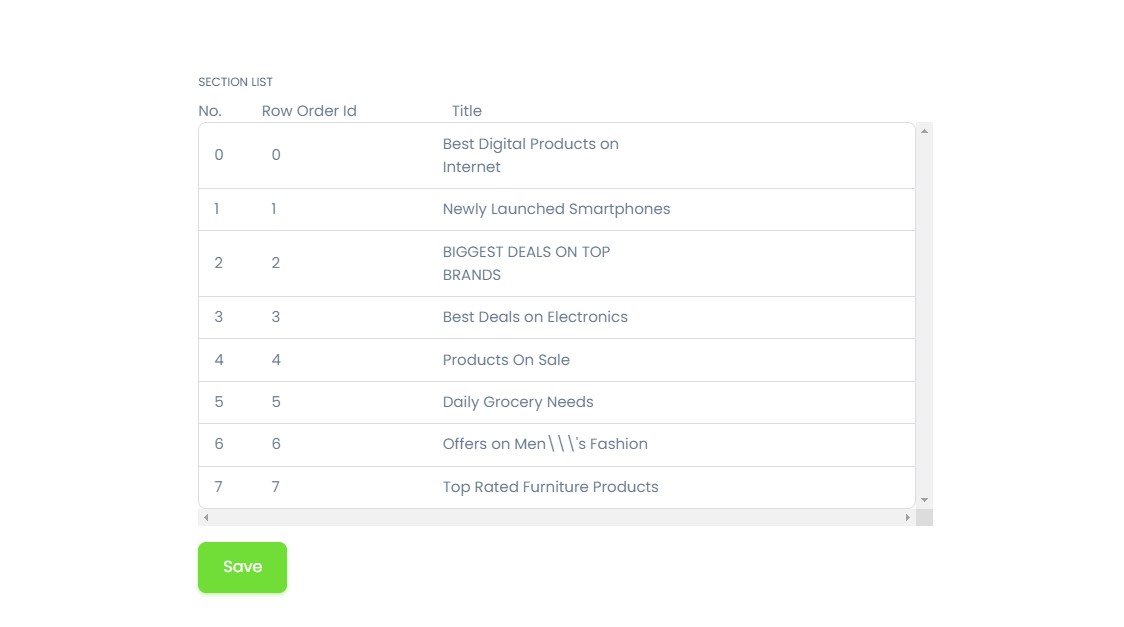
Here all the information related to Sections Order is display
Customer Panel
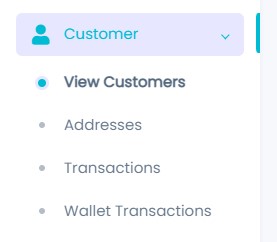
View Customer

Here all the information related to Customer is display
Actions- Search Customer
-
To search the
Customer Name or Any other Detail
- Refresh Customer list
-
To Refresh
Customer List
- Filters
-
Used to filter the
Customer details according to the criteria
View Transaction
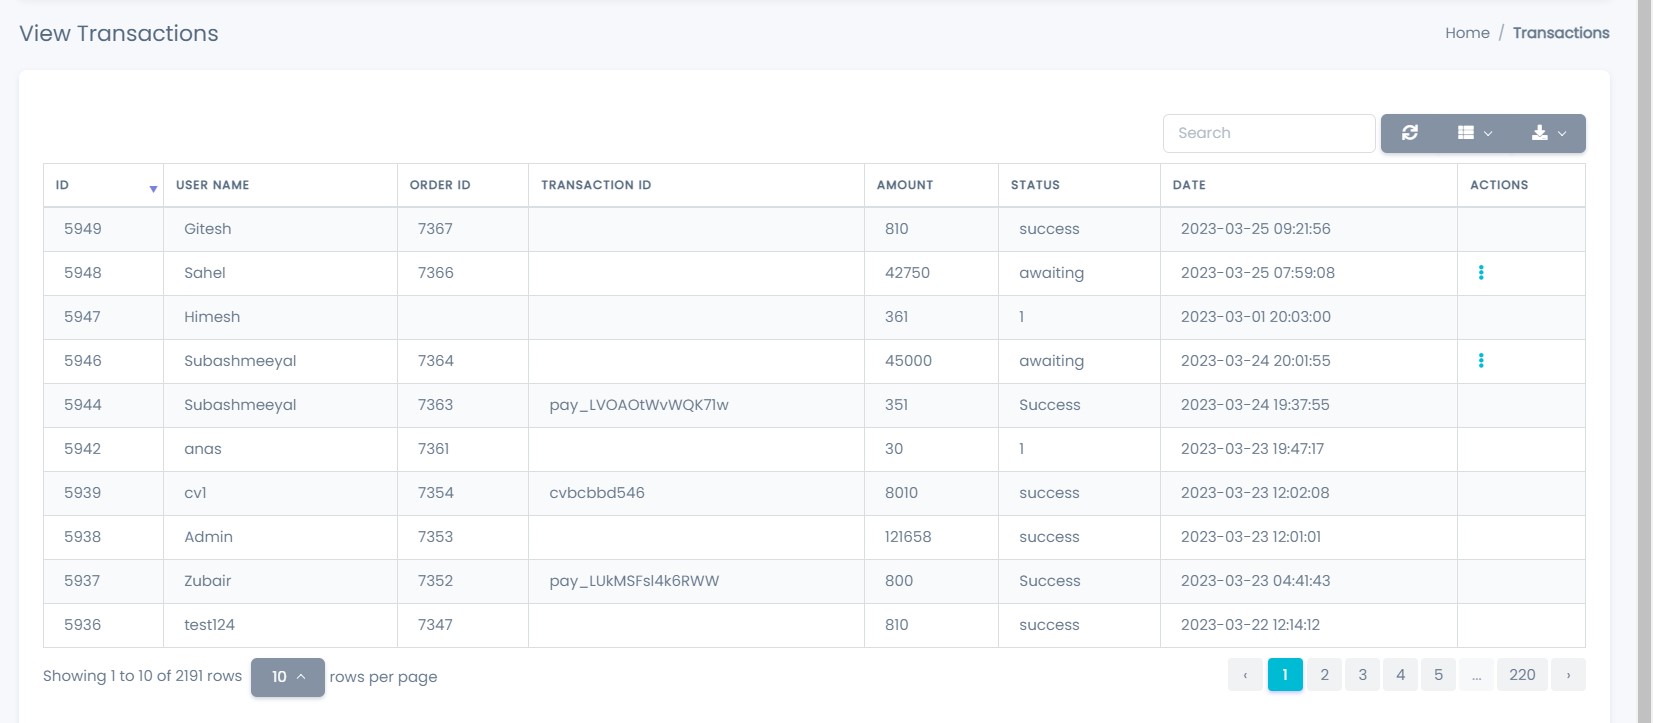
Here all the information related to Customer Transaction is display
Actions- Search Customer Transaction
-
To search the
Customer Name or Any other Detail
- Refresh Customer Transaction list
-
To Refresh
Customer Transaction List
- Filters
-
Used to filter the
Customer Transaction details according to the criteria
Customer Wallet Transaction
Here all the information related to Customer Wallet Transaction is display
Actions- Search Customer Wallet Transaction
-
To search the
Customer Name or Any other Detail
- Refresh Customer Wallet Transaction list
-
To Refresh
Customer Wallet Transaction List
- Filters
-
Used to filter the
Customer Wallet Transaction details according to the criteria
Return Requests
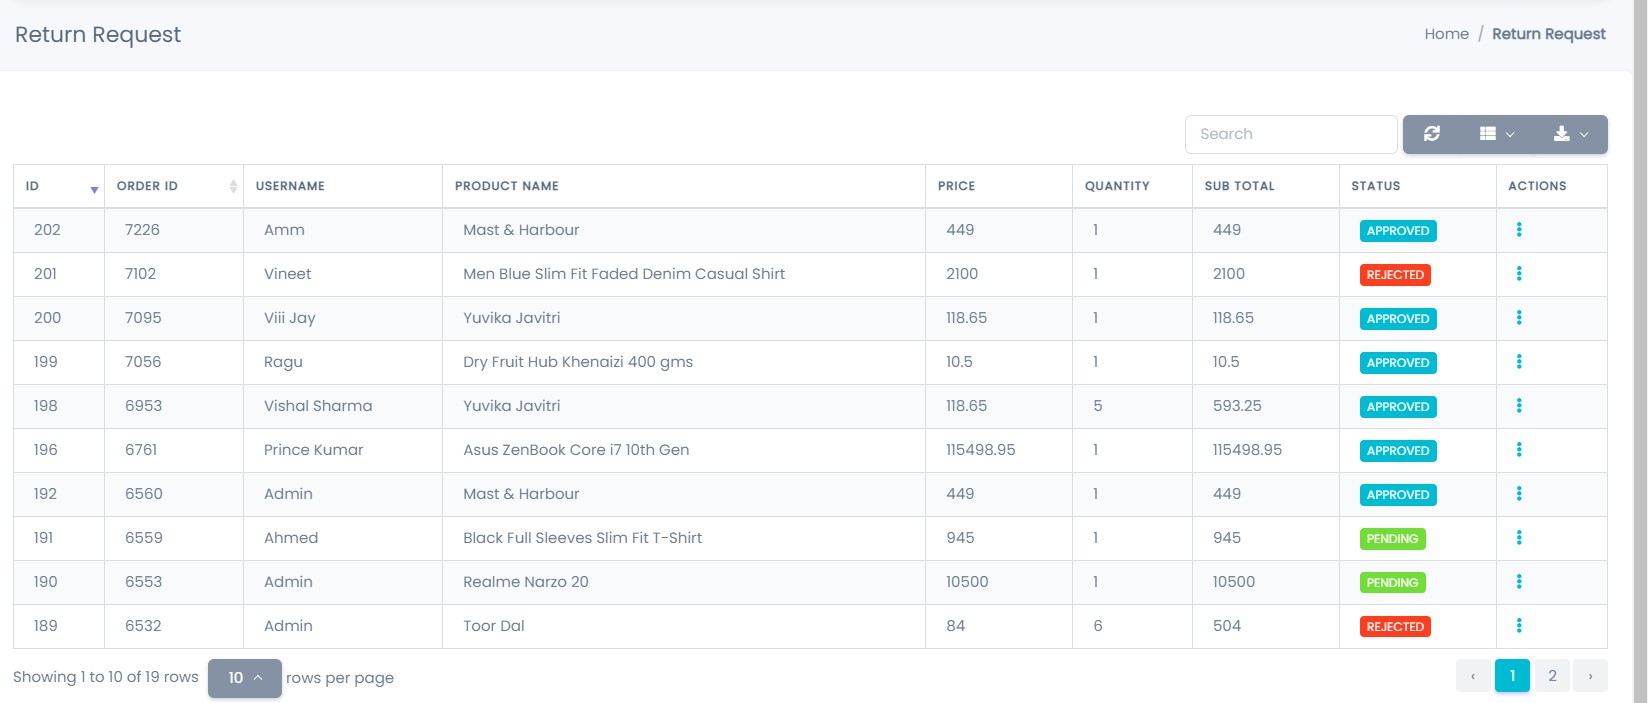
Here all the information related to Return Requests is display
Actions- Search Return Requests details
-
To search the
Return Requests related Detail
- Refresh Return Requests list
-
To Refresh Return
Requests List
- Filters
-
Used to filter the
Return Requests details according to the criteria
- Edit Return Requests Values
-
Used to Edit the
Return Requests Values details
- Delete Return Requests
-
Used to Delete the
Return Requests Details.
We Can Edit Return Requests and delete Return Requests by following Steps :
Step 1:Edit Return Requests in the Return Requests List
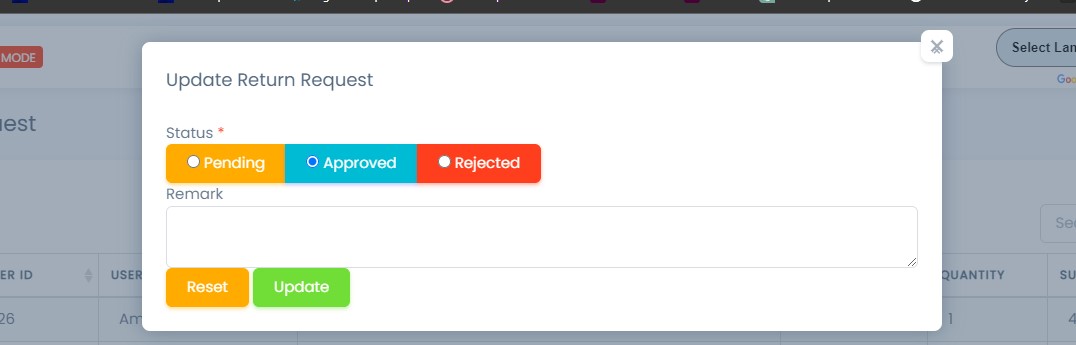
- Select Status field of the Return Requests list.
- In Remark field Enter the Remark of the Return Requests list.
- Click update to update Return Requests or Reset to Reset the form.
Step 2:Delete Return Requests from the List
For Deleting Return Requests we need to use as explained
above under Actions Return Requests.
Delivery Boys Panel
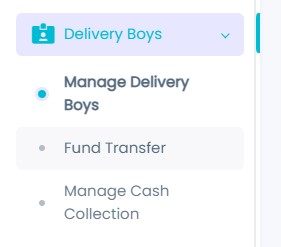
Manage Delivery Boys
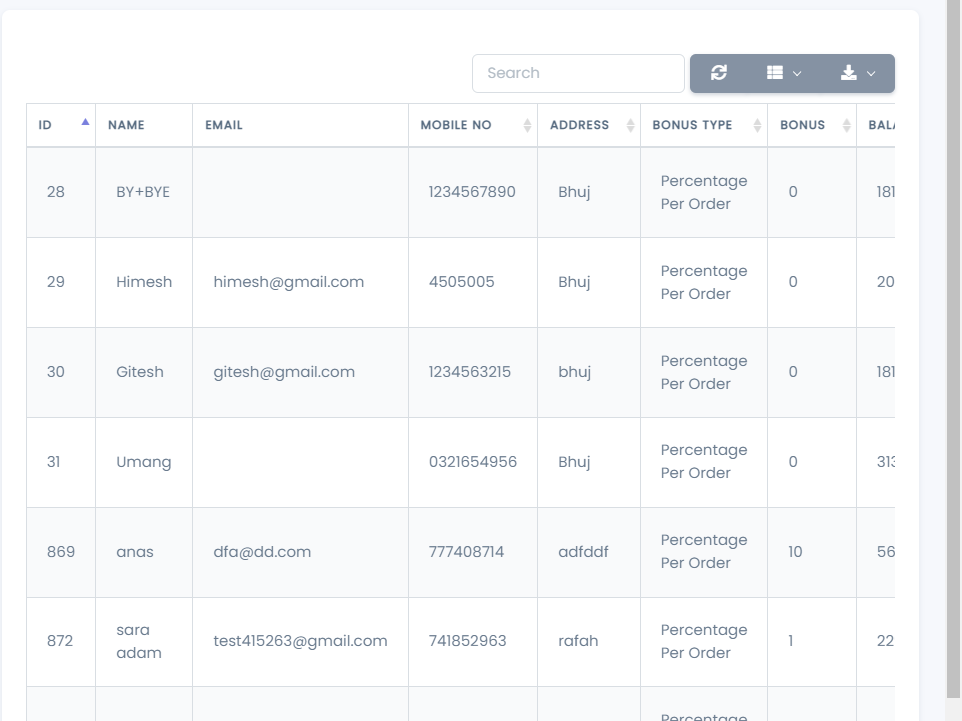
Here all the information related to Delivery Boys is display
Actions- Search Delivery Boys details
-
To search the
Delivery Boys related Detail
- Refresh Delivery Boys list
-
To Refresh
Delivery Boys List
- Filters
-
Used to filter the
Delivery Boys details according to the criteria
- Edit Delivery Boys Values
-
Used to Edit the
Delivery Boys Values details
- Delete Delivery Boys
-
Used to Delete the
Delivery Boys Details.
- View Fund Transfer values
-
 Used to View
fund transfer Details.
Used to View
fund transfer Details.
We Can add New Delivery Boys and delete Delivery Boys by following Steps :
Step 1:Adding New Delivery Boys in the Delivery Boys List
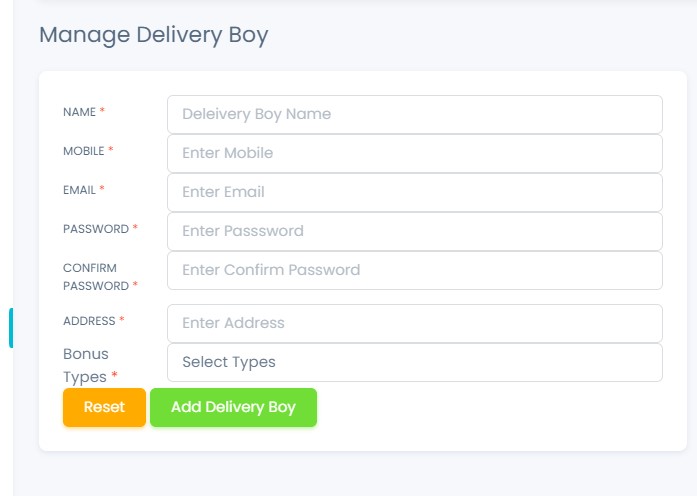
- In Name field Enter the Name of the Delivery Boys.
- In Mobile field Enter the Mobile No. of the Delivery Boys.
- In Email field Enter the Email of the Delivery Boys.
- In Password field Enter the Password
- In Confirm Password field Enter the Confirm Password
- In Address field Enter the Address of the Delivery Boys.
- In Bonus field Enter the Bonus
- Click add Delivery Boy to add Delivery Boy or Reset to Reset the form.
Step 2:Delete Delivery Boy from the List
For Deleting Delivery Boy we need to use as explained
above under Actions Delivery Boy.
Fund Transerfer
Here all the information related to Fund Transerfer is display
Actions- Search Fund Transerfer
-
To search the
Customer Name or Any other Detail
- Refresh Fund Transerfer list
-
To Refresh Fund
Transerfer List
- Filters
-
Used to filter the
Fund Transerfer details according to the criteria
Send Notification
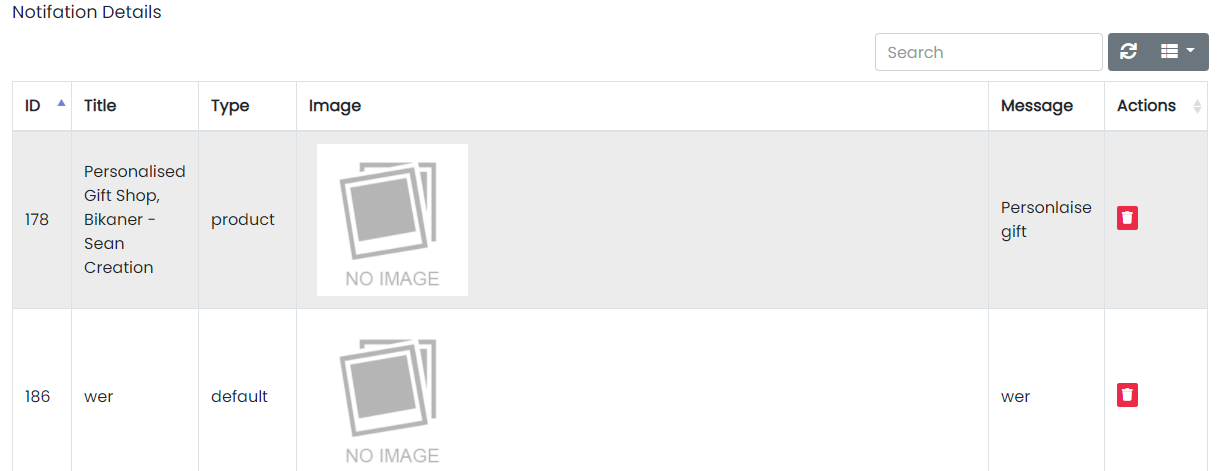
Here all the information related to Notifaction Details is display
Actions- Search Notification Details
-
To search the
Notification Title or Any other Detail
- Refresh Notification list
-
To Refresh
Notification List
- Filters
-
Used to filter the
Notification details according to the criteria
- Delete Notification
-
Used to Delete the
Notification Details.
We Can Send Notification and delete Notification by following Steps :
Step 1: Fill the Fields as follows
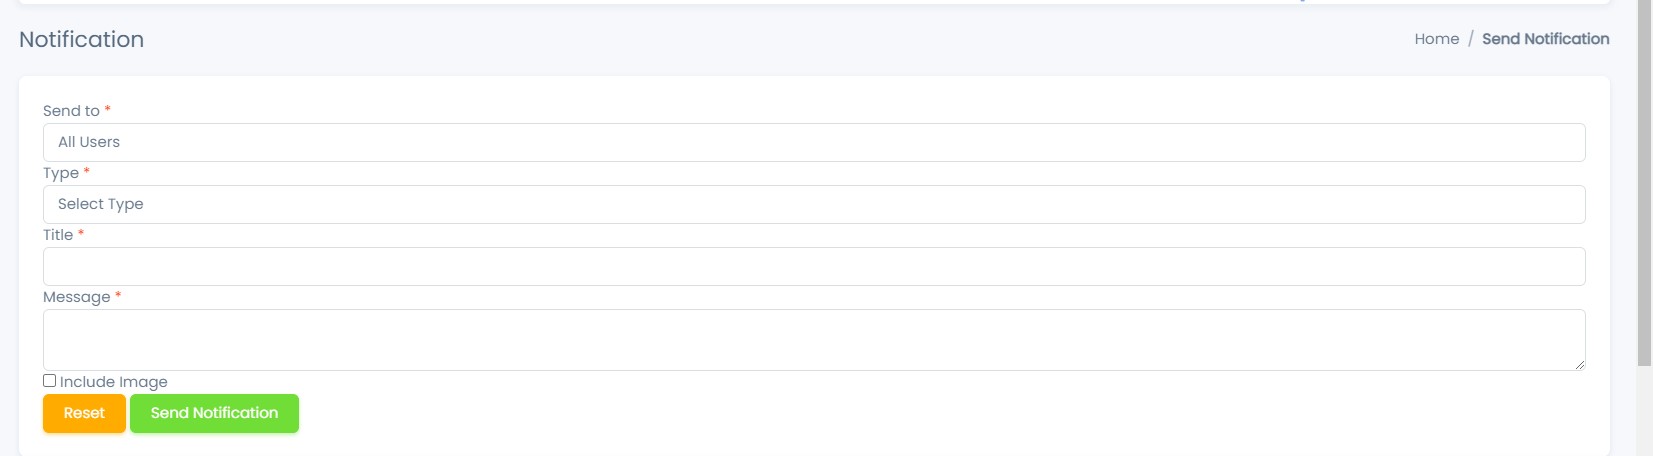
- Select Type of the Notification Type.
- In Title field Enter the Title of the Notification.
- In Message field Enter the Message of the Notification.
- In Image field Select the Image.
- Click Send Notification to the Send Notification or Reset to Reset the form.
Step 2:Delete Notification from the List
For Deleting Notification we need to use as explained
above under Actions Notification.
System Panel
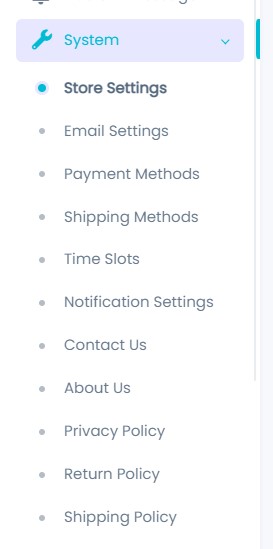
Store Setting
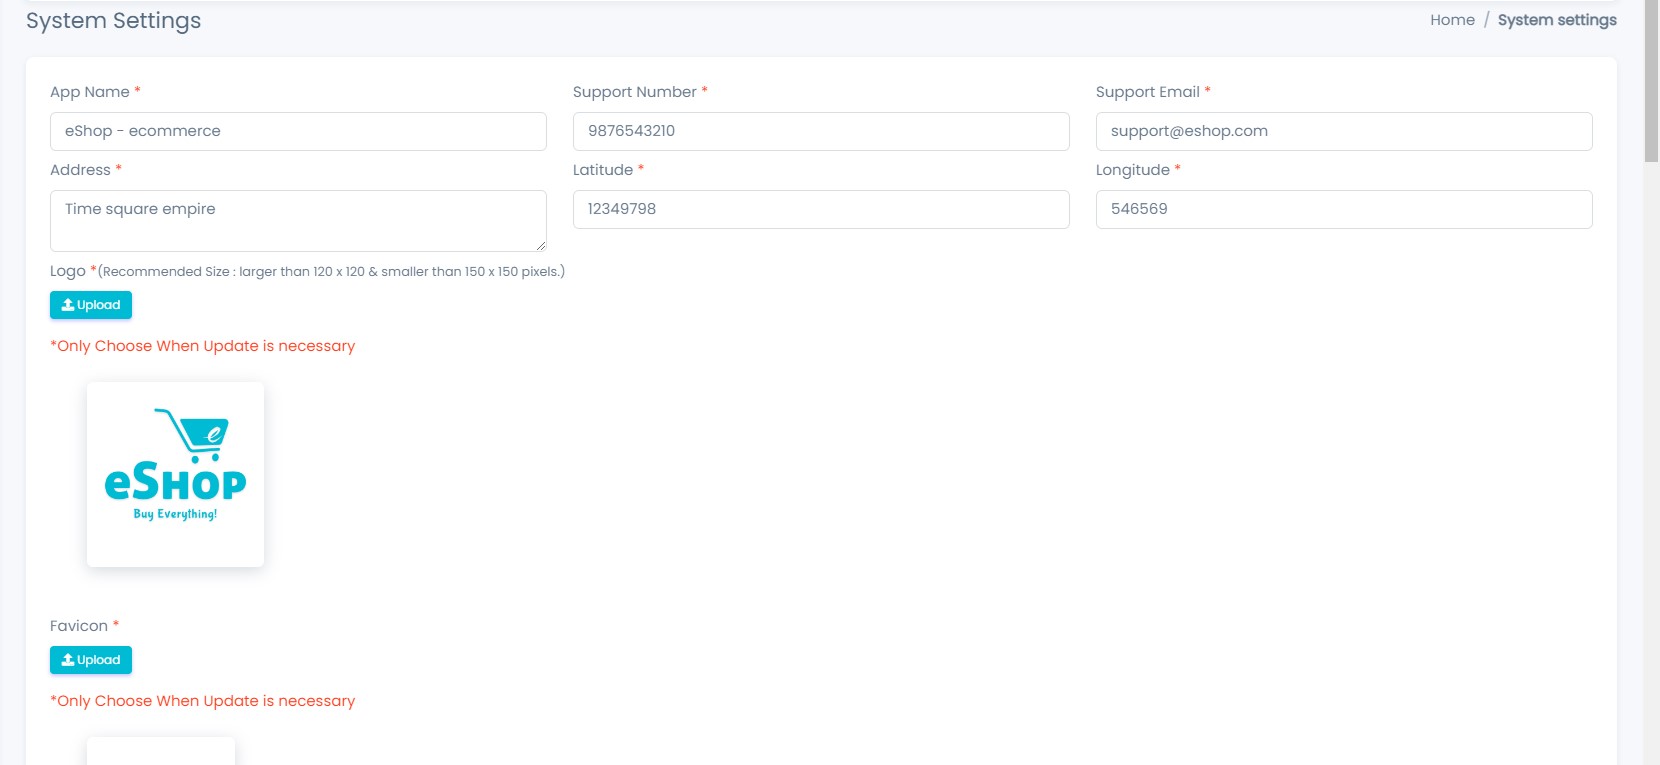
- From Here The Store Settings can be Updated as per requirements
- App Name : From Here we can update the App name
- Support Number : From Here we can update the Support Number
- Support Email : From Here we can update the Support Email
- Logo : From Here we can update the App Logo
- Favicon : From Here we can update the App Favicon
- To know how to upload image in the form click here.
- Current Version Of App : From Here we can update the Current Version Of App
- Minimum Version Required : From Here we can update the Minimum Version
- Version System Status : From Here we can update the Version System Status
- Store Currency ( Symbol or Code - $ or USD - Anyone ) : From Here we can update the Store Currency
- Delivery Charge Amount (₹) : From Here we can update the Delivery Charge Amount (₹)
- Minimum Amount for Free Delivery (₹) : From Here we can update the Minimum Amount for Free Delivery (₹)
- System Timezone : From Here we can update the Version System Timezone
- Minimum Cart Amount(₹) : From Here we can update the Minimum Cart Amount(₹)
- Maximum Items Allowed In Cart : From Here we can update the Maximum Items Allowed In Cart
- Minimum Order Amount (₹) : From Here we can update the Minimum Order Amount (₹)
- Refer & Earn Bonus (₹ OR %) : From Here we can update the Refer & Earn Bonus (₹ OR %)
- From eMail ID :
 All Emails in the system will be sent from this email id
 - Reply To eMail ID :
 Customer who receives the email will
be able to reply on this email id
Customer who receives the email will
be able to reply on this email id - Click Update Settings to the Update System Settings or Reset to Reset the form.
Email Setting
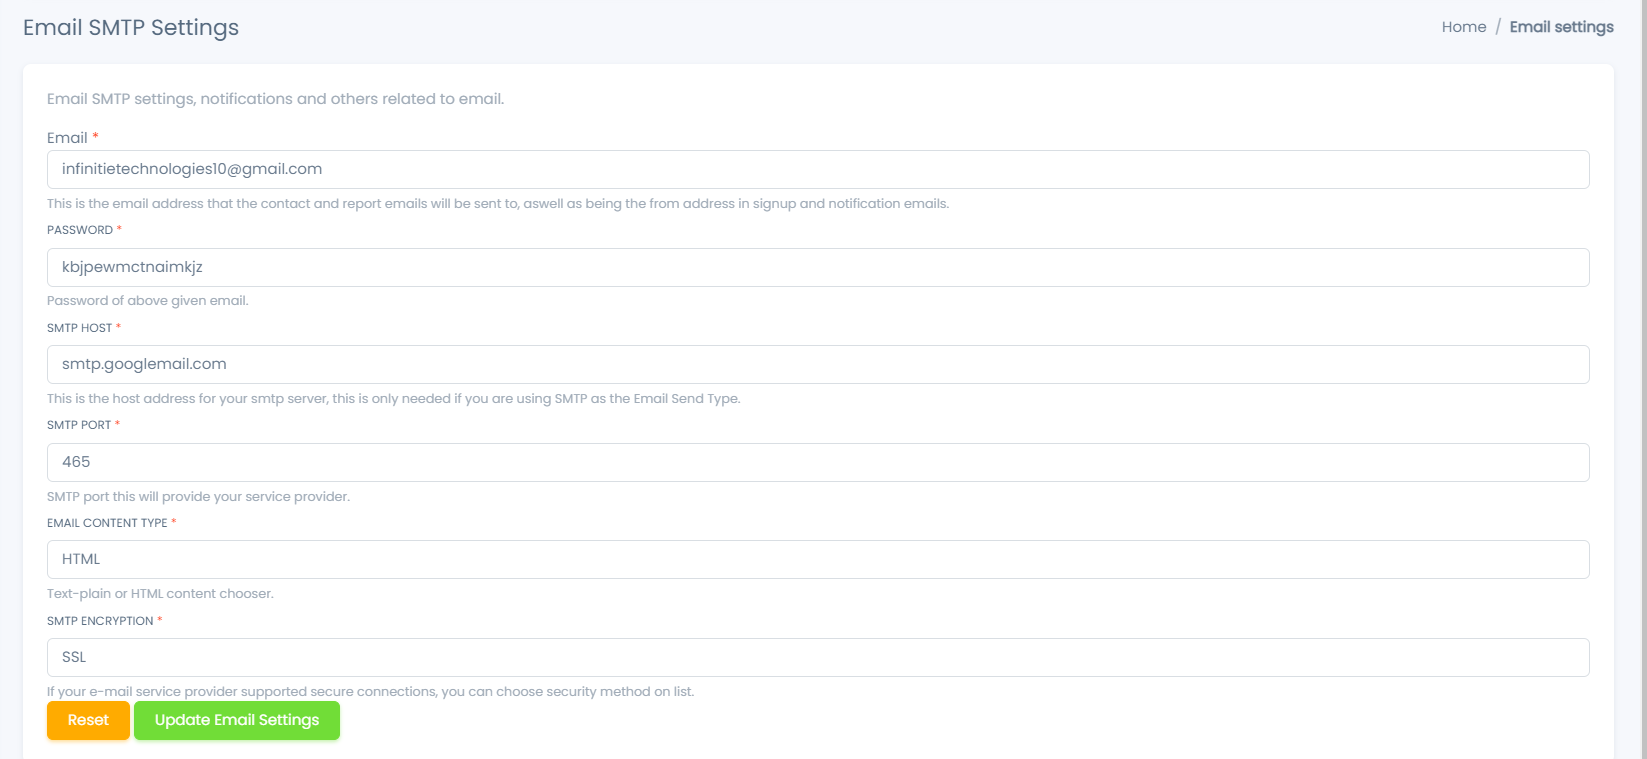
- From Here The Email Settings can be Updated as per requirements
- From eMail ID : All Emails in the system will be sent from this email id
- Password : From Here we can update the Password
- SMTP Host : From Here we can update the SMTP Host
- SMTP Port : From Here we can update the SMTP Port
- Email Content Type : From Here we can update the Email Content Type
- SMTP Encryption : From Here we can update the SMTP Encryption
- Click Update Email Settings to the Update Email Settings or Reset to Reset the form.
Payment Methods
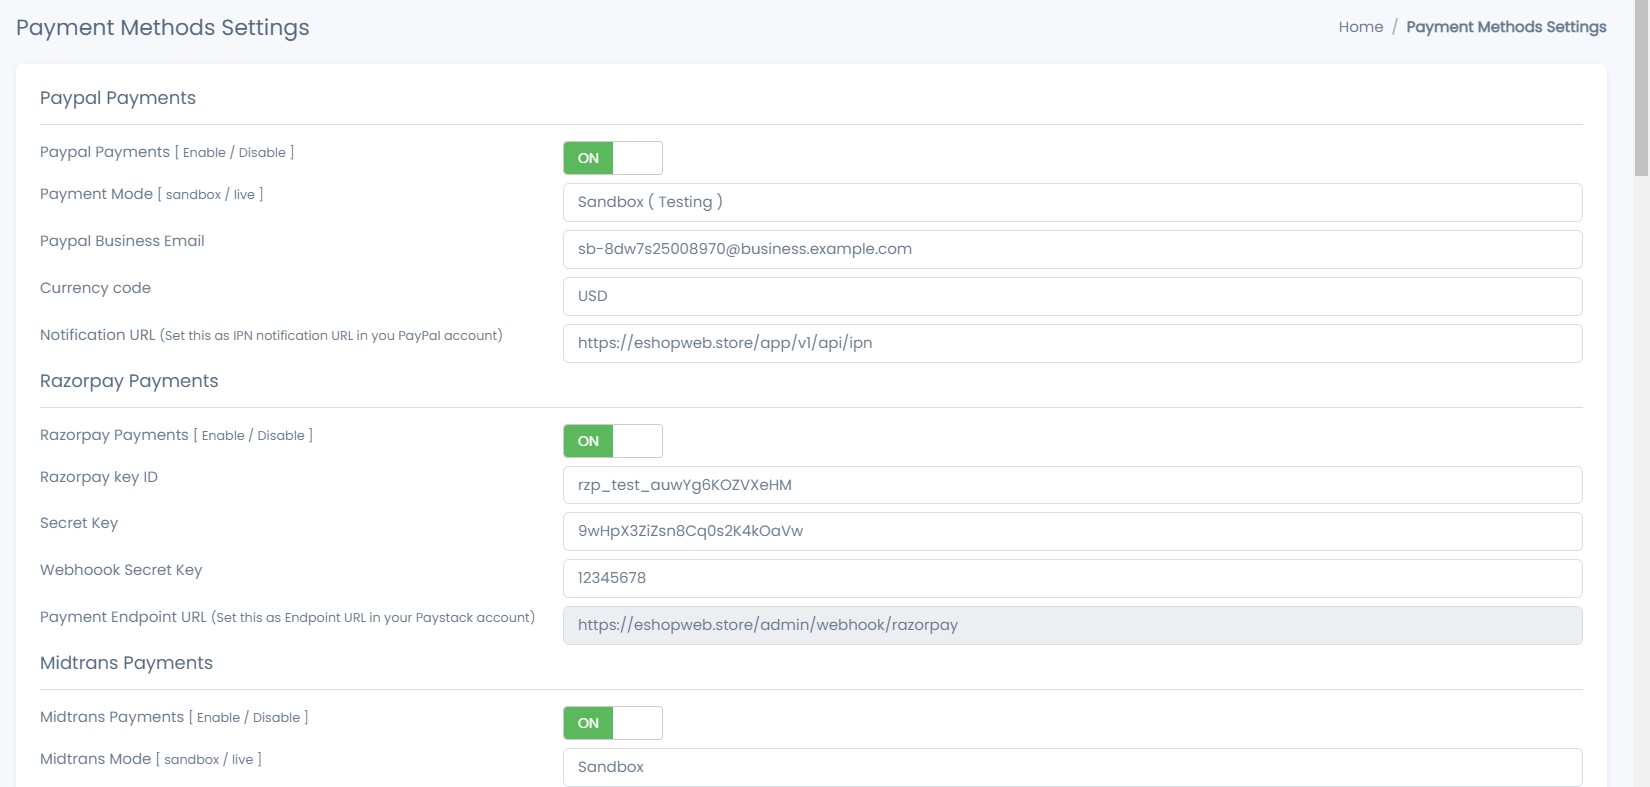
- From Here The Payment Methods can be Updated as per requirements
- Paypal Payments : From Here we can update the Paypal Payments
- Payment Mode : From Here we can update the Payment Mode
- Paypal Business Email : From Here we can update the Paypal
Business Email
- Currency code : From Here we can update the Currency code
- Notification URL : From Here we can update the Notification URL
- PayUMoney Payments : From Here we can update the PayUMoney Payments
- Payment Mode : From Here we can update the Payment Mode
- Merchant key : From Here we can update the Merchant key
- Merchant ID : From Here we can update the Merchant ID
- Salt : From Here we can update the Salt
- Razorpay Payments : From Here we can update the Razorpay Payments
- Razorpay key ID : From Here we can update the Razorpay key ID
- Secret Key : From Here we can update the Secret Key
- Paystack Payments : From Here we can update the Razorpay Payments
- Paystack key ID : From Here we can update the Razorpay key ID
- Secret Key : From Here we can update the Secret Key
- Flutterwave Payments : From Here we can update the Flutterwave Payments
- Flutterwave key ID : From Here we can update the Flutterwave key ID
- Secret Key : From Here we can update the Secret Key
- Flutterwave Encryption key : From Here we can update the Flutterwave Encryption key
- COD : From Here we can update the COD
- Click Update Payment Settings to the Update Payment Settings or Reset to Reset the form.
PayUMoney Payments
Razorpay Payments
Paystack Payments
Flutterwave Payments
Cash On Delivery
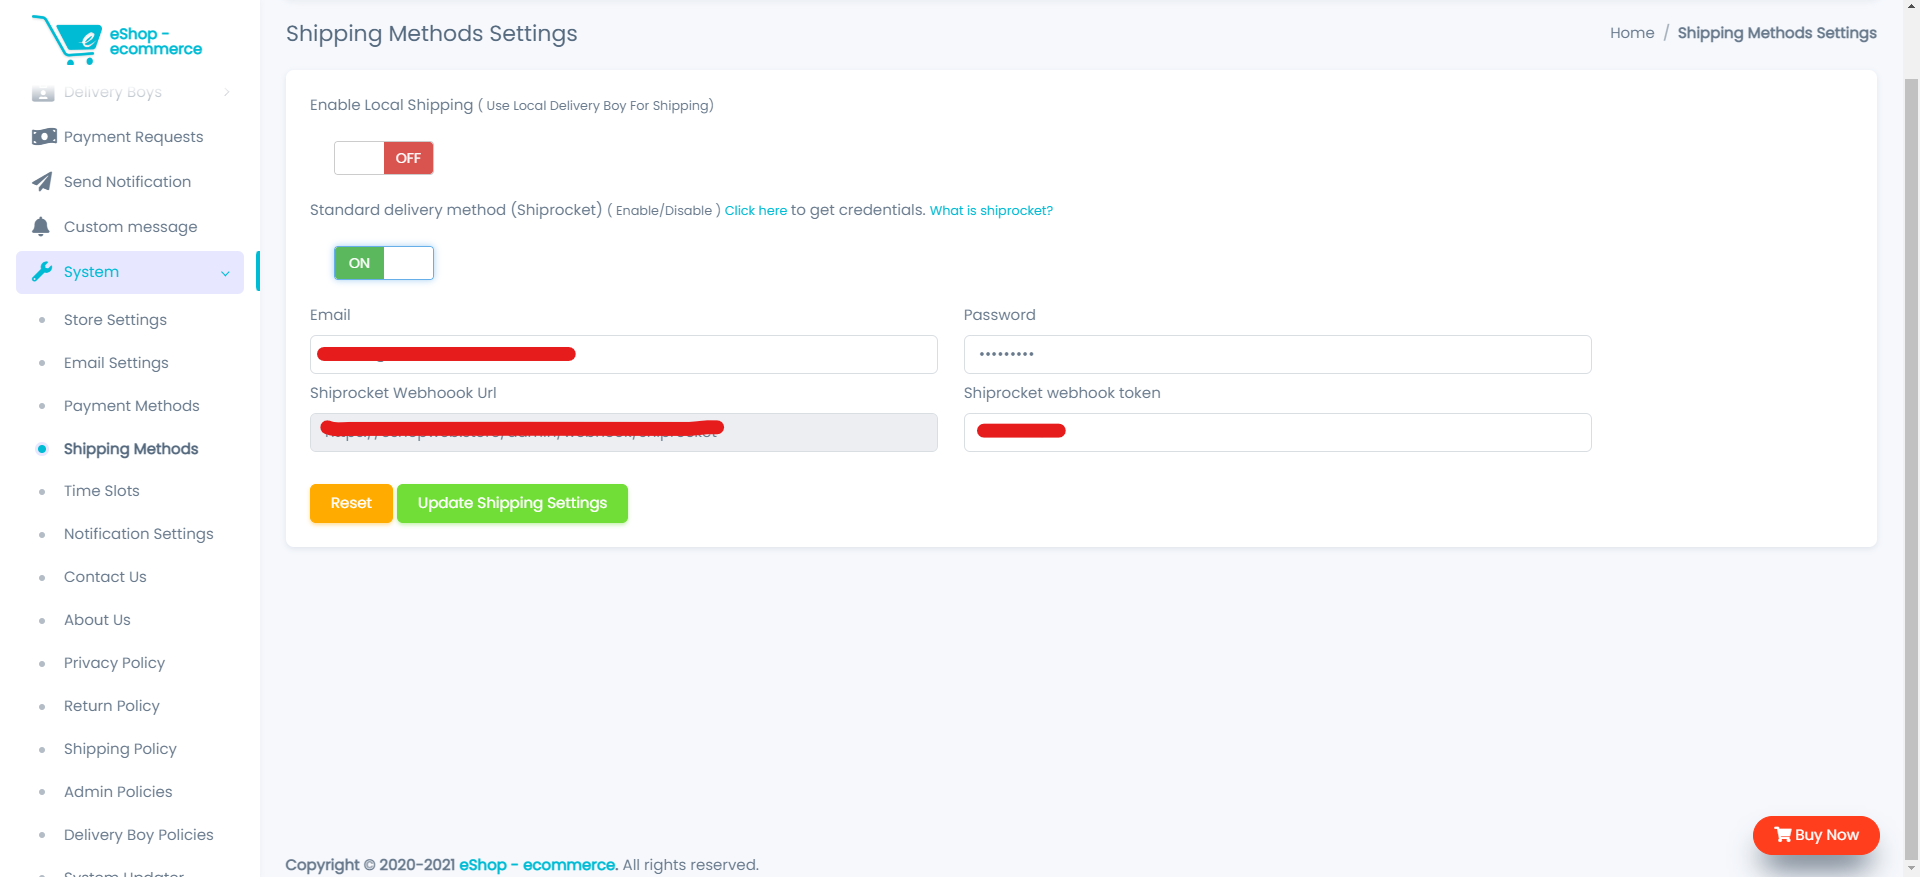
Shipping Methods
- In Shipping you can select shippings method for deliver orders to customers.
- currently 2 shipping methods are available in Eshop. if you want you can use both shipping method at a time.
Type :
- Local Shipping
-
Standard Shipping
- Shiprocket
How to change shipping Methods:
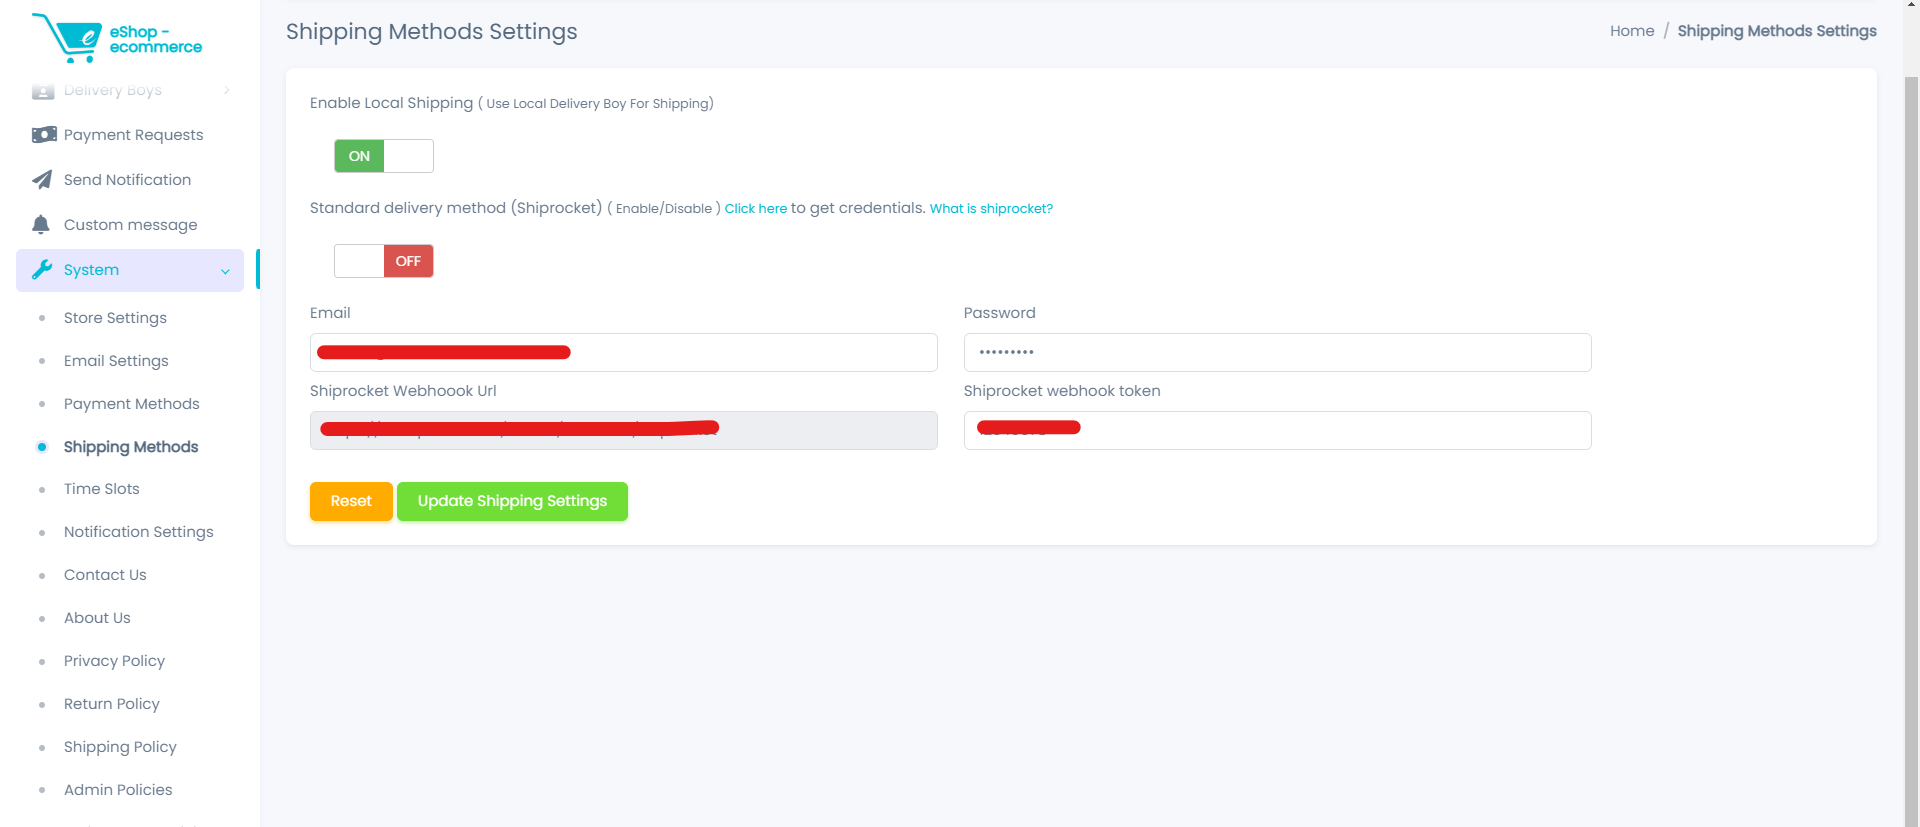
Local Shipping Method
- In this method you can assign your delivery boy for deliver customer orders.
Standard Shipping
- in this method you can use other currier services like shiprocket for deliver orders to customers.
- Shipprocket
-
Shiprocket, a product of Delhi based BigFoot Retail solution, is India's first automated
shipping software that aims reduce ecommerce shipping to its bare bones. ... You can
print bulk shipping labels and ship your products to in and around the world using a
single platform.
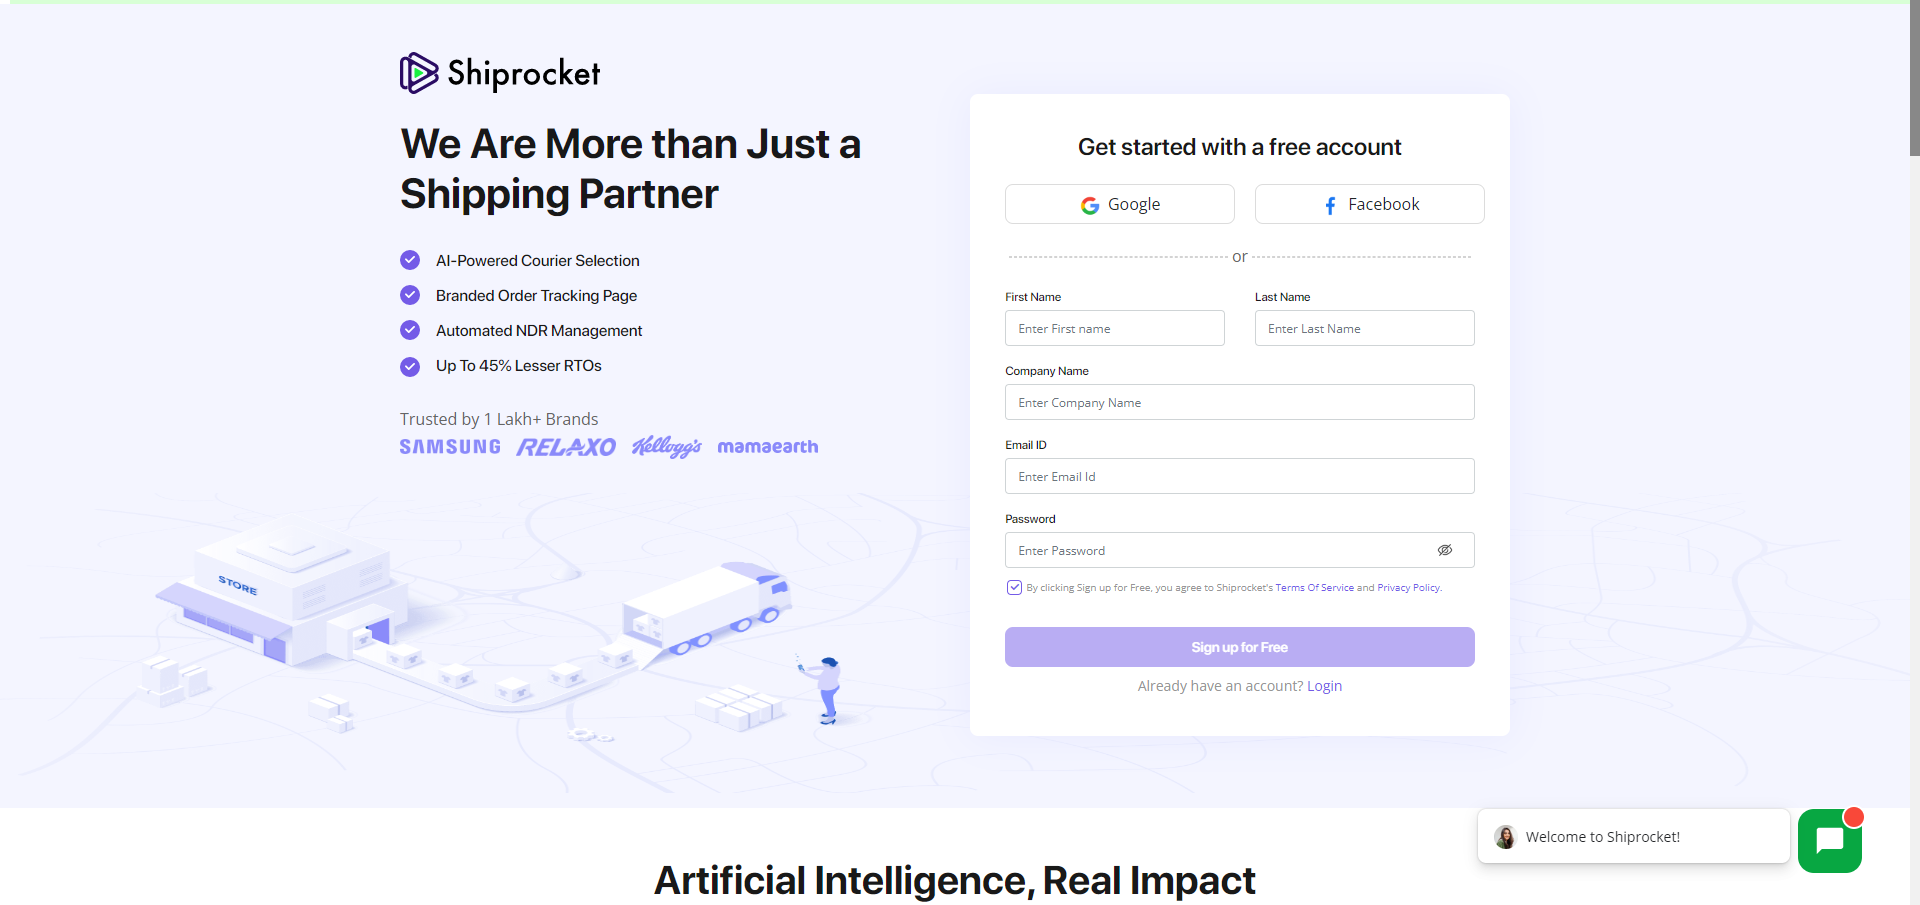
Account
- First Create shiprockdet account Click here.
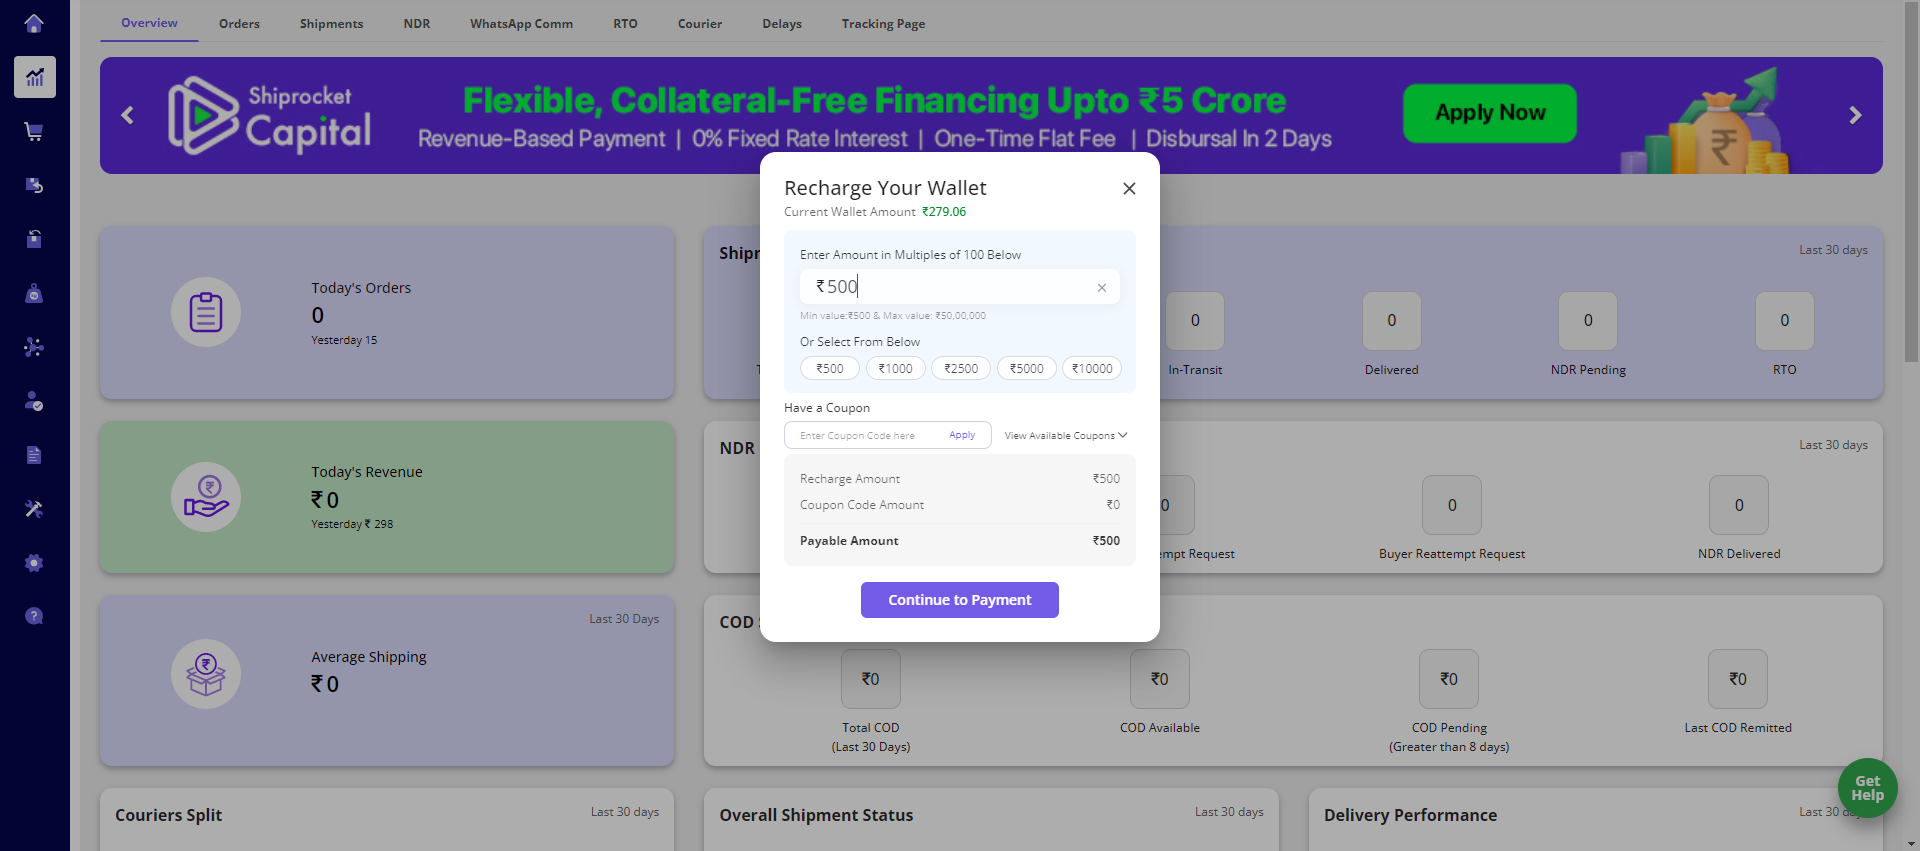
Recharge Wallet
- after successfully login you have to recharge you shiprocket wallet without wallet balance you can not use their services
API Config
- So now to use shiprocket in your system first go to api Config from here
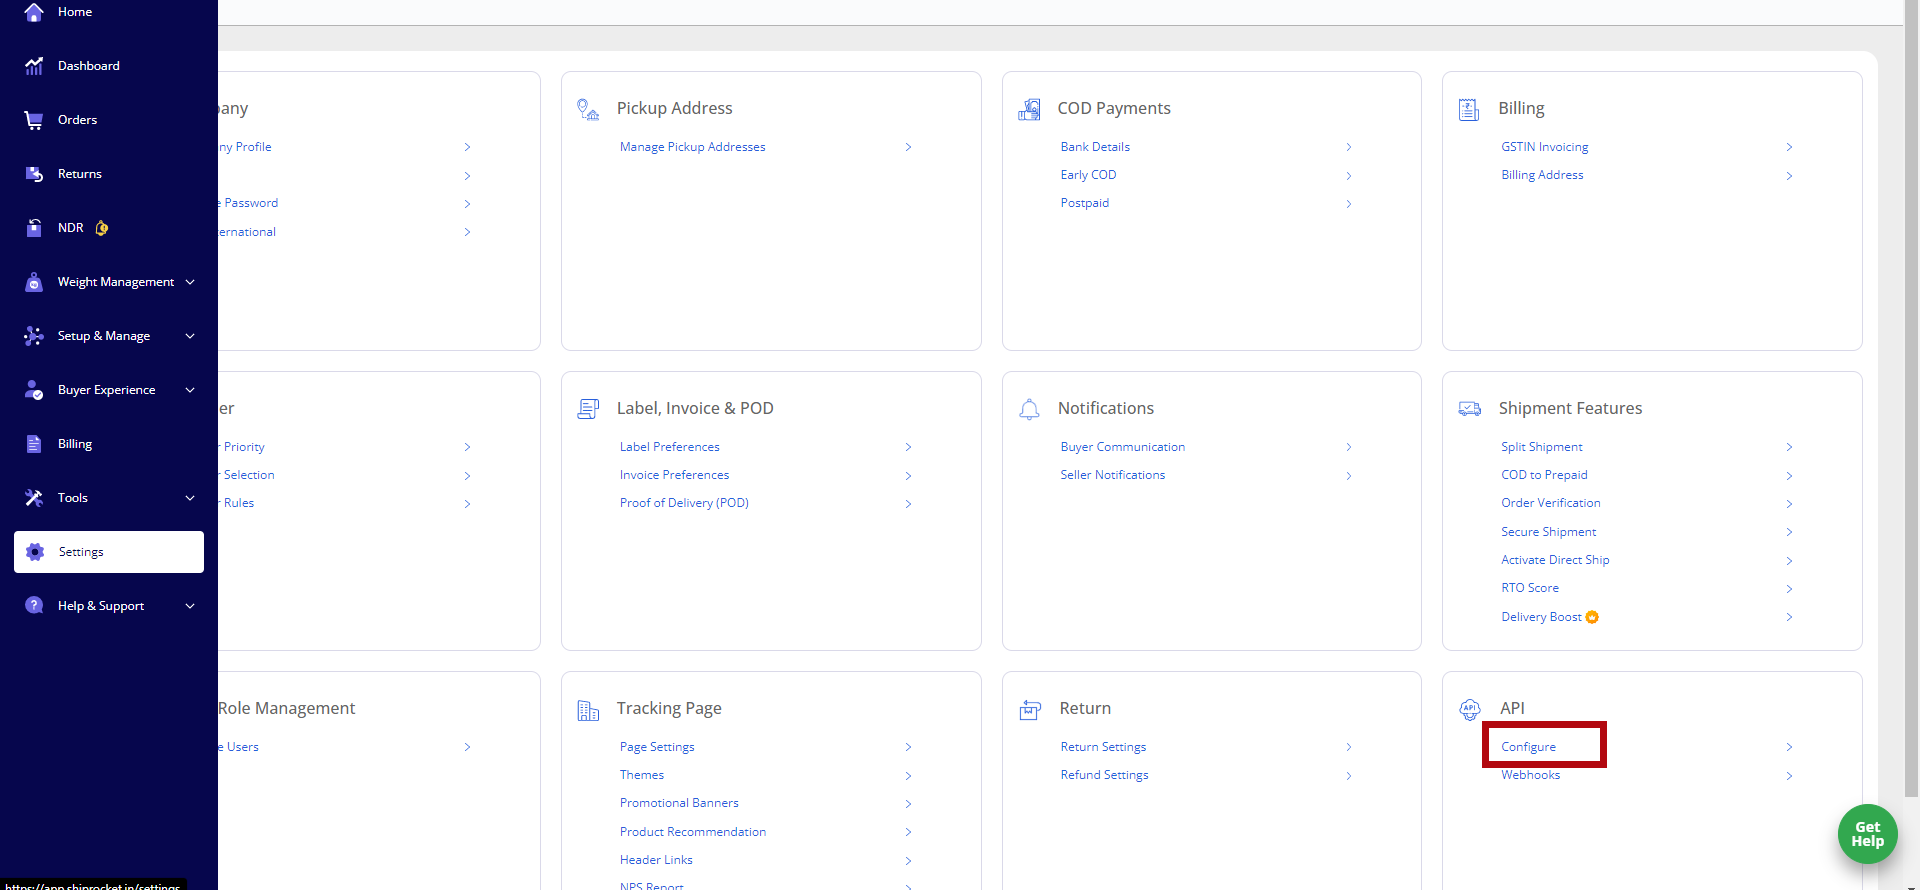
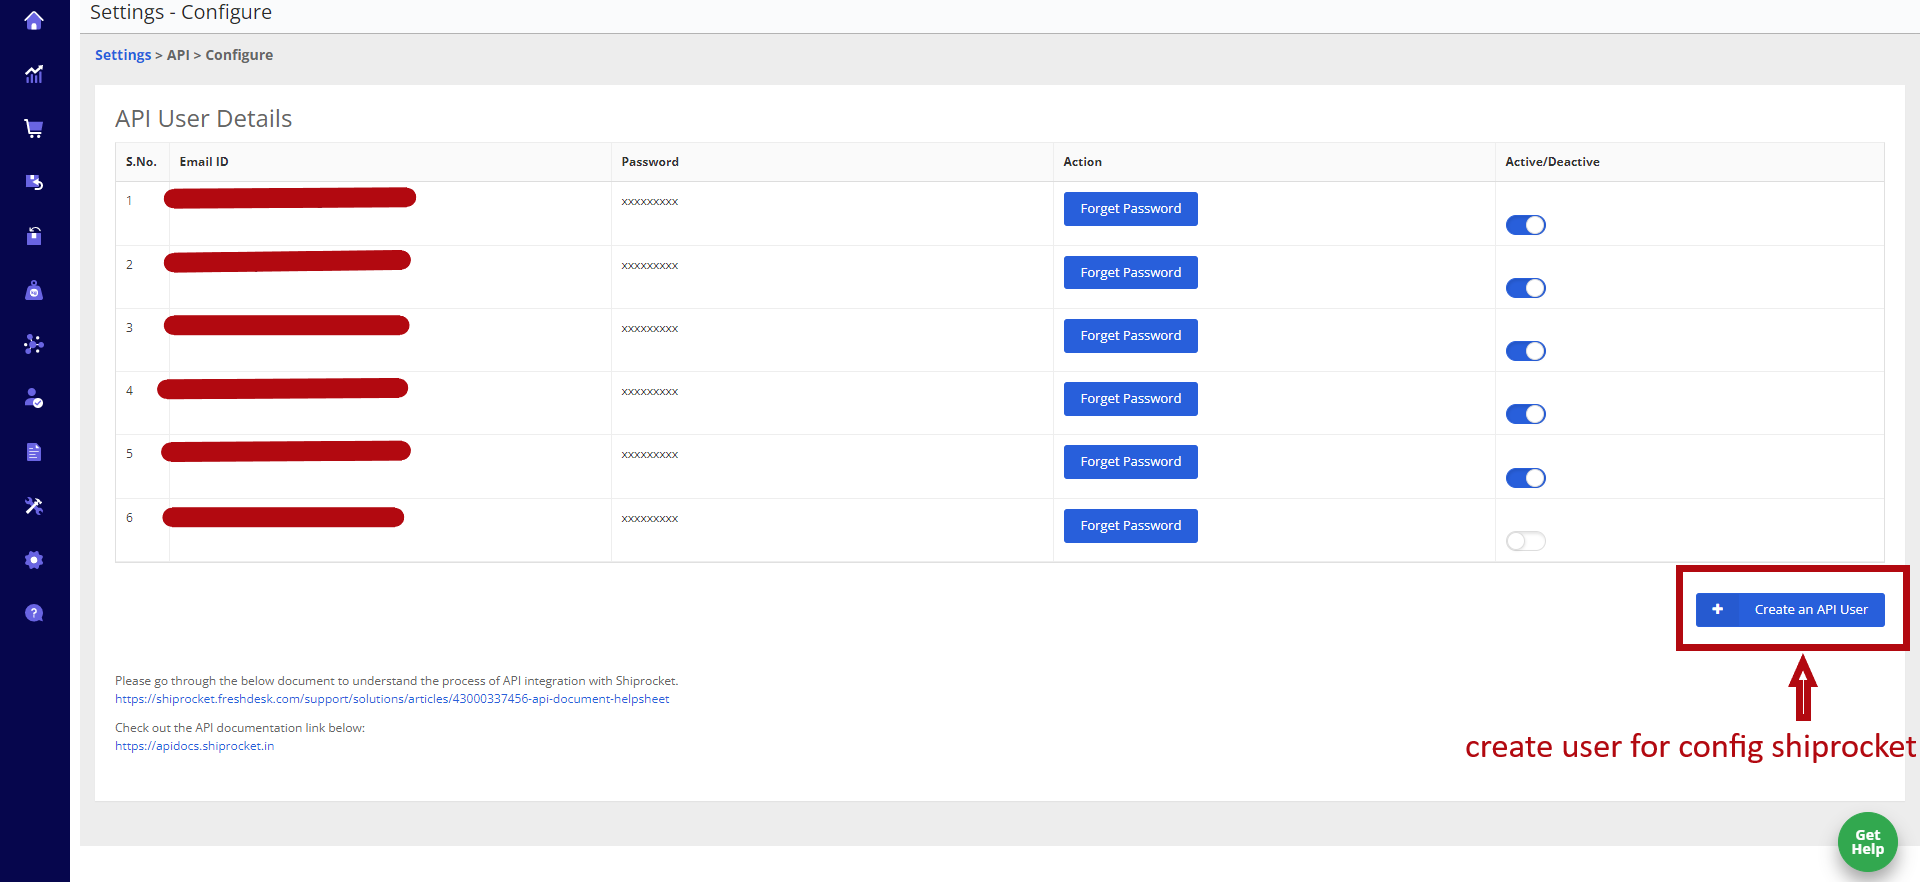
- here you have to create user for use shiprockdet in your system.

-
After create user you have to add user credentials in you admin panel here.
How it will work?
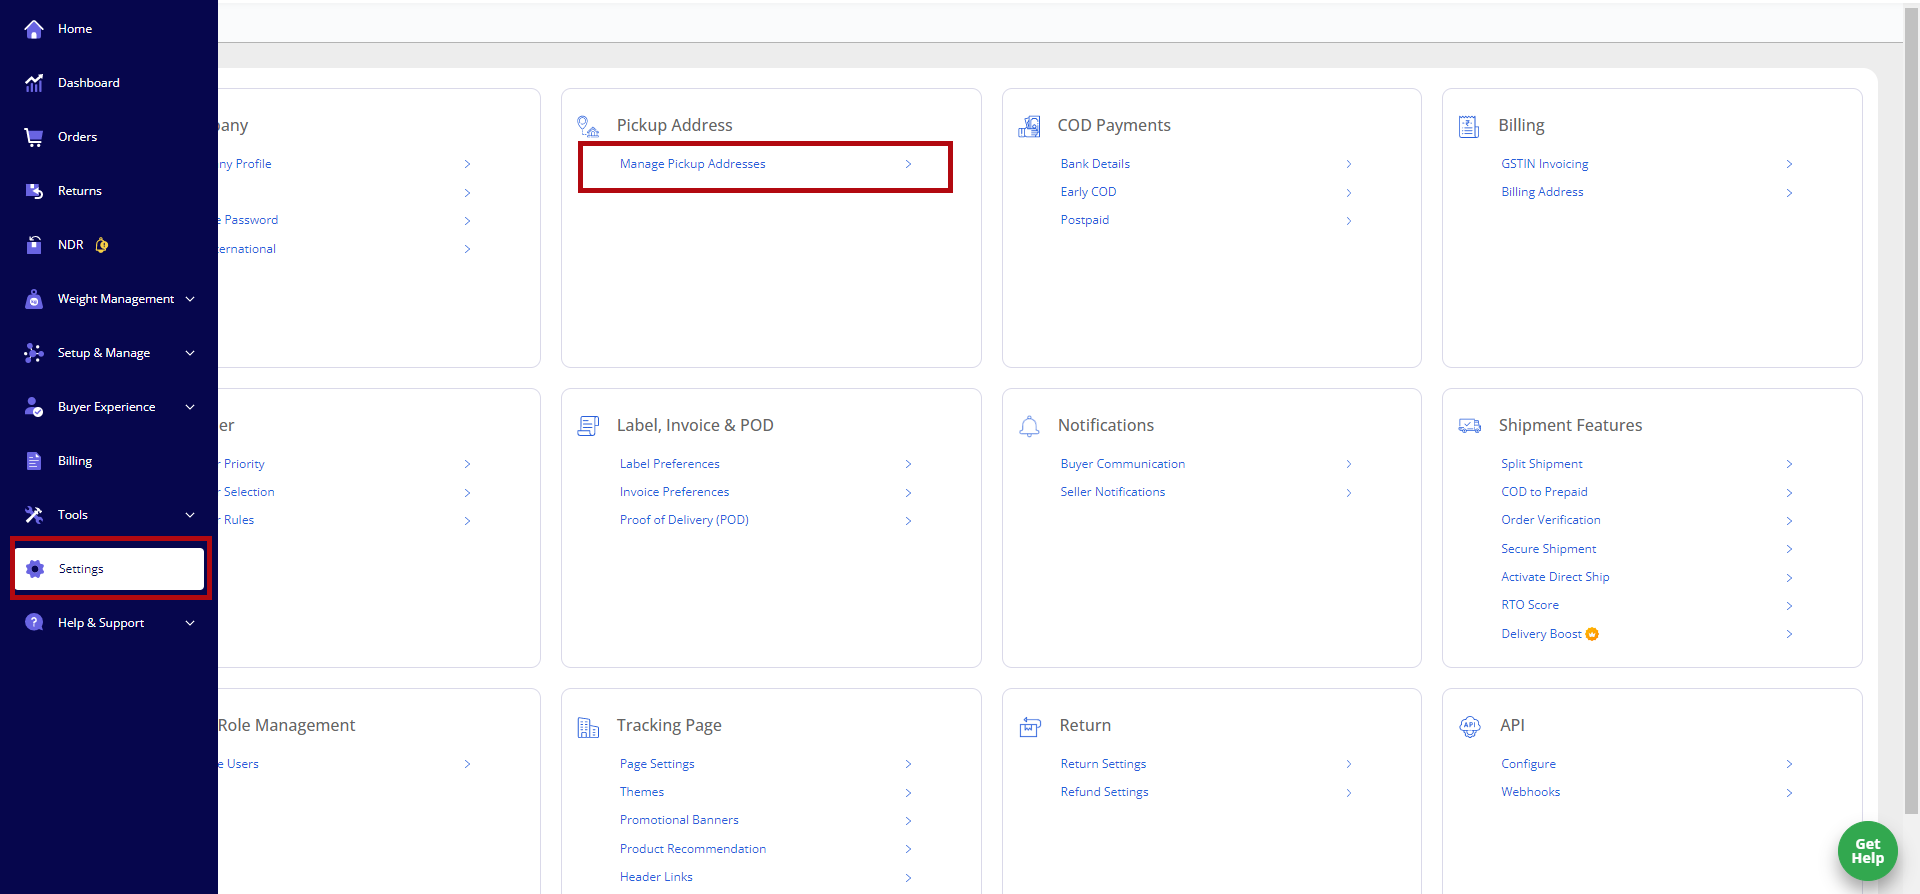
1. Add Pickup Location.
- shiprocket uses pickup location for pickup orders from owner
- in your system only seller can add pickup location, from here seller can add pickup location.
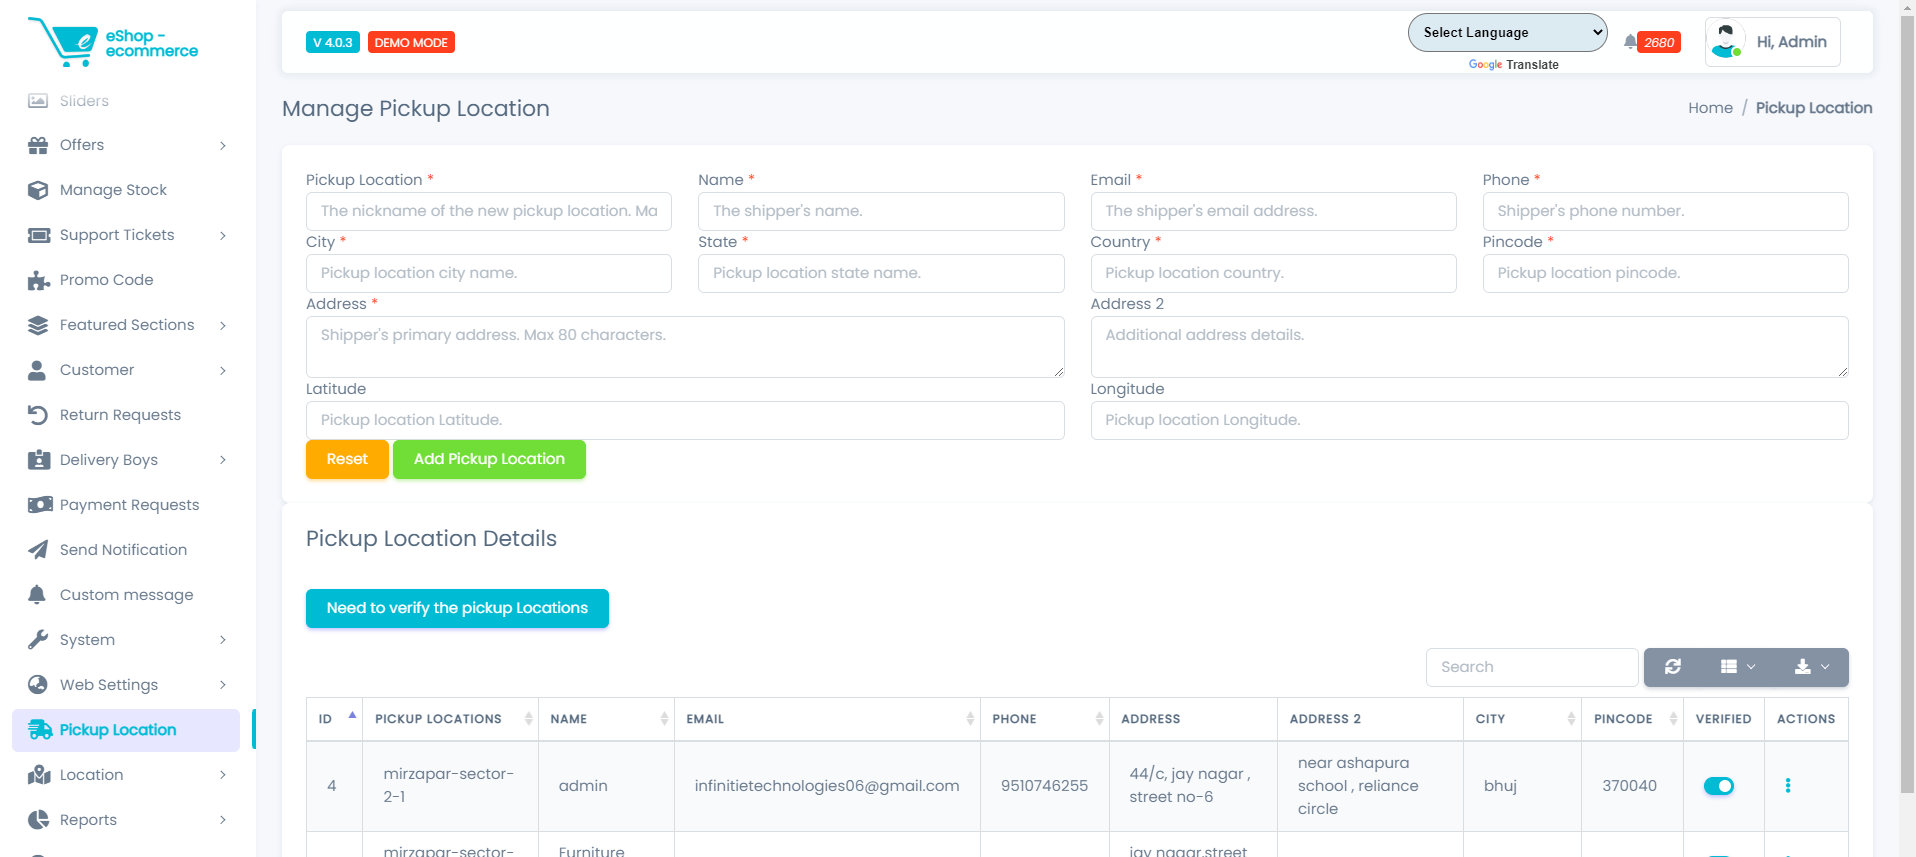
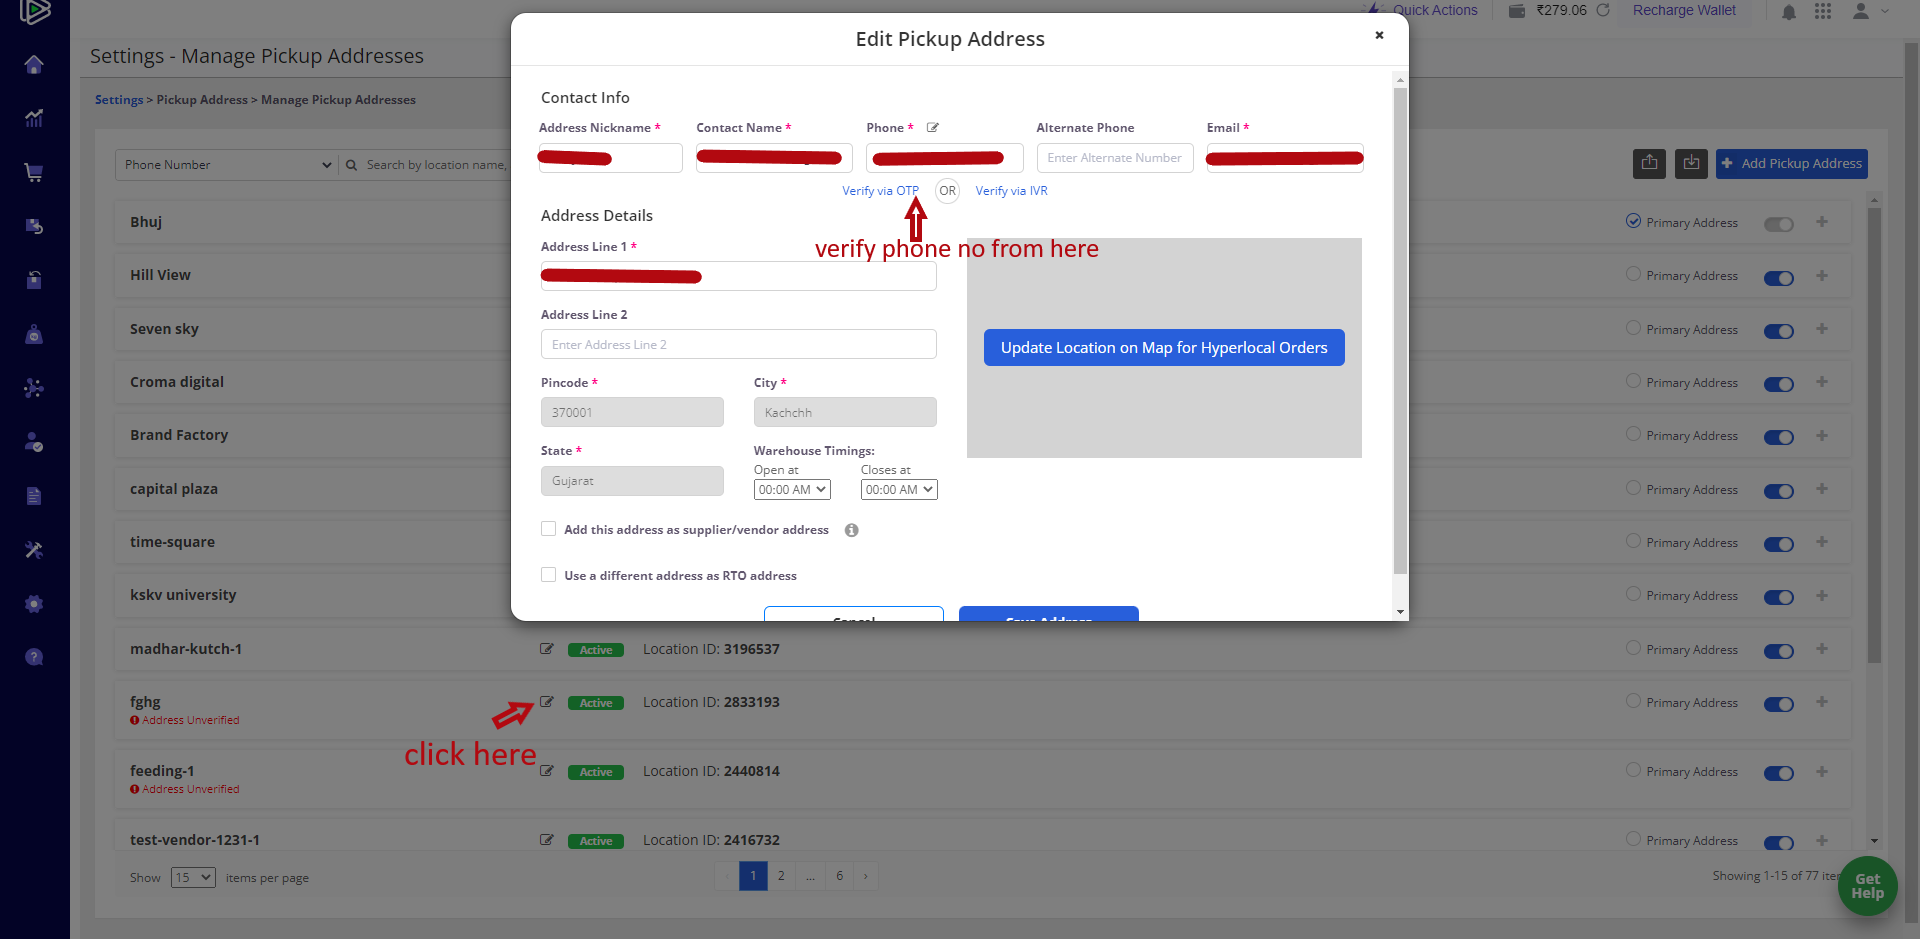
after adding pickup location admin have to verified pickup location from admin panel and also from shiprocket dashboard
- verify pickup location from admin panel
- verify pickup location from shiprocket dashboard

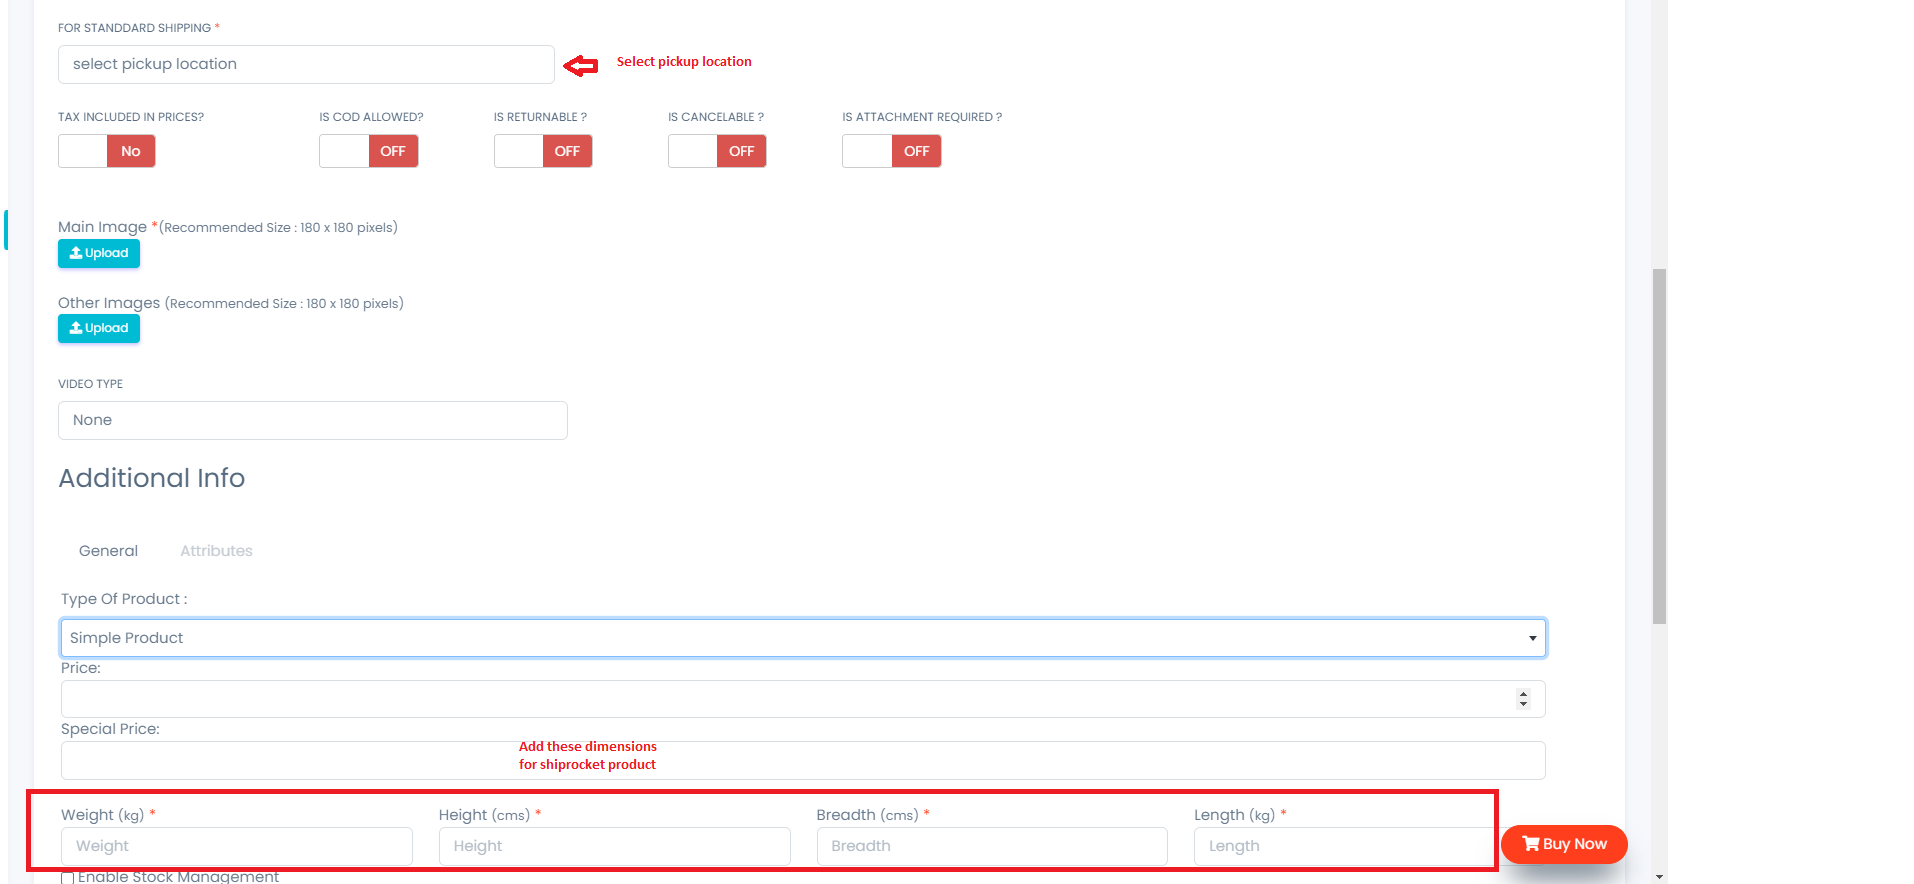
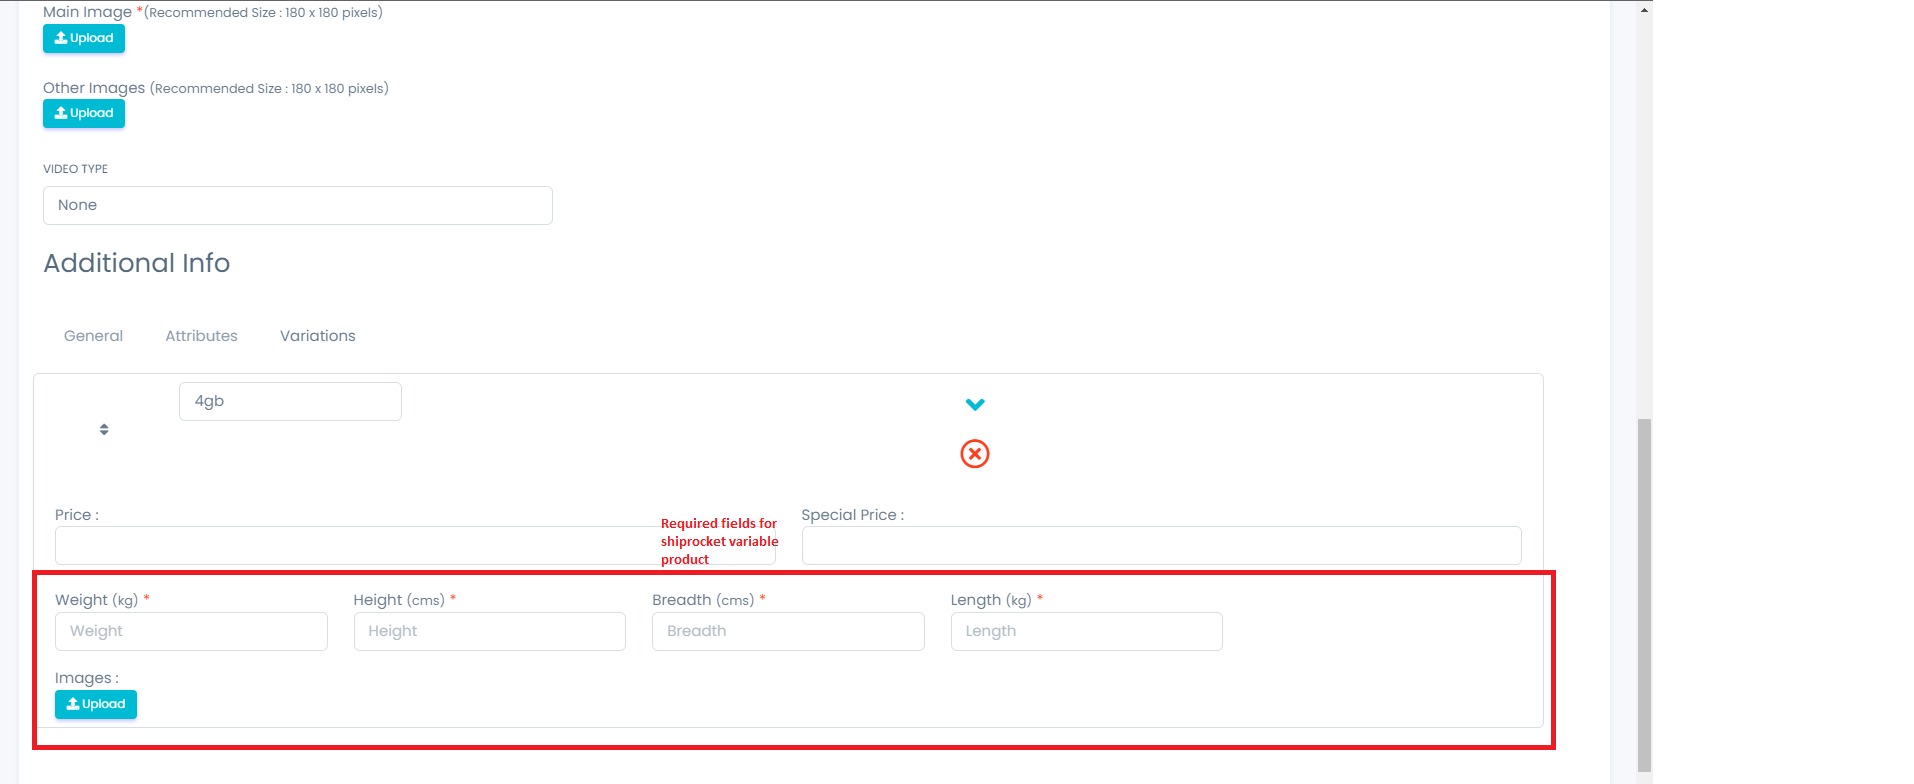
2. Add product or Edit product.
- after successfully verify pickup location you can add/edit product like this
- For simple product
- For variable product
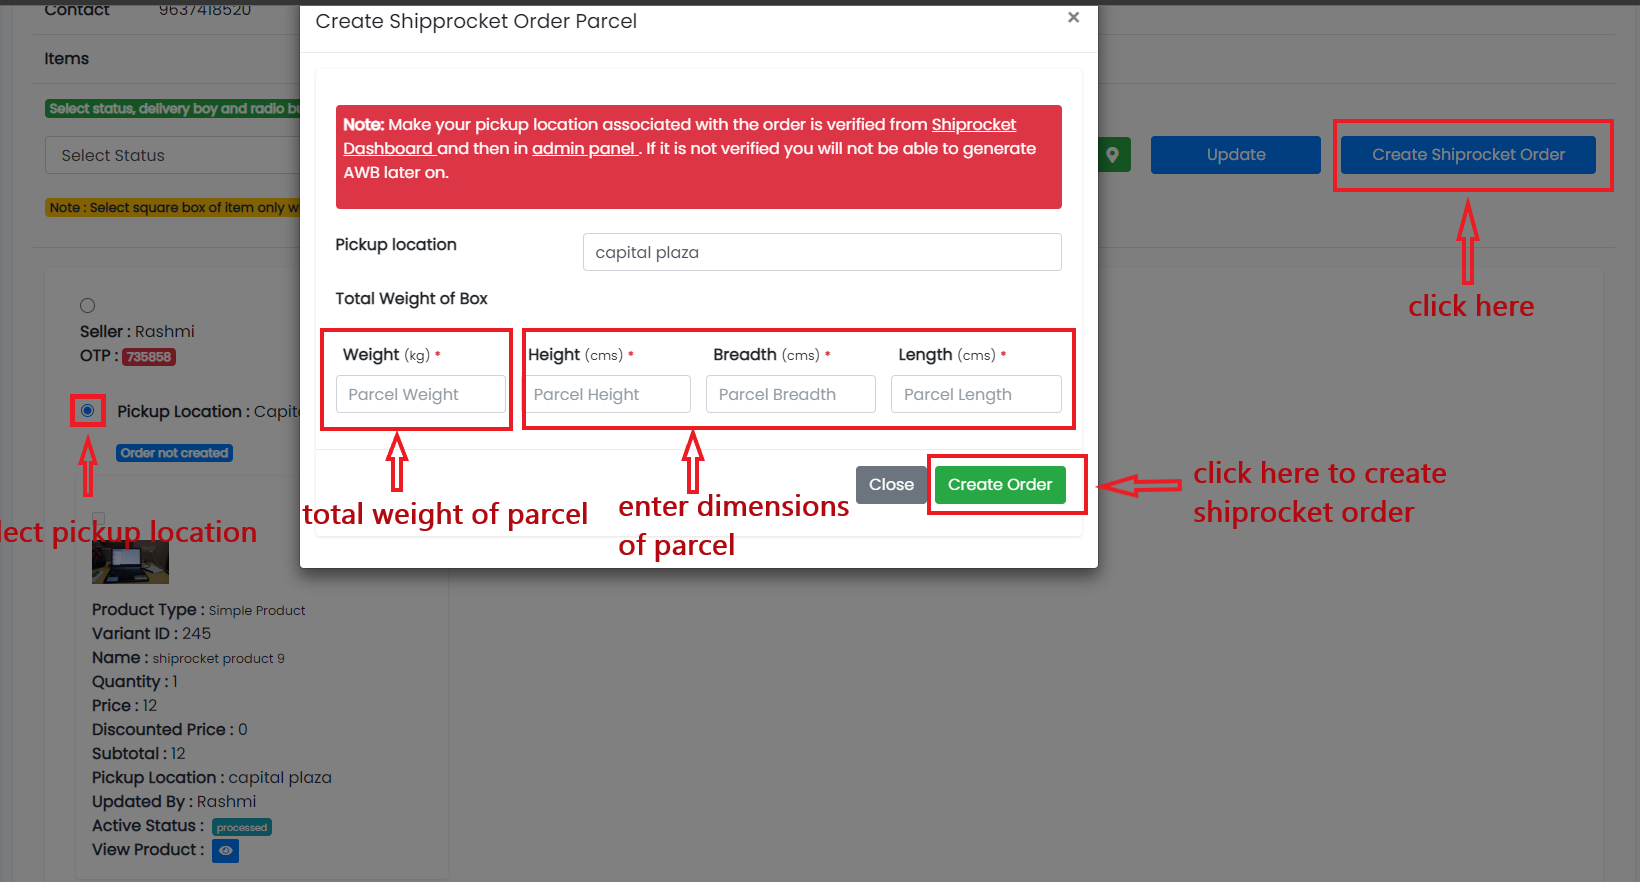
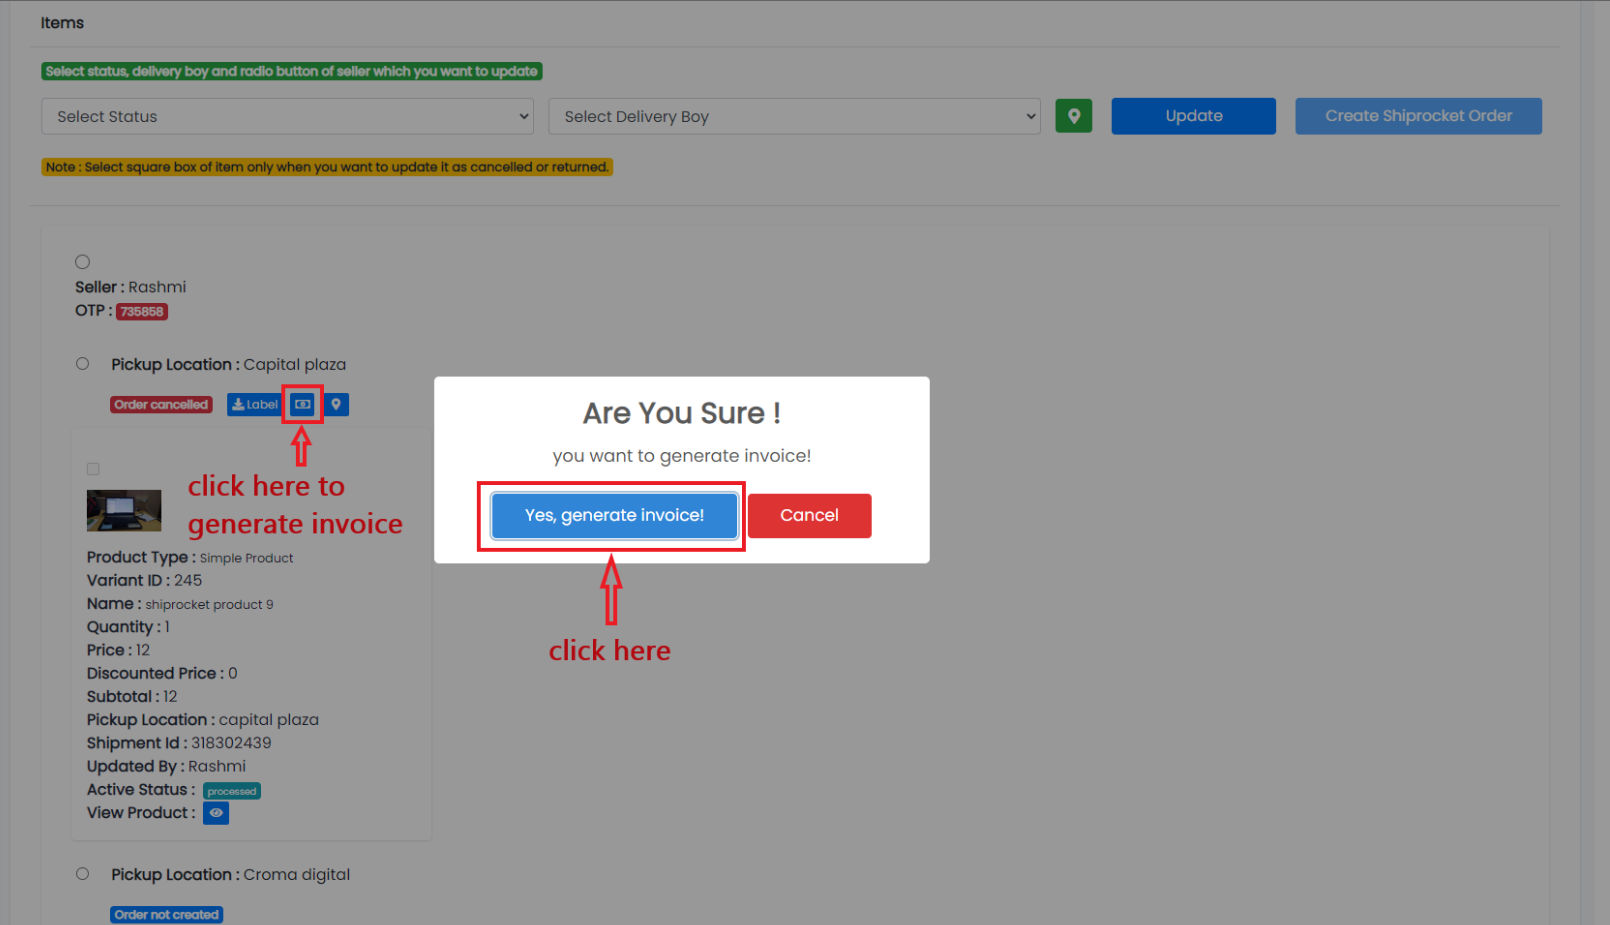
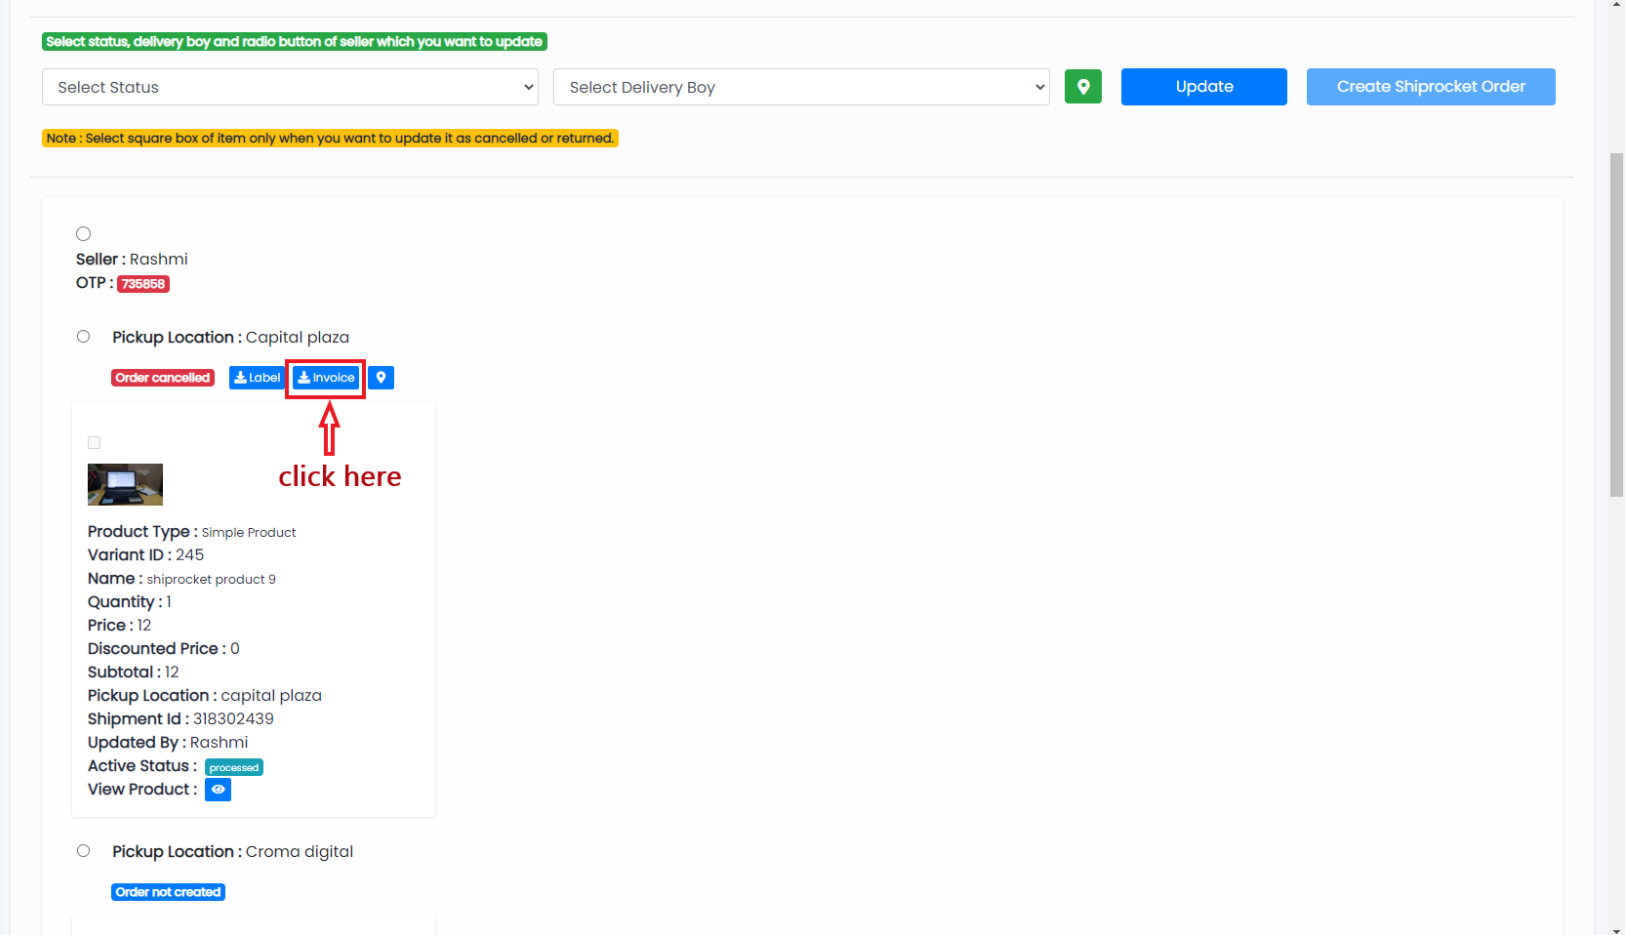
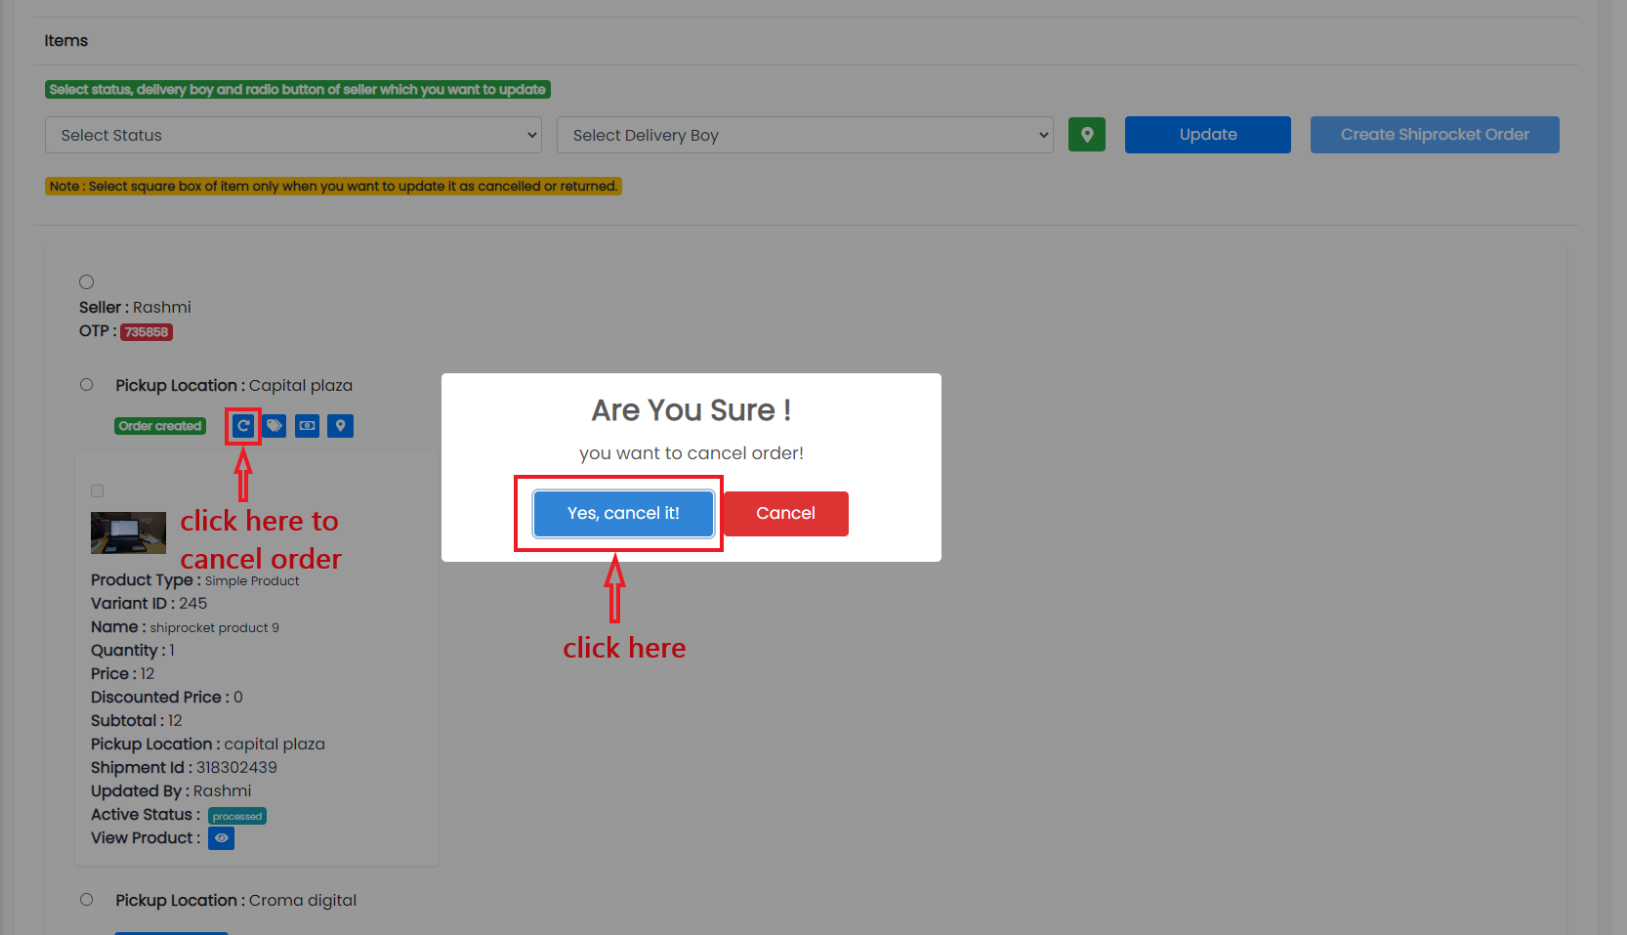
How to create shiprocket order?
- after getting orders and want deliver order using shiprocket you have to create shiprocket order Go to edit order in you panel
- Select Pickup Location for which you want to create parcel and click on Create Shiprocket Order button.
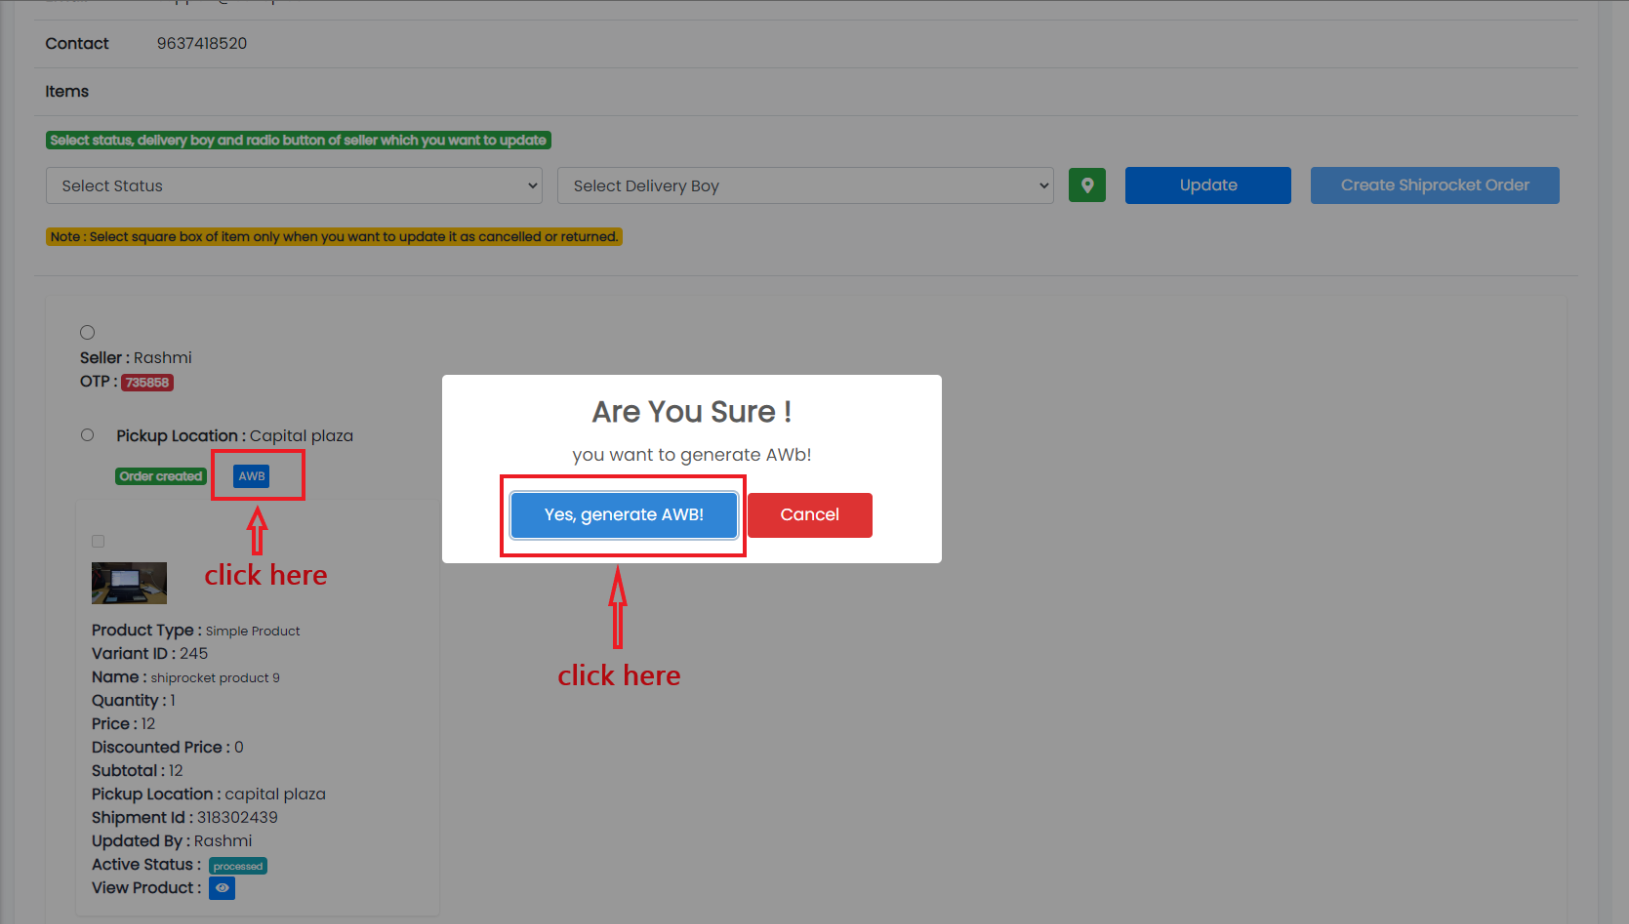
- After create order generate AWB code(its unique number use for identify order) like this.
- After generate AWB Send pickup request for scheduled you shipping.
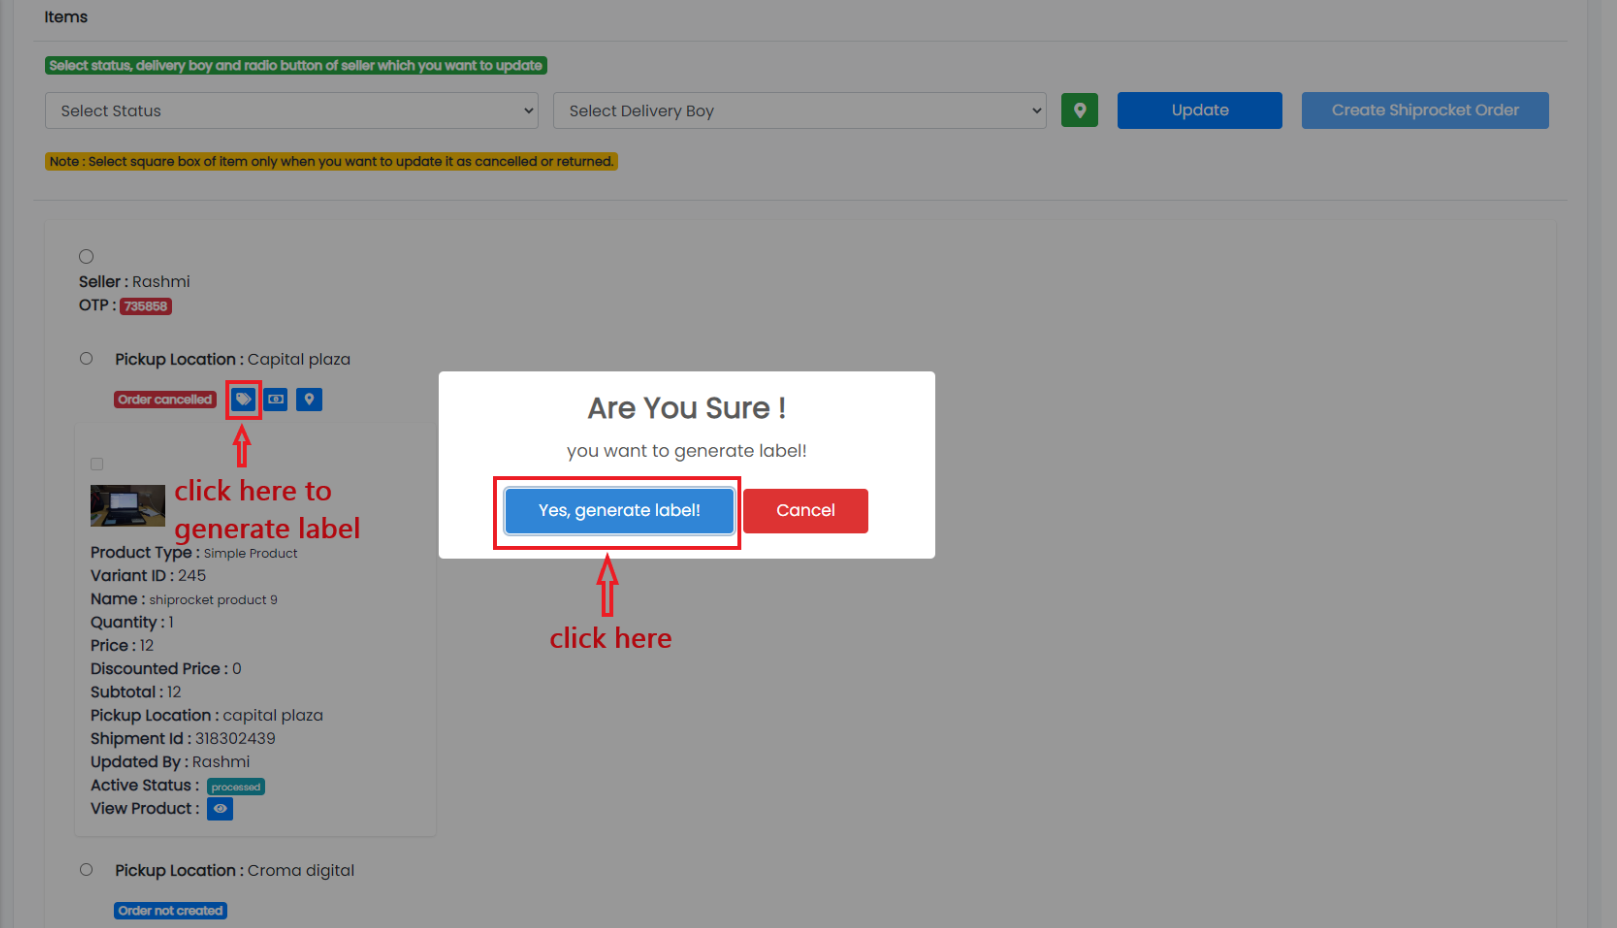
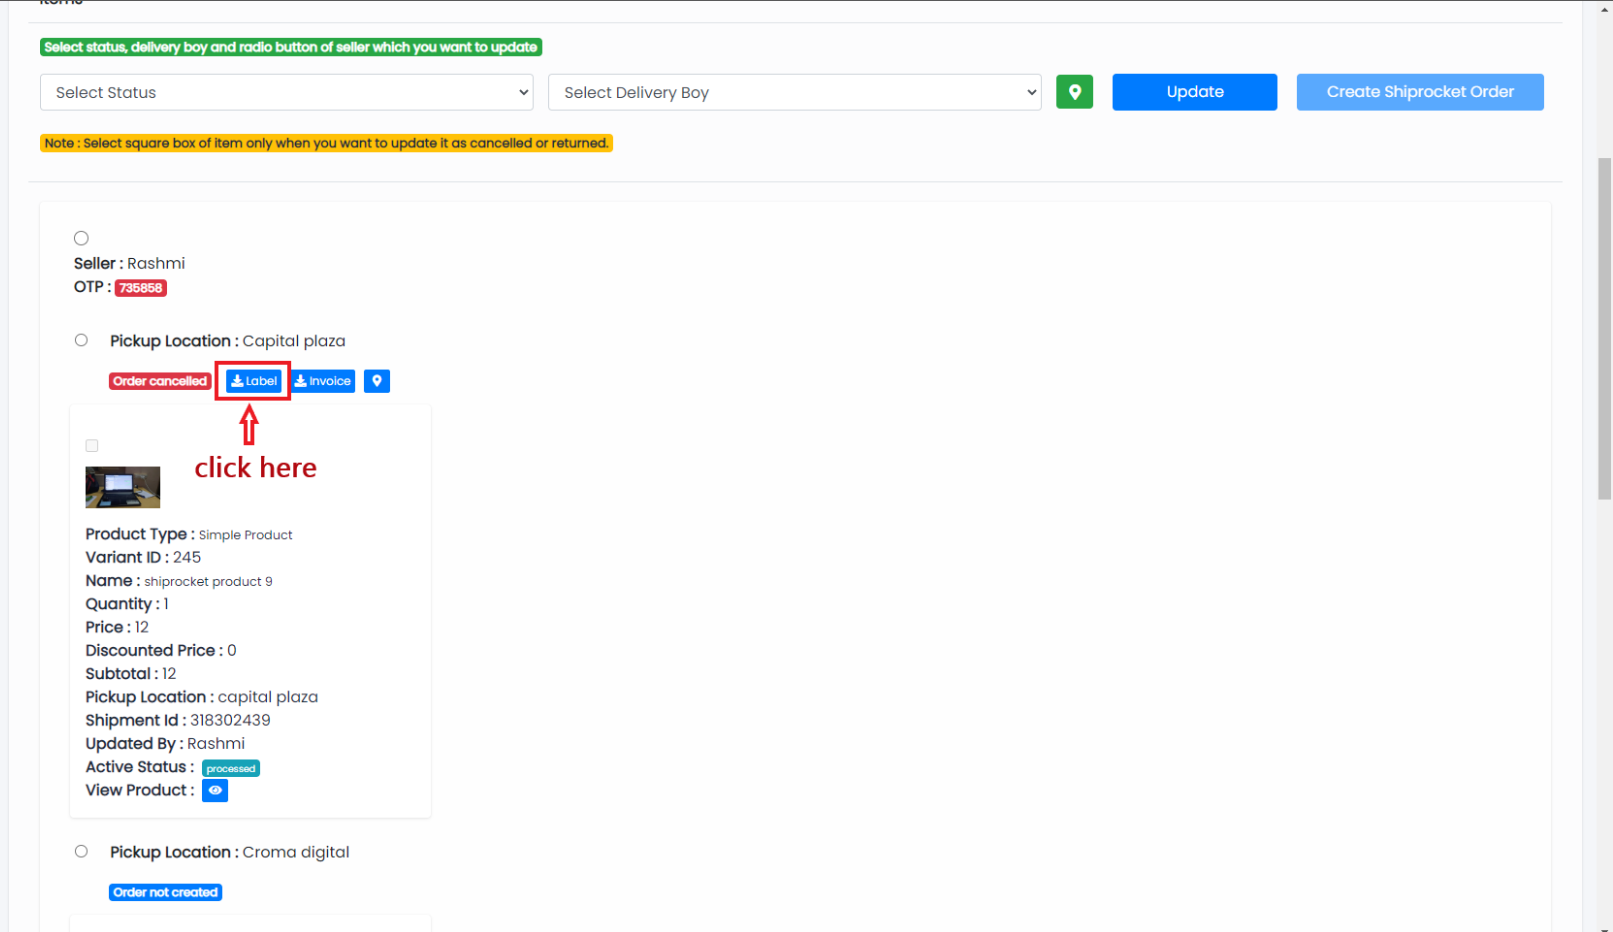
- Generate and download Label.
- Generate and download Invoice.
- Cancel shiprocket order.
- shiprocket order traking.

Time Slots

Here all the information related to Time Slots Details is display
Actions- Search Time Slots Details
-
To search the Time
Slots Title or Any other Detail
- Refresh Time Slots list
-
To Refresh Time
Slots List
- Filters
-
Used to filter the
Time Slots details according to the criteria
- Delete Time Slots
-
Used to Delete the
Time Slots Details.
We Can Add Time Slots and delete Time Slots by following Steps :
Step 1: Fill the Fields as follows
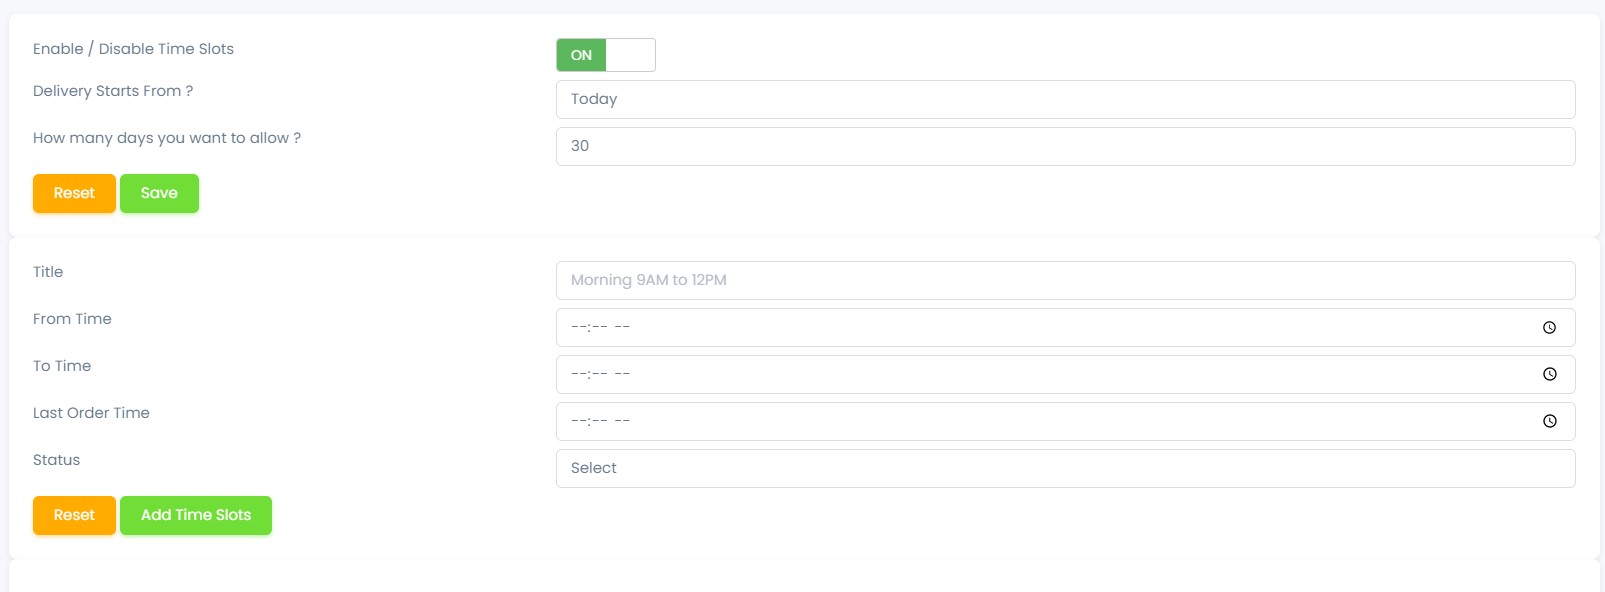
- In Title field Enter the Title of the Time Slots.
- Select From Time of the Time Slots.
- Select To Time of the Time Slots.
- Select Last Order Time of the Time Slots.
- Select To Status of the Time Slots.
- Click Add Time Slots to the Add Time Slots table or Reset to Reset the form.
Step 2:Delete Time Slots from the List
For Deleting Time Slots we need to use as explained above
under Actions Time Slots.
Notification Settings
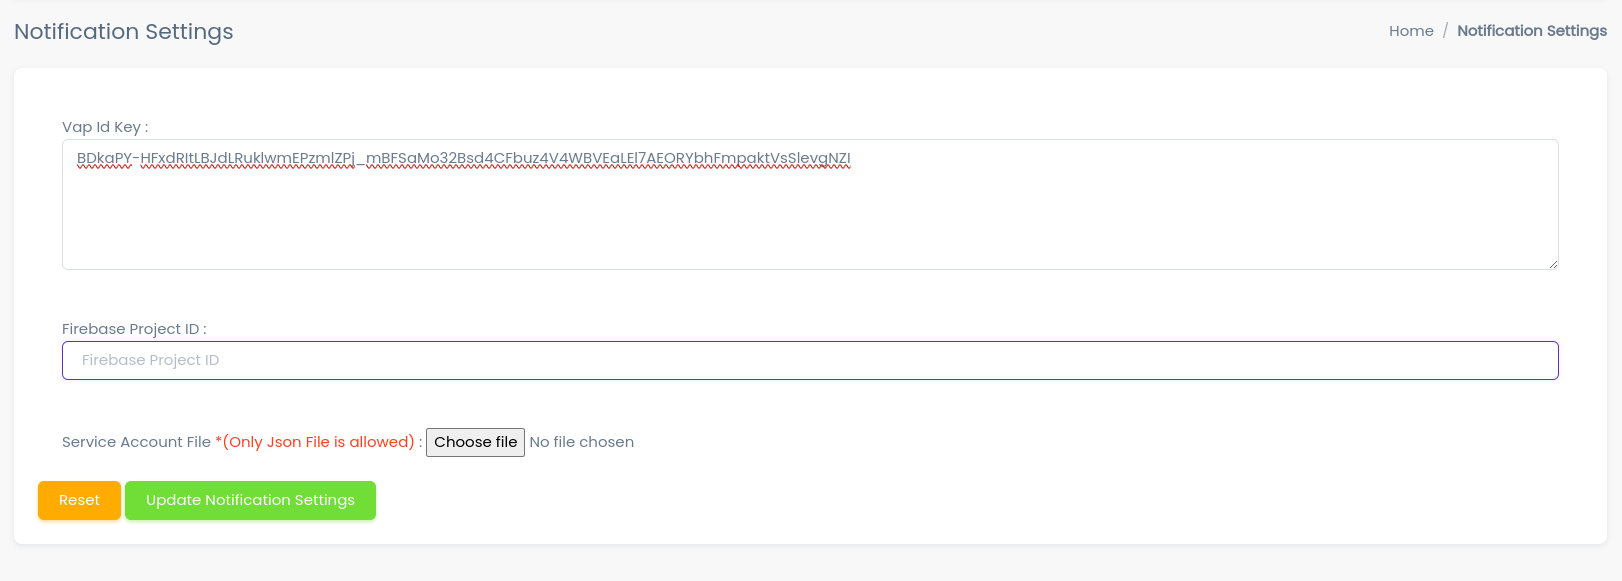
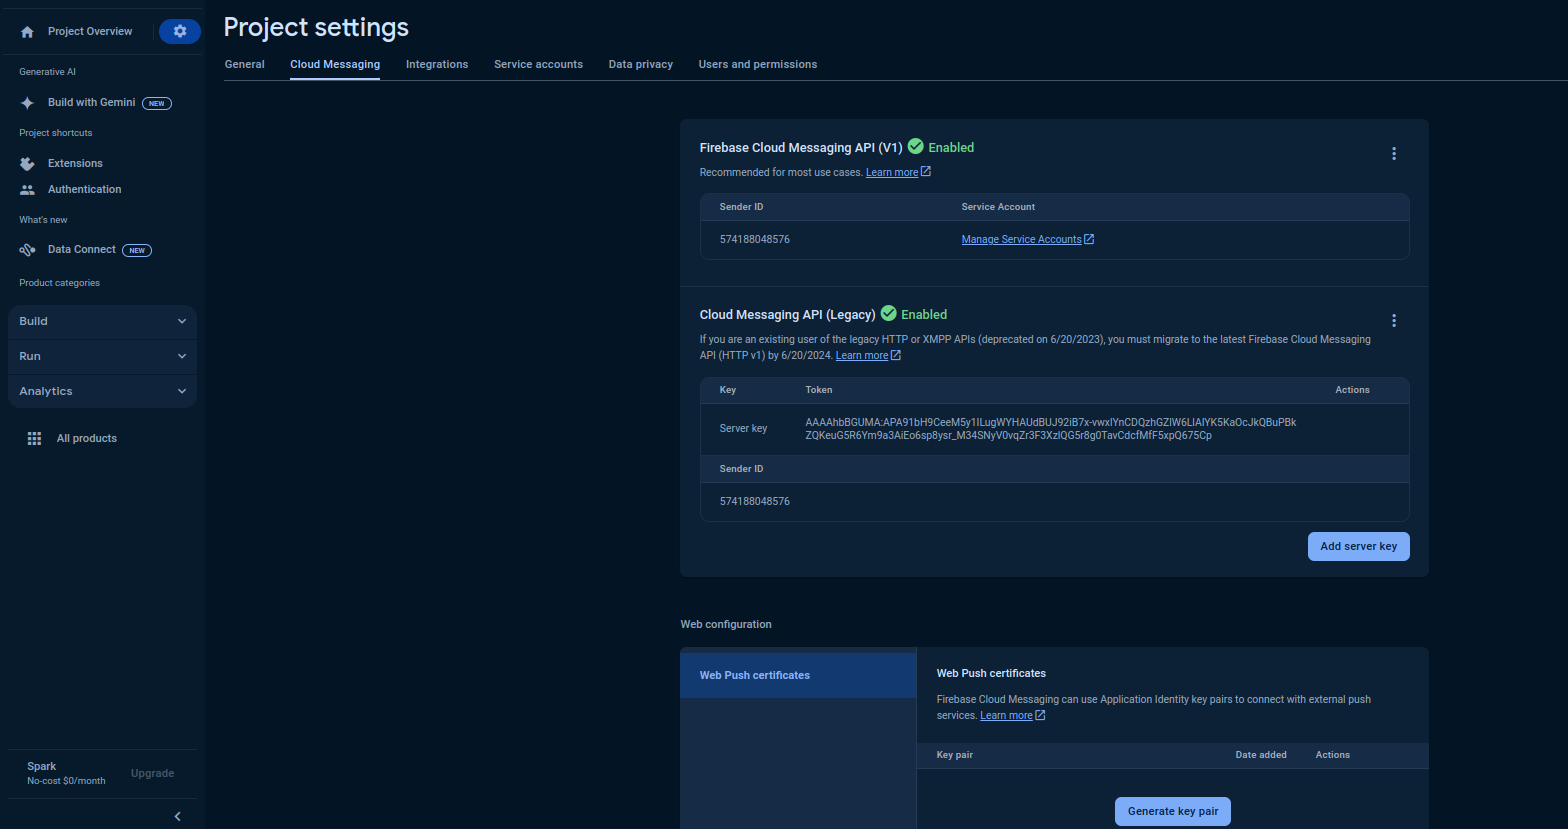
- Vap id : Firebase → Project Settings → Cloud Messaging → Web Configuration → here you have to generate it
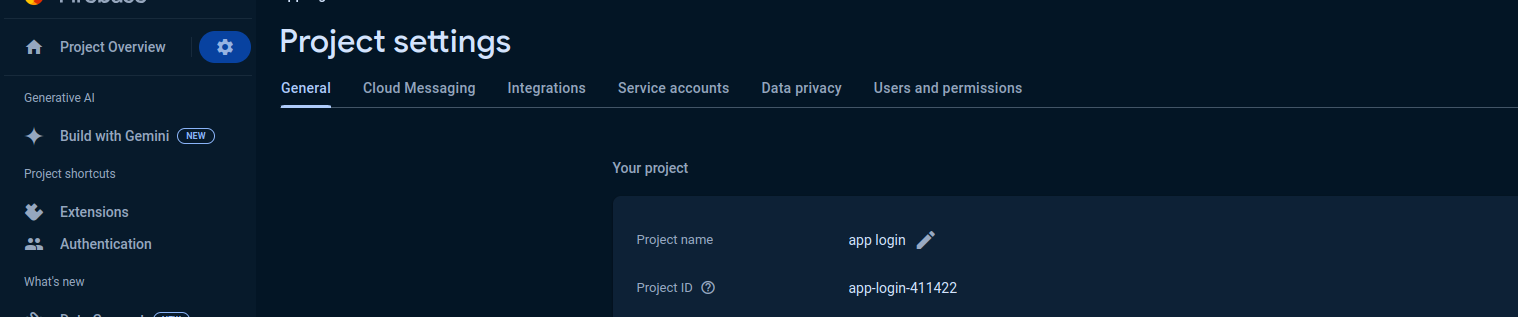
- Firebase Project ID : Firebase → Project Settings → General → Project ID
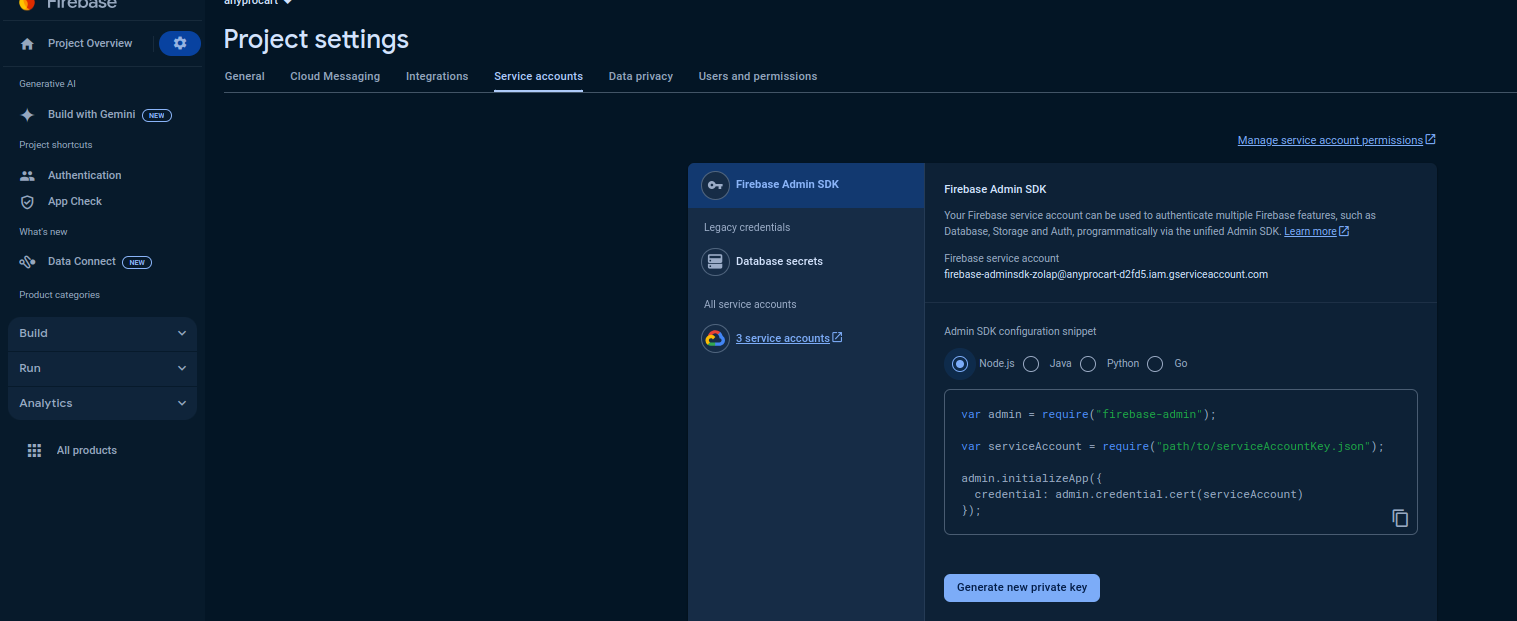
- Service Account File : Firebase → Project Settings → Service Account → Generate new private key → Here you will get a JSON file which you need to upload in the admin panel
- Click the button to update notification settings or reset to reset the form.
Contact Us
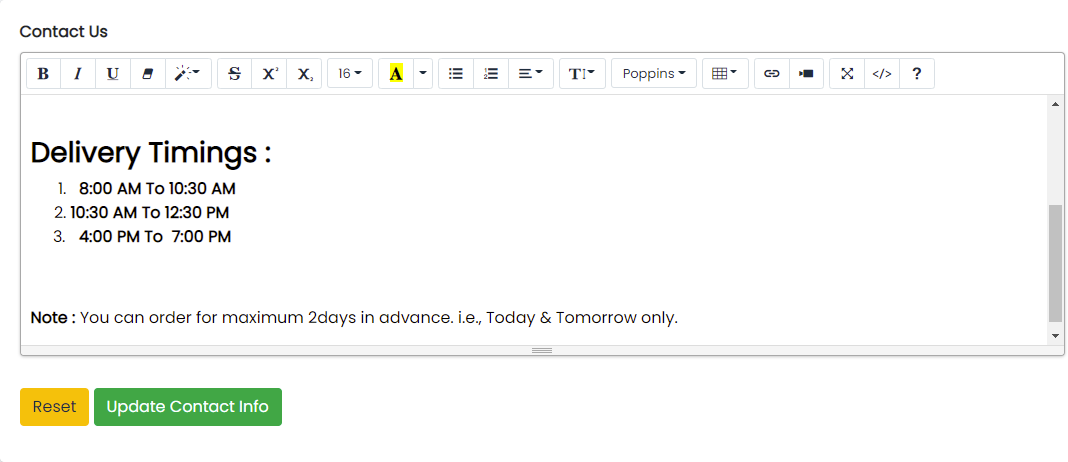
- From here the contact us information can be updated as per requirements
- Click button to update contact info or Reset to Reset the form.
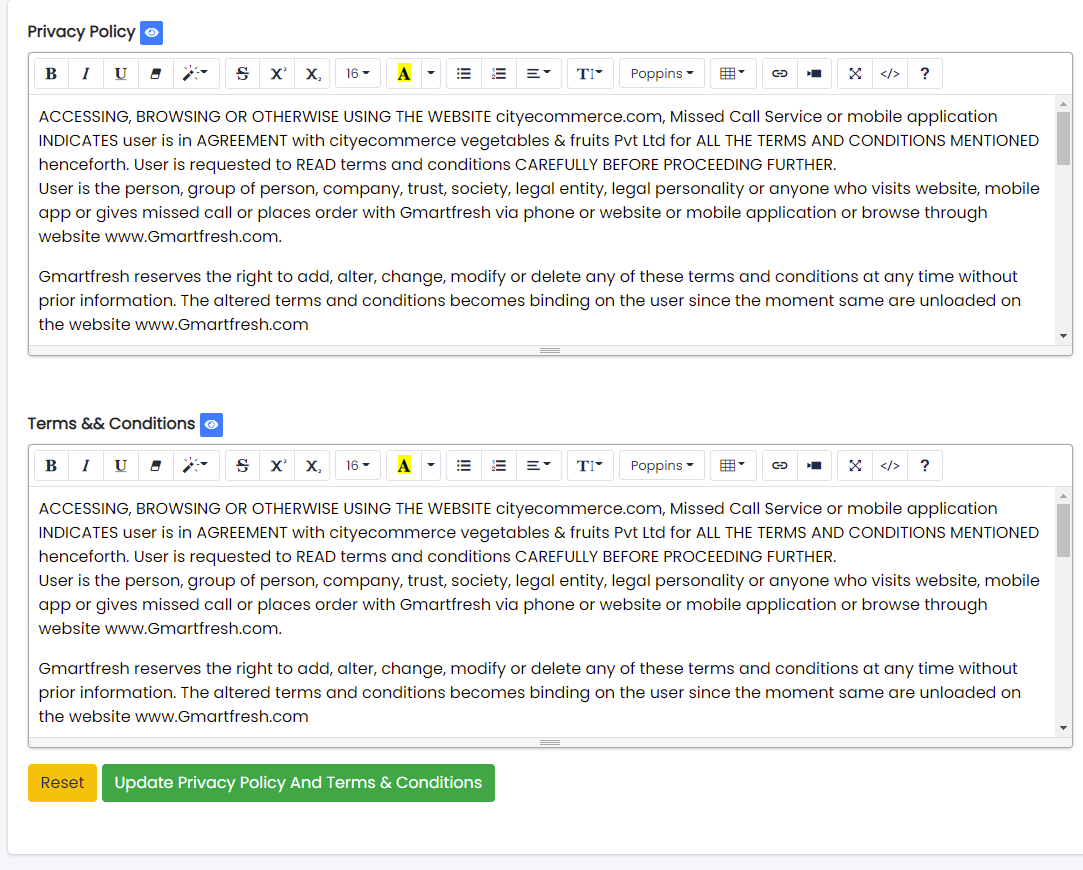
Privacy Policy
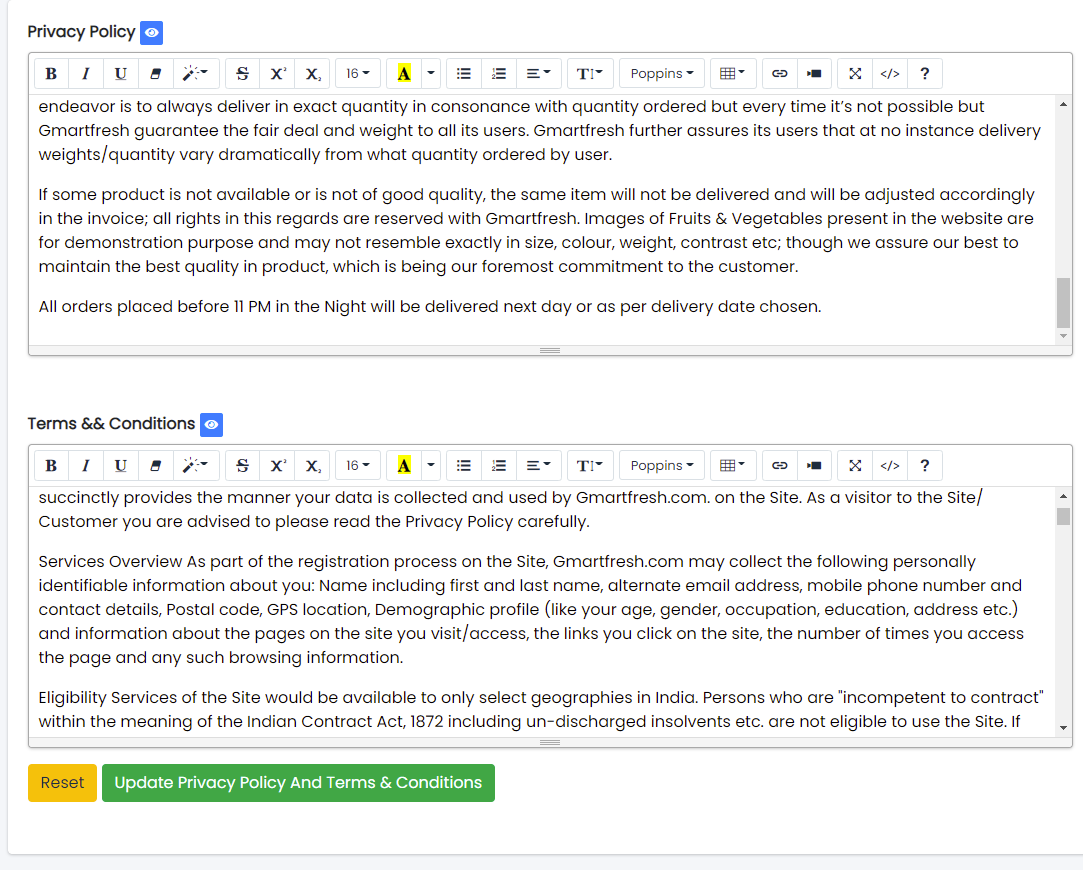
- From here the privacy policy and terms and conditions can be updated as per requirements
- Click Update Privacy Policy And Terms & Conditions button to update information or Reset to Reset the form.
Delivery Boy Privacy Policy
- From here the Delivery Boy privacy policy and terms and conditions can be updated as per requirements
- Click Update Privacy Policy And Terms & Conditions button to update information or Reset to Reset the form.
About Us
- From here the About Us can be updated as per requirements
- Click Update About Us button to update information or Reset to Reset the form.
Location
- City
- Areas
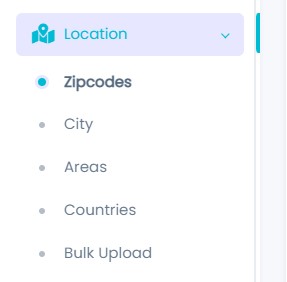
Sample Image
City
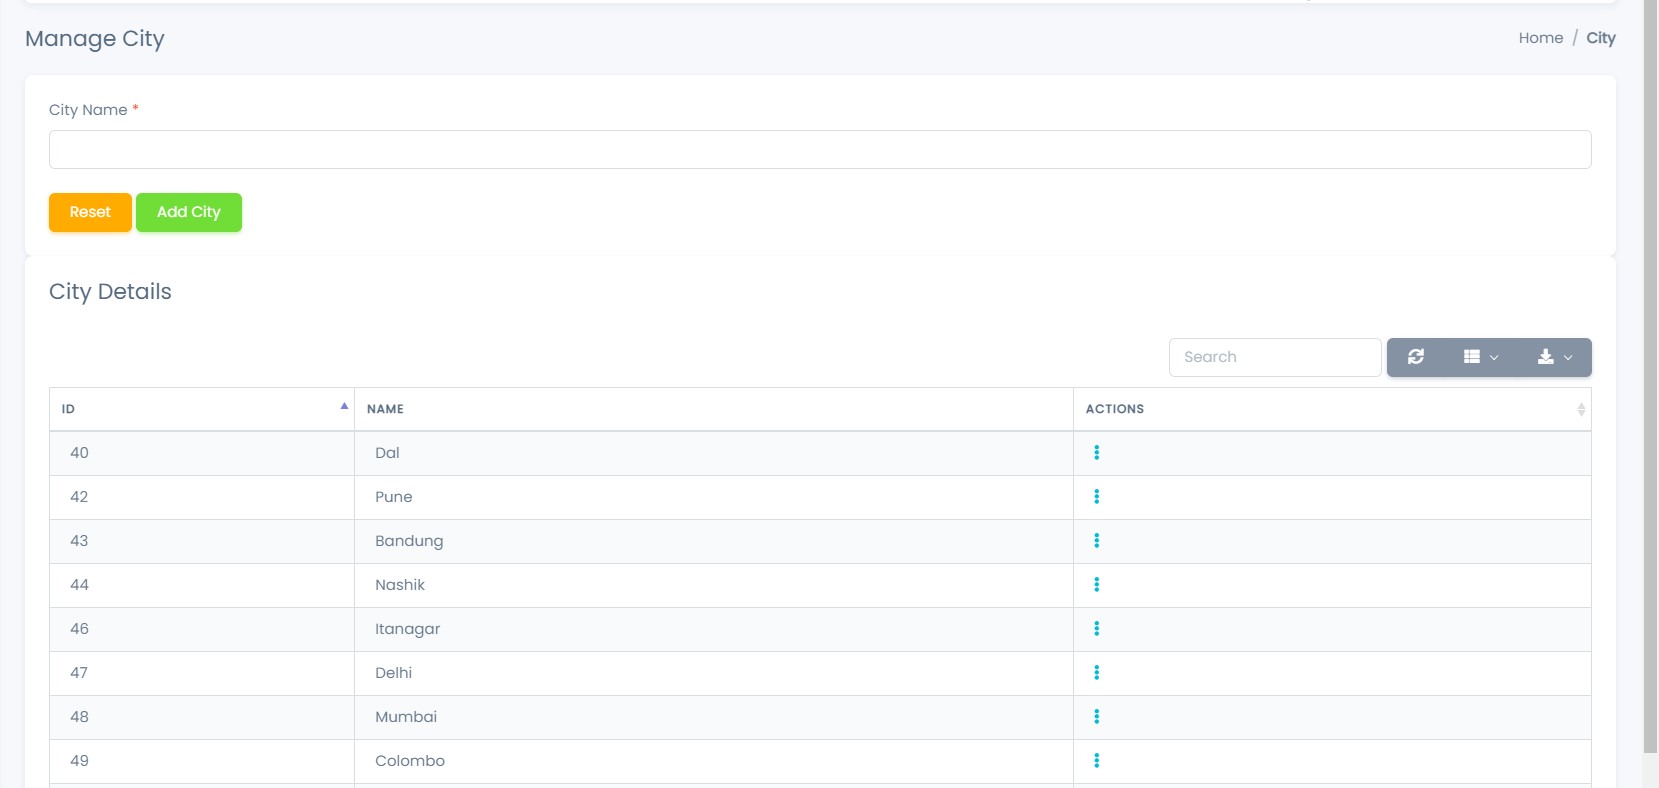
Sample Image
Actions:
-
Used to Delete the
Specific City
-
To Refresh City List
-
Used to filter the City
details according to the criteria
-
Used to Edit the City
details
-
Used to Delete the
Specific City
Adding New Cities

- In City Name field Enter the Name of the City.
- Click Add City button to Add the City or Reset to Reset the form.
Areas
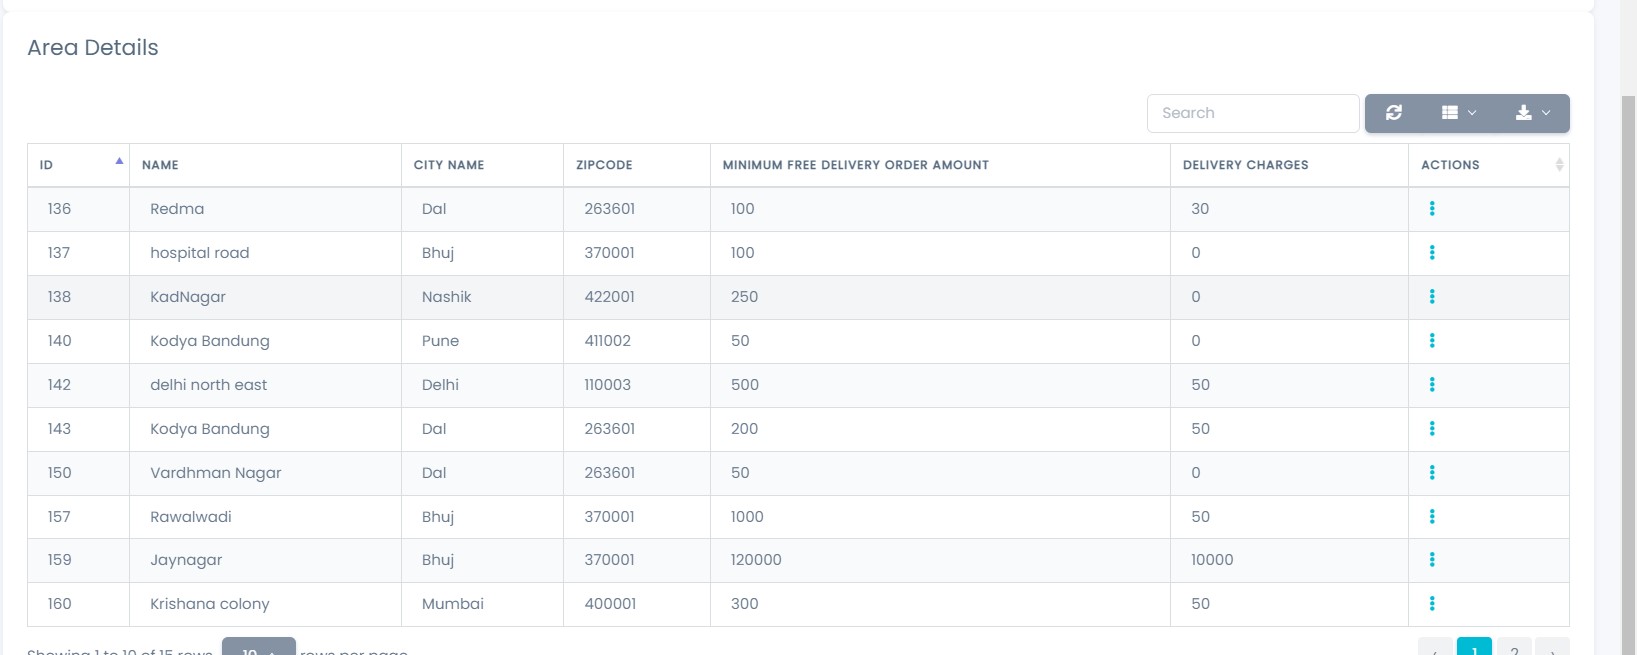
Sample Image
Actions:
-
This feature is used to
search areas according to city's name
-
To Refresh Area List
-
Used to filter the Area
details according to the criteria
-
Used to Edit the Area
details
-
Used to Delete the
Specific Area
Adding New Areas
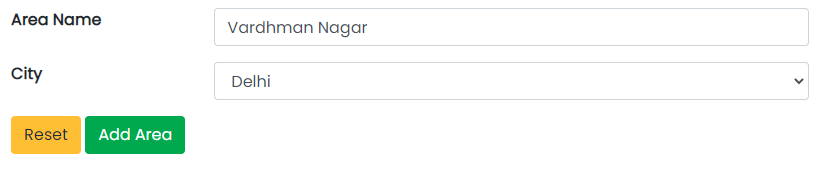
- In Area Name Field Enter the Area Name .
- In City Field Select the City.
- Click Add Area to Add Area or Reset to Reset the form.
Reports
- Sales Report
Sample Image
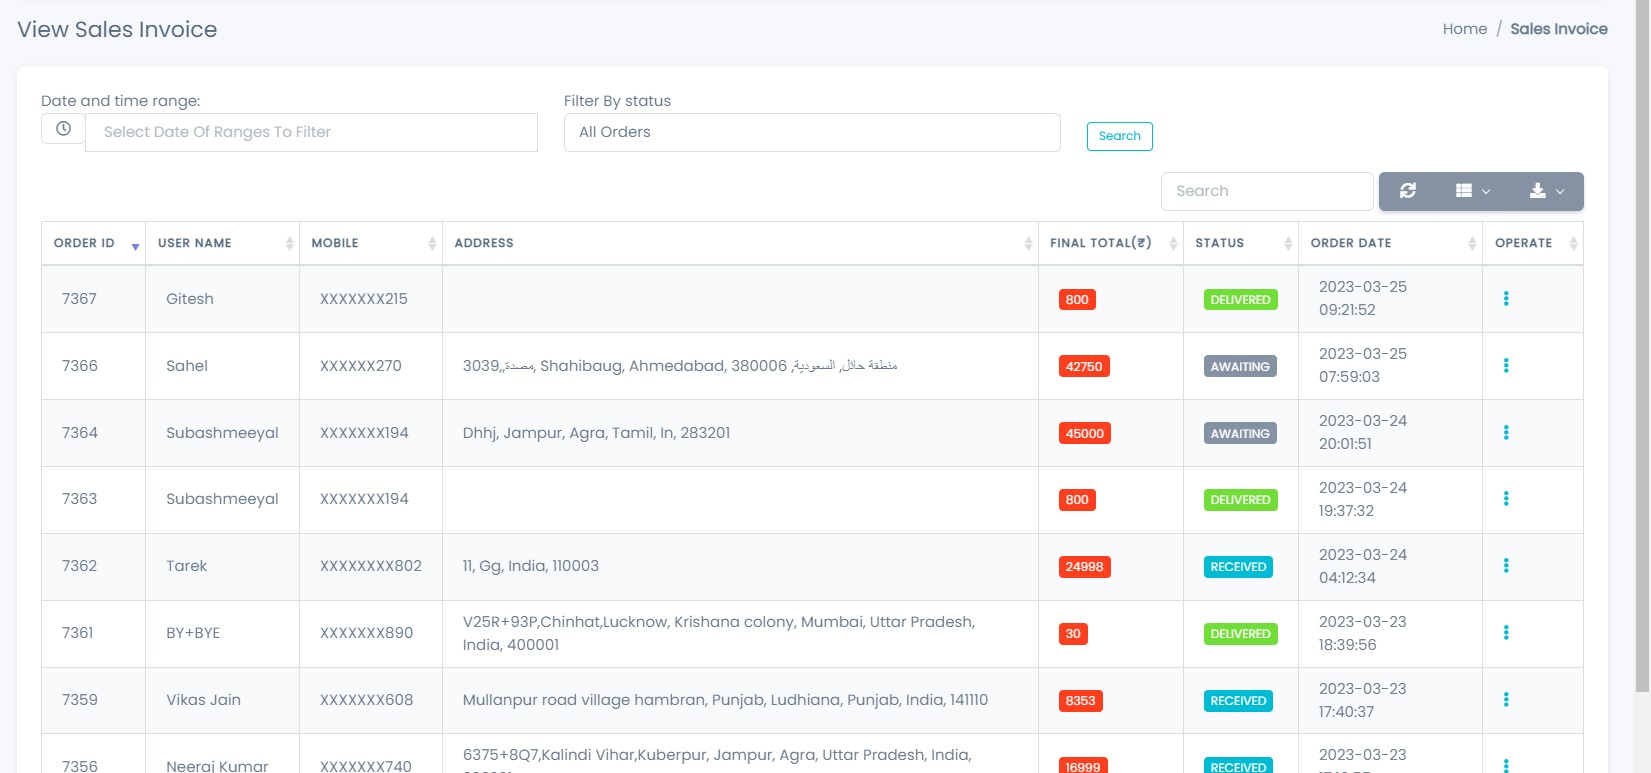
Sales Report
Sample Image
Actions:
-
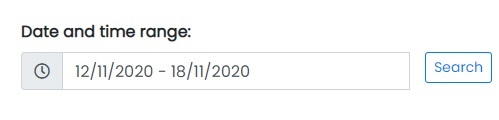 This feature is used to search Sales report data
between dates specified by the user
This feature is used to search Sales report data
between dates specified by the user
-
This feature is used to search Sales report data
-
To Refresh Sales
Report List
-
Used to filter the
Sales Report details according to the criteria
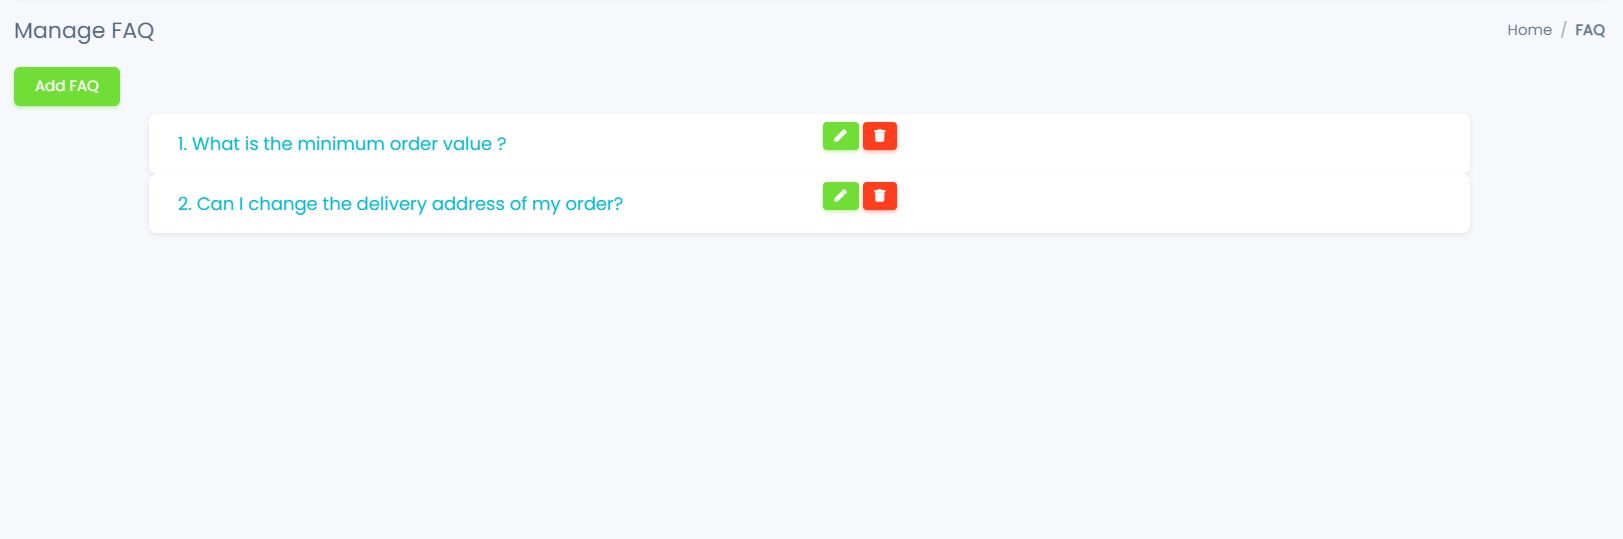
FAQ
Sample Image
In this Panel all The Questions are display Which are asked by the users
Actions:
-
Edit
- Used to Edit the Answers
-
Delete
- Used to delete the Questions
Adding New Faq
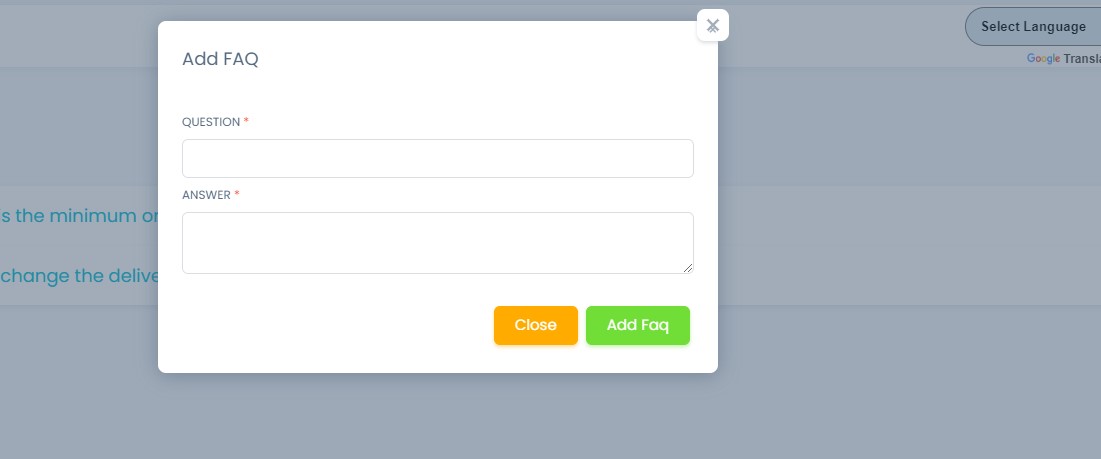
- In Question Field Enter the Question.
- In Answer Field Enter the Answer.
- Click Add Faq to Add Faq or Close to Close the form.
System Flow
Setting Up Product Deliverability
Shipping Flow
- Go to Admin Panel > System > Store Settings. Choose "Product Deliverability" based on your needs.
- Next, visit Admin Panel > System > Shipping Method. Select your preferred shipping method.
- If you opt for "Local Shipping":
- Add zip codes for pincode-based shipping or cities for city-based shipping.
- No pickup location required for local shipping.
- If you prefer "Standard Shipping":
- Set up Shiprocket credentials in the shipping settings.
- Add zip codes and cities in the admin panel.
- Add and approve pickup locations in both Shiprocket and admin panel.
- When adding products, assign pickup locations for smooth delivery.
Note: Keep your delivery settings updated for a seamless experience.
How to Set Up Your Home Page
Web Frontend Home Section
-
Sliders: Displayed in the first section.
Note: Add sliders through the admin panel. -
Popular Categories: Shown in the second section.
Note: Assign categories to products in the admin panel. -
Brands: Displayed in the third section.
Note: Assign brands to products in the admin panel. -
Offers and Flash Sales: Shown in the fourth section.
Note: Add two entries to the feature section and one entry for offers or flash sales in the admin panel.
Configuring Orders with Bank Transfer Payments
Bank Transfer Workflow
-
Configure the bank details in the Payment Methods Settings within the admin
panel.
Customers will select the bank transfer option during checkout.
After placing the order, the customer must upload a payment receipt.
Note: The customer must submit the payment receipt from the order details page for admin verification. -
Once the receipt is uploaded:
- Navigate to the admin panel.
- Go to the Orders section.
- Identify orders with the bank transfer payment method and proceed to:
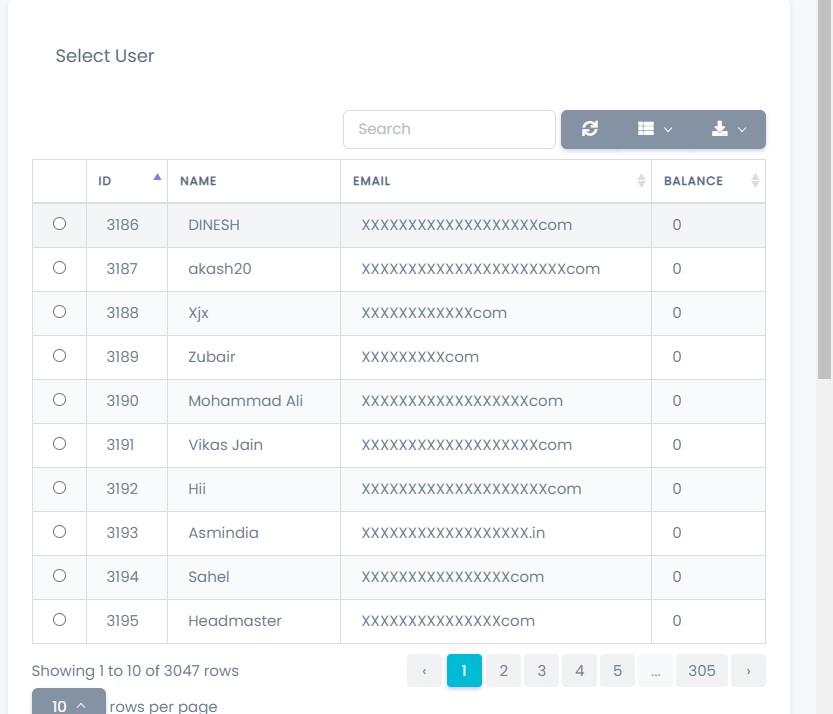
- Admin panel -> Customers -> Transaction
- Update the transaction status to "Success," and include the transaction ID and a message. Save the updates.
- Next, go to:
- Admin panel -> Orders -> View Orders
- Change the order status to "Accepted" under the bank transfer section. You can then update the order status as required.
Difficulty in User Registration?
Configuration for Registration
- There are two methods for configuring user registration:
-
- Firebase Settings
- SMS Gateway Settings
-
Authentication Method
- Navigate to the admin panel.
- Go to System.
- Select Authentication Method.
- Firebase Authentication
- Custom SMS Gateway OTP based
-
Firebase Settings:
- Navigate to the admin panel.
- Go to Web Settings.
- Select Firebase.
-
SMS Gateway Settings:
- Navigate to the admin panel.
- Go to System.
- Select SMS Gateway Settings.