What is eRestro?
The eRestro system will make it possible to purchase meals through
Application.
This is an additional sales channel that will increase the number of orders carried out at
your eatery.
It is great way to attract customers near you.
An eRestro for you. Open up to new opportunities and win clients and
Restaurants online - on this system and in applications.
In this system, New restaurants can register on system and Super admin can accept or rejct
according to details.
Super Admin will get commission per Restaurant.
Super admin can add delivery boy for order delivery and set multiple commission methods.
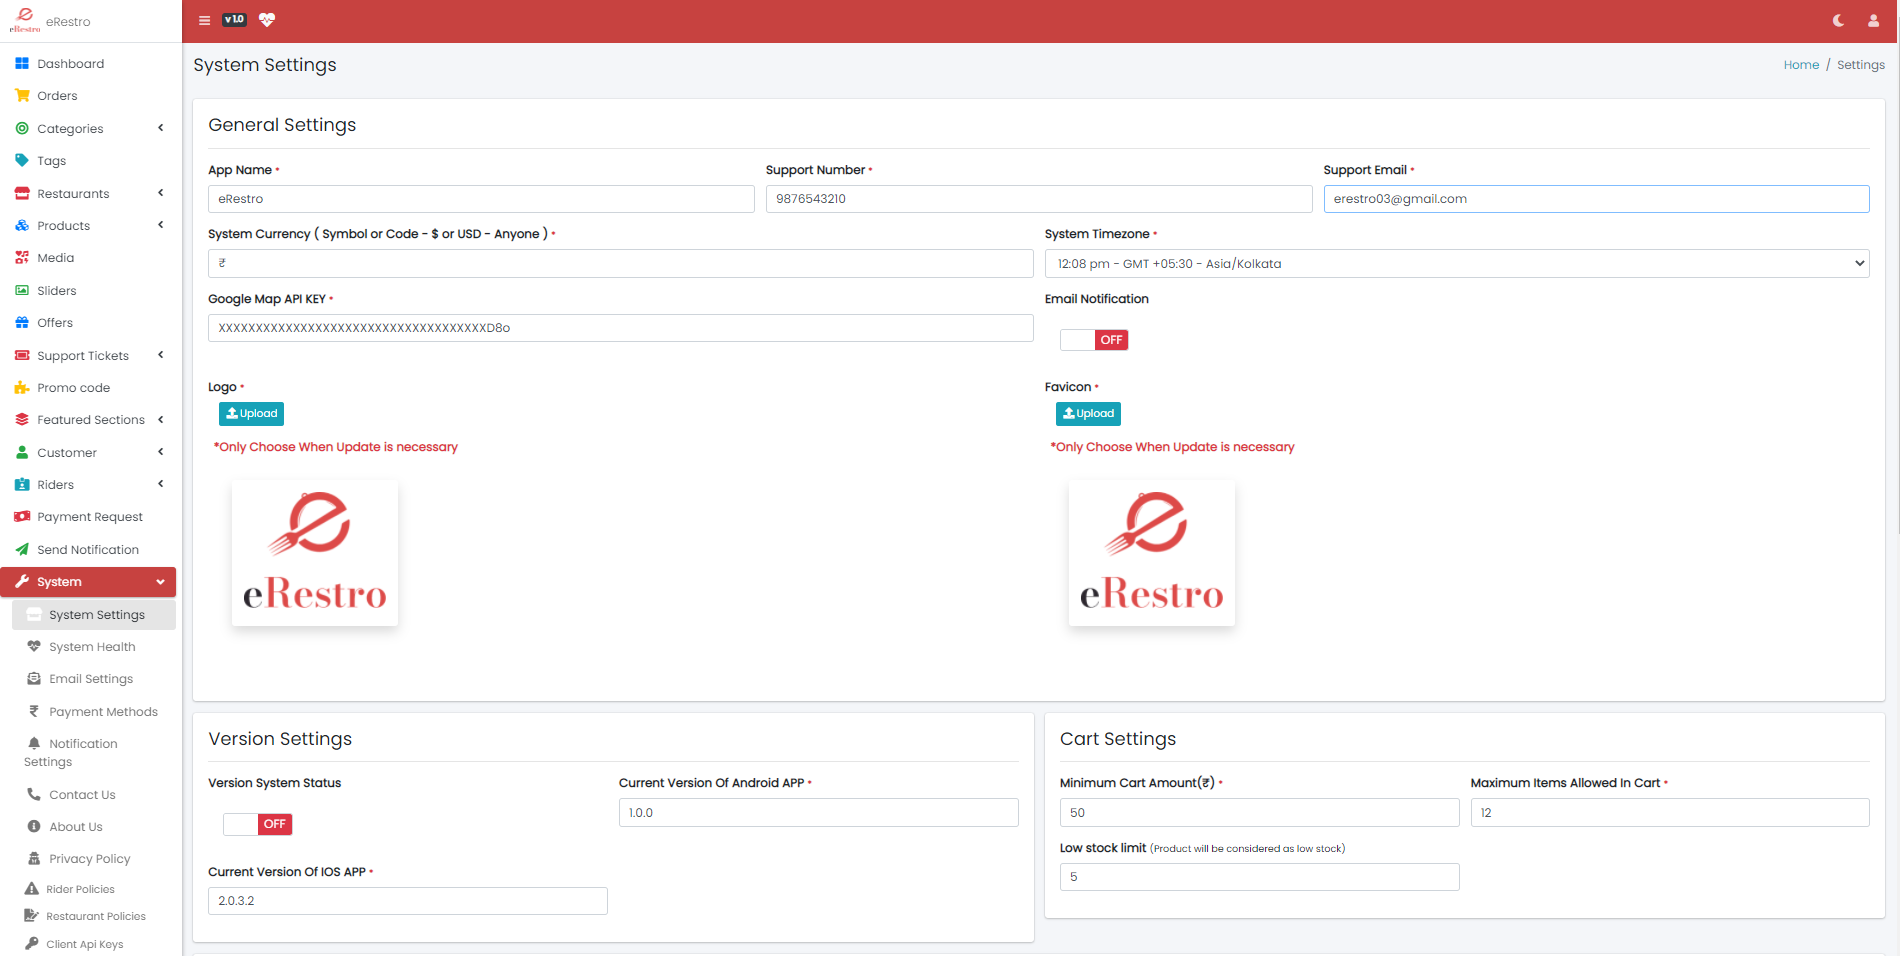
System Settings
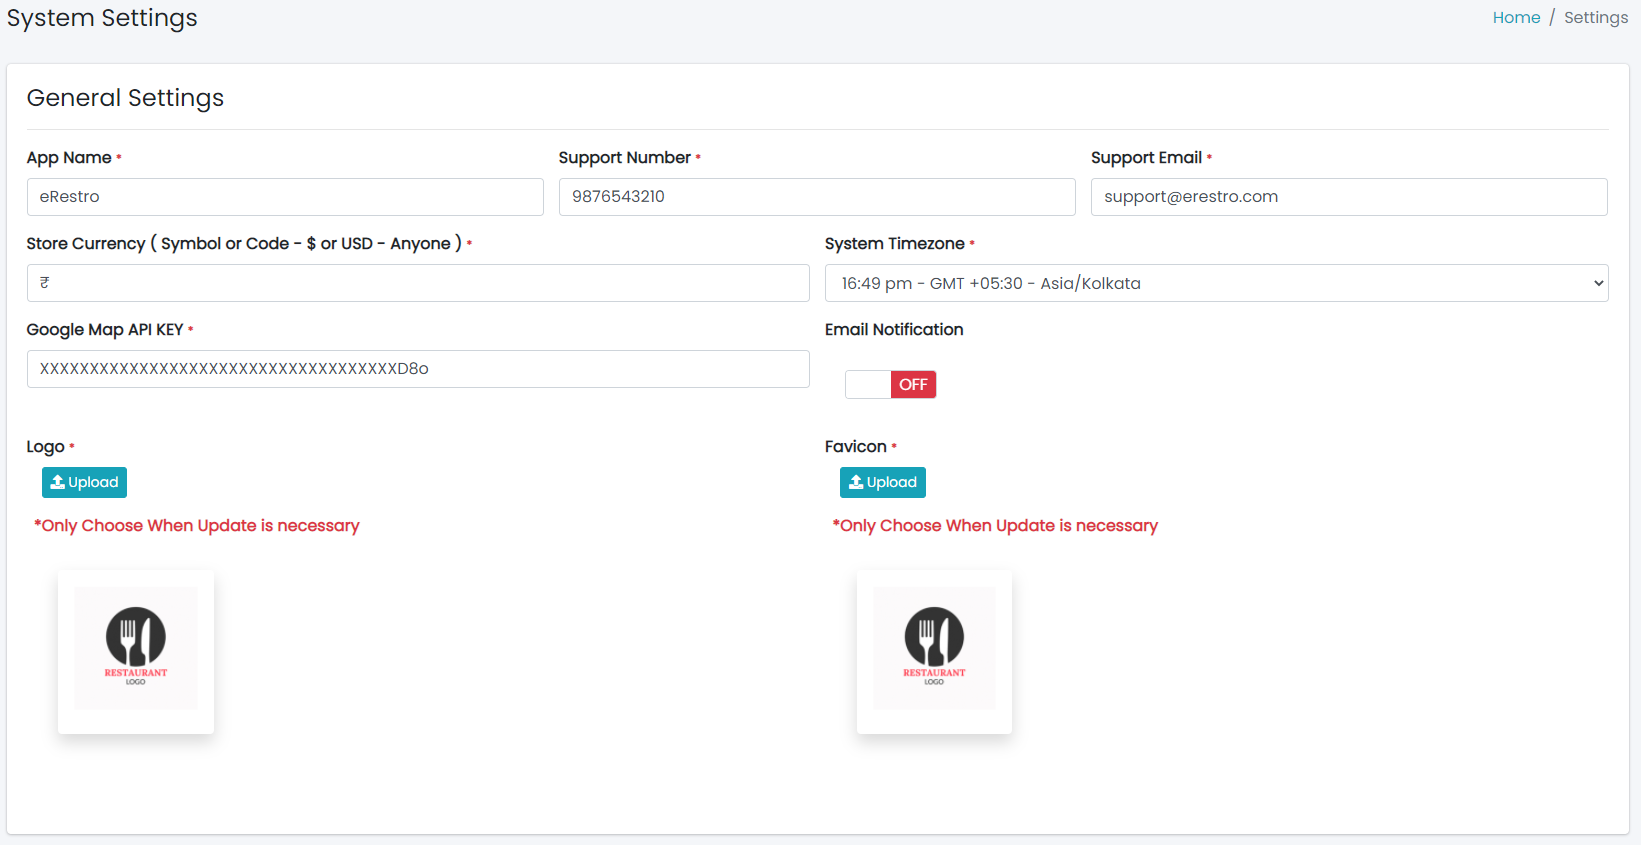
- General Settings
- App Name : Enter your System name.
- Support Number : Enter your System Support Number for any query.
- Support Email : Enter your Support Email.On this email you will receive all the
notifications.
- System Currency : Set your System Currency.
- System Timezone : Set your System Timezone according to your country.
- Google Map API KEY : You have to create Google Map API KEY. We have separate menu
for setup. this API key Here you can check
documentation for that
Please do carefully. you need to follow documentation properly.
You need to enable 1) places, 2)drawing, &
3)distancematrix these APIs
Visit this documentation for enable or disable the APIs
- Email Notification : Email notification on system email, restaurant email and
customer email will enable or disable by this settings.
- Logo : Set your System Logo.
- Favicon : Set your System Favicon.
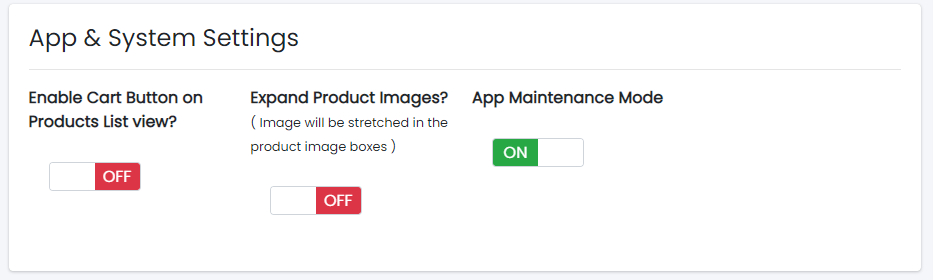
- Application Version Settings
This settign is use for manage system version on application and admin panel side.
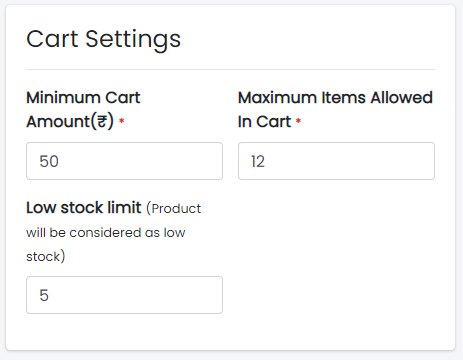
- Cart Settings
- Minimum Cart Amount : User have to add item in cart atleast minimum amount.
- Maximum Items Allowed In Cart : Maximum number of items user can add items in cart.
- Low stock limit : Set number of stock limit that you can see number of product are
out of stock when perticular product will reach that limit.You can see that Low
stock product count on Admin dashboard.
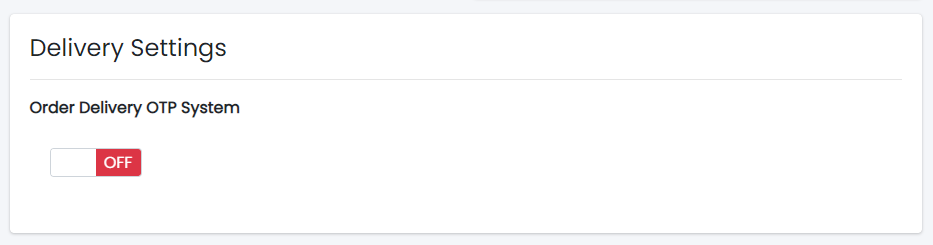
- Delivery Settings
- App & System Settings
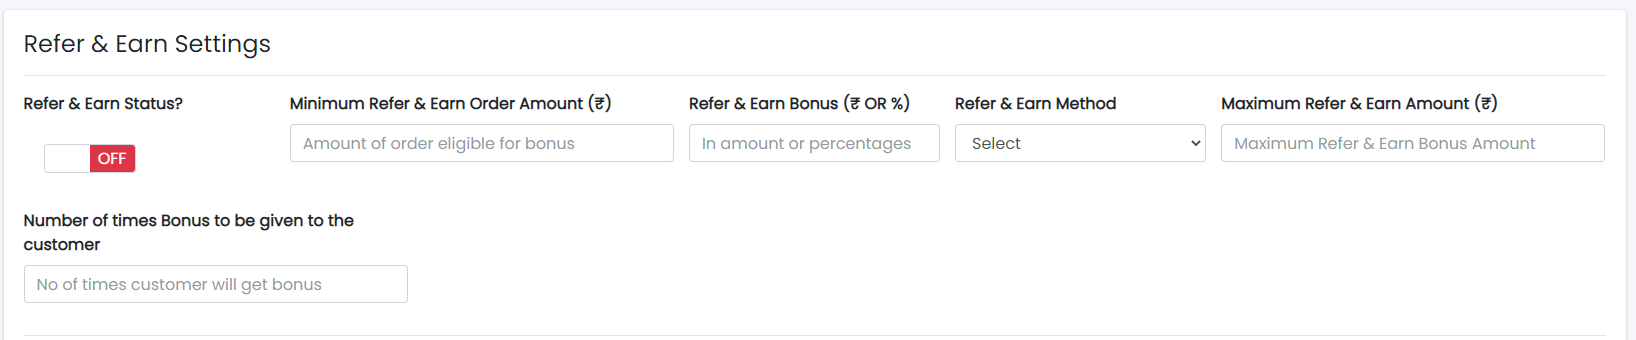
- Refer & Earn Settings
- Refer & Earn Status: You can enable or disable the refer & earn system
- Minimum Refer & Earn Order Amount: minimum order amount to apply this system
- Refer & Earn Method: you can select method percentage(%) or flat amount for bonus
- Refer & Earn Bonus: as you select method you can set amount or number as you want.
- Maximum Refer & Earn Amount: You can also set maximum amount for bonus if bonus
amount will increase this maximum amount then user will get this maximum amount as
bonus.
- Number of times Bonus to be given to the customer: You can also set number of time
user can get bonus as per he/she place an order.
- Note: Customer will get bonus in his wallet as his order will delviered
successfully.
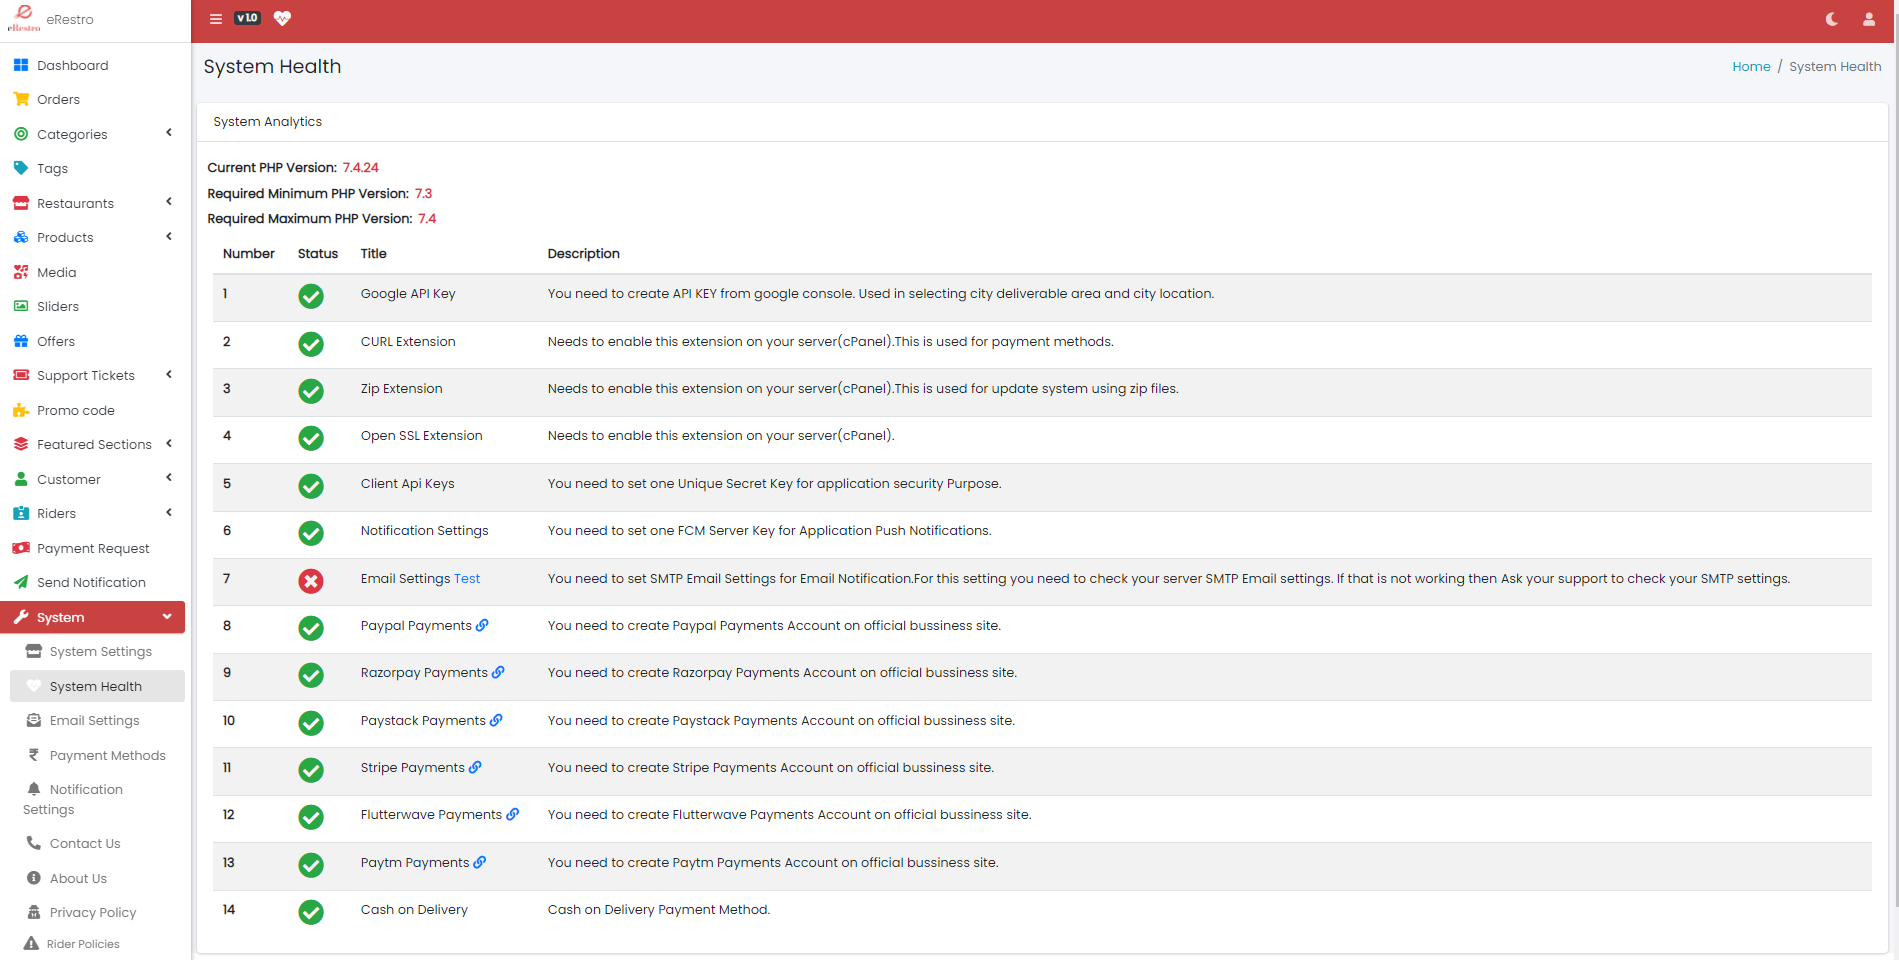
System Health
Here you can check which module is enable or disabled on your system and server. You can see
the status or health of system
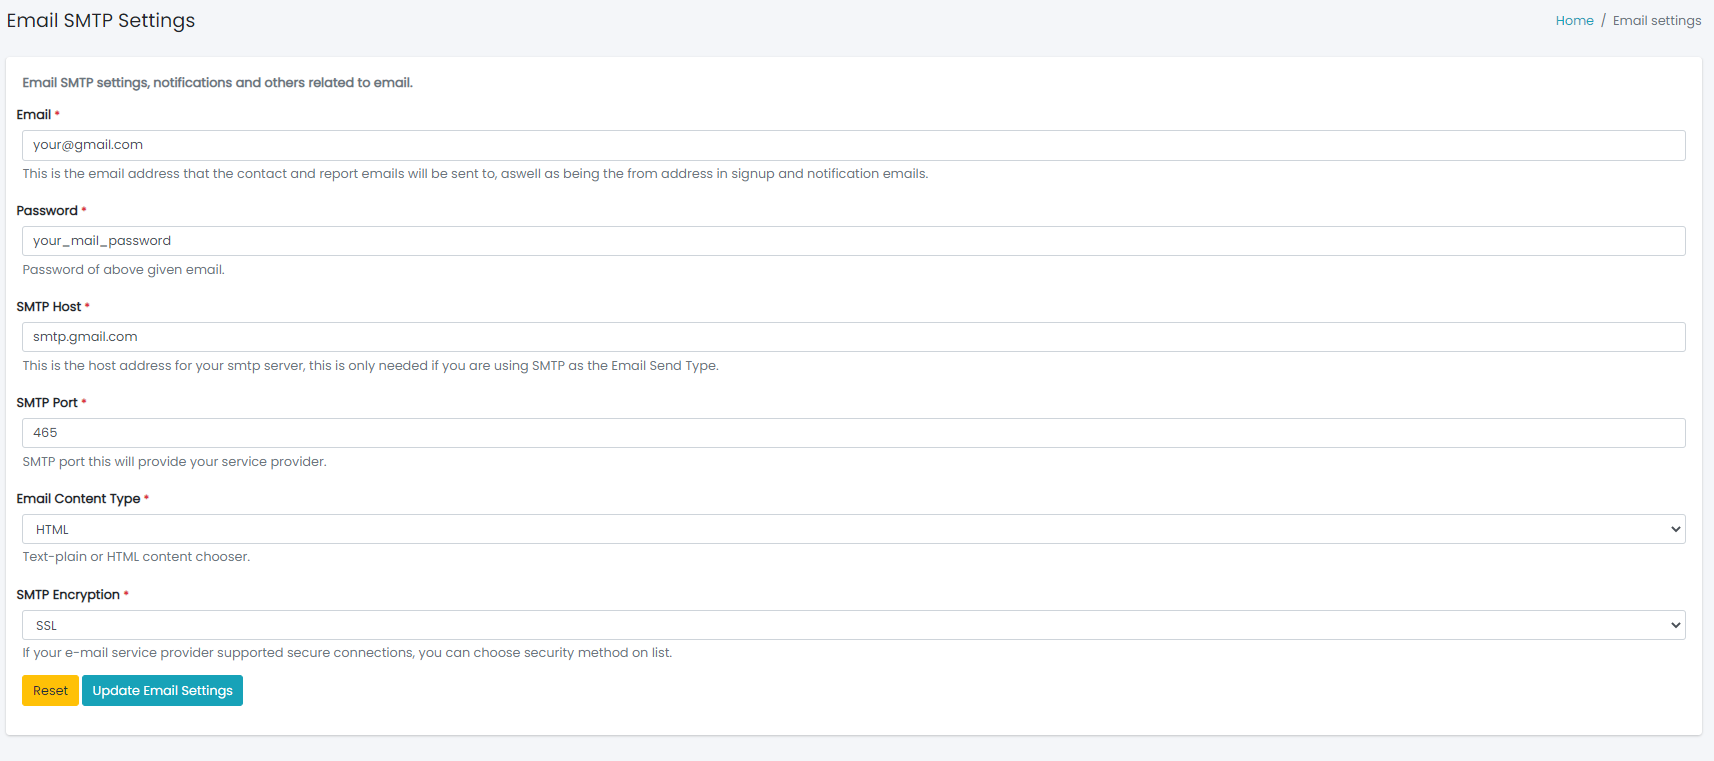
Email Settings
Configure Email settings.
Just go to Settings -> Email(SMTP) settings.
You can check your SMTP Email settings at this URL
- Type the host name.
- Type SMTP user name.
- Type SMTP Password.
- Enter SMTP Port no.
- Select SMTP Encryption Type
- Select Mail type (HTML,TEXT)
Notification Settings
Configure Notification Settings from firebase console for application push notification.
Just go to System -> Notification Settings.
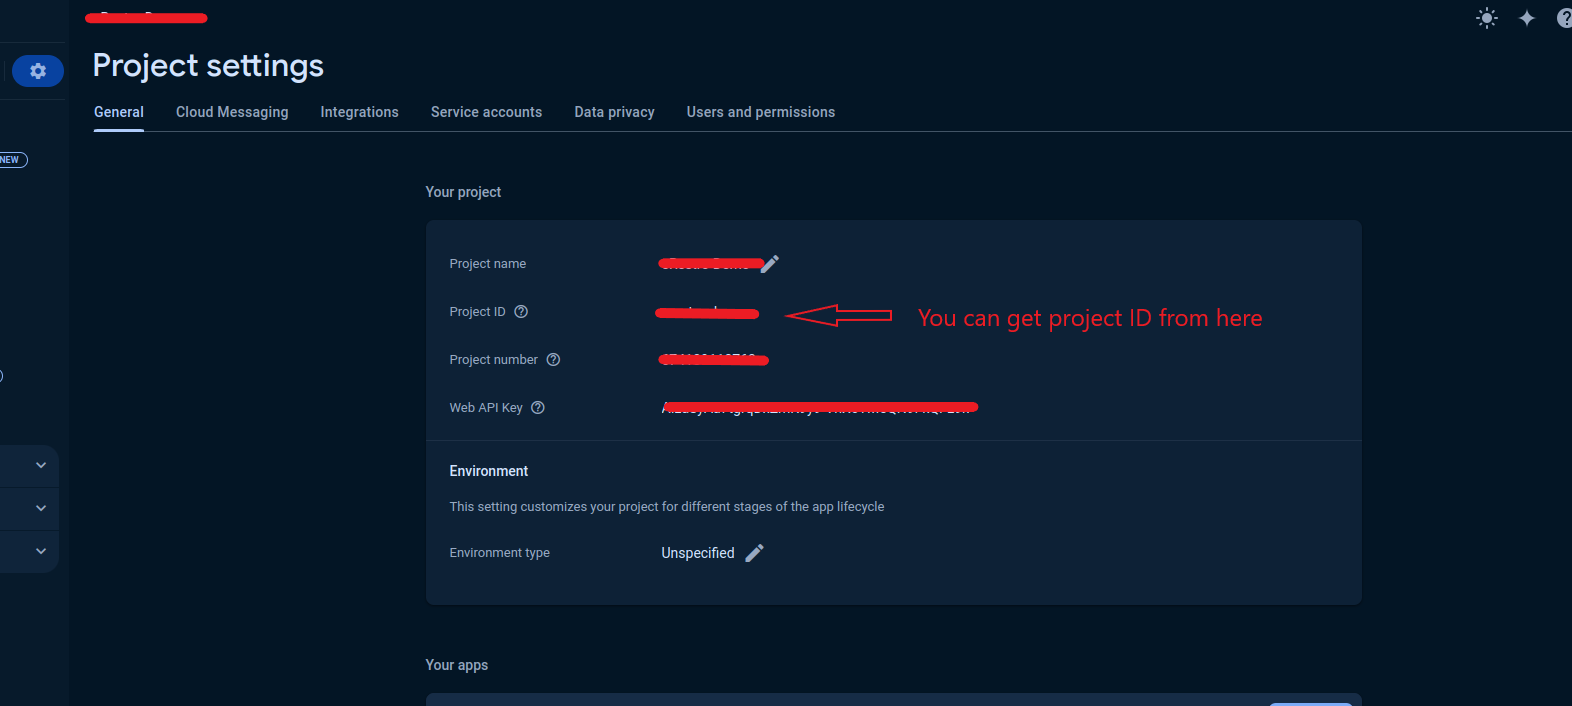
Firebase Project Id
- In the Firebase console, go to Project Settings.
- Go to > General where Project Id is given add that to Admin Panel in System Settings >
Notification Setting.
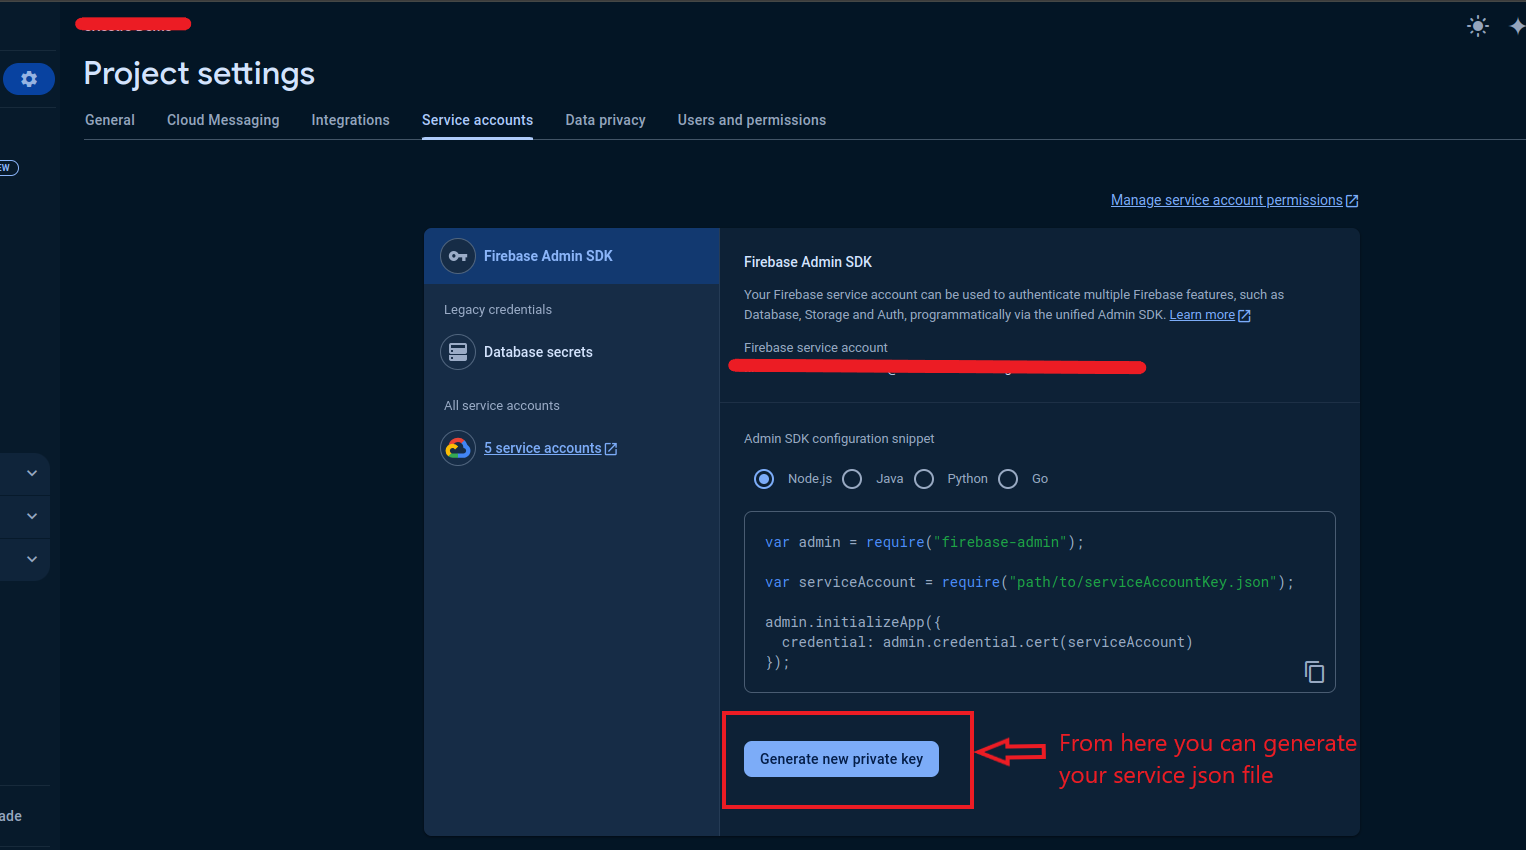
Service Json File
- In the Firebase console, open Settings > Service Accounts.
- Click Generate New Private Key, then confirm by clicking Generate Key.
- Securely store the JSON file containing the key and upload in Admin Panel in System
Settings > Notification Setting.
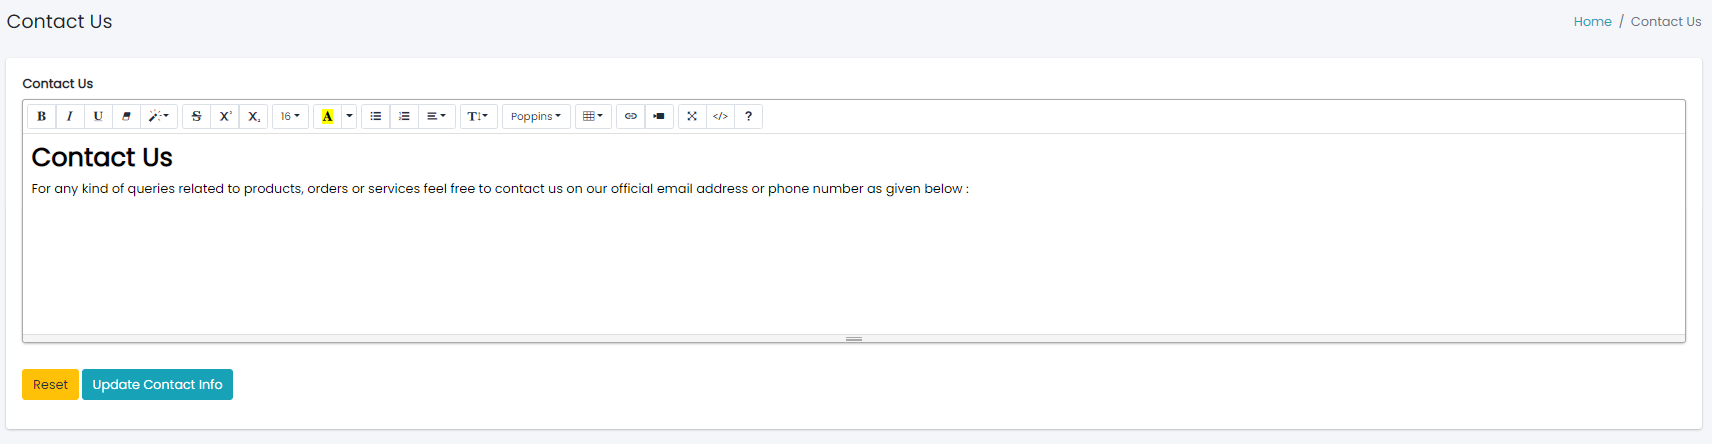
Contact us
Configure Contact us settings.
Just go to System -> Contact us.
- Enter all Contact us under Contact us section.
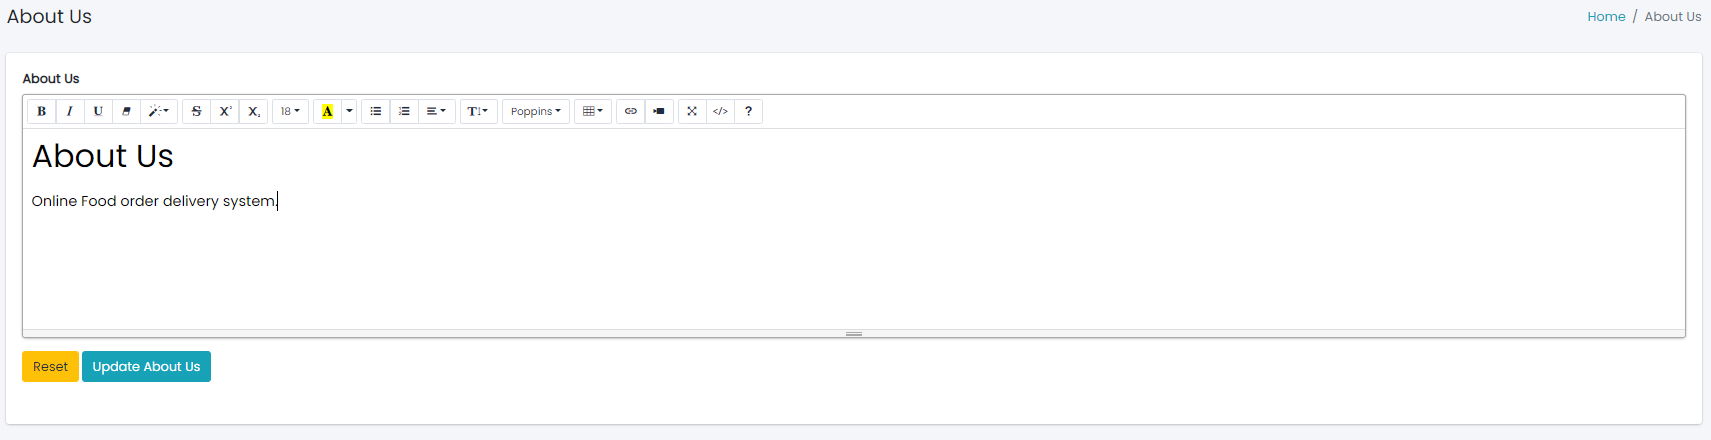
About us
Configure About us settings.
Just go to System -> About us.
- Enter all About us under About us section.
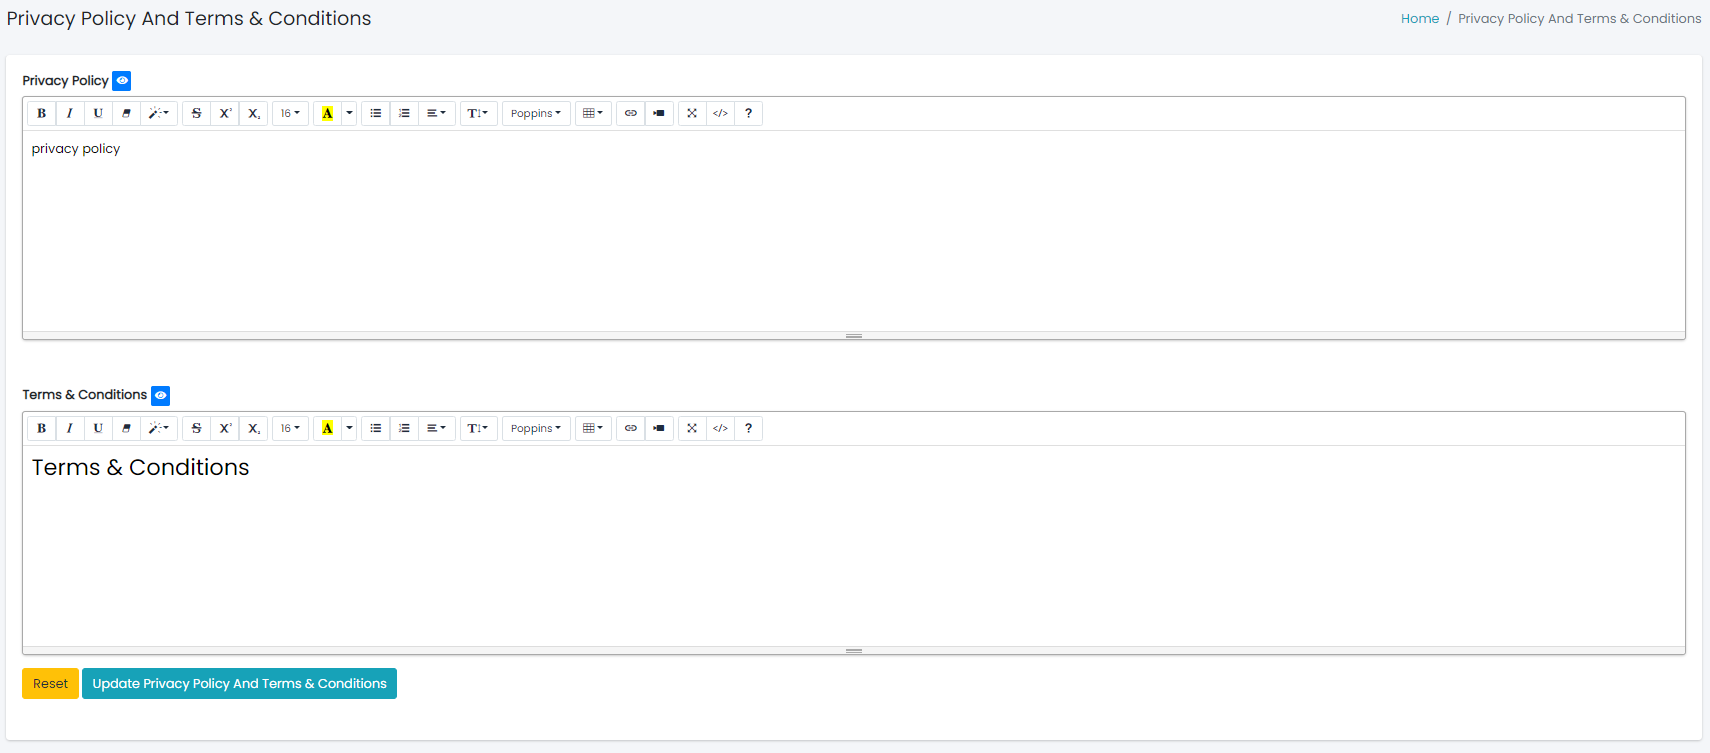
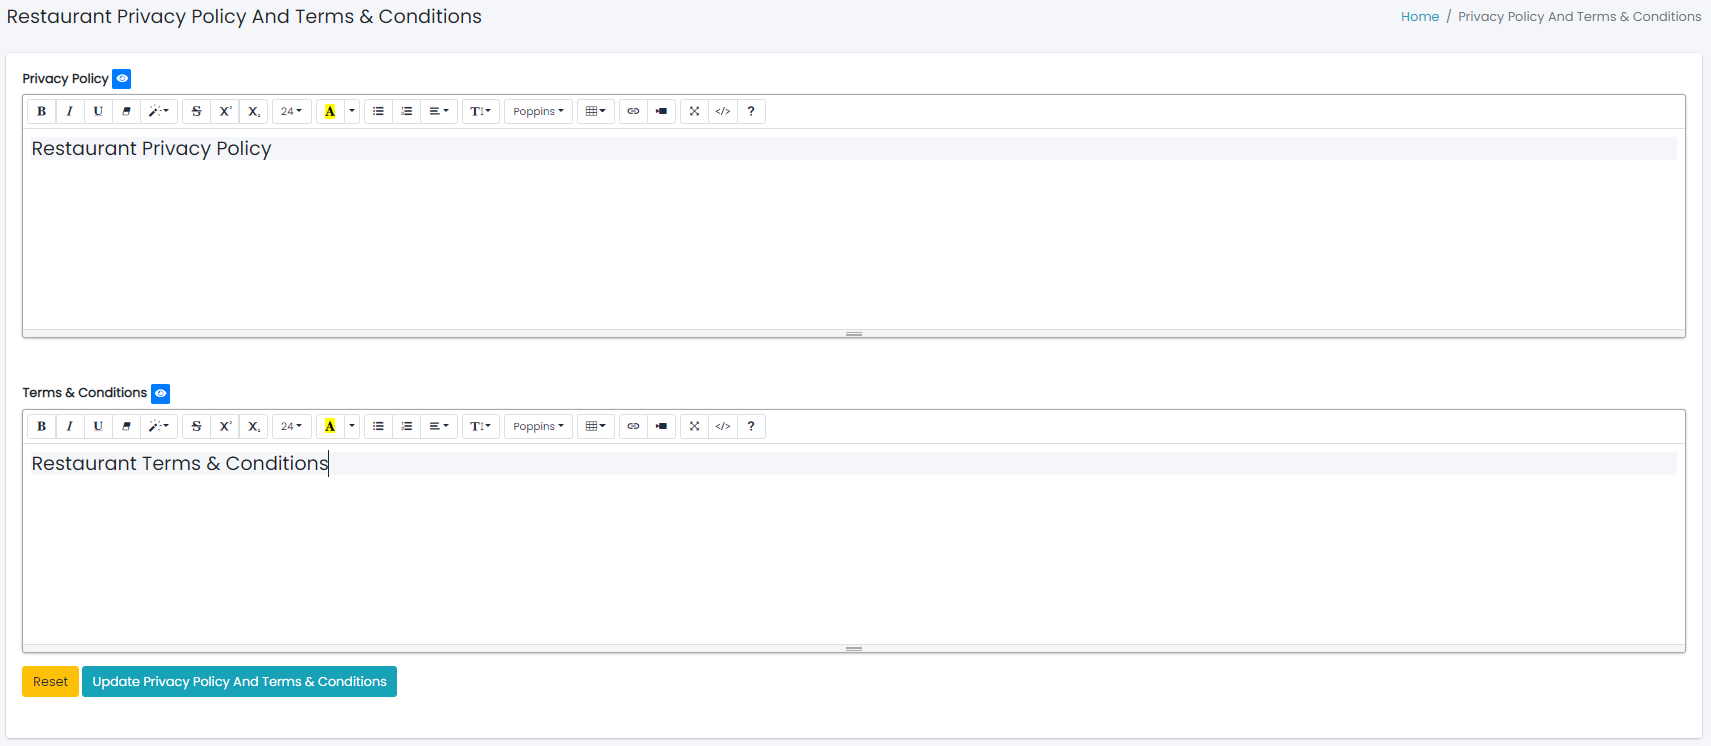
Privacy Policy And Terms & Conditions
Configure Privacy Policy And Terms & Conditions settings for customer application.
Just go to System -> Privacy Policy.
- Enter all Privacy Policy And Terms & Conditions details accordingly.
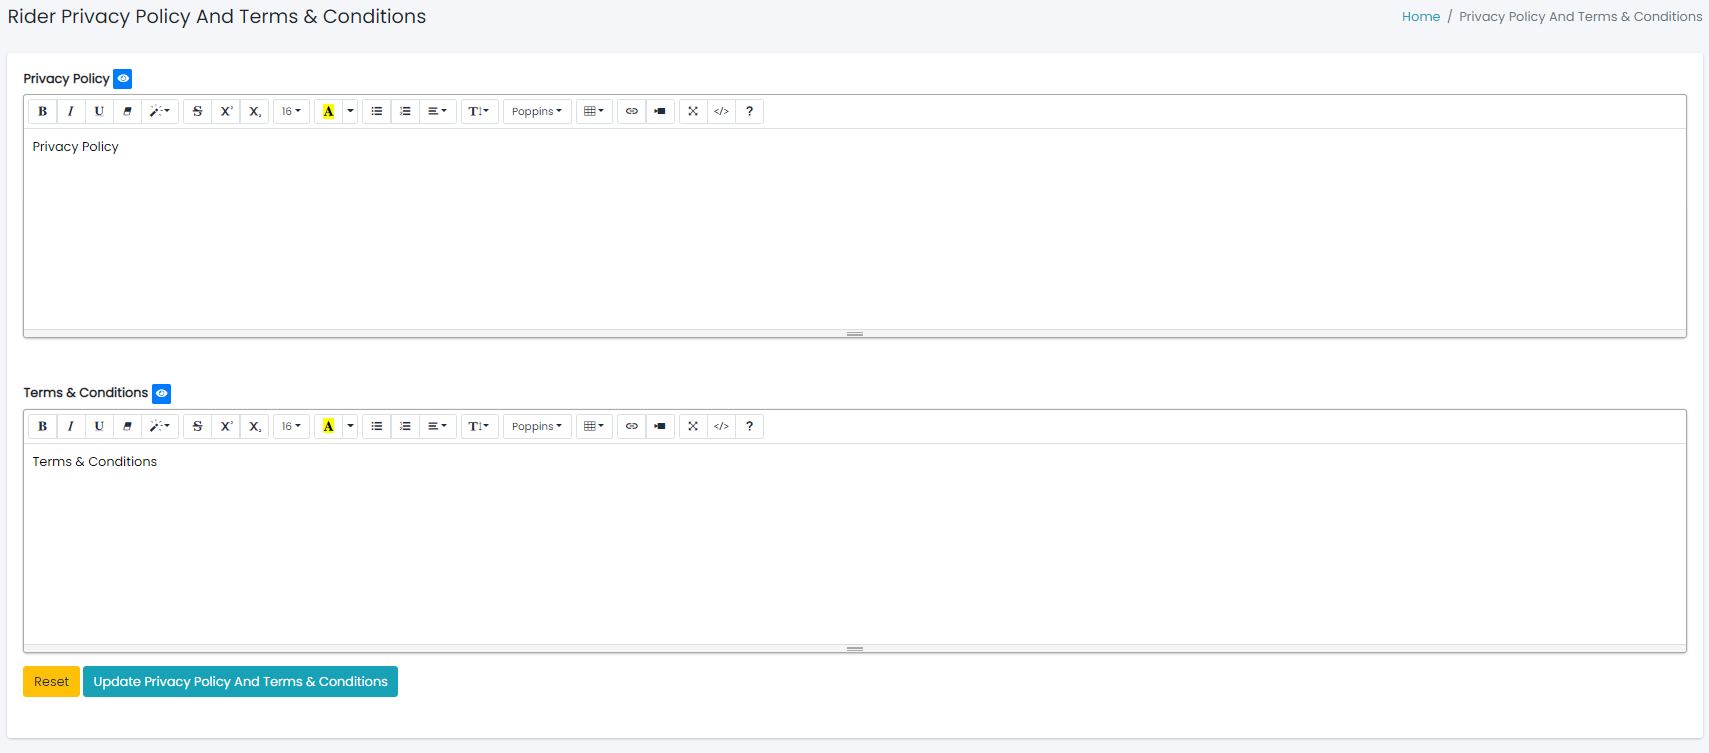
Rider Policies And Terms & Conditions
Configure Privacy Policy And Terms & Conditions.
Just go to System -> Rider Policies.
- Enter all Privacy Policy And Terms & Conditions under Privacy Policy And Terms &
Conditions section accordingly.
Restaurant Policies And Terms & Conditions
Configure Privacy Policy And Terms & Conditions.
Just go to System -> Restaurant Policies.
- Enter all Privacy Policy And Terms & Conditions under Privacy Policy And Terms &
Conditions section accordingly.
Client Api Keys
Configure Client Api Keys settings.You have to create one secret key for Security Token.You
have to set this key at application also.
Just go to System -> Client Api Keys.
- Enter Client Name field.
- Click on Add Client API.
- Reload the page and you will see the added details at following table.There you can
active or deactive the key.
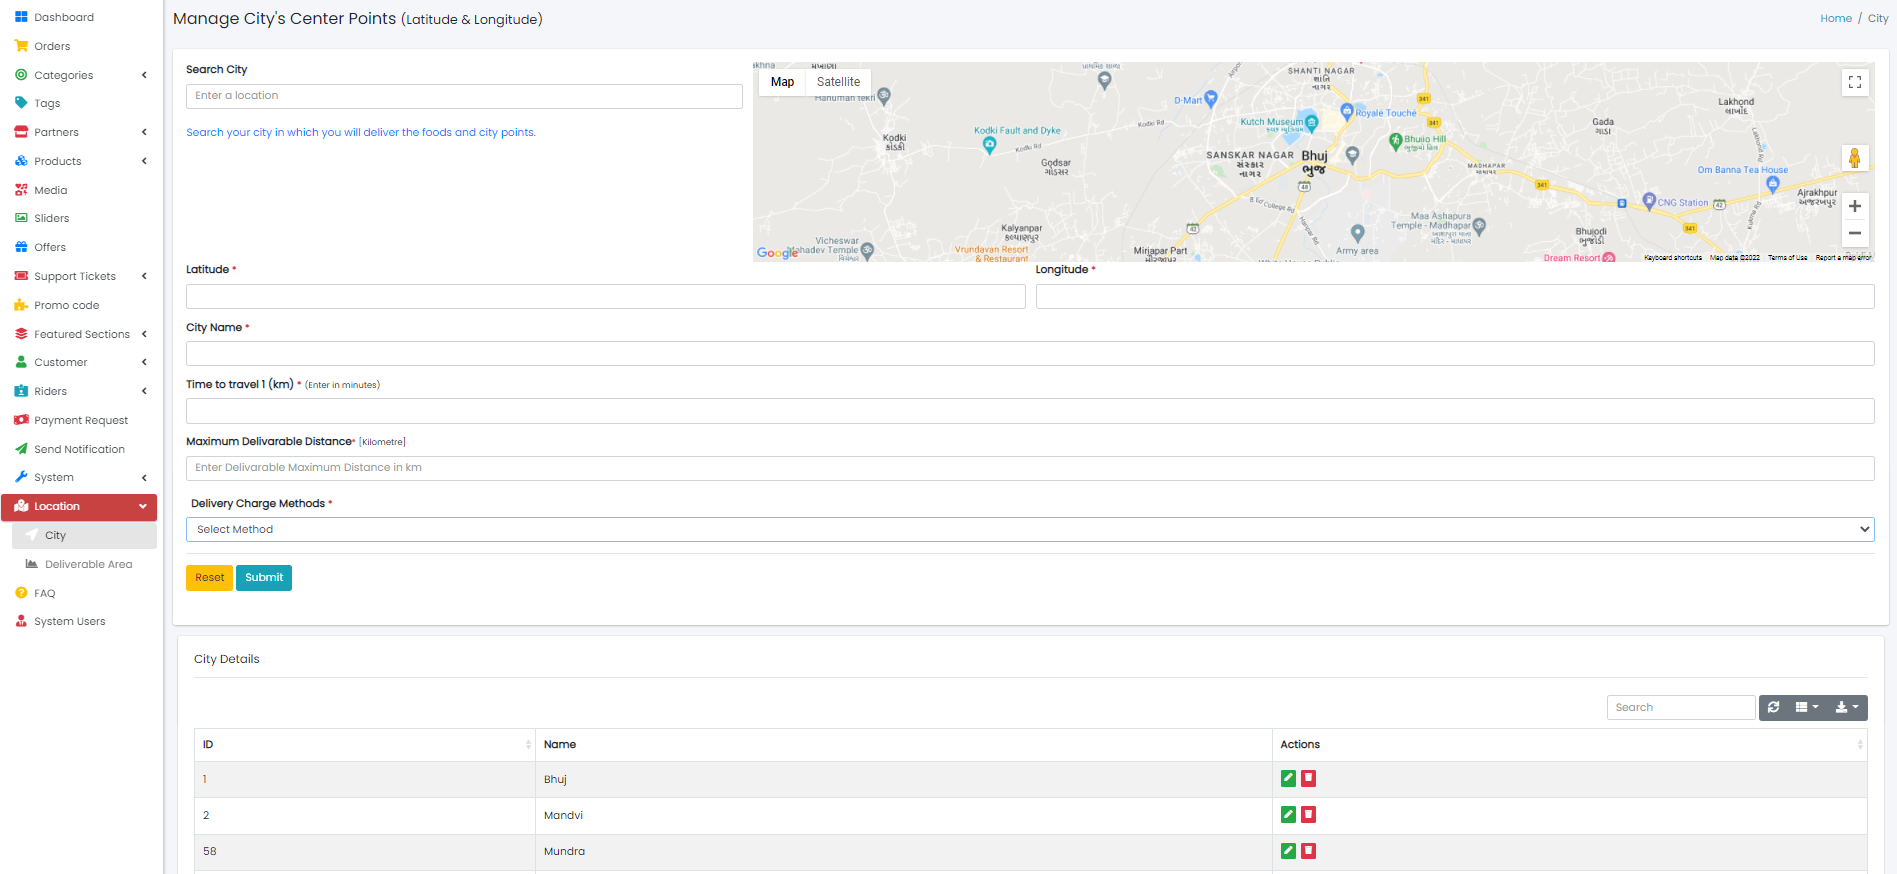
Delivarable City Area
Configure Delivarable City Area at Location -> Deliverable Area.
- Before configure the city area you have to add city in which you are going to delivery
the online food.As you see following image there you can add city Location ->
City
- For more details about this you can see City Tab explanation.
Here
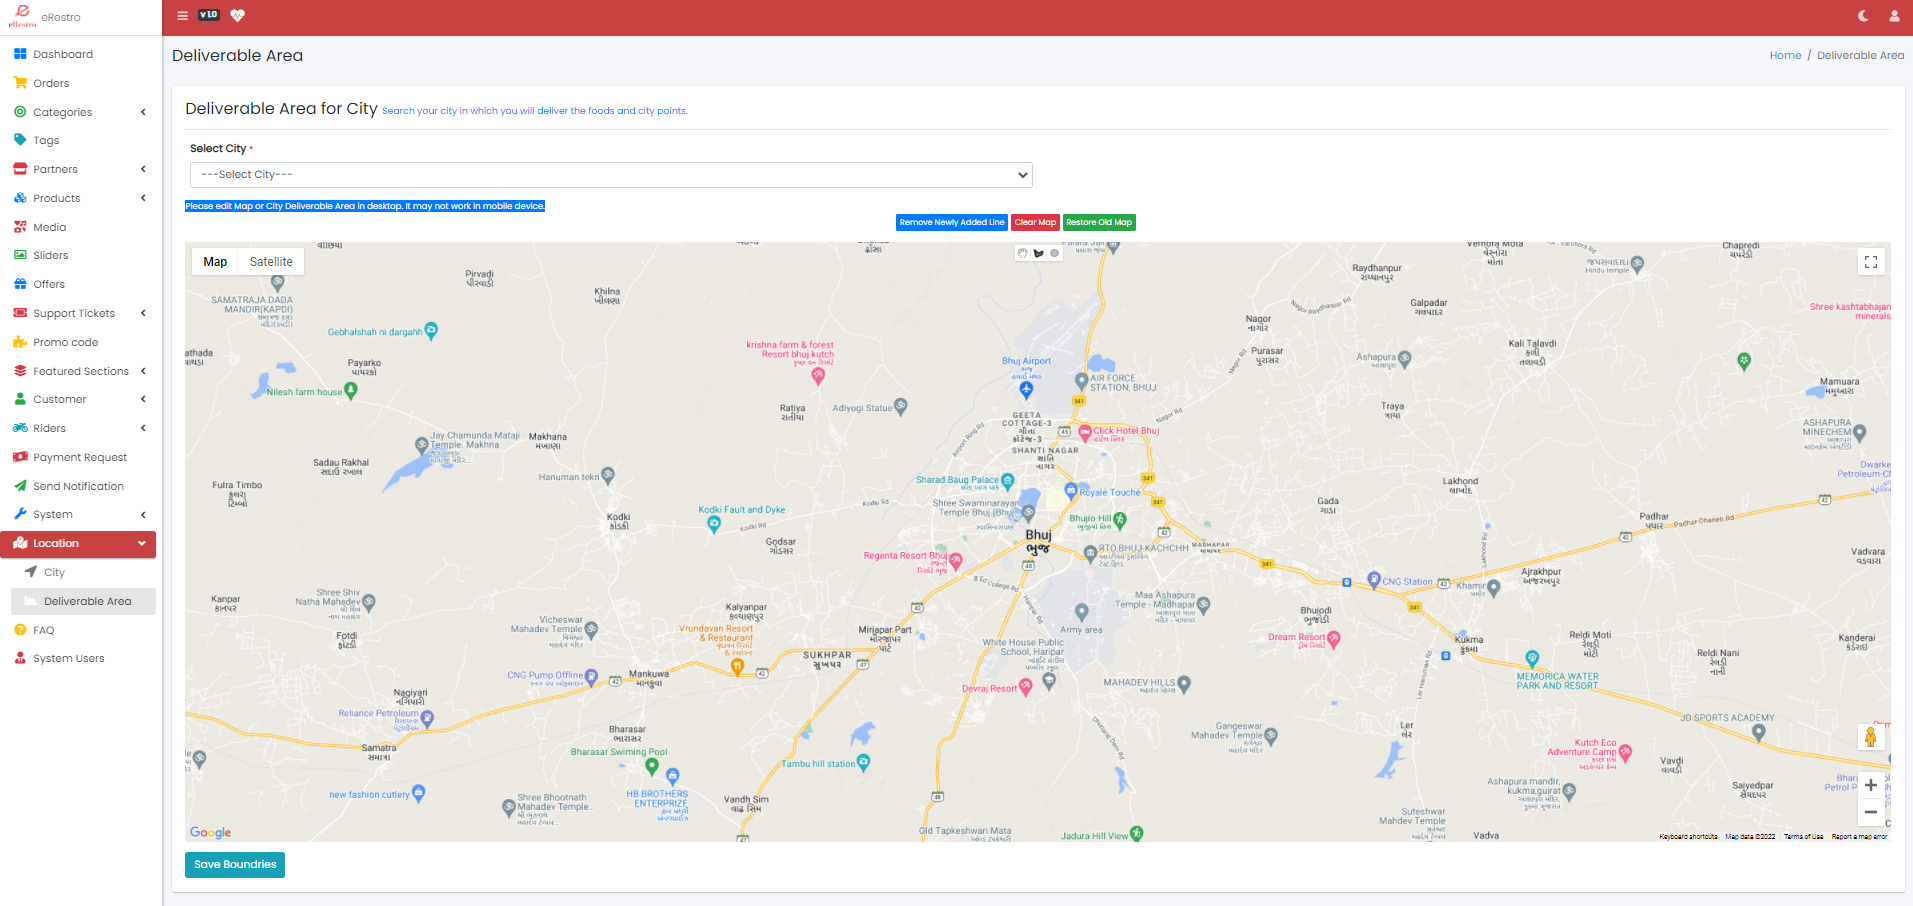
- After adding the city go to Location -> Deliverable Area
- Here, You need to select the city in which you want to set the delivarable area.You can
see following image.
- Here note the point that you can set city area approximately.
- If you have already set area for perticular city then it will show the drawing or shape
that you have made for that city.
- You can change the area by drawing the new shape.
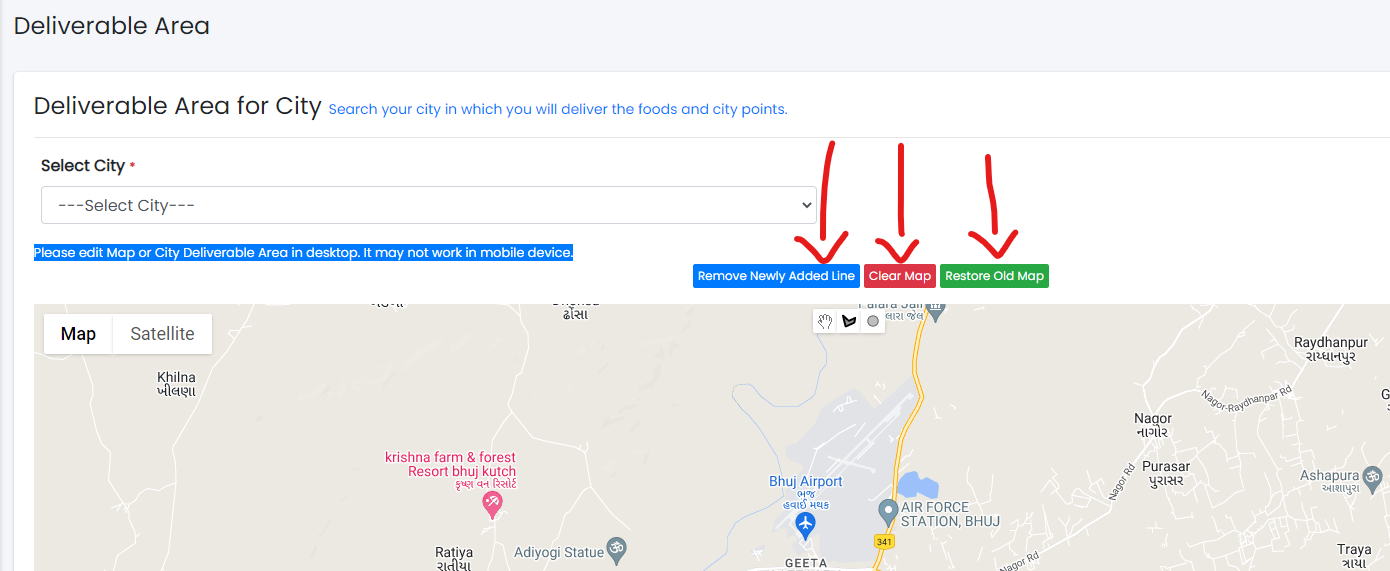
- Also use some action button we have given above map. See the following image.
- We have 3 buttons
- Remove Newly Added Line : You can remove new Drawed shape.
- Clear Map : You can clear all the shape you have drawed.
- Restore Old Map : You can Restore the old saved shape of city which you have
saved in database.
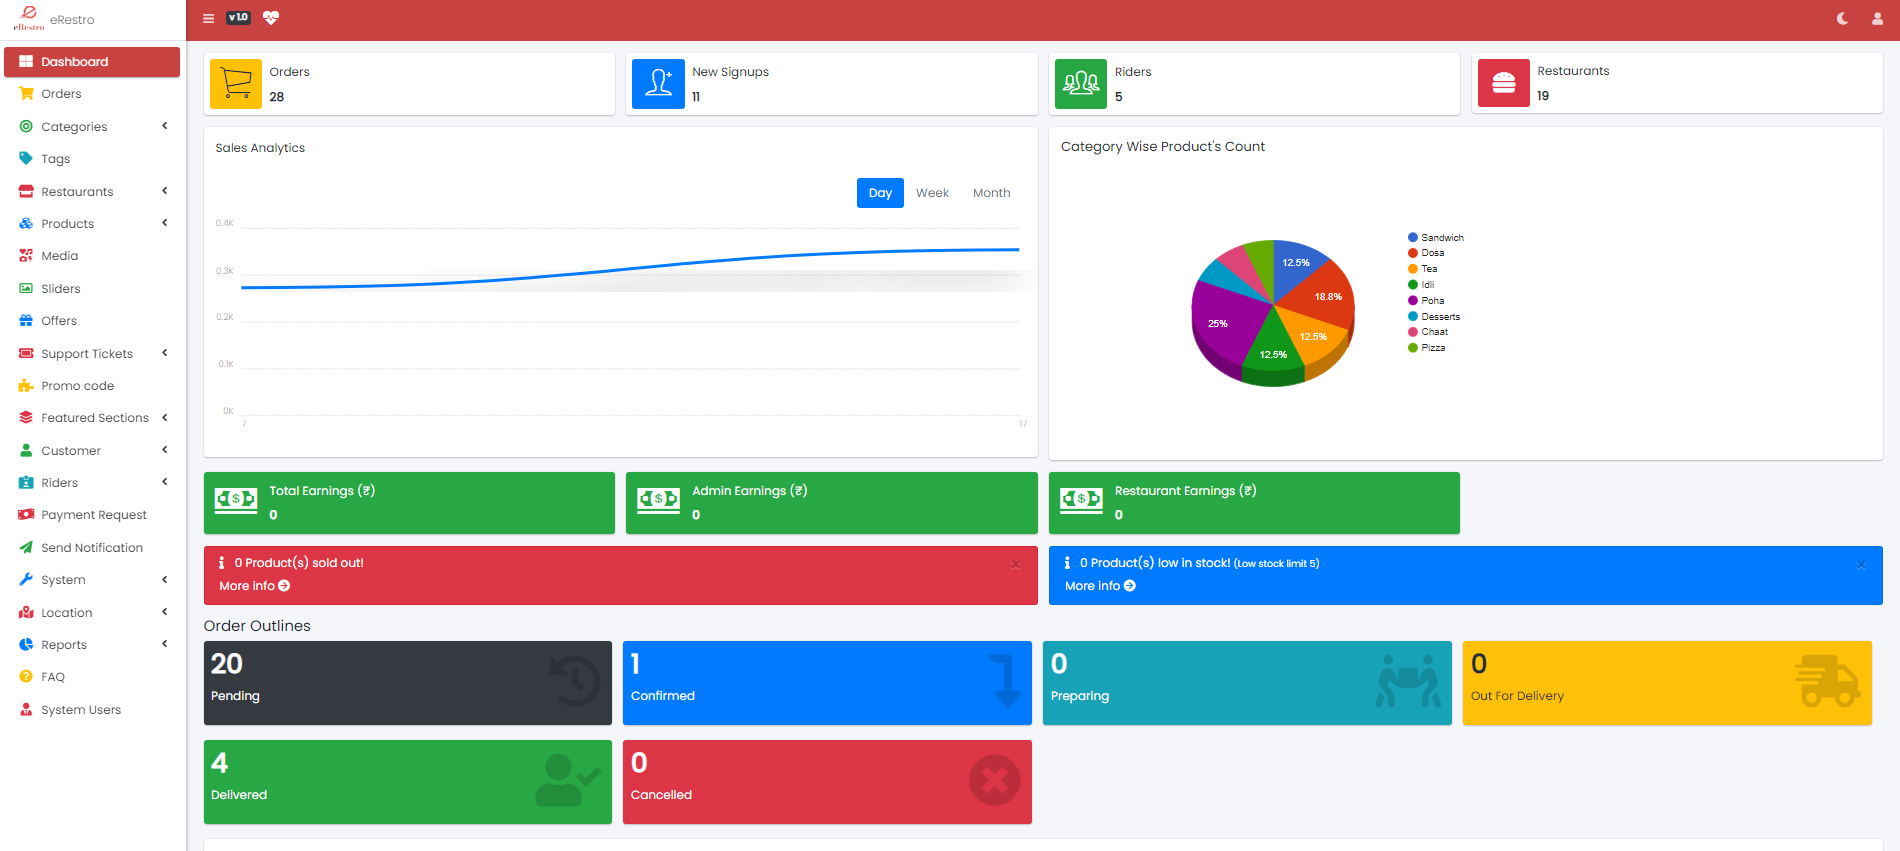
Dashboard
- Dashboard of the app to view app insights.
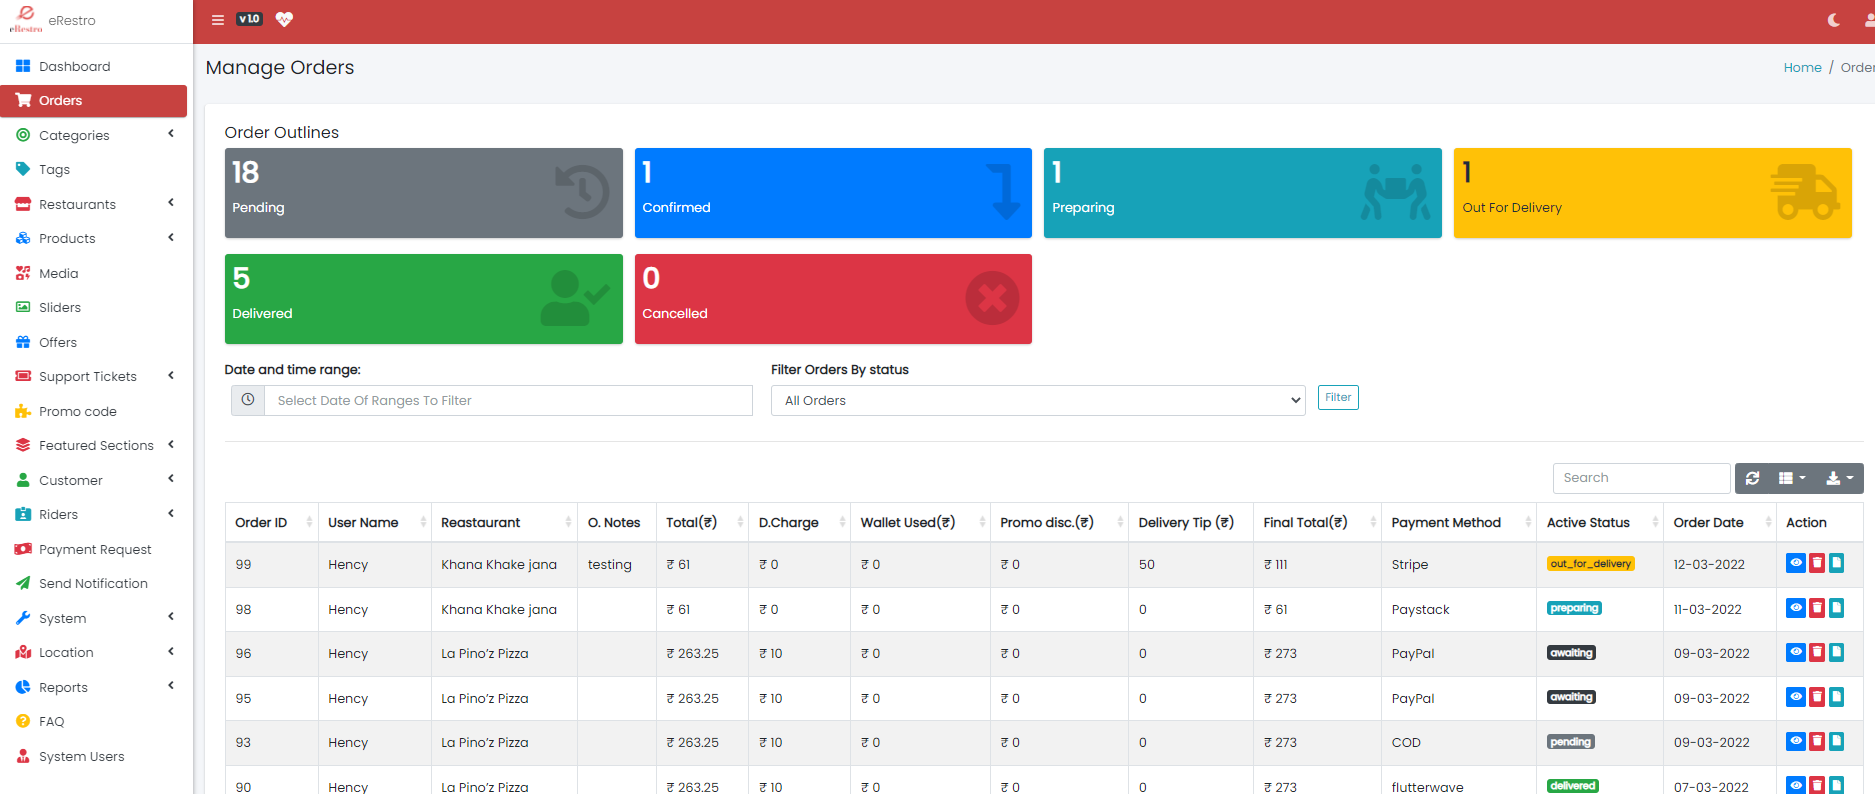
Orders
Order system of eRestro is very simple and easy to manage.
- Customer will place an order as Pending
- Customer can see their city's restaurant and can order Restaurant delivrable area only.
- Restanurant will Confirm the order
- Rider will accept or reject the order if he/she will available on that area.
- Customer can cancle the order if Perticular item or product will available for
cancellation.
- Note: One Rider can delviery only one order at a time.
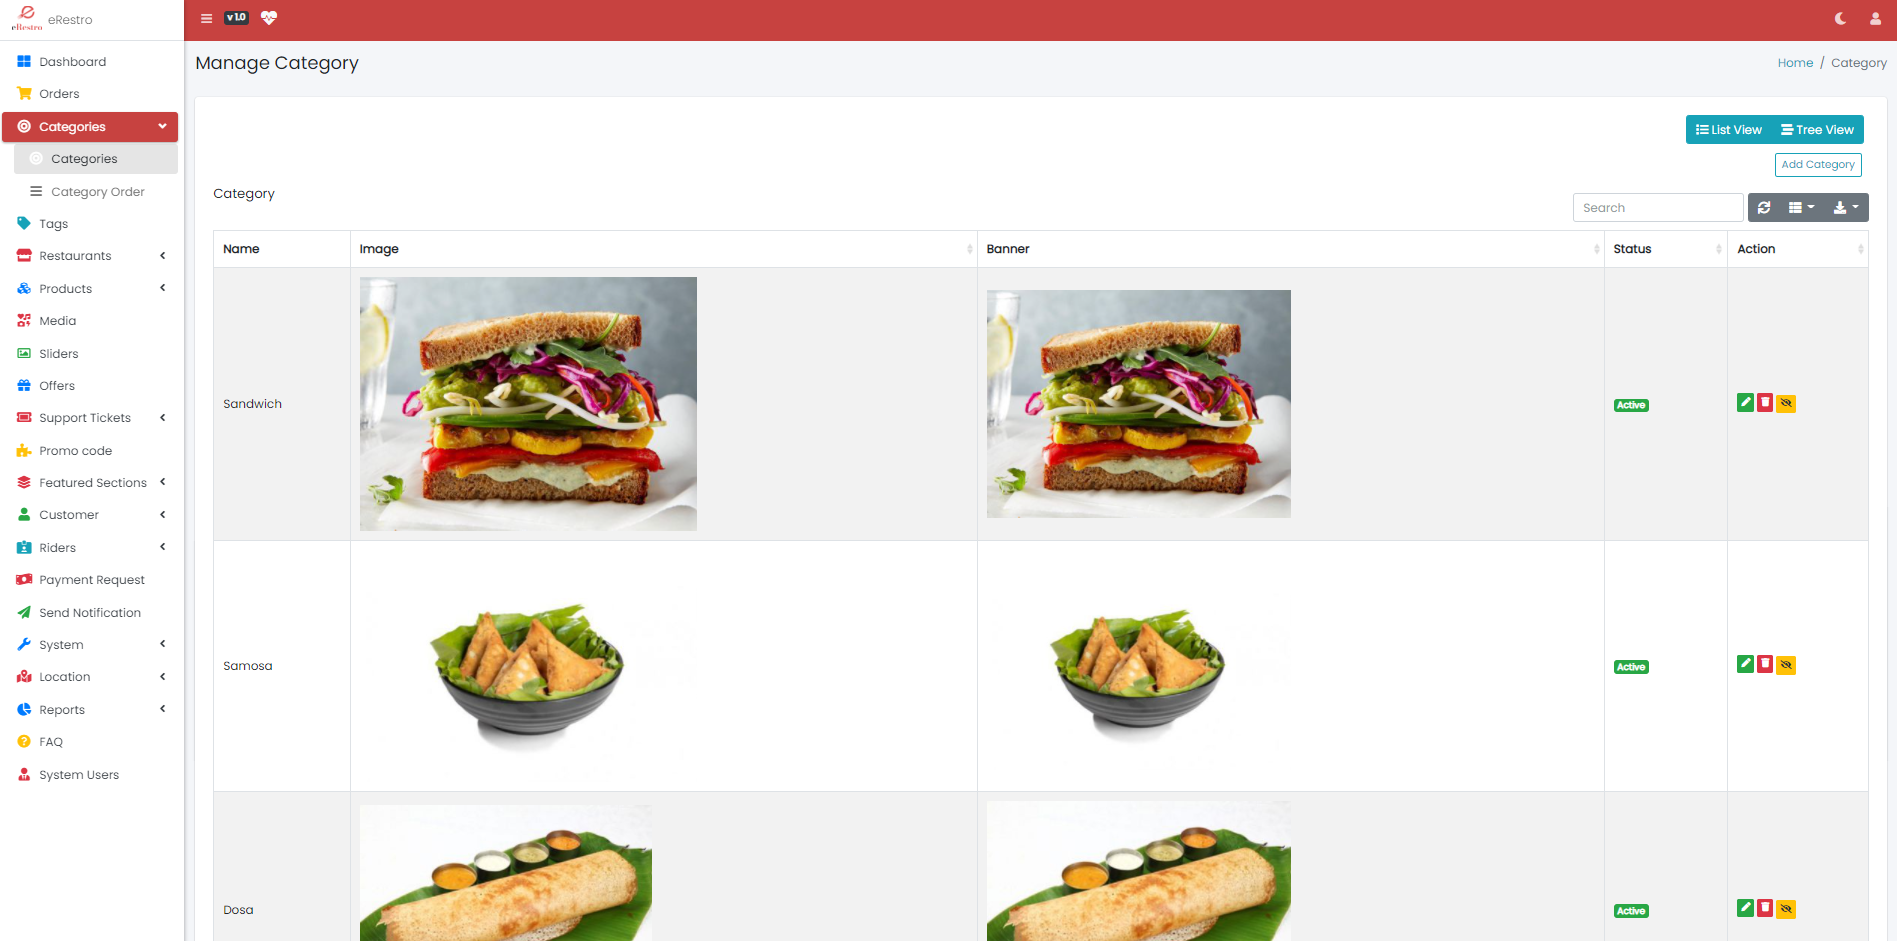
Categories
Admin can create/edit/delete/hide/show the categories.
Restanurant can see all categories. So, restaurant can add foods in that categories.
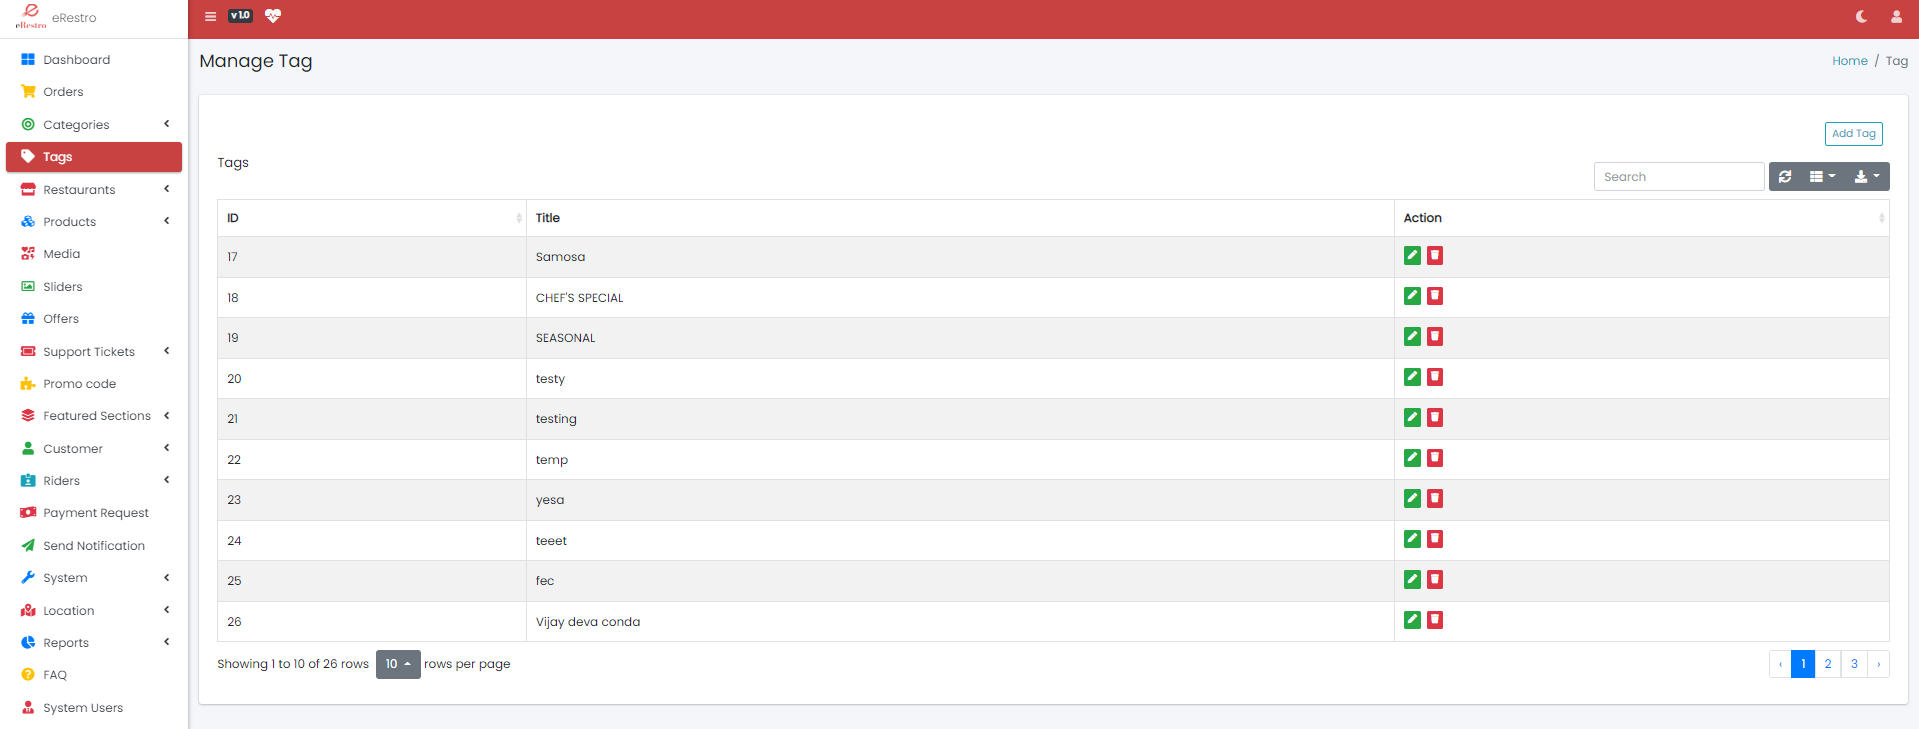
Tags
This tags will used in product tags and restaurant tags also. Admin and Restaurant can create
or edit the tags.
Restanurant will be able to that tags which are created by him only because restaurant can
manage their tags.
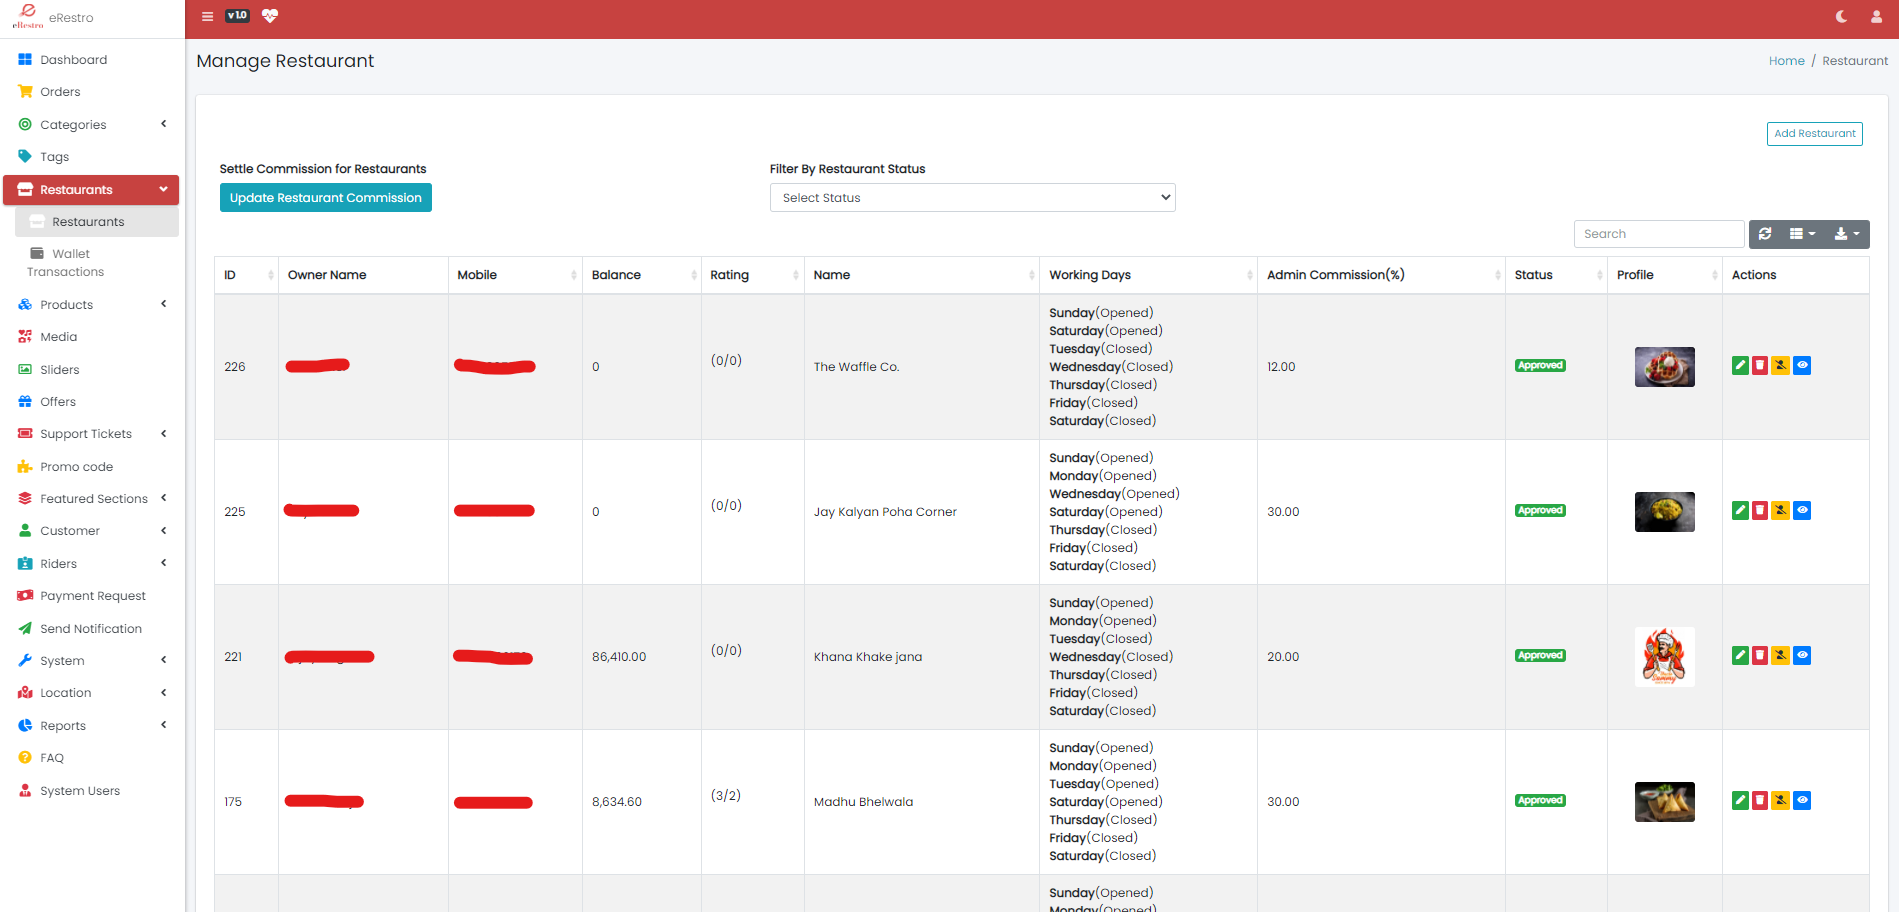
Restaurants
- You can manually add Restaurants under Add Restaurants section.
- Admin can add restaurants.And Also Restanurant can register the system and apply
for partnership. Admin can Approve/Reject the request.
-
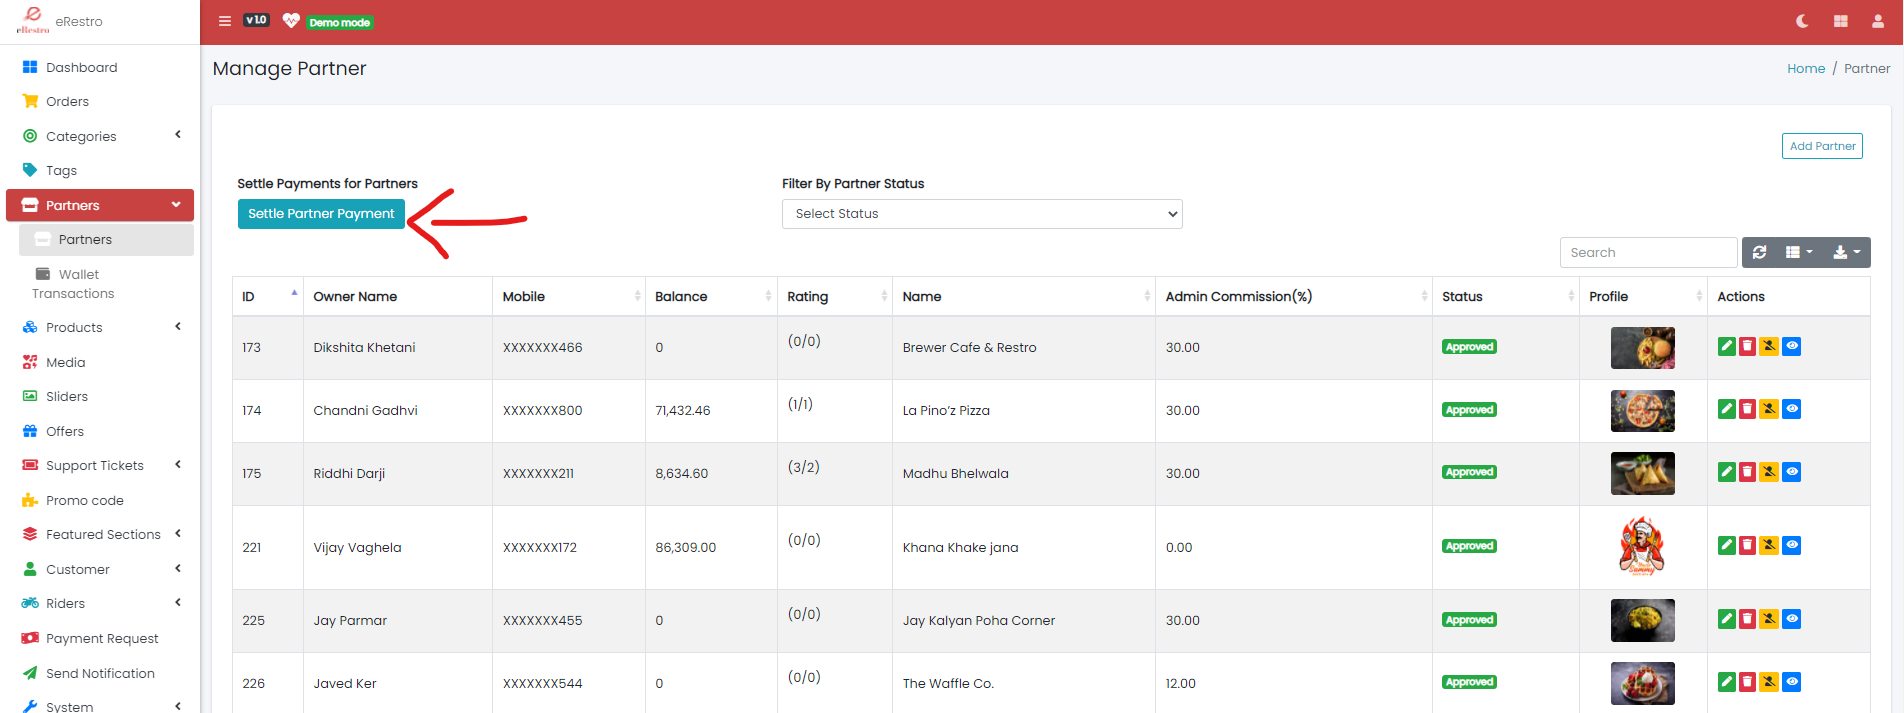
Restaurant Payment System
- Order payments will manage by admin. when order will deliver then
restaurant will get paid by admin manually or by
server cron job file settings
- While admin add restaurant and restaurant will send Request to admin for
partnership then admin will update the commission for restaurant.
- Note: if you are not aware of cron job then you can ask your server for
help or documentation.
- For more details of commission method you will find guidance on bottom
of System -> System Settings page.
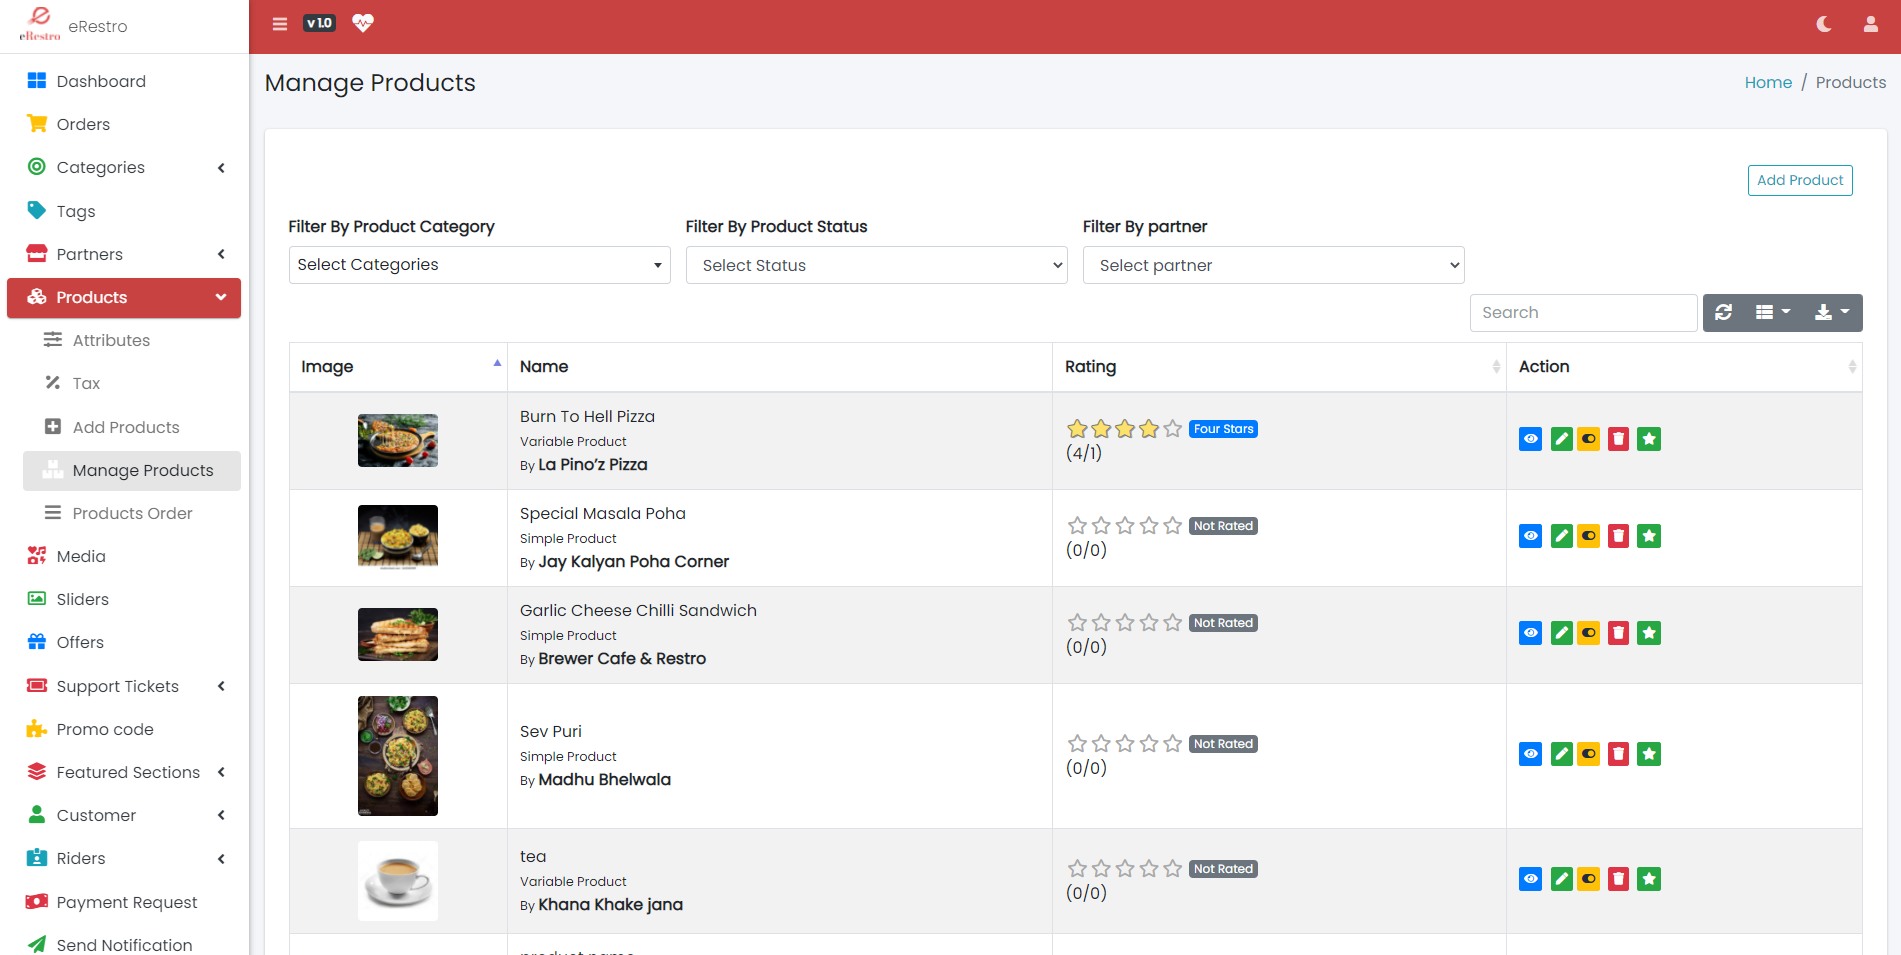
Products
- See all the Products/Foods in this section.
- Before adding the product you need to create attributes for that.
- Attributes are just property of food for e.g. Pizza will have attributes like ->
Size(Regular,Midium,Large,Giant). Here, Size is Attribute. and
Regular,Midium,Large,Giant are Attribute values
- Here You can manage attributes and it's values.
- Admin can add/edit/delete/active/de-active the products/foods.
- Admin can edit or add the attributes. This will be used in products.
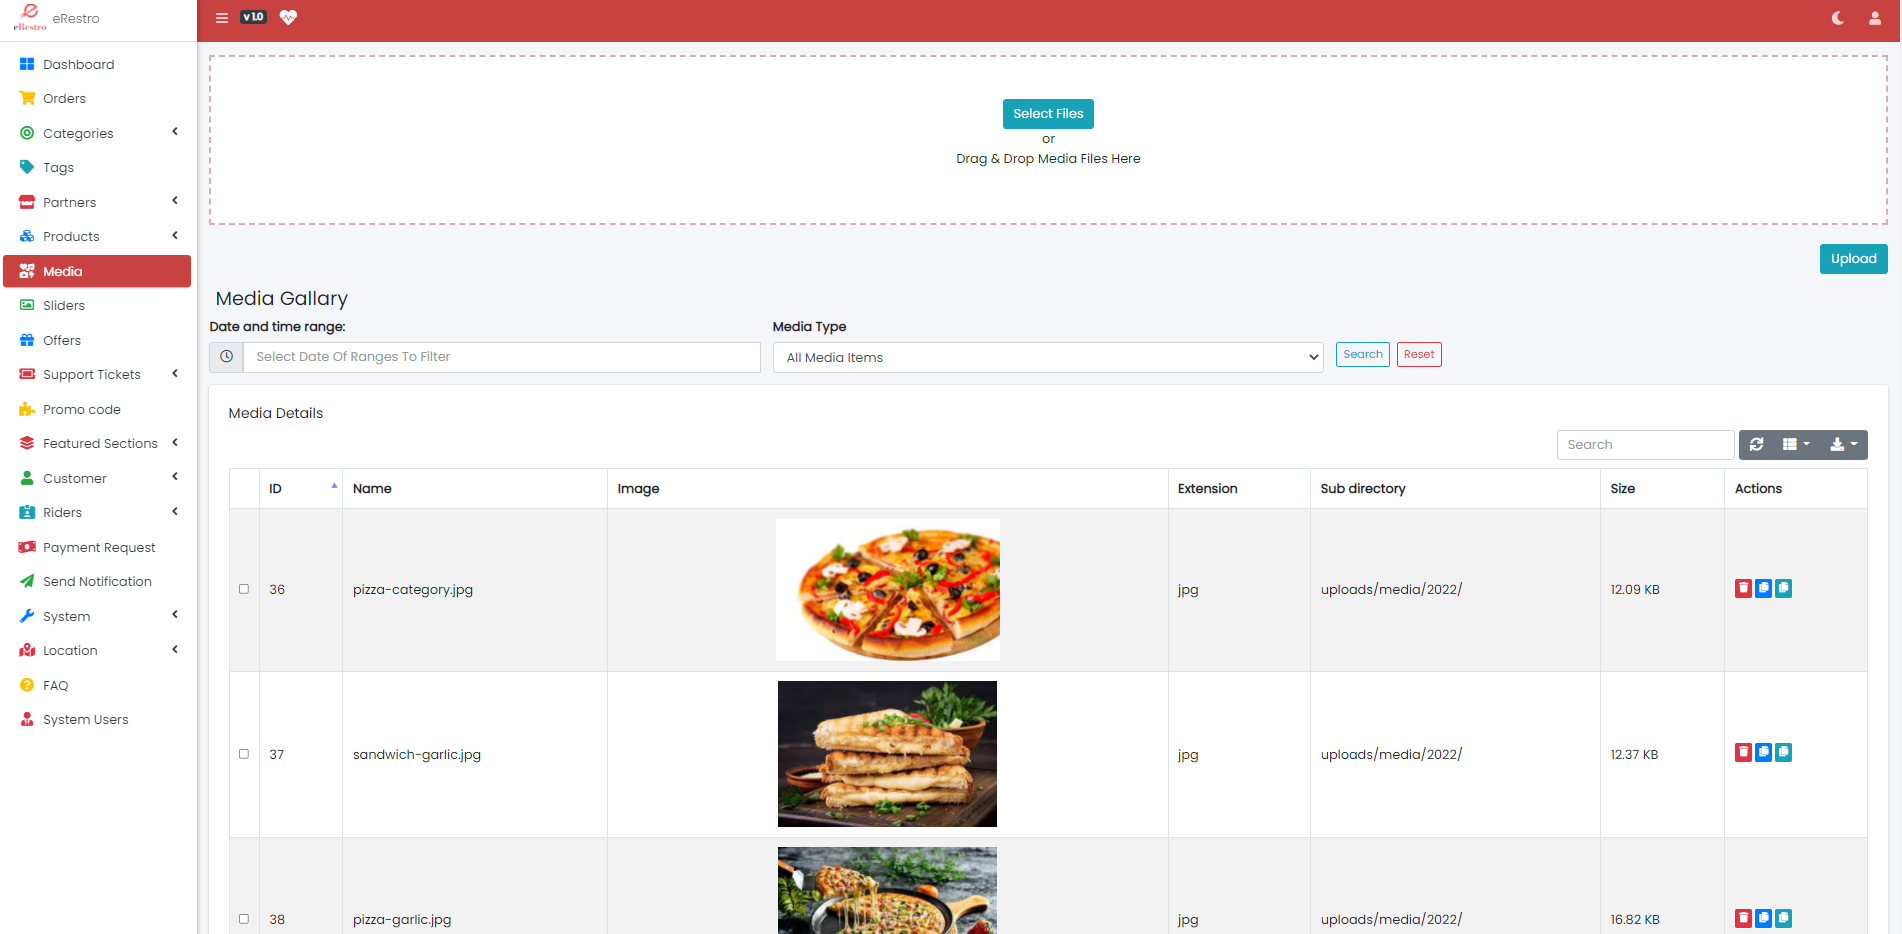
Media
- See all Media under Media Sections.
- Here you need to uplaod all the media which you will use in this system.
- you can add food images and restaurant gallary images here so when ou add product
then you need to just select the Media.
- Here you can copy the image path so in future if you need then directly you can get
access.
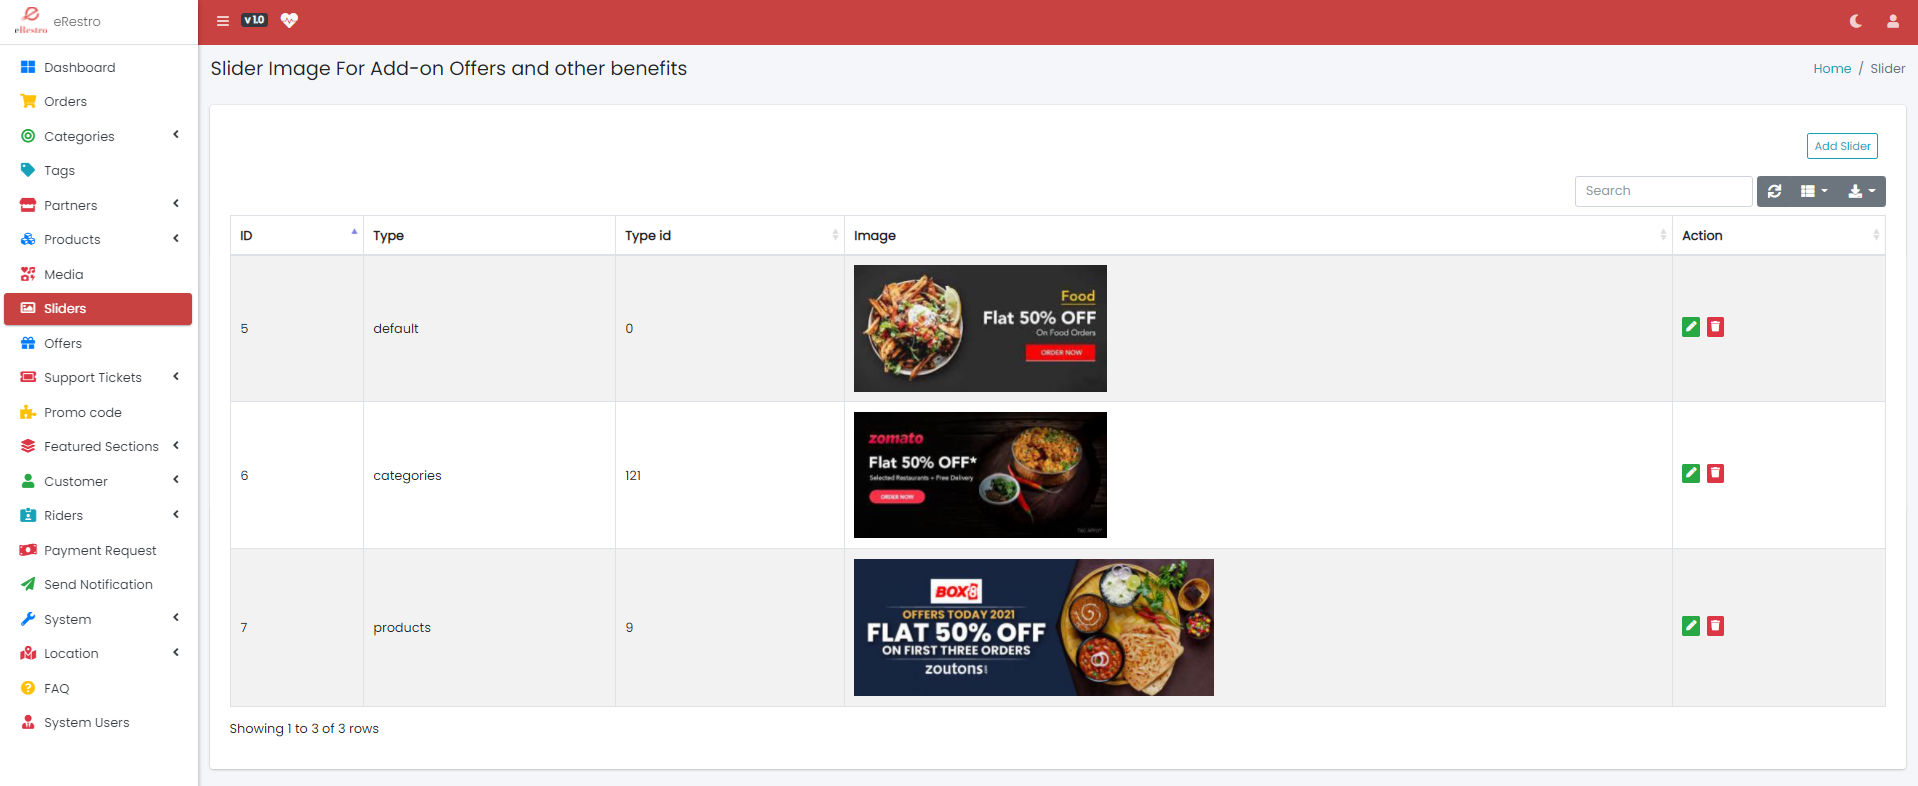
Sliders
- See all Sliders under Slider Sections.
- Here you can add/edit/delete sliders for home page on customer application.
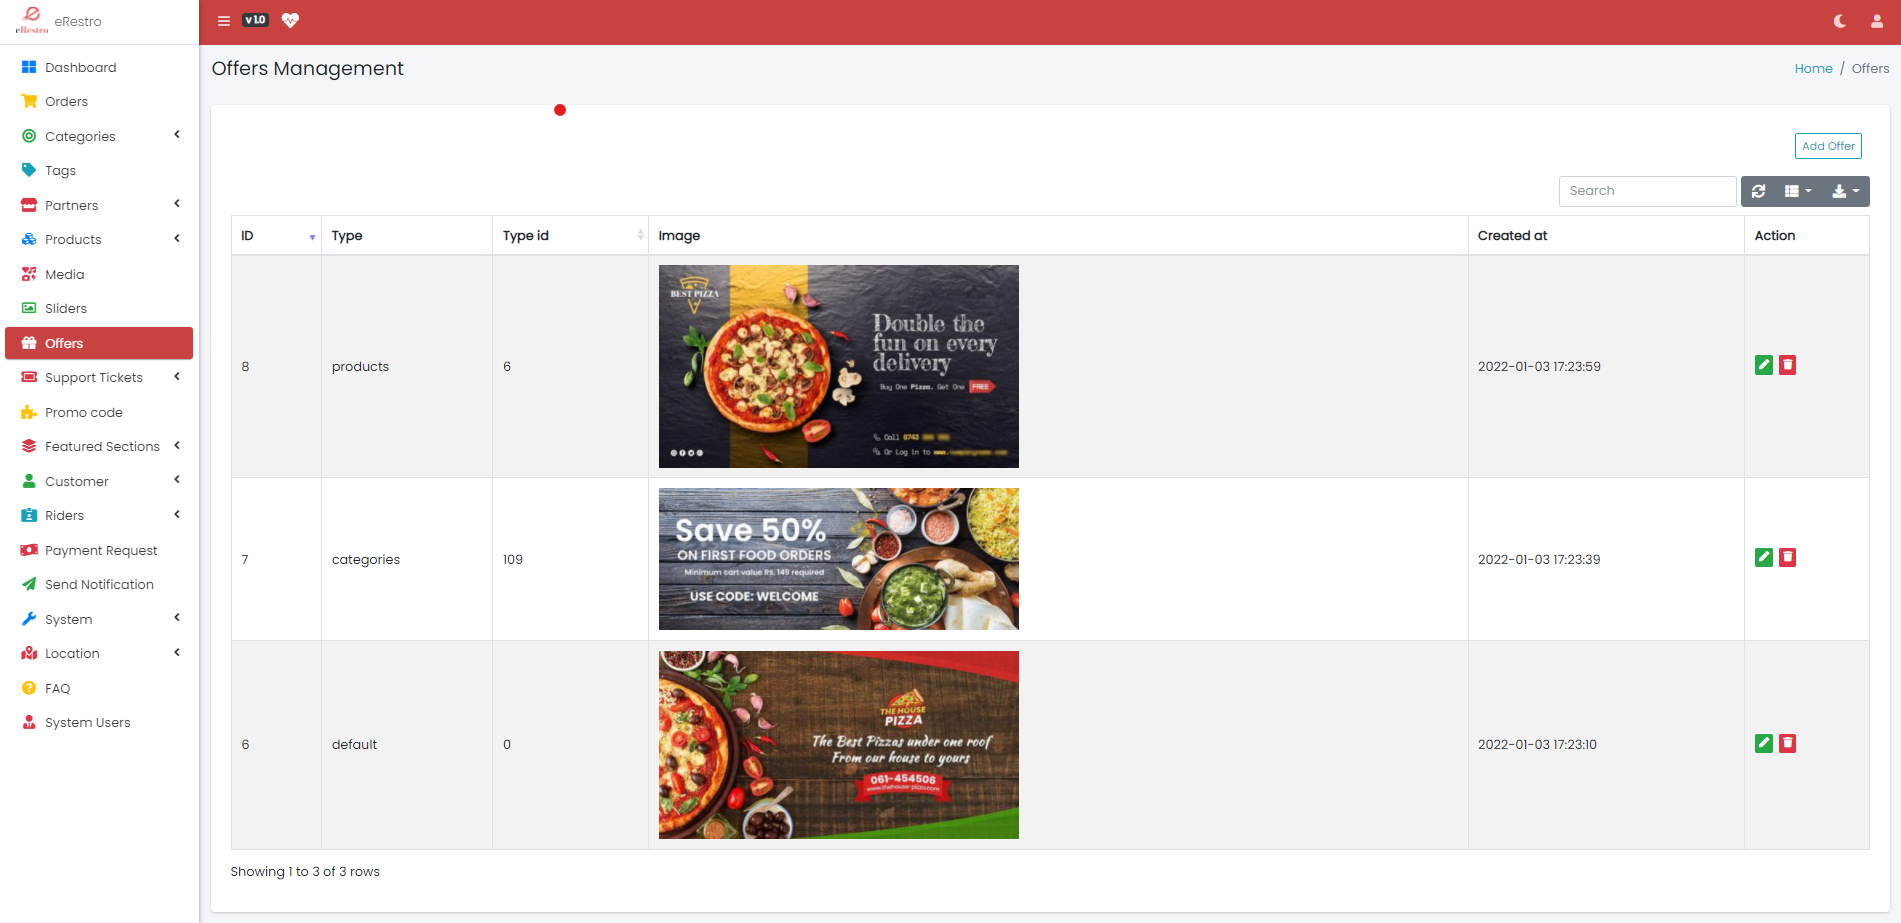
Offers
- See all Offers under Offer Sections.
- Here you can add/edit/delete offer images.
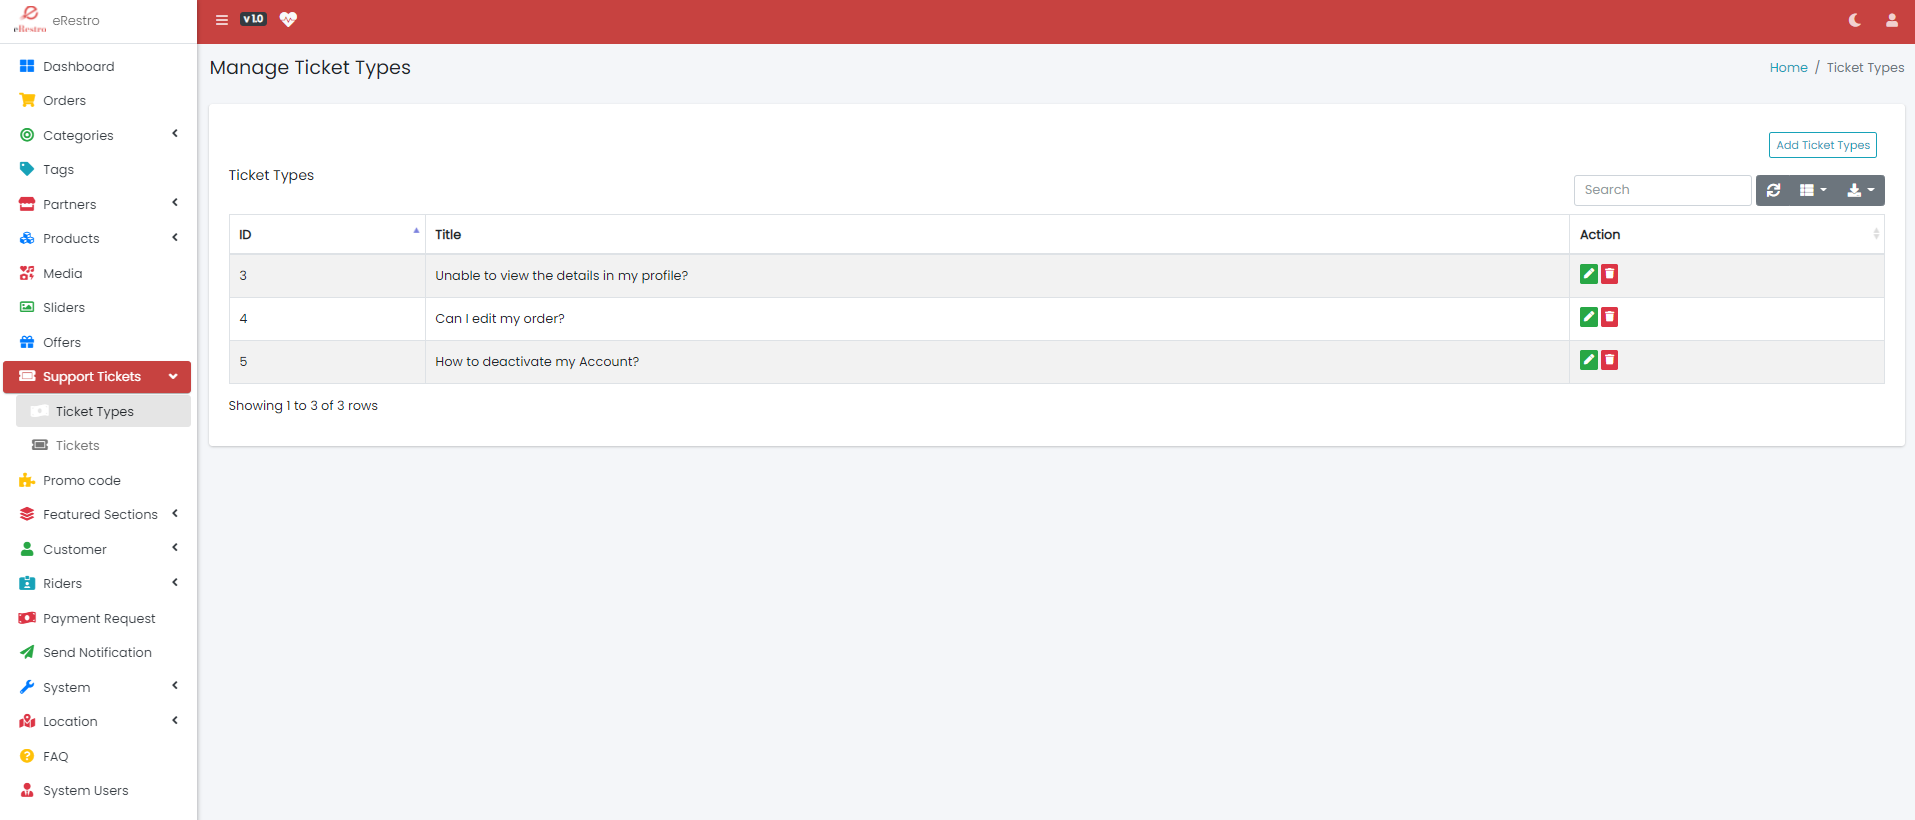
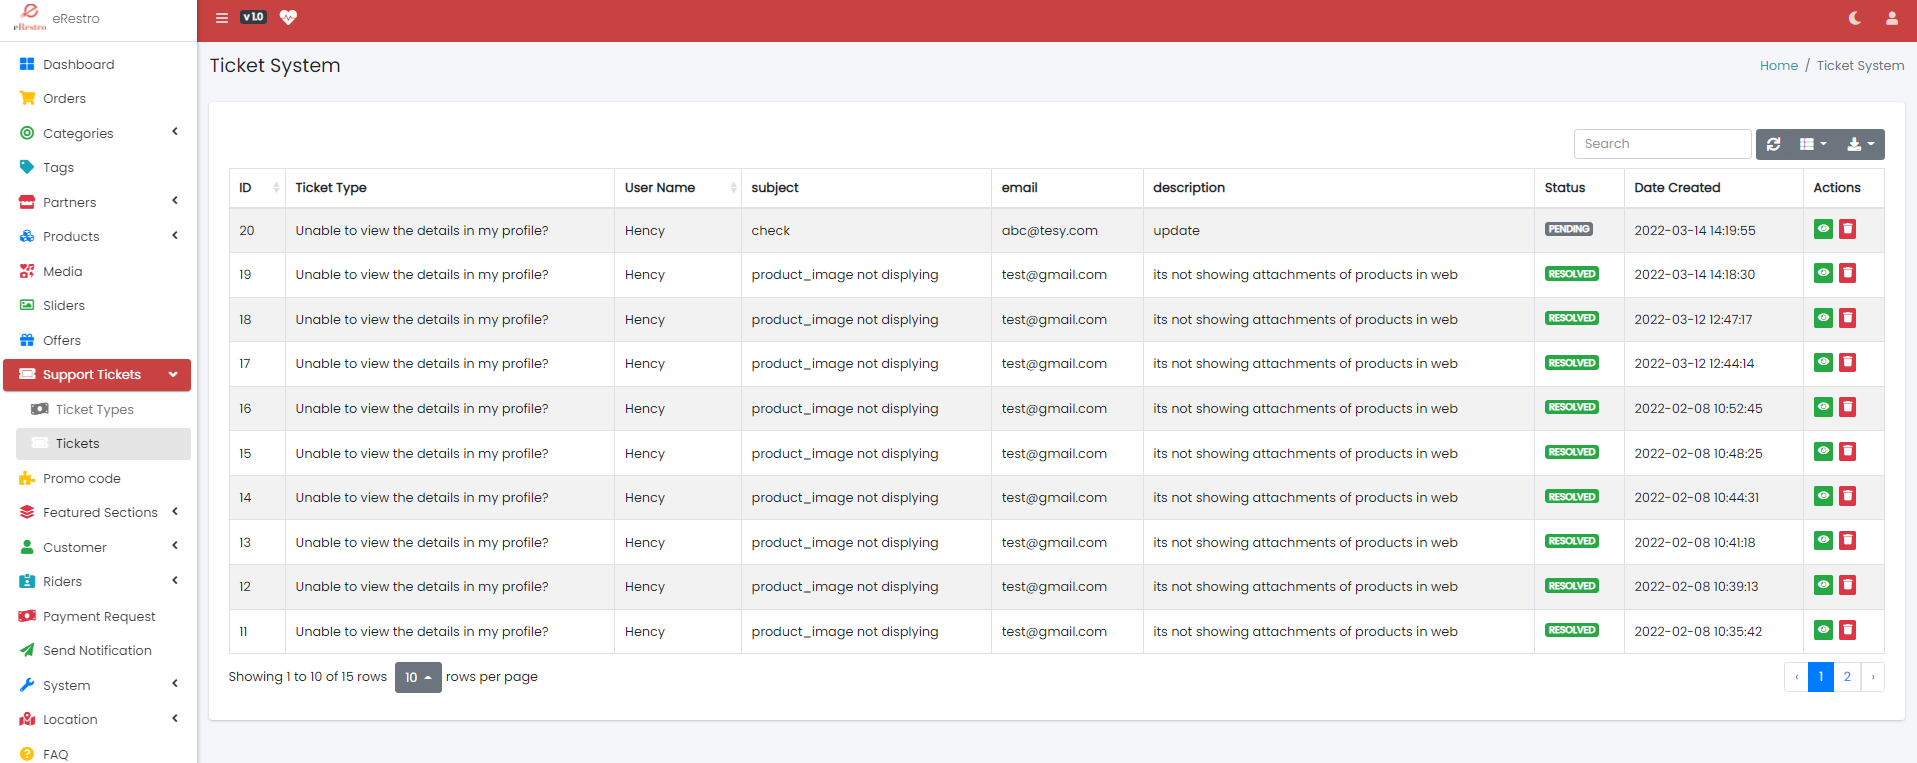
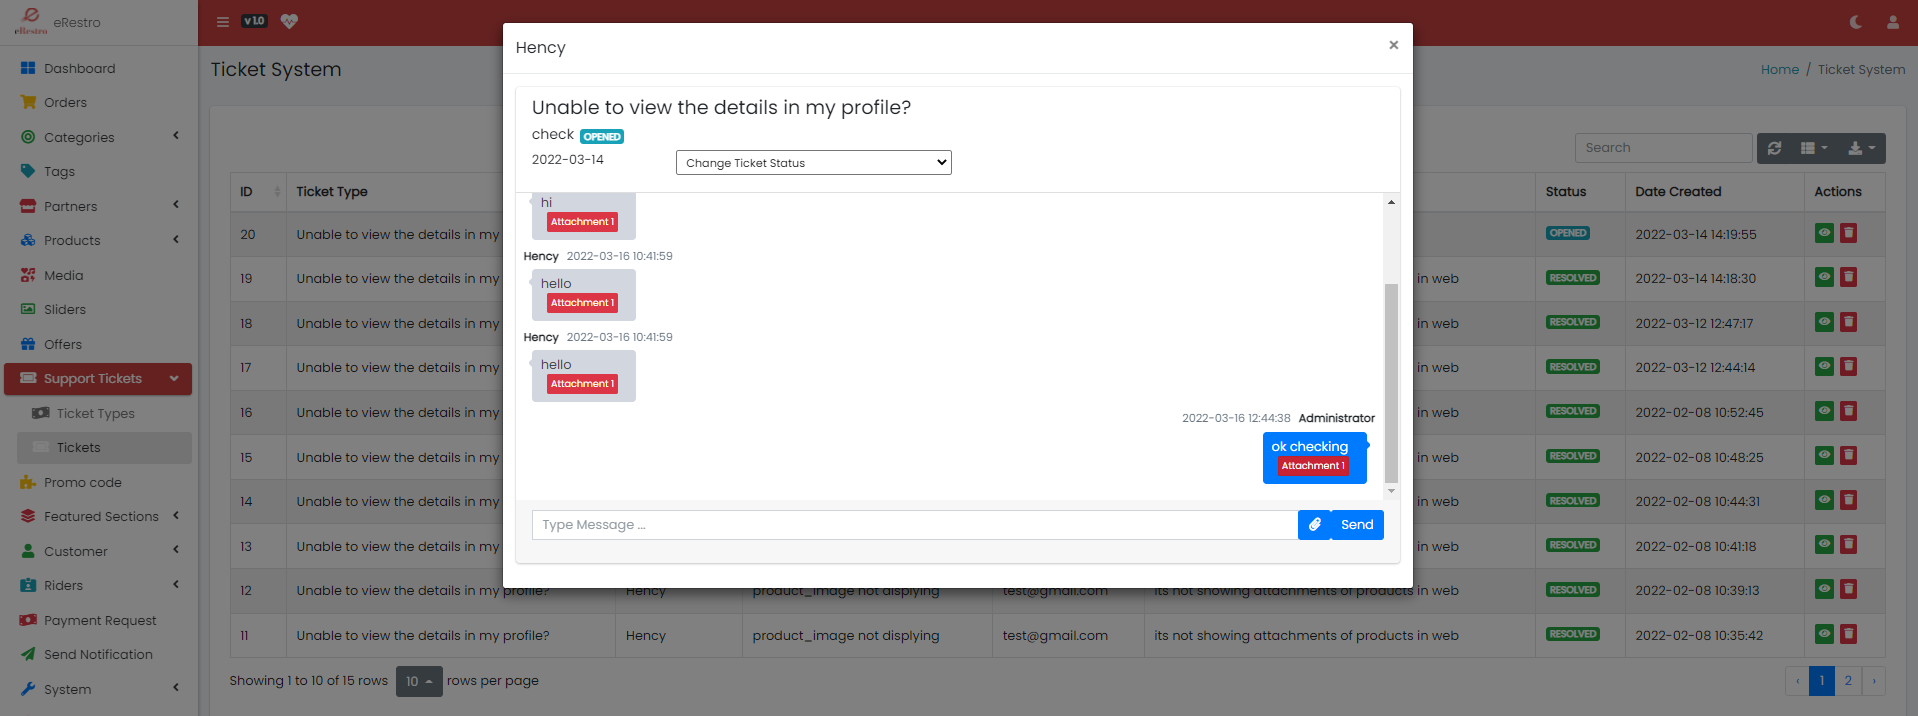
Support Tickets
- See all Customer Queries under Support Tickets Sections.
- Admin need to create ticket type. So user can select the subject of issue.
- Customer need to create ticket for this if customer have some query and admin will
answer their questions.
- Customer and admin can communicate through the system.
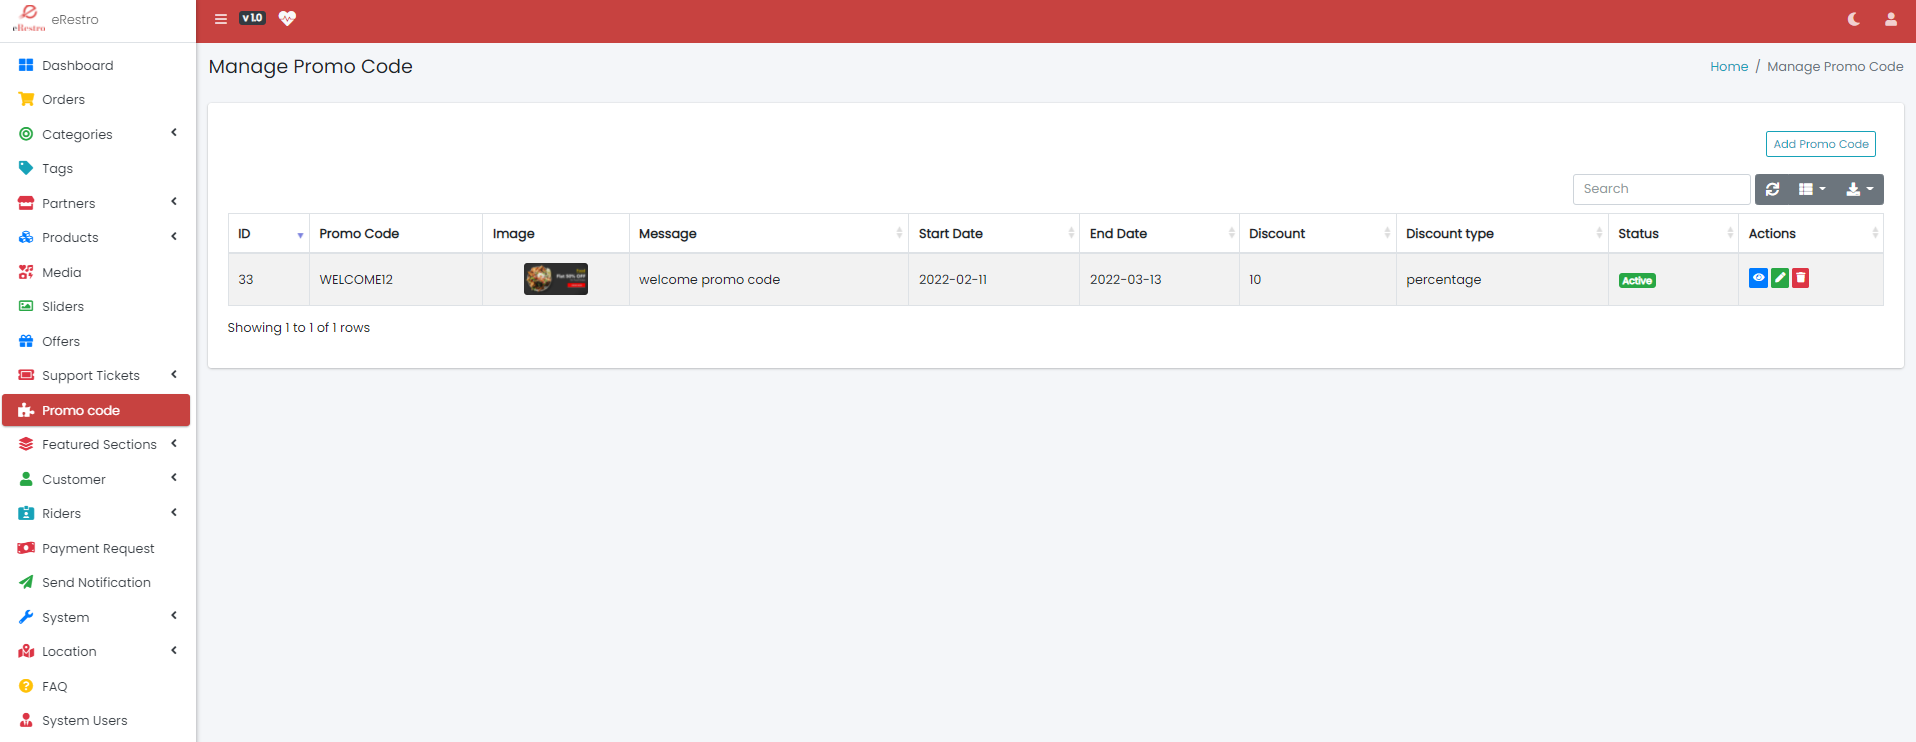
Promo Code
- See all Promo Code under Promo Code Sections.
- You need to create promo code and active promo codes will display at appication.
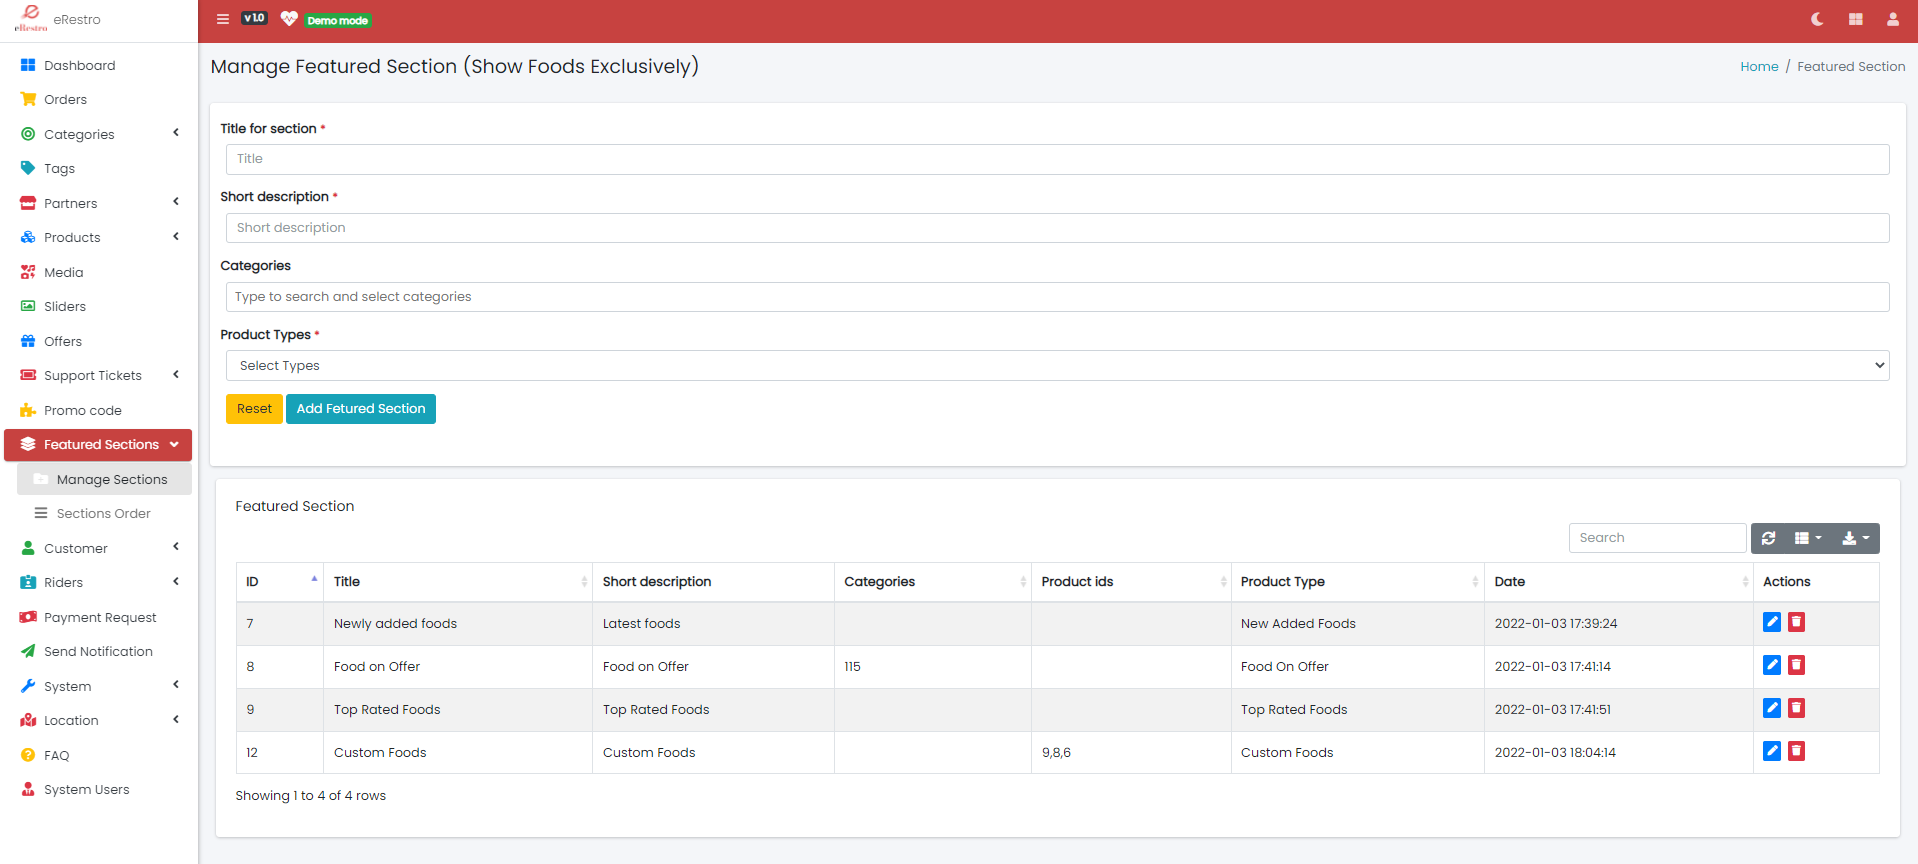
Featured Sections
- See all Featured Sections under Featured Sections Sections.
- Here you can set feature section for home page of customer application home page.
- Note: To show perfect result of feature section then you need to add more
products/foods and orders to display products.
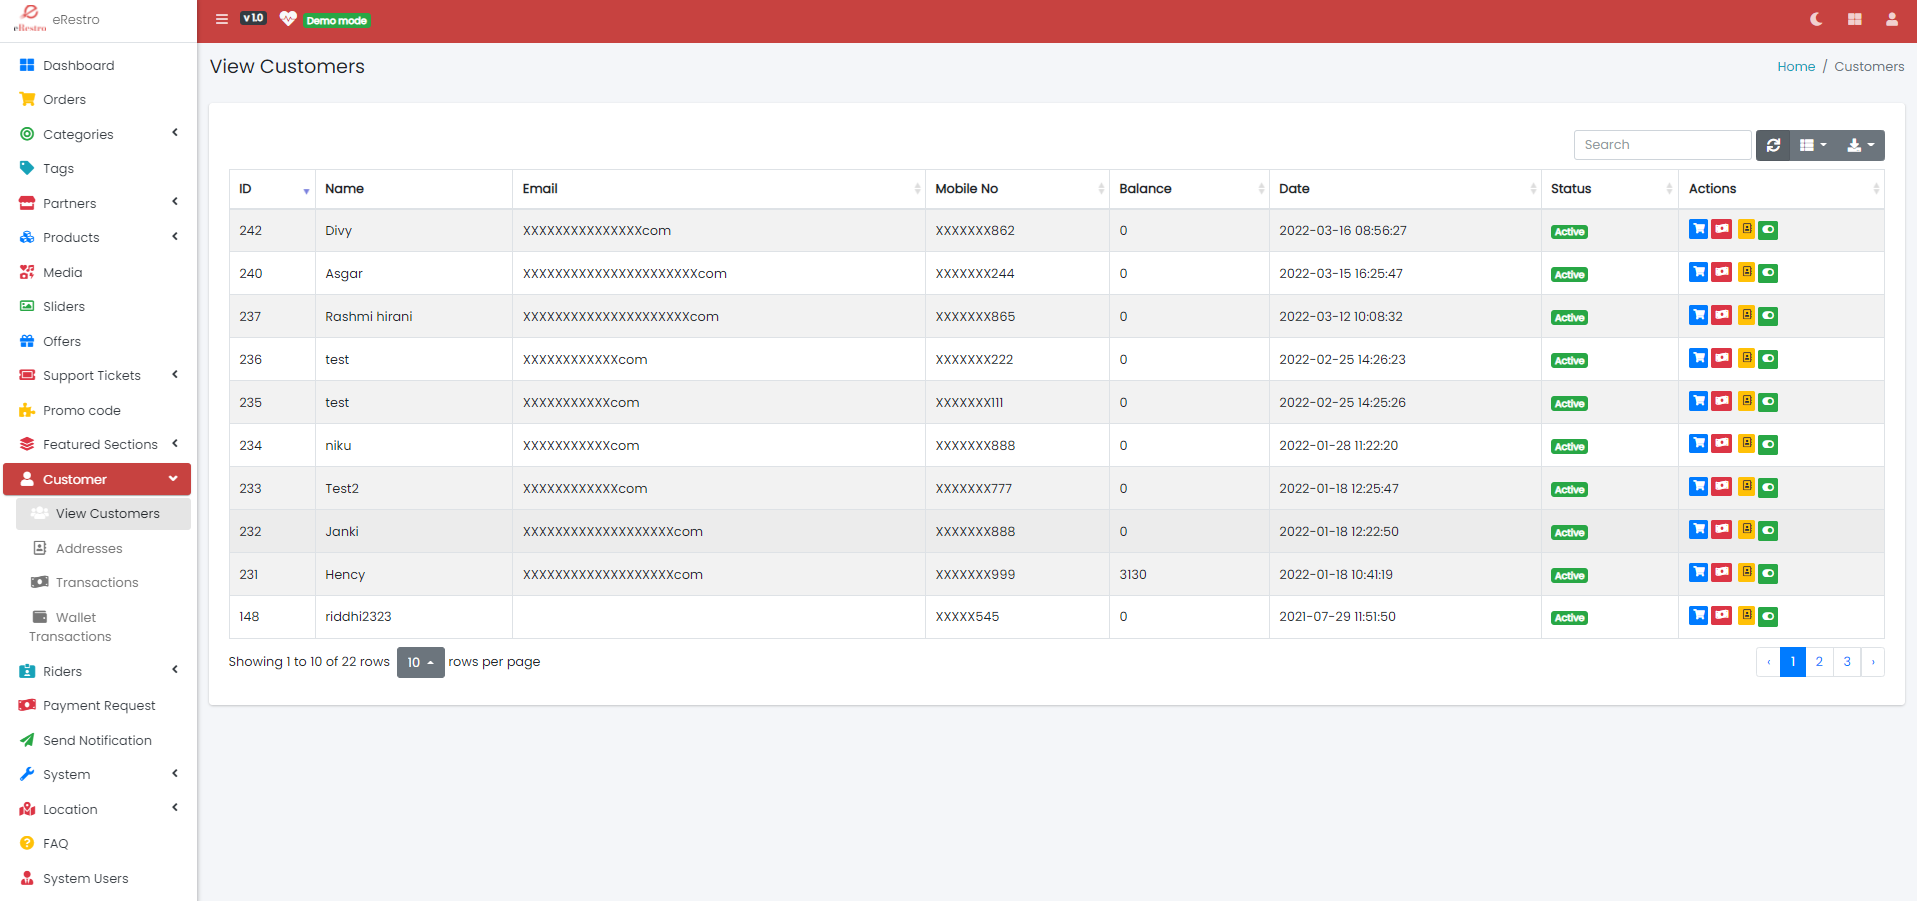
Customer
- See all Customer under Customer Sections.
- Here you will see the list of all customer of system.
- You can hide or show perticular customer.
- You can see transactions of customer.
- You can see the addresses of customers
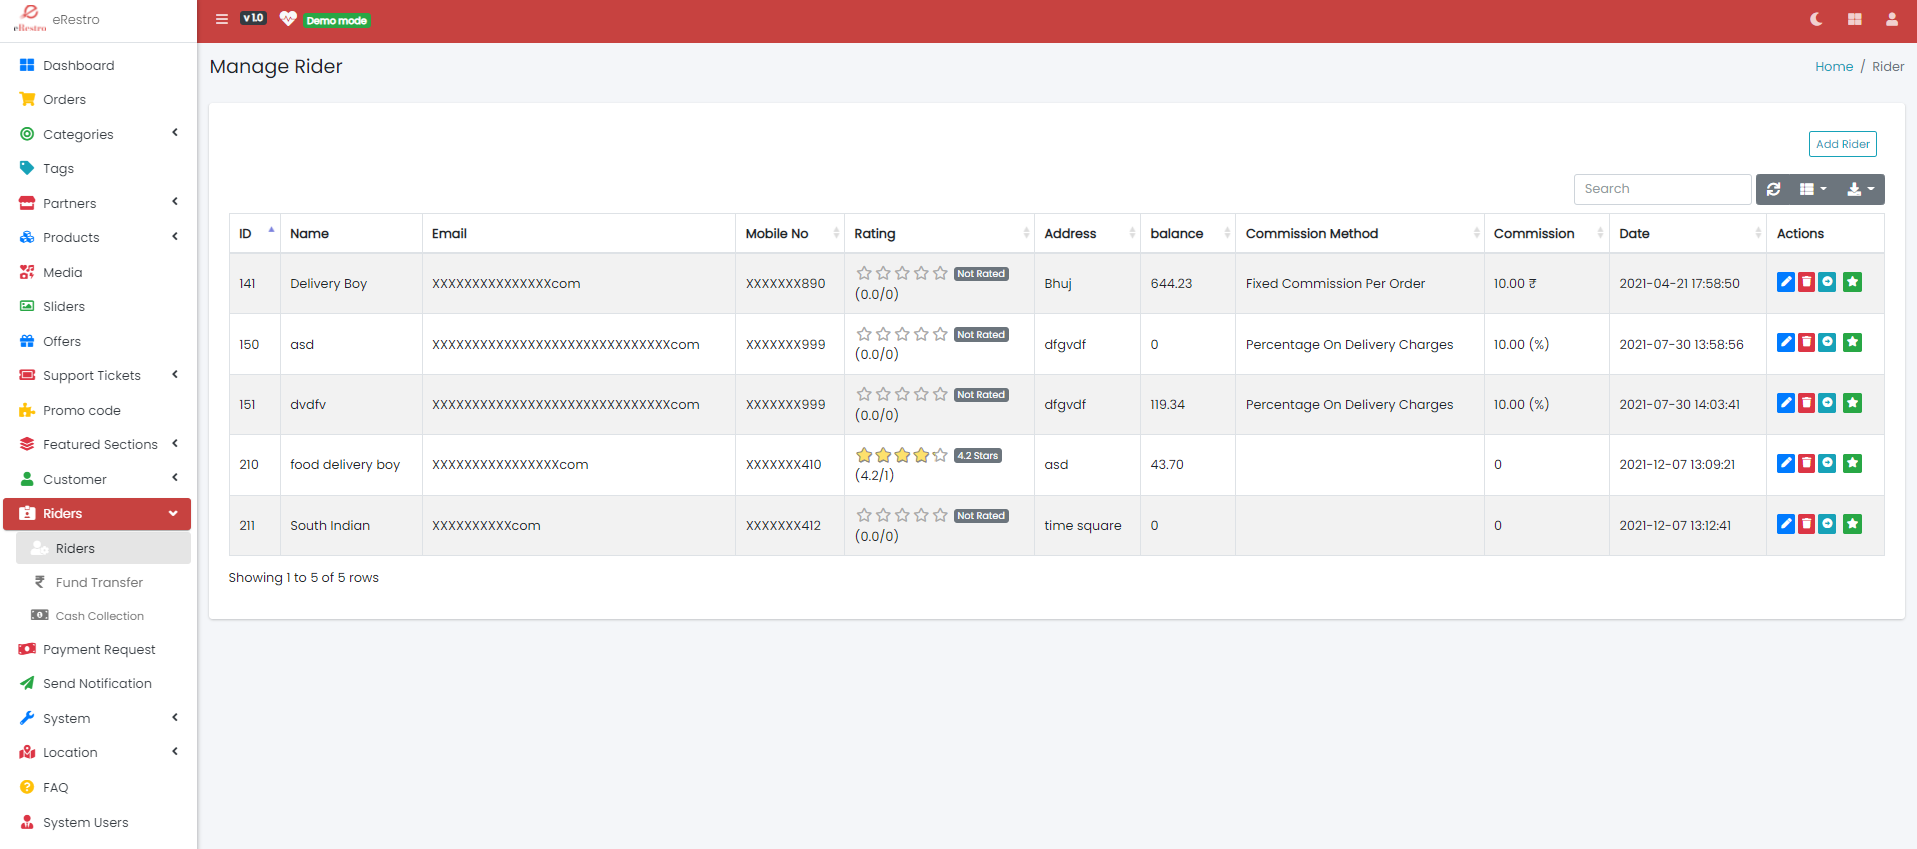
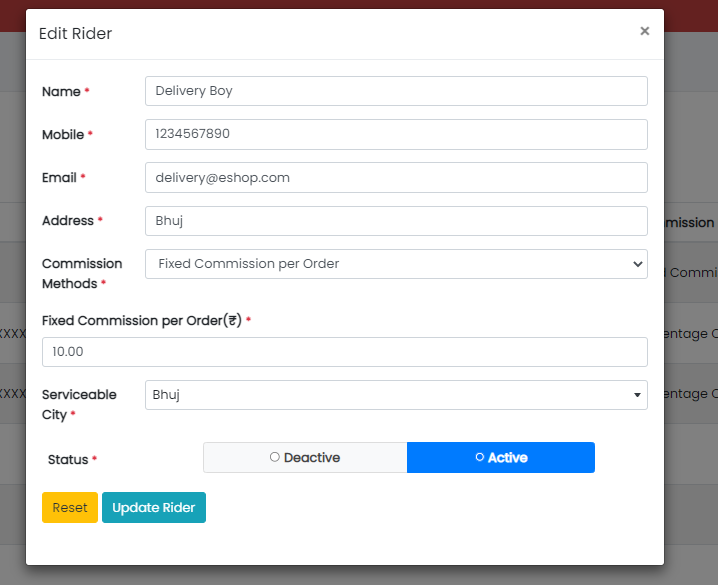
Riders
- See all Riders under Riders Sections.
- Admin can add riders from admin panel.
- Riders will see the pending list of orders on rider panel and rider application.
- Rider can accept the order if he/she in that perticular area of customer or
restaurant
- Admin will set the Serviceable City for rider.
- Rider Commission System
- Percentage on Delivery Charges
- Rider will get commission on delivery charge of orders when he/she will
delvier the order.
- Payment will transfer in wallet of rider
- Fixed Commission per Order
- Rider will get fix amount of commission per order when he/she delvier the
order.
- Payment will transfer in wallet of rider
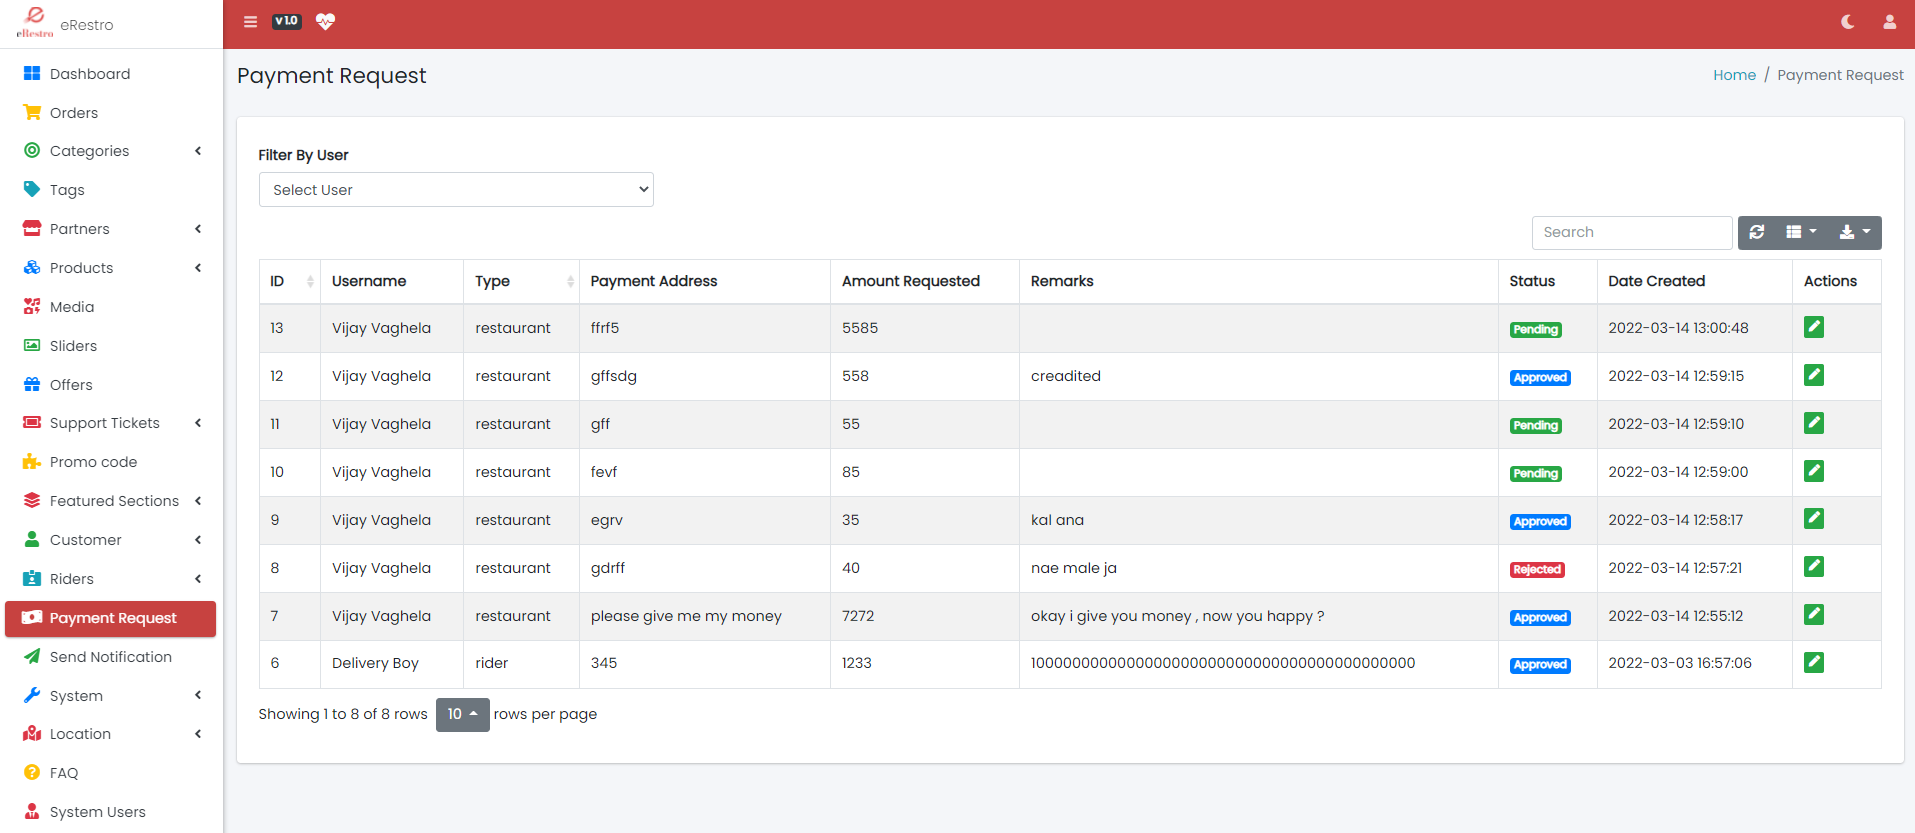
Payment Request
- See all Payment Requests under Payment Request Sections.
- Here you will see the wallet withdrawal request from restaurants and riders.
- Admin need to accept/cancle the request.
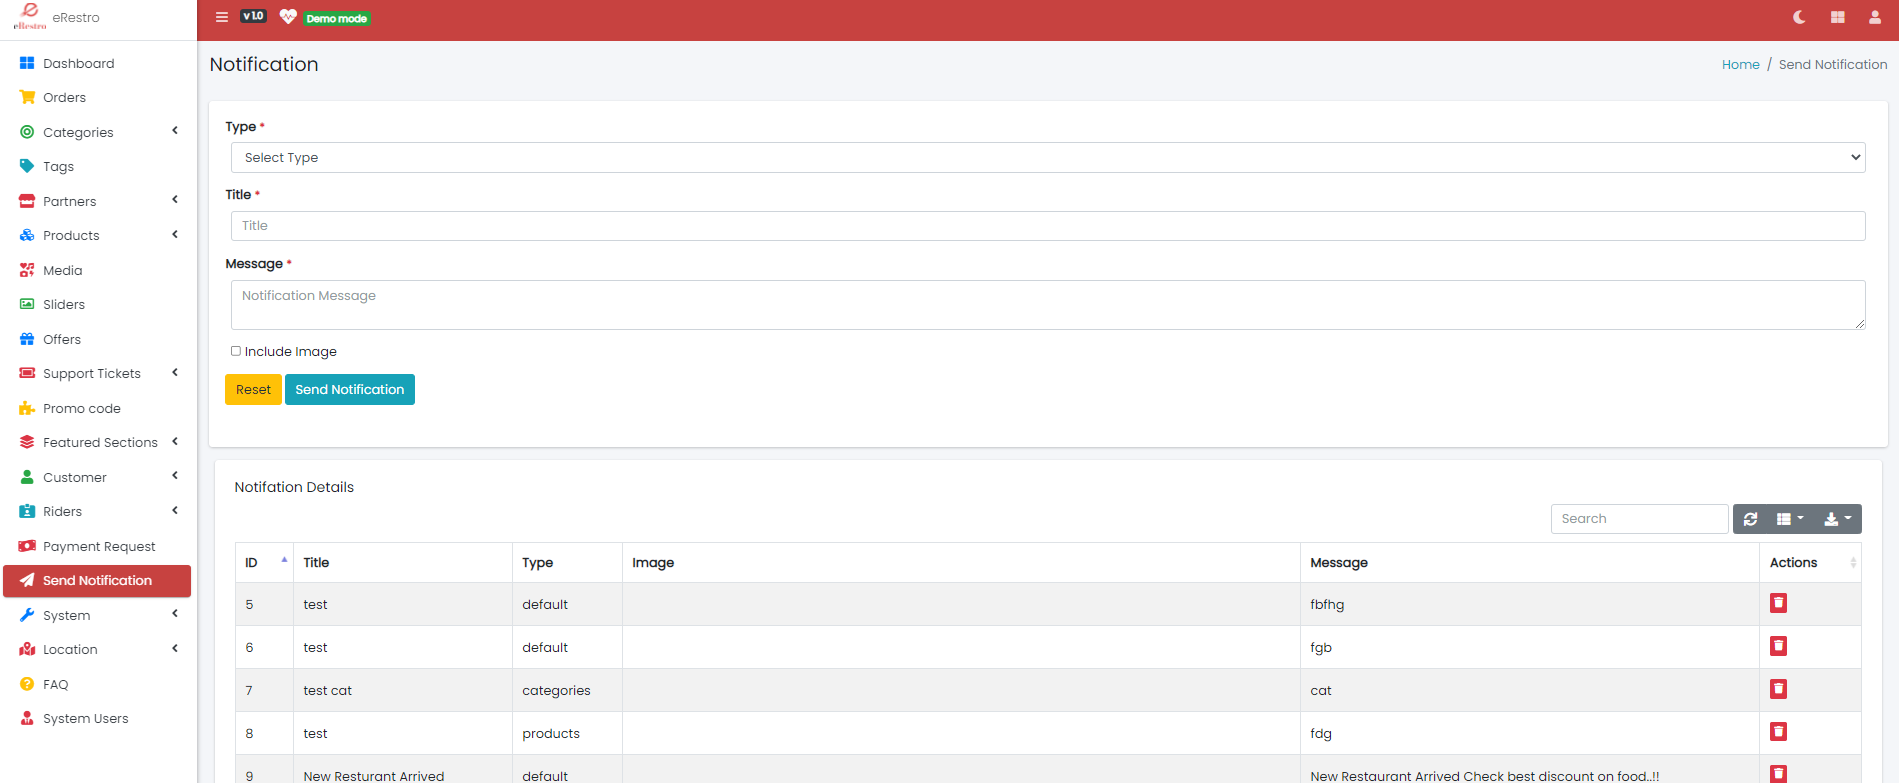
Send Notification
- Here you can send push notifcation to customer application.
- All customers will get this notifications.
Location
- See all Cities under Location->City Manu.
- Add City with all the fields
- Time to travel 1 (km) : Enter time to travel 1 km in city by
rider. (Here we are caculating the approx deliverable distance from your
customer and restaurant.)
- Maximum Delivarable Distance :Enter maximum distance in
kilometer(KM) you are delivering the orders.
- Delivery Charge Methods :
- Fixed Delivery Charges : In this method Fix delvery
charge will apply to
all orders
- Per KM Delivery Charges : In this method, On the basis
of distance from
customer to restaurant. FOr e.g. if distance is 10KM and charge is 5
Ruppies per Kilometer then final delivery charge will be = 10*5 = 50
Ruppies(Currency you will set in system)
- Range Wise Delivery Charges: In this method, you need
to set distance
range while adding the city. for e.g. 5-10 Kilometer and set price for
that distance.
Deliverable Area
- See all Cities points(coordinates) under Location->Deliverable Area Manu.
- Add City points by drwing polygon or circle. that will the area in which you are
delivering the orders.
- Select the city which ou want to set points
- Draw the area you want to allow deliver.
- You will get the selected area if you have already selected deliverable rea for
that perticular city.
- If you want to change it then you can override the points and draw a new polygon
or circle.
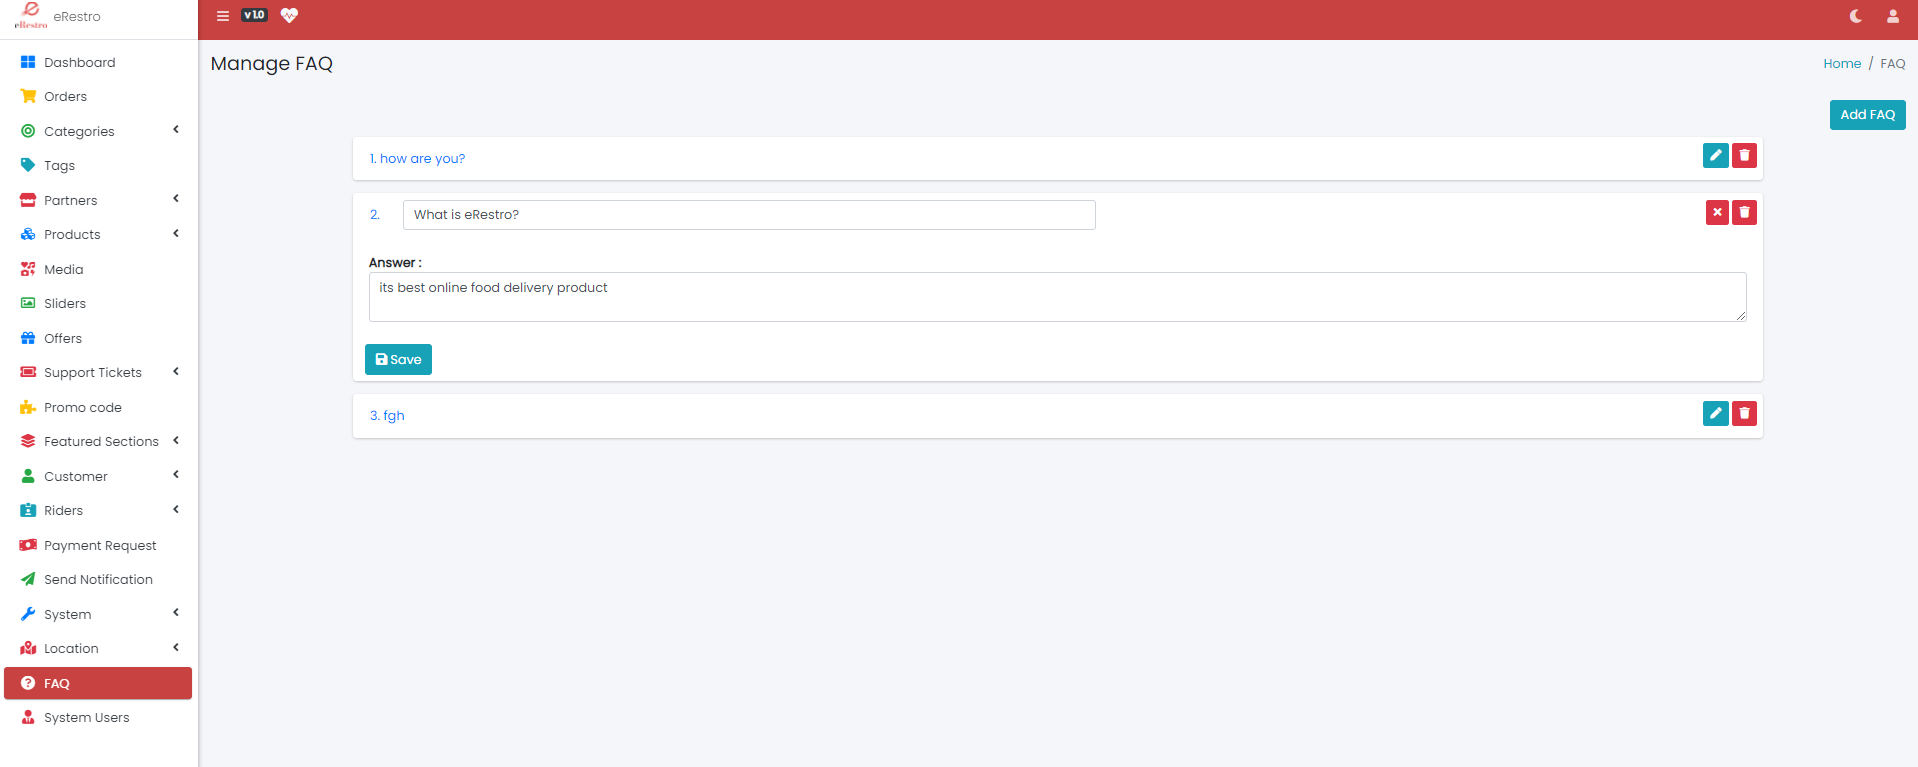
FAQ
- See all FAQ under FAQ Sections.
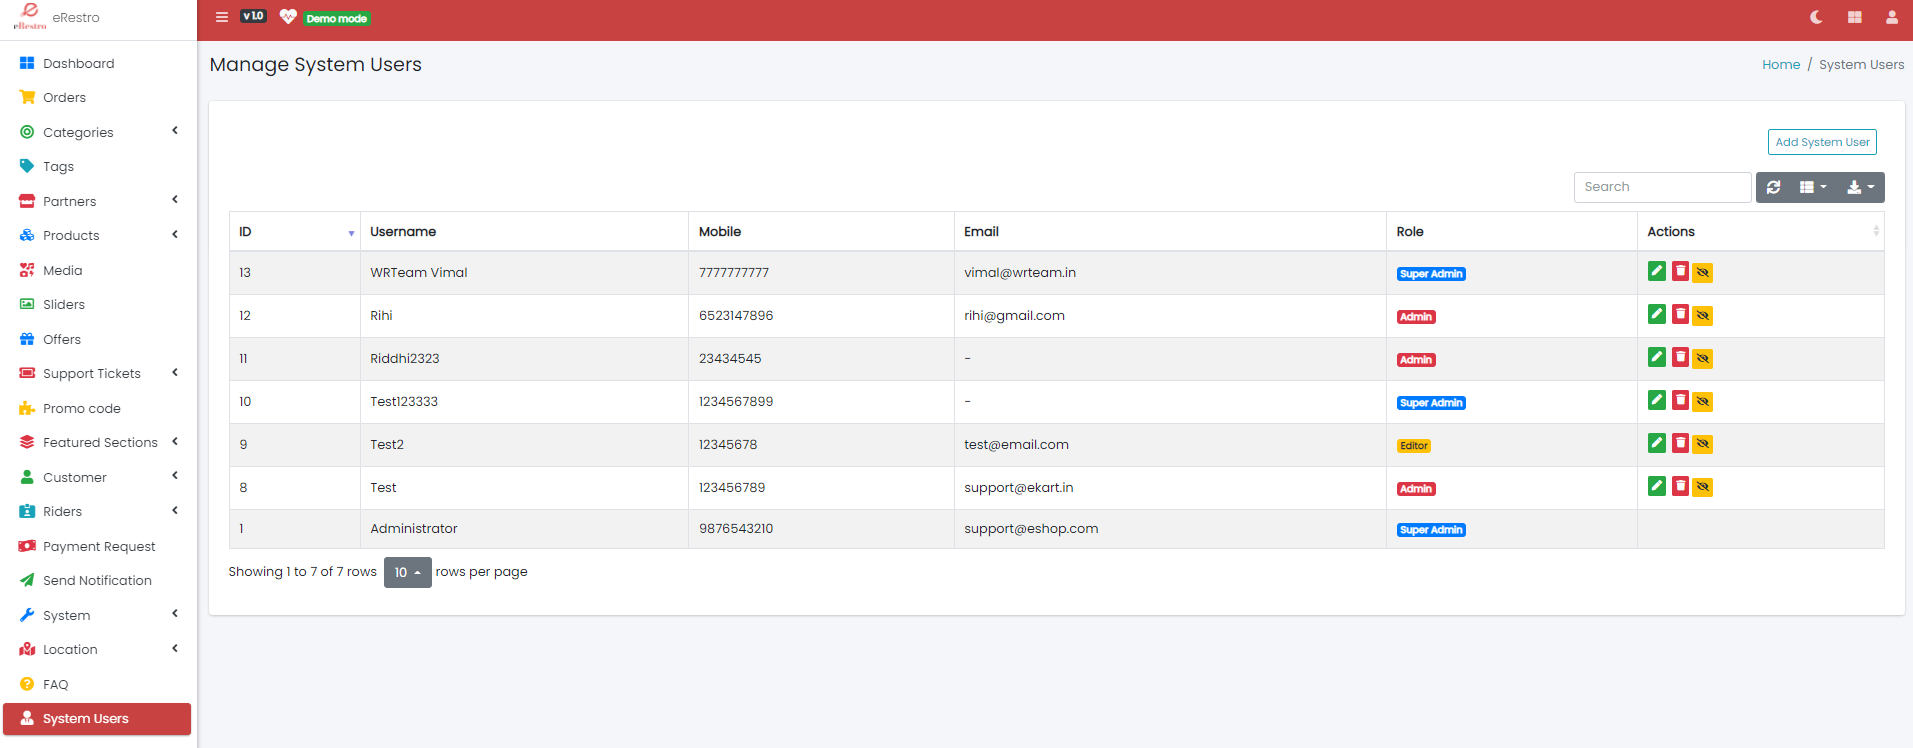
System Users
- See all System Users under System Users Sections.
- Here Super admin can create other roles on system like editer,member etc.
- You can select read,update,delete and create operations.


 Razorpay
 Paystack
 Paypal
 Flutterwave
 Paytm
Paytm
 COD
COD