How to set Notification
-
Go to your firebase project in project settings -> general. Copy your project id from there as below image.
-
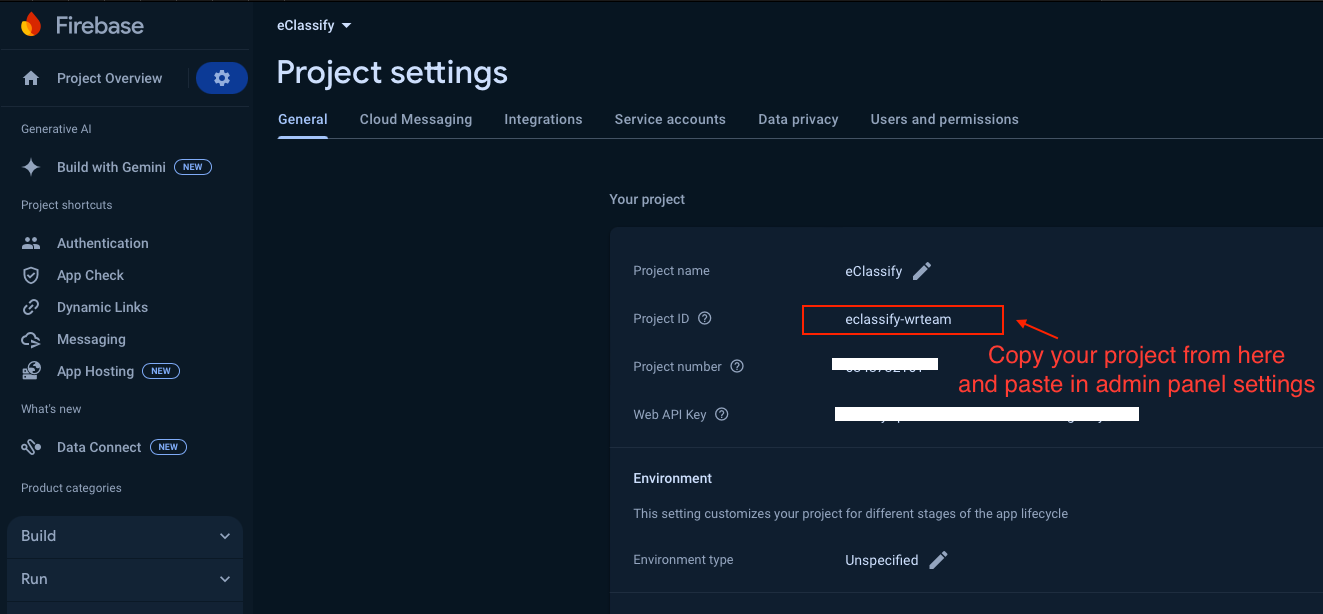
Go to project settings -> service accounts. For download service json file click on Generate new private key button as below image.
-
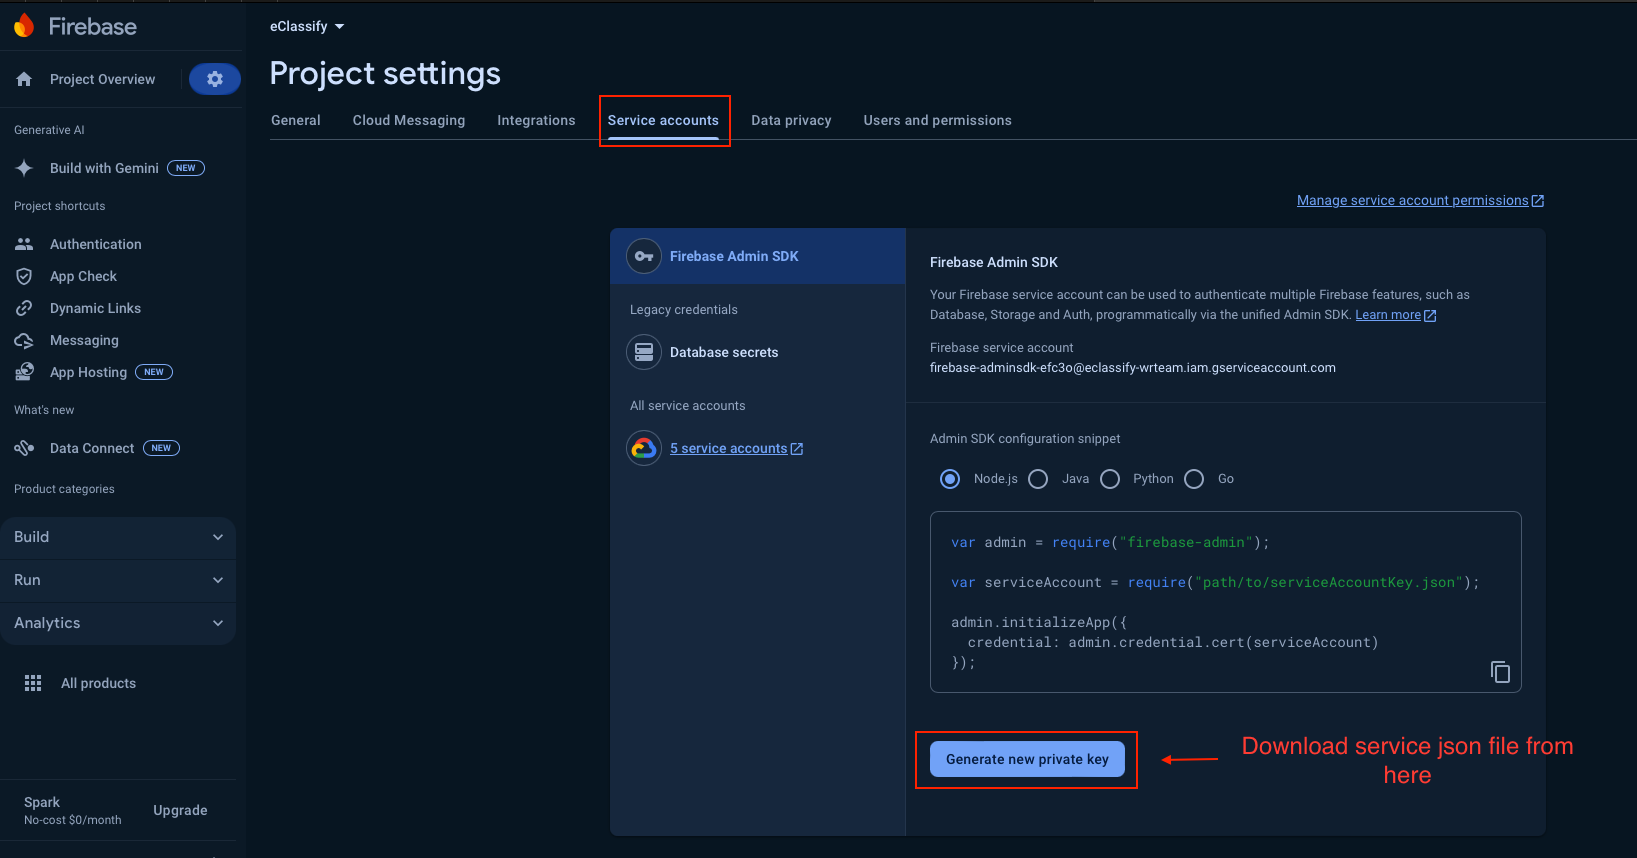
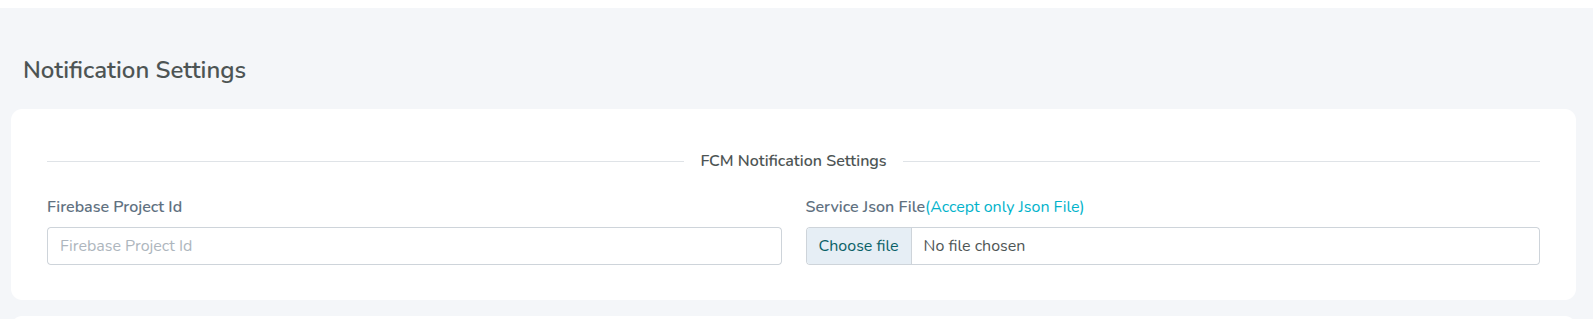
Now add your project id and downloaded service json file in admin panel system settings and save it.
For iOS you need to perform below given step
-
In Xcode, open the project.
-
In the Project Navigator (the left-hand menu), select the project icon that represents your app.
-
In the top-left corner of the right-hand pane in Xcode, select your app's target.
-
Navigate to the Capabilities tab.
-
Enable Push Notifications.
-
Check Remote Notifications and Background Fetch from Enabling Background Modes.
-
APNs (Apple's Push Notification service) currently supports two types of connections: token-based (.p8) and certificate-based (.p12). You can follow either one of them.
For Token-based (.p8)
-
Log in to the Apple Developer Portal.
-
Navigate to Certificates, IDs & Profiles > Identifiers > App IDs and click the App ID associated with your app.
-
On the screen for your App ID, check Capabilities > Push Notifications.
-
Select App ID in next page & click continue.
-
And then create Development SSL Certificate & Production SSL Certificate by adding CSR certificate. Follow Apple's Create a certificate signing request instructions.
-
Navigate to Certificates, IDs & Profiles > Keys Section and add a Universal key for Notifications, which you can use for more than one apps as well.
-
Just save and Download & keep it safe, as it will be downloaded only once.
-
Then go to Firebase and add this .p8 file along with Your Key ID and Team ID.
FOR certificate-based (.p12)
-
Log in to the Apple Developer Portal.
-
Navigate to Certificates, IDs & Profiles > Identifiers > App IDs and click the App ID associated with your app.
-
On the screen for your App ID, check Capabilities > Push Notifications.
-
Click Save and respond to the Modify App Capabilities dialog box that appears.
-
To create the certificate, we will use to communicate with Apple when sending push notifications:
- In a new browser tab, follow Apple's Create a certificate signing request instructions.
- In the Apple Developer Portal, navigate back to your App ID.
- Click Capabilities > Push Notifications > Configure.
- Click one of the following buttons:
- Development SSL Certificate > Create Certificate (for testing push notifications while developing an iOS app)
- Production SSL Certificate > Create Certificate (for sending push notifications in production)
- Click Choose File and select the certificate signing request you created above.
- Click Continue.
- Click Download to download the certificate.
- Use this file to export a .p12 file in the next step.
-
On your Mac, double-click the .cer file to open it in Keychain Access.
-
In Keychain Access, in the lower-left corner, select Category > Certificates.
-
Select the certificate to export.
-
Choose File > Export Items.
-
Enter a name in the Save As field.
-
Accept the default .p12 file format and click Save. Respond to the prompts, and enter a password for the file if necessary.
-
Keep track of this file, since you'll upload it to firebase in a later step.