How to Setup Backend Panel
How to Install Video Plus on Your shared hosting?
- Create your domain or subdomain in your shared hosting
- Create an empty database in your shared hosting and remember this credentials:
i. database name
ii. database username
iii. database password - Upload the source code you have downloaded from CodeCanyon and unzip it.
- Now navigate to the url where your project is located.
ex. mydomain.com or subdomain.mydomain.com - The installation screen should appear and guide you in the process.
Thats it! Now you are ready to run your first Video Plus : https://videos.wrteam.in
Default Login DetailsUsername: admin@gmail.com
Password: admin123
How to Setup Java jdk-11 on windows
- If your System already have Java jdk-8 installed then you can skip this step.
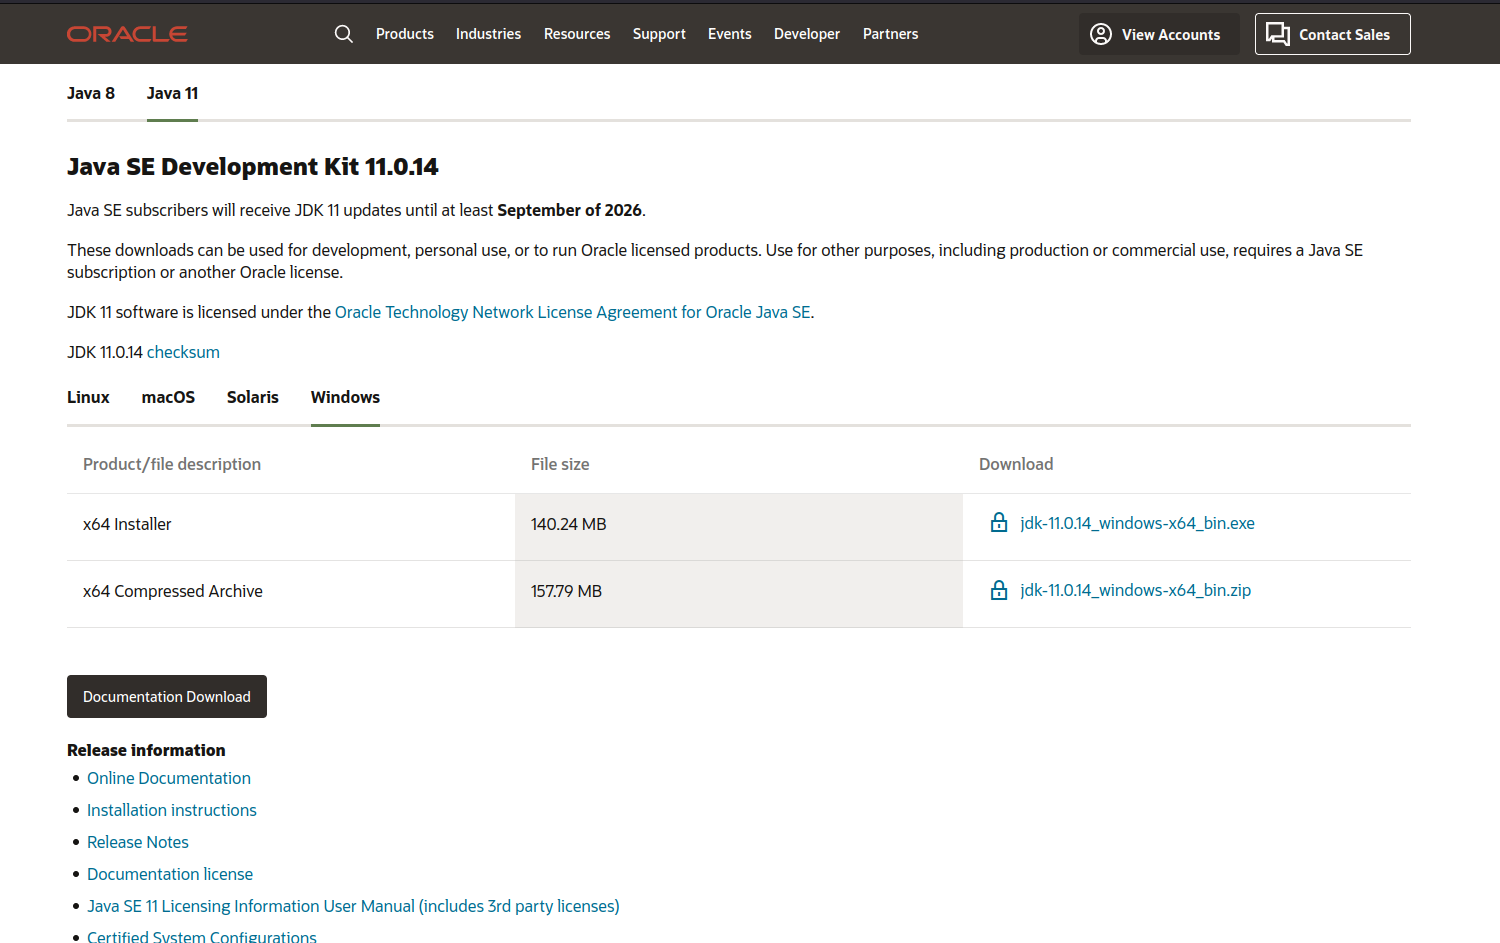
- Download Java-11 jdk by clicking below link.
(JAVA jdk-11) - Download Java-11 JDK for your version 32 bit or JDK download 64 bit.
- When you click on the Installation link the popup will be open. Click on I reviewed and accept the Oracle Technology Network License Agreement for Oracle Java SE development kit and you will be redirected to the login page. If you don’t have an oracle account you can easily sign up by adding basics details of yours.
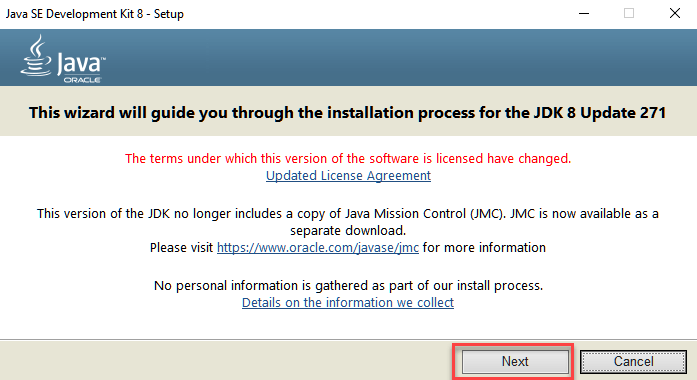
- Once the Java JDK 11 download is complete, run the exe for install JDK. Click Next
- Select the PATH to install Java in Windows… You can leave it Default. Click next.
- Once you install Java in windows, click Close
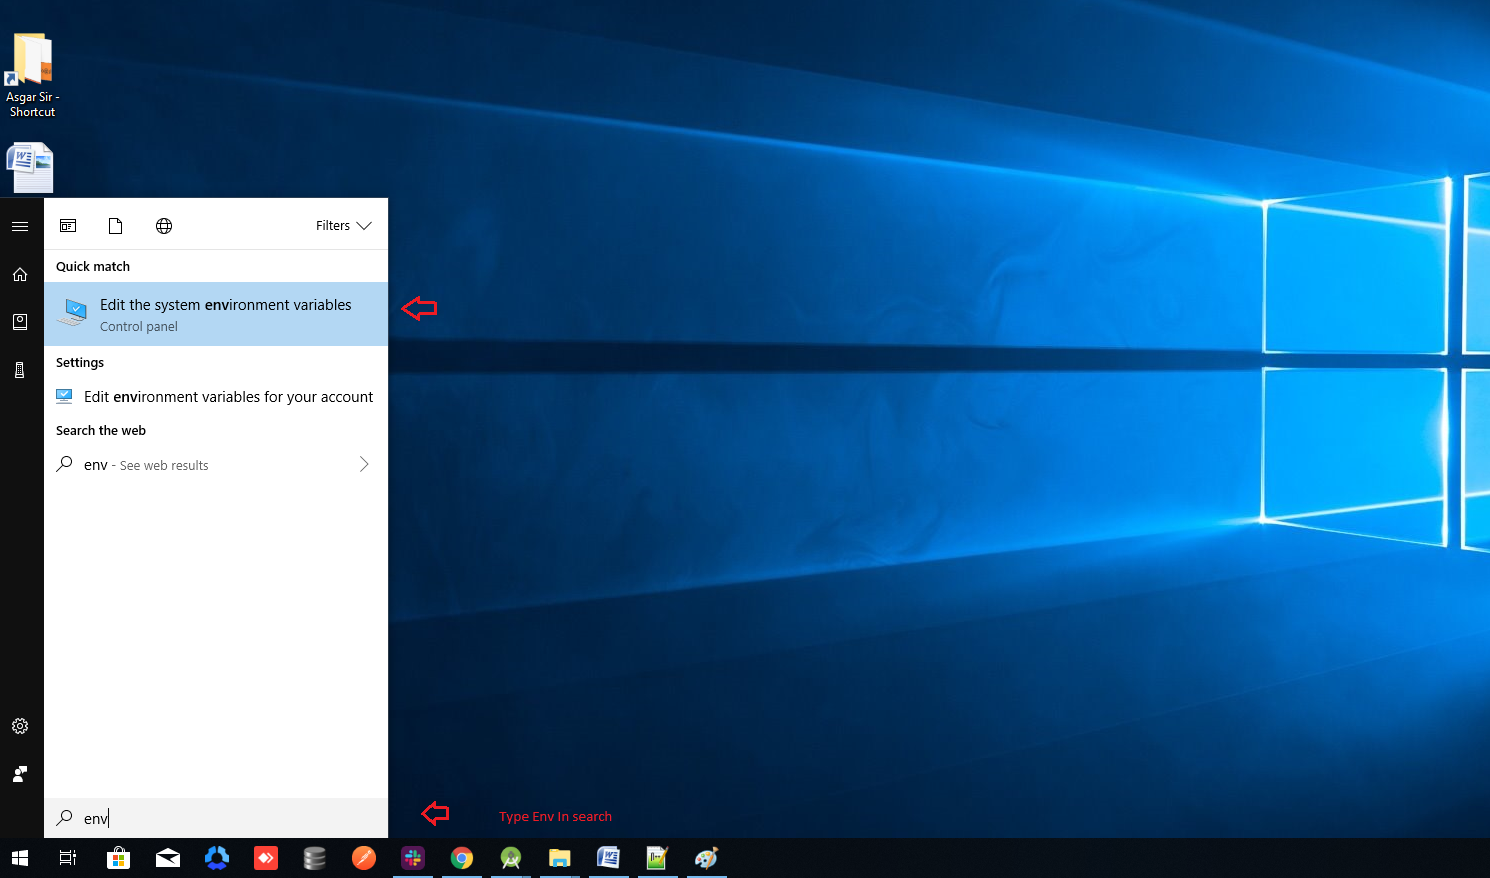
- Now set your enviournment variable
- From the Start search bar in , type ‘env’ and select Edit environment variables for your account
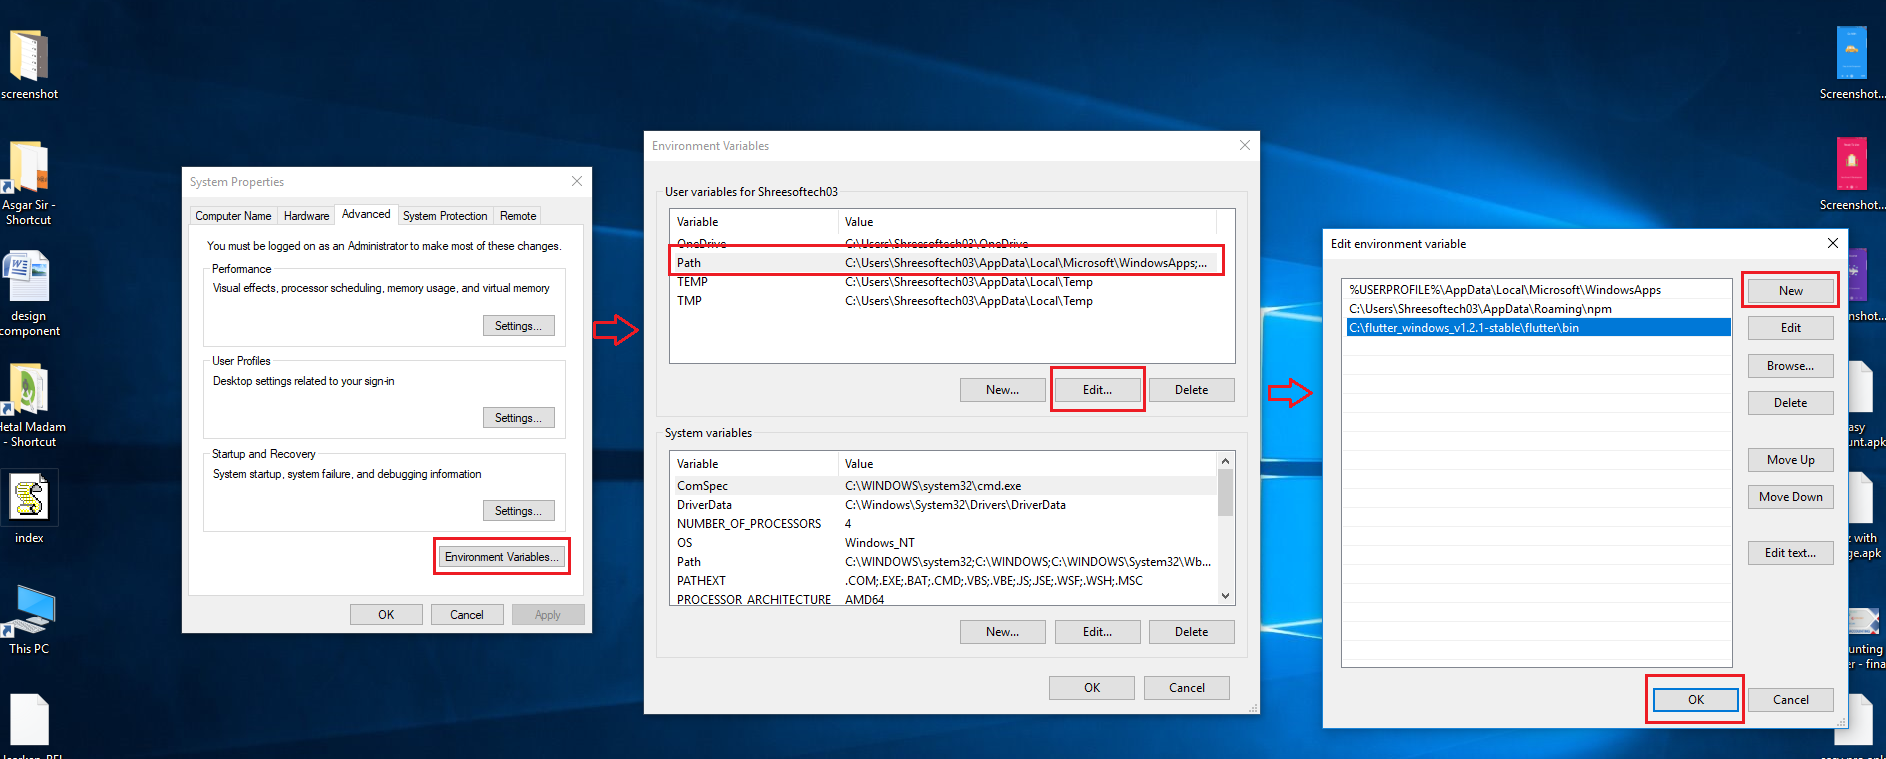
- Under User variables check if there is an entry called Path:
- Click on Edit. then Dialog will open from it, now click on new and Copy the path of bin folder which is installed in JDK folder. then Paste Path of bin folder in Variable value. Click on OK Button.
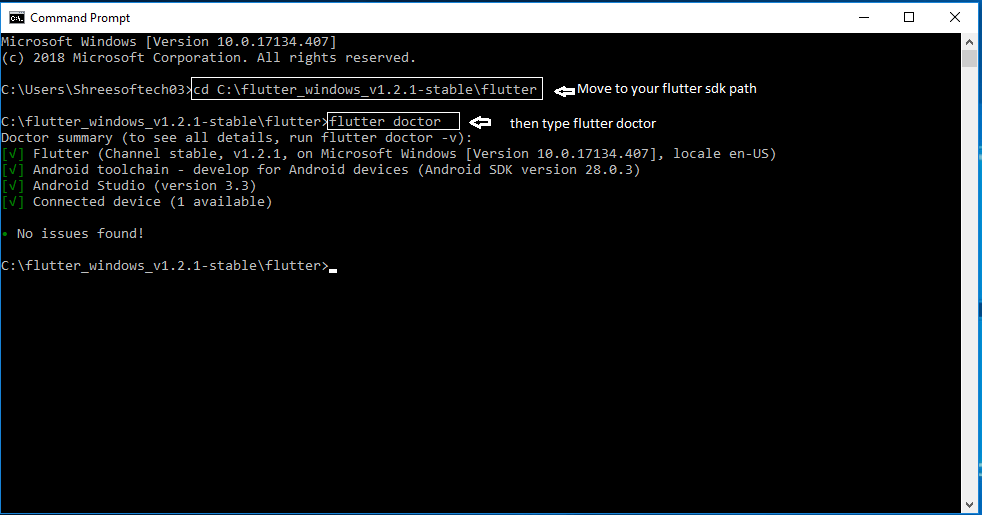
- Now check everything is ok or not
- open cmd and do following shown in below picture
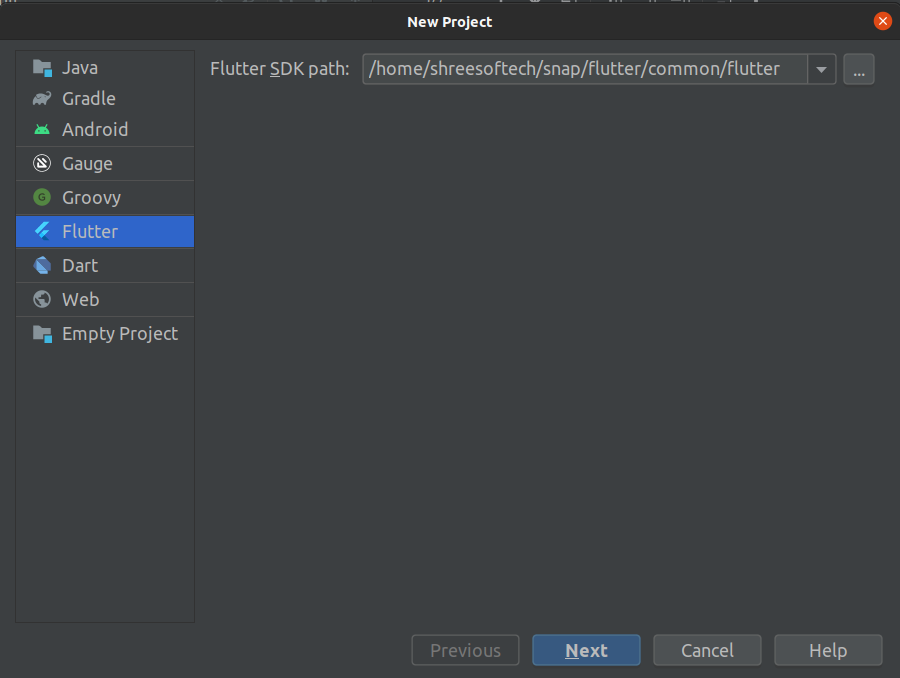
- Now open Android Studio and create new flutter project then select your flutter sdk file to the location where we have downloaded earlier and that's it


How to setup flutter
-
Visit flutter official website : https://docs.flutter.dev/get-started/install
for full install guide.
- Extract the zip file and copy flutter folder into your desired installation location for the Flutter SDK (eg. C:\src\flutter; do not install Flutter in a directory like C:\Program Files\).
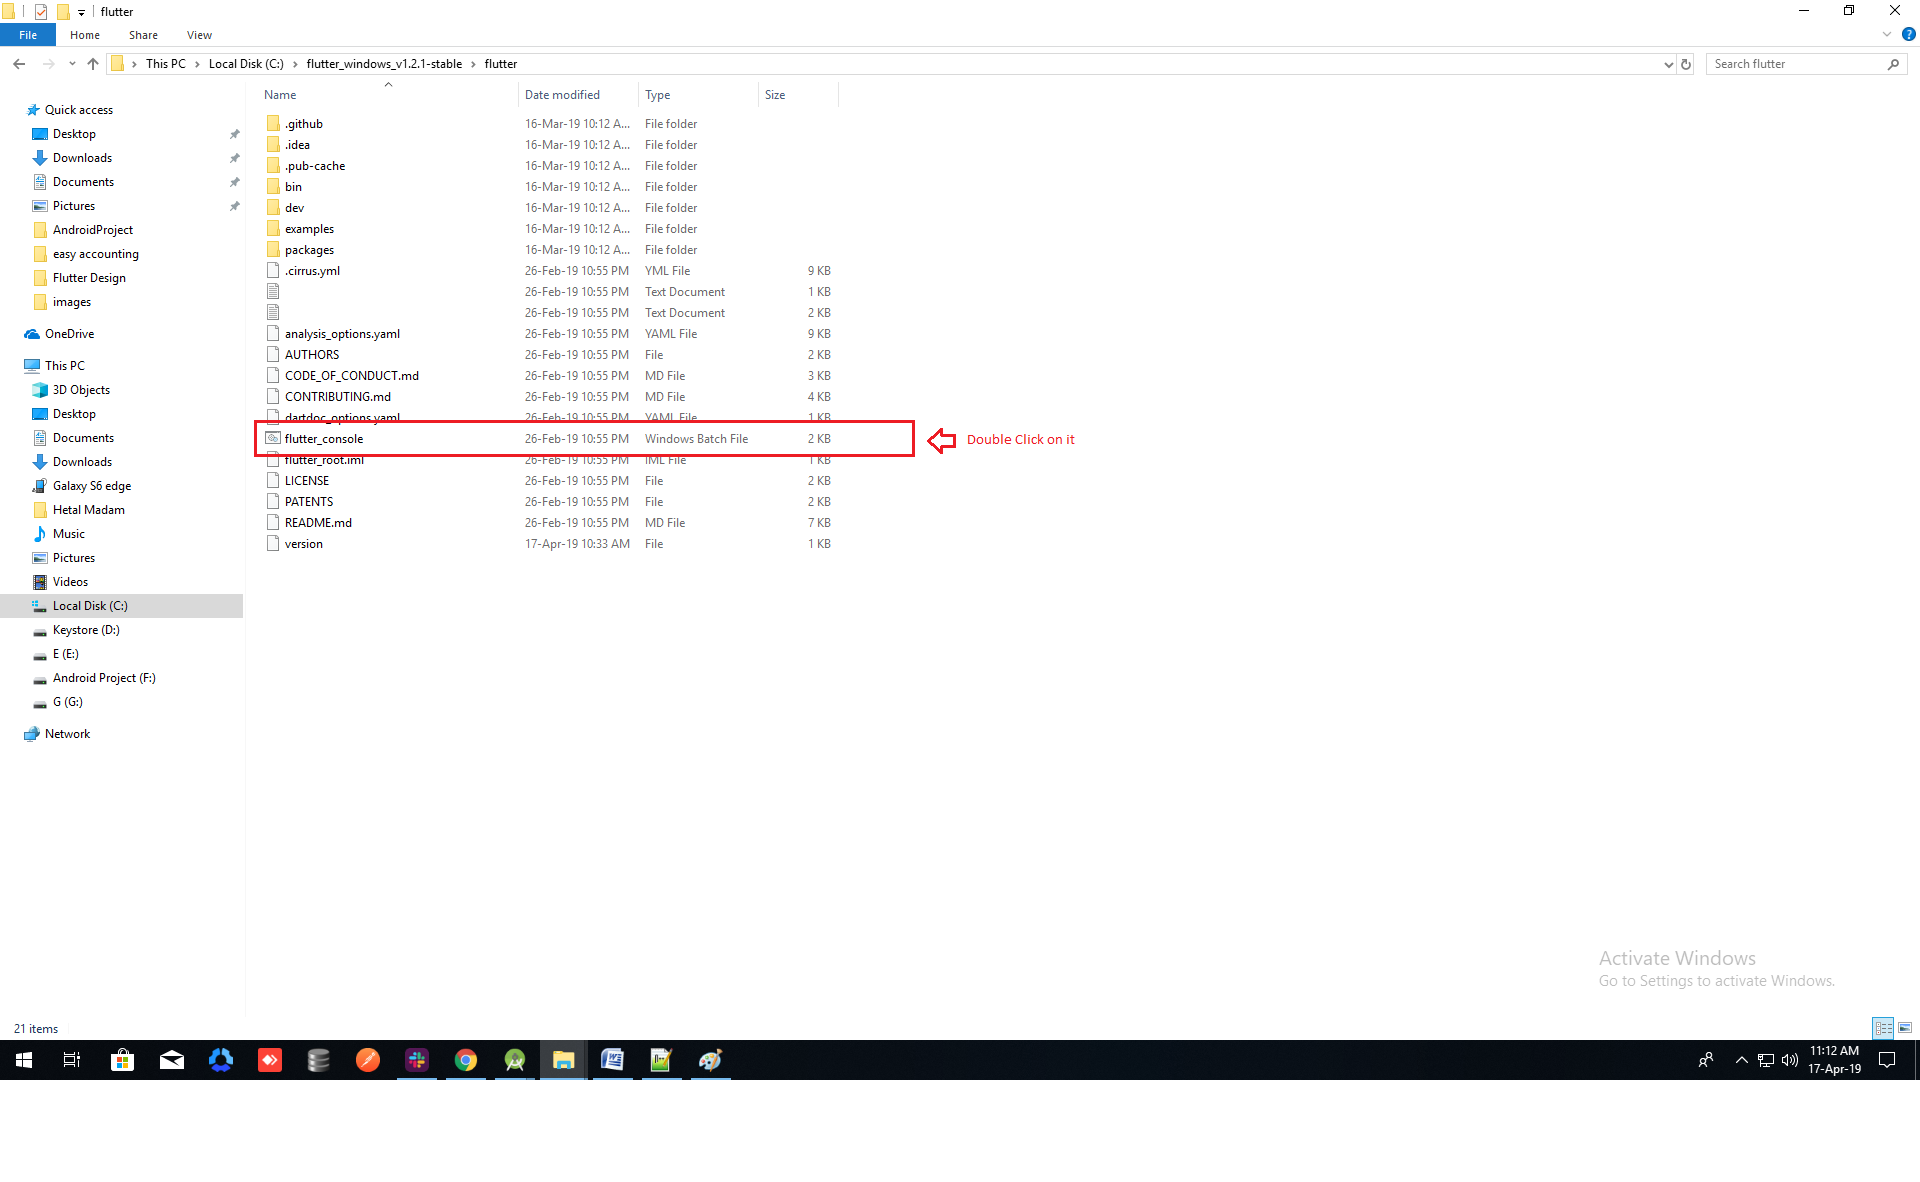
- Inside Flutter folder find flutter_console.bat. Start it by double-clicking.
<\li>
- Now set your enviournment variable
- From the Start search bar in , type ‘env’ and select Edit environment variables for your account
- Under User variables check if there is an entry called Path:
- Click on Edit.new Dialog open from it click on new and copy full path to flutter\bin as its value
- Now Restart your pc for changes to take effect
- Now check everything is ok or not
- open cmd and do following shown in below picture
- Now open Android Studio and create new flutter project then select your flutter sdk file to the location where we have downloaded earlier and that's it
If you prefer video tutorials, we recommend this playlist for the full installation process
https://www.youtube.com/playlist?list=PLSzsOkUDsvdtl3Pw48-R8lcK2oYkk40cm
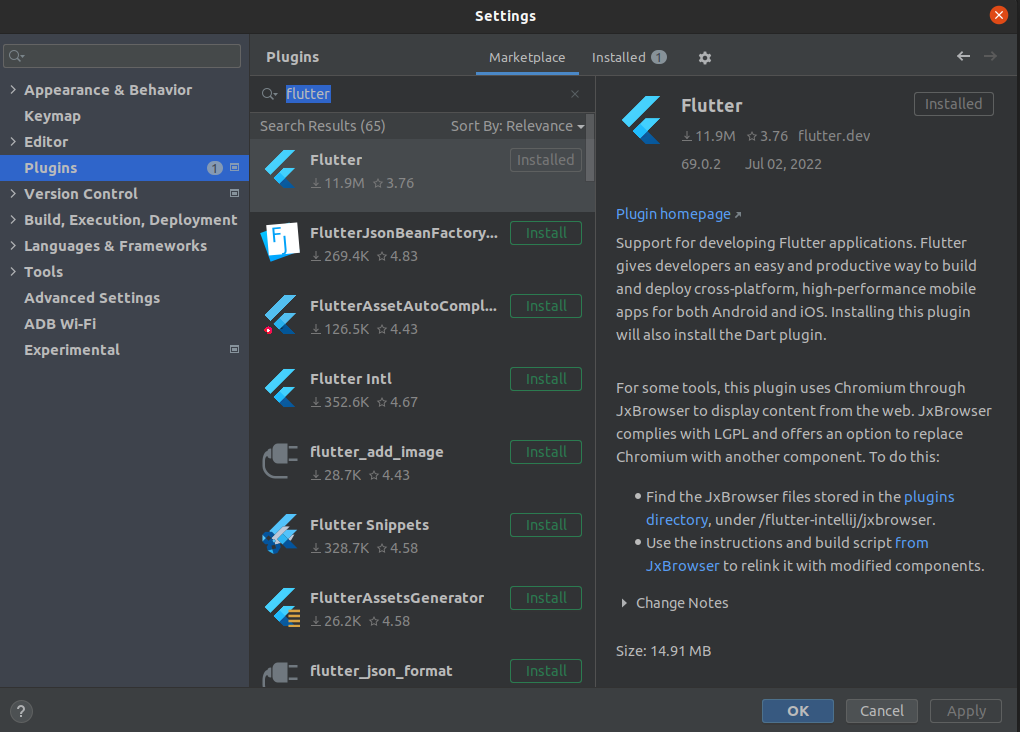
- Install Flutter from marketplace
How to run this project
-
Unzip the downloaded code. After unzipping you will have Video Plus - Flutter Code zip folder.
Unzip Video Plus - Flutter Code folder and open it in Android Studio or Visual Studio Code. - Open ide teminal and execute flutter pub get command.
-
If you are running this app for ios then run these following commands in terminal.
cd ios
pod install
cd .. - open terminal and execute flutter run
How to change package name
-
Change package name for android app
Execute this command in your terminal
flutter pub run change_app_package_name:main your_new_package_name
-
Change package name for ios app
Open ios folder of this project in xcode. Go Select Runner->Targets->General->Identity and enter new package name in Build Identifier.
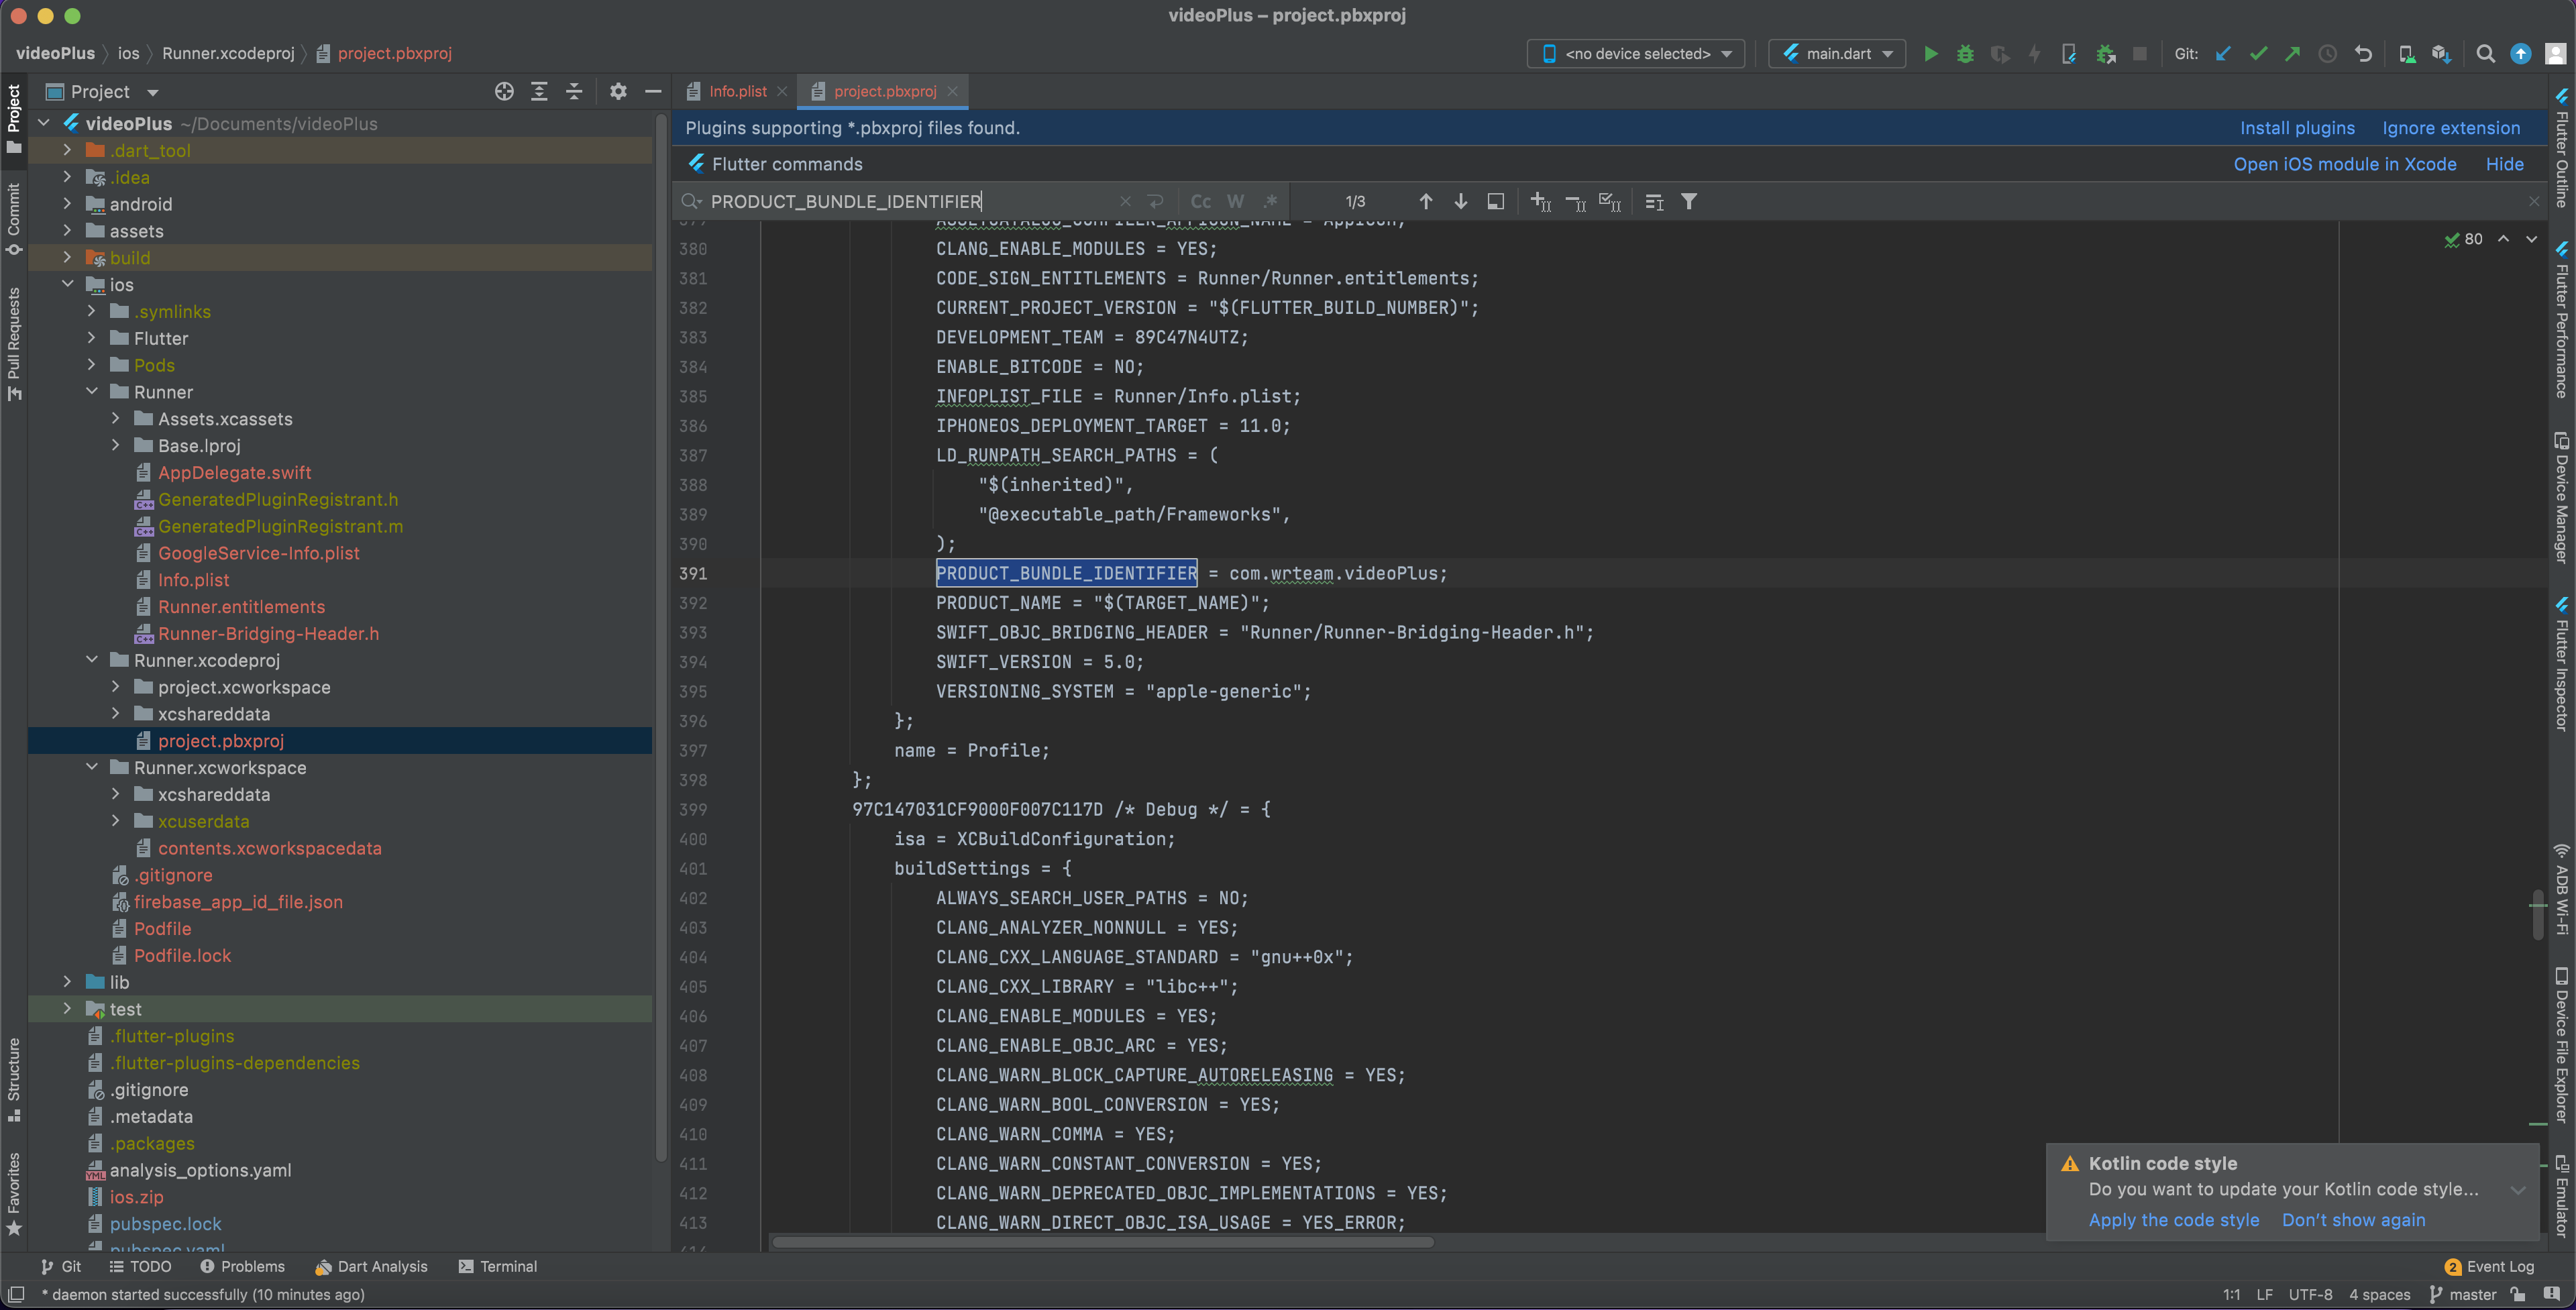
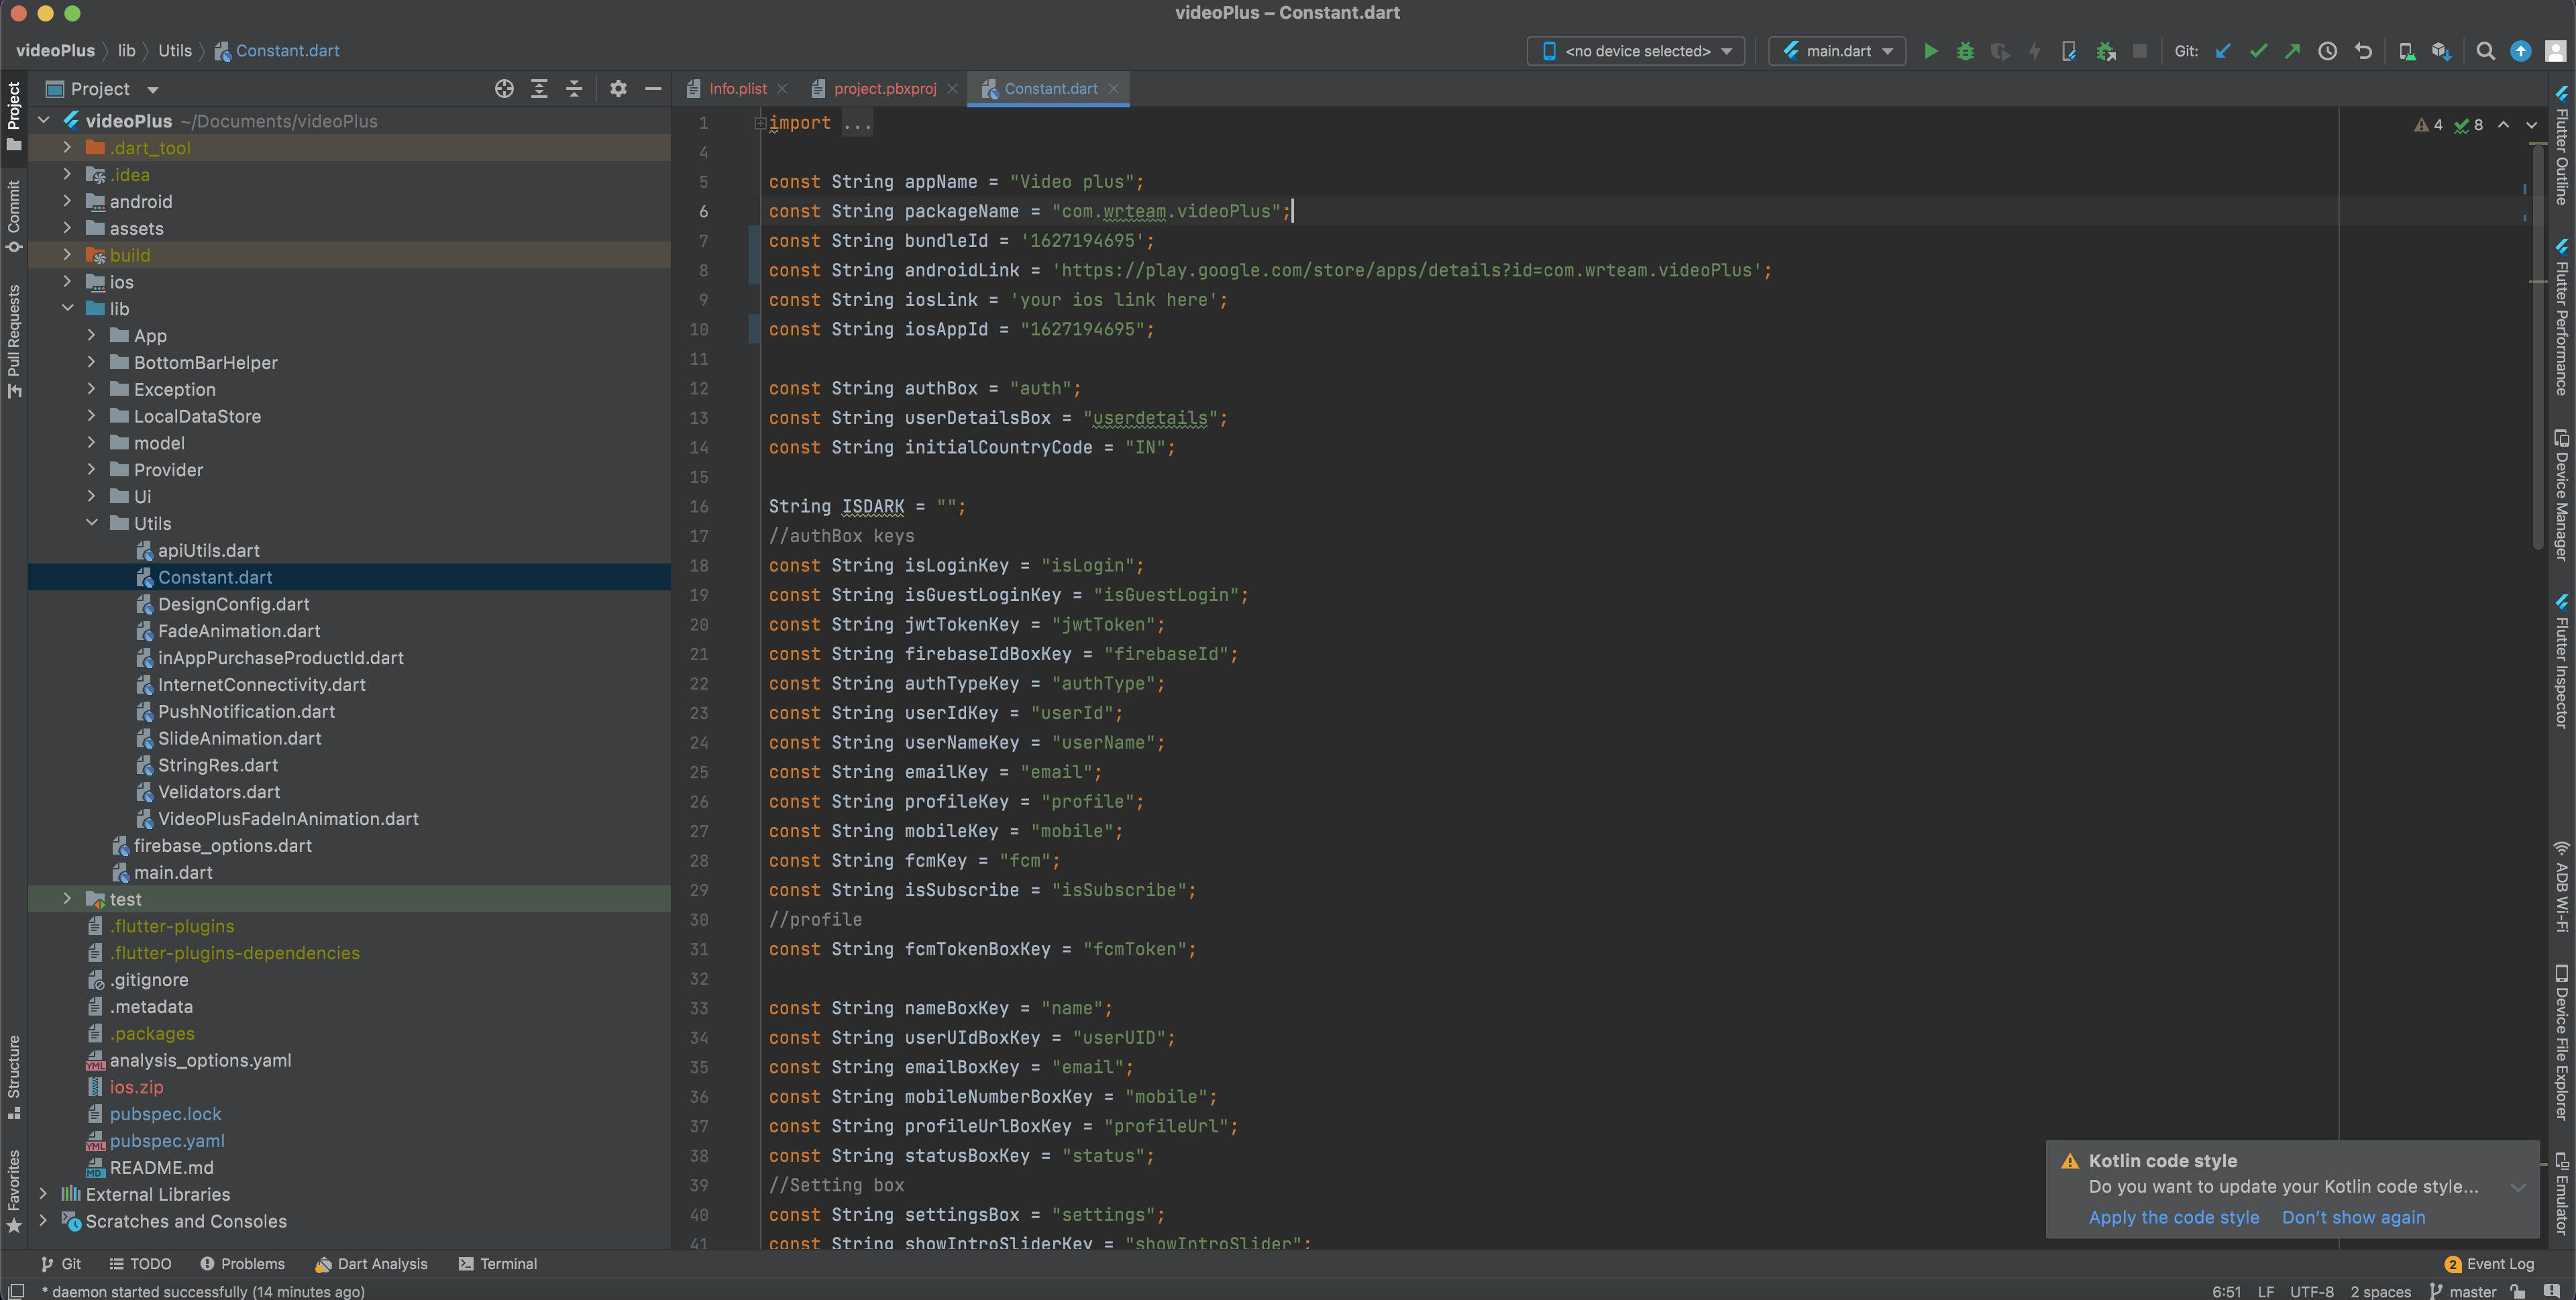
-
Go to lib/utils/constants.dart and update package.
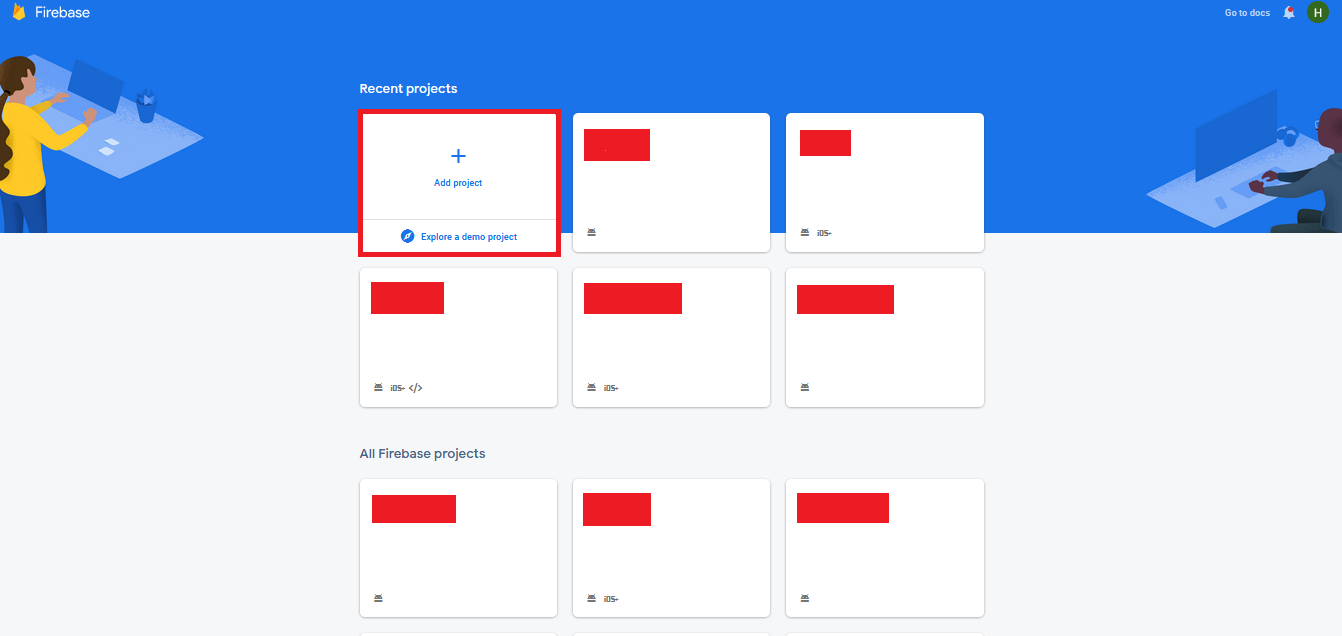
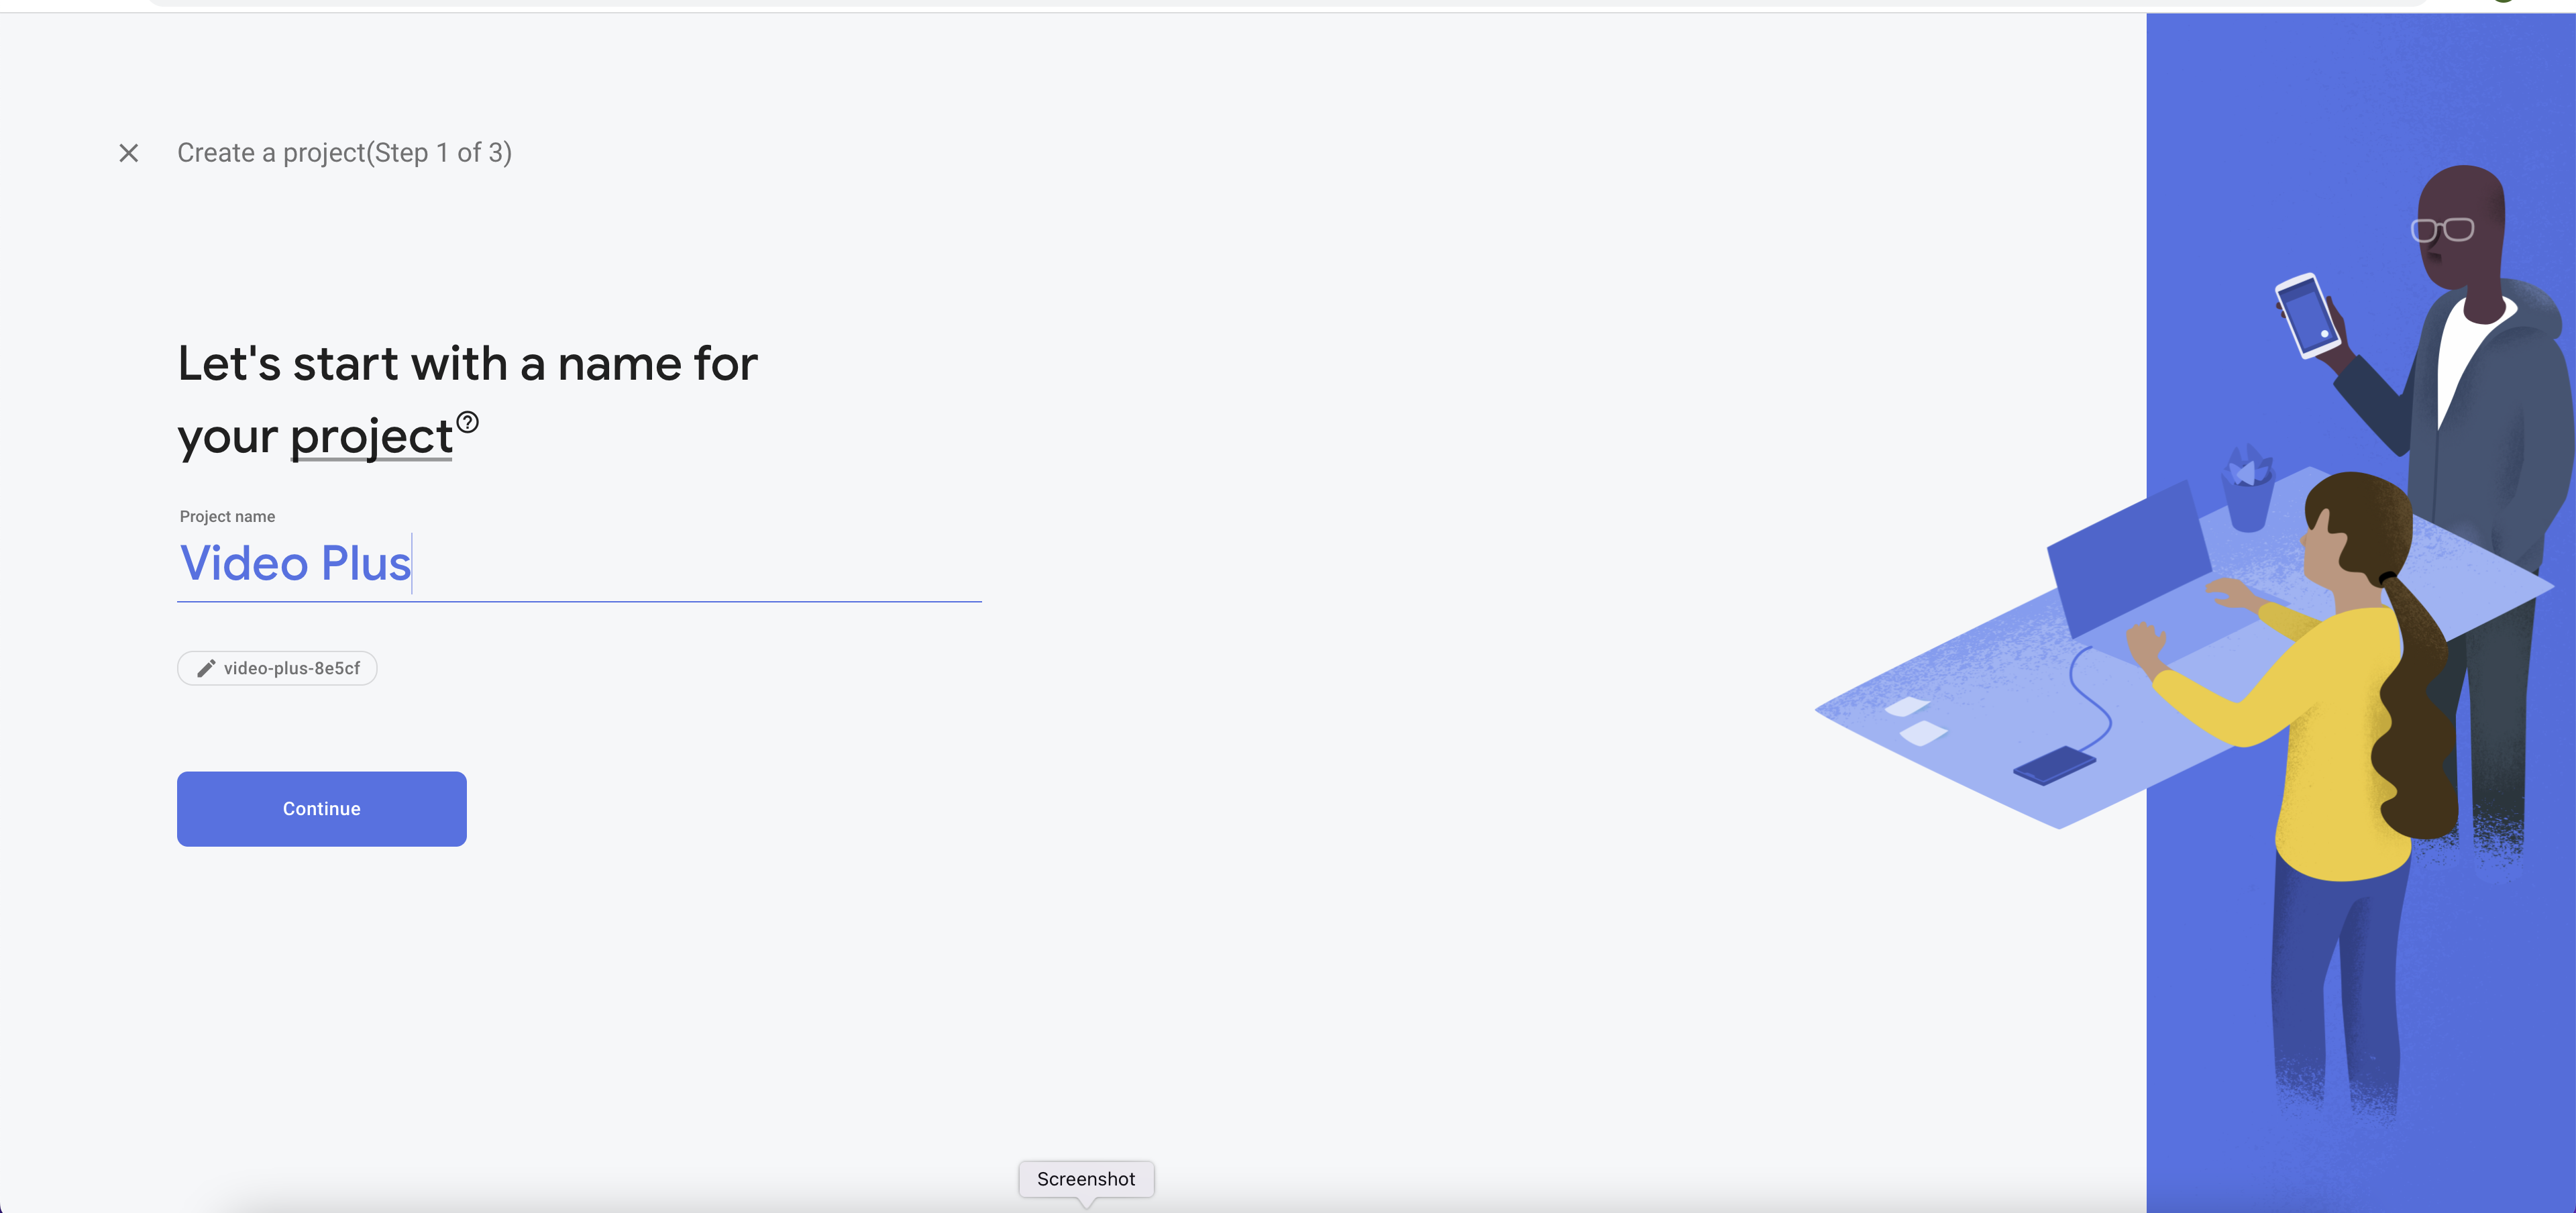
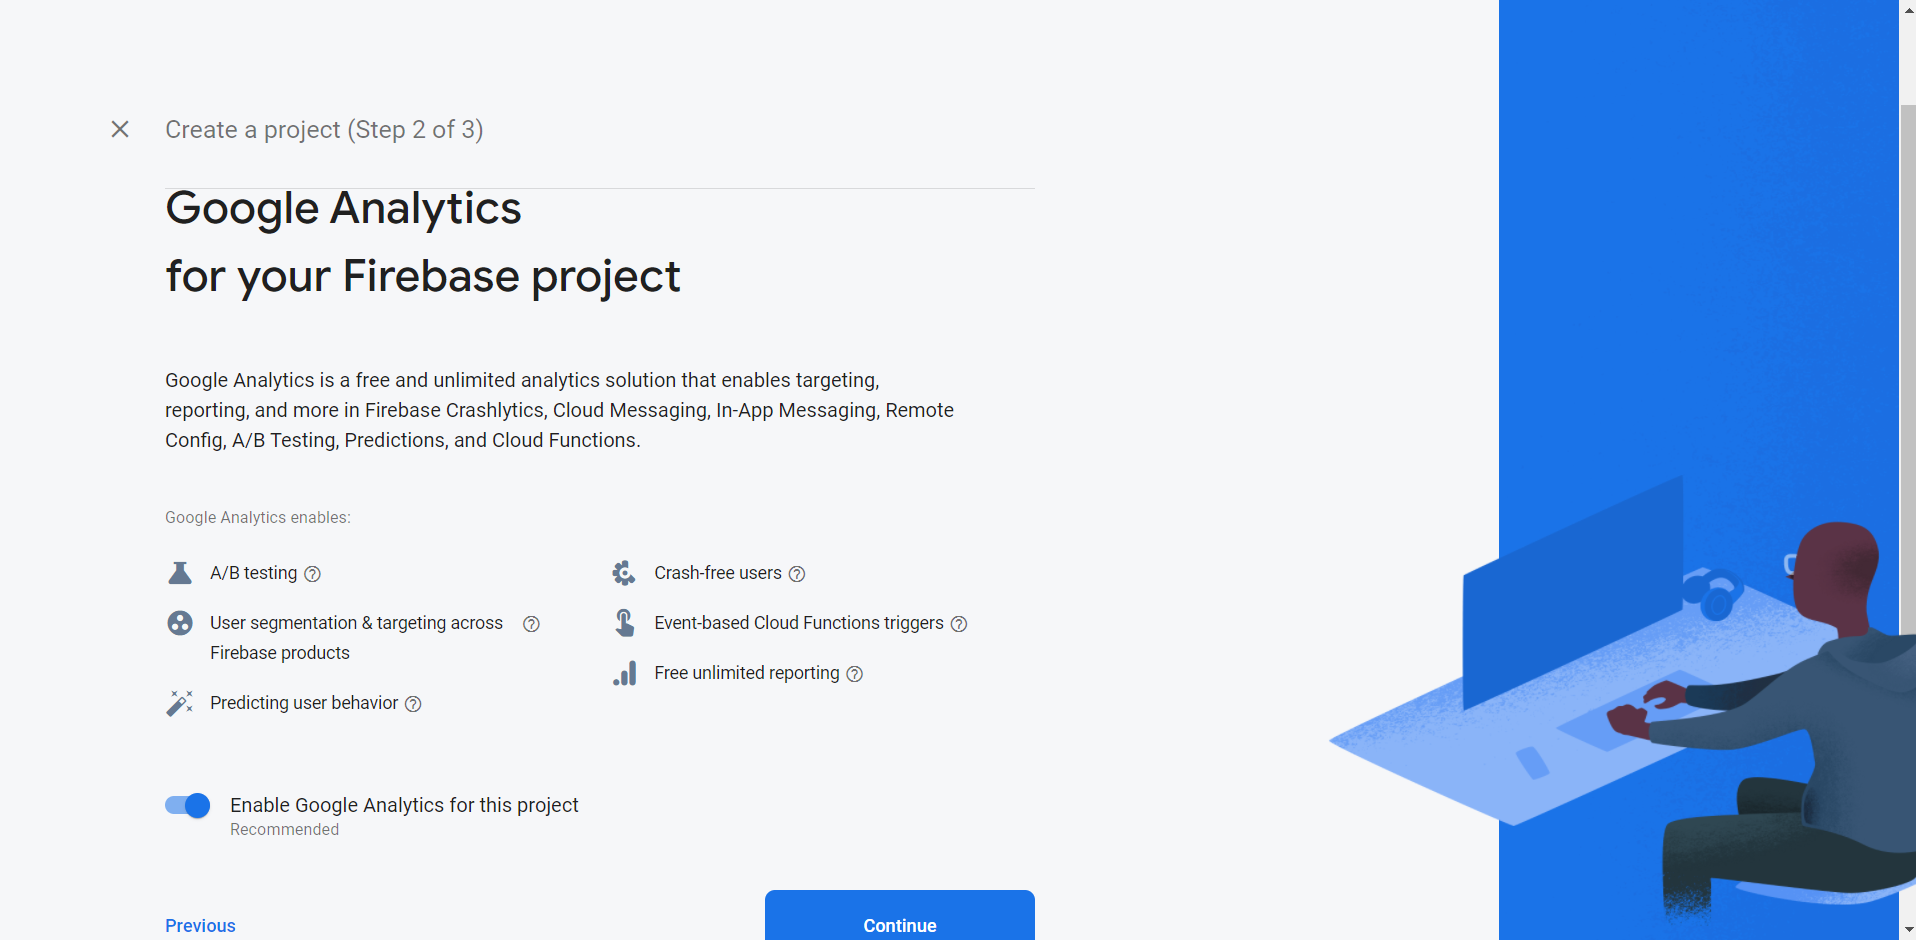
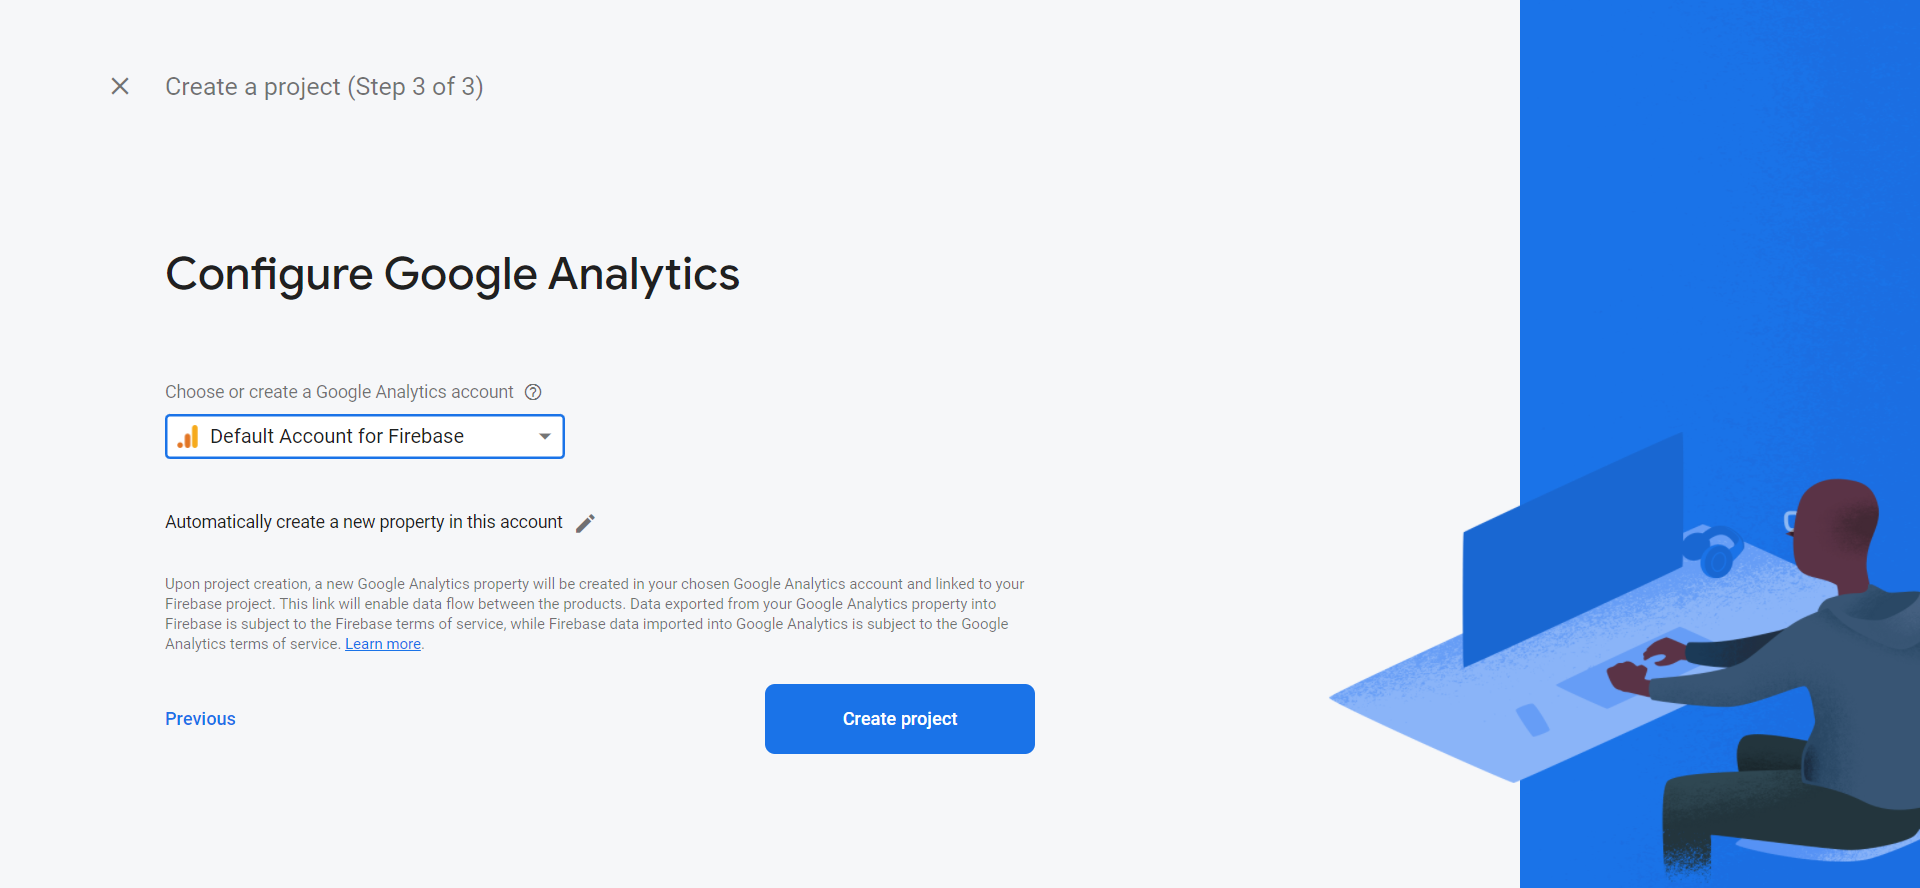
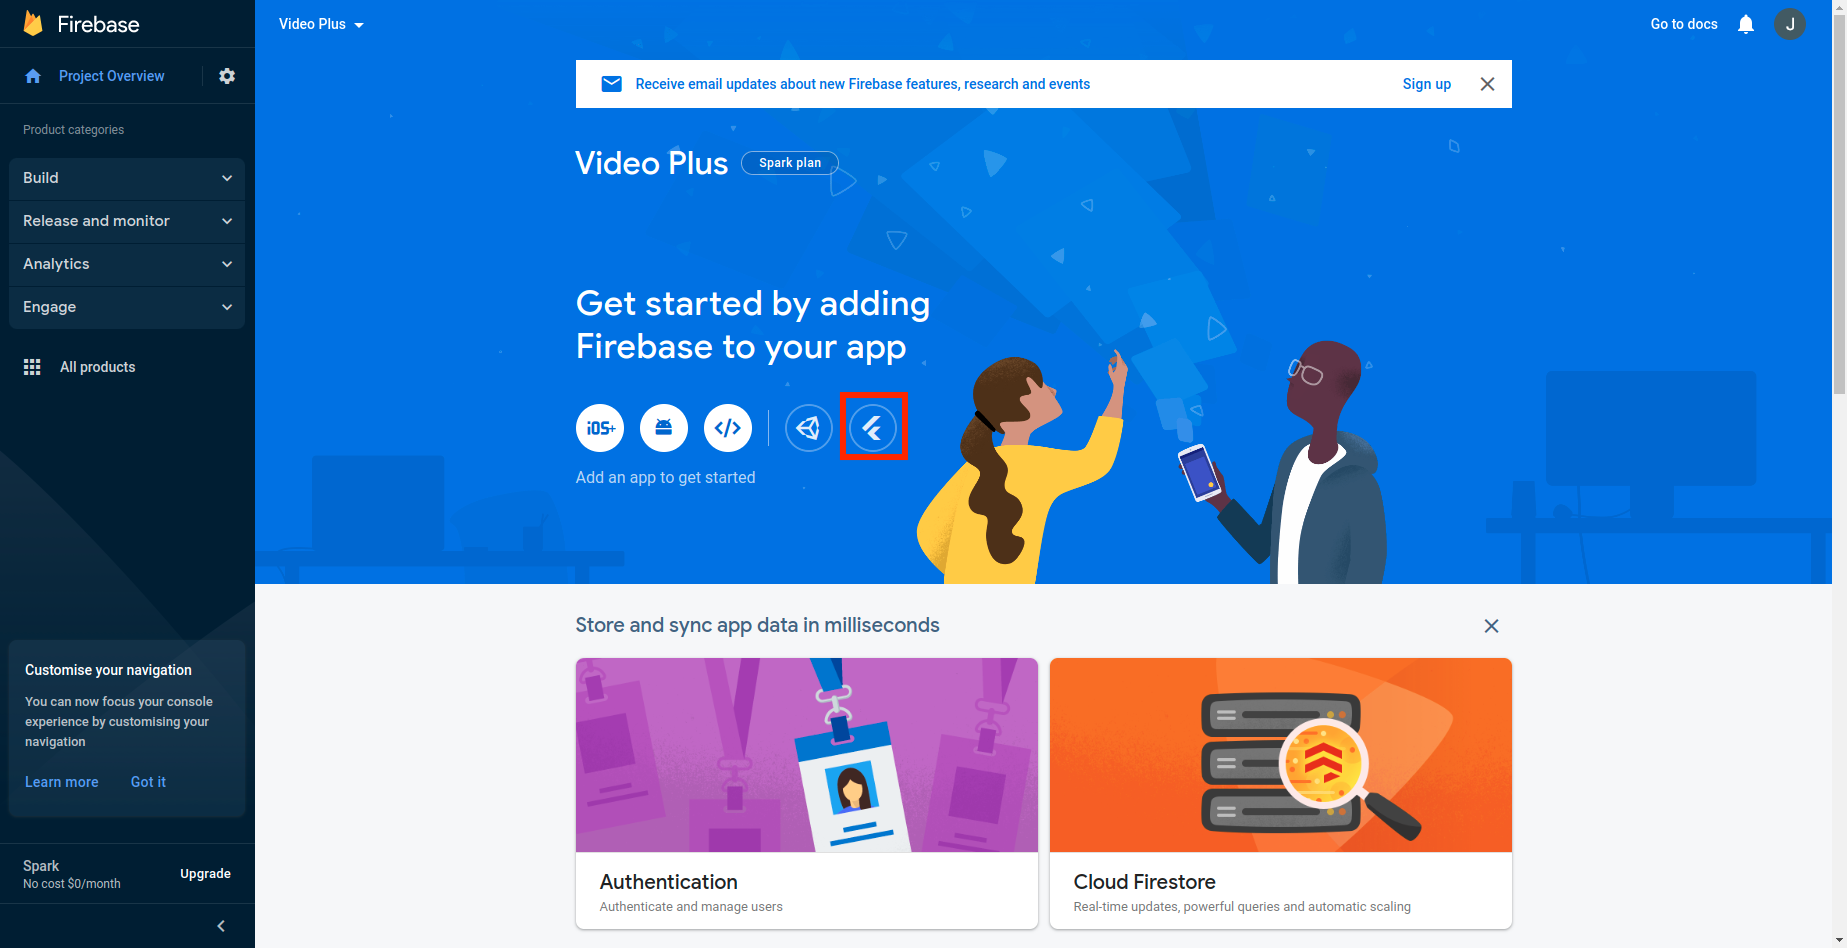
How to integrate firebase
- Create firebase project in your account
- Select flutter
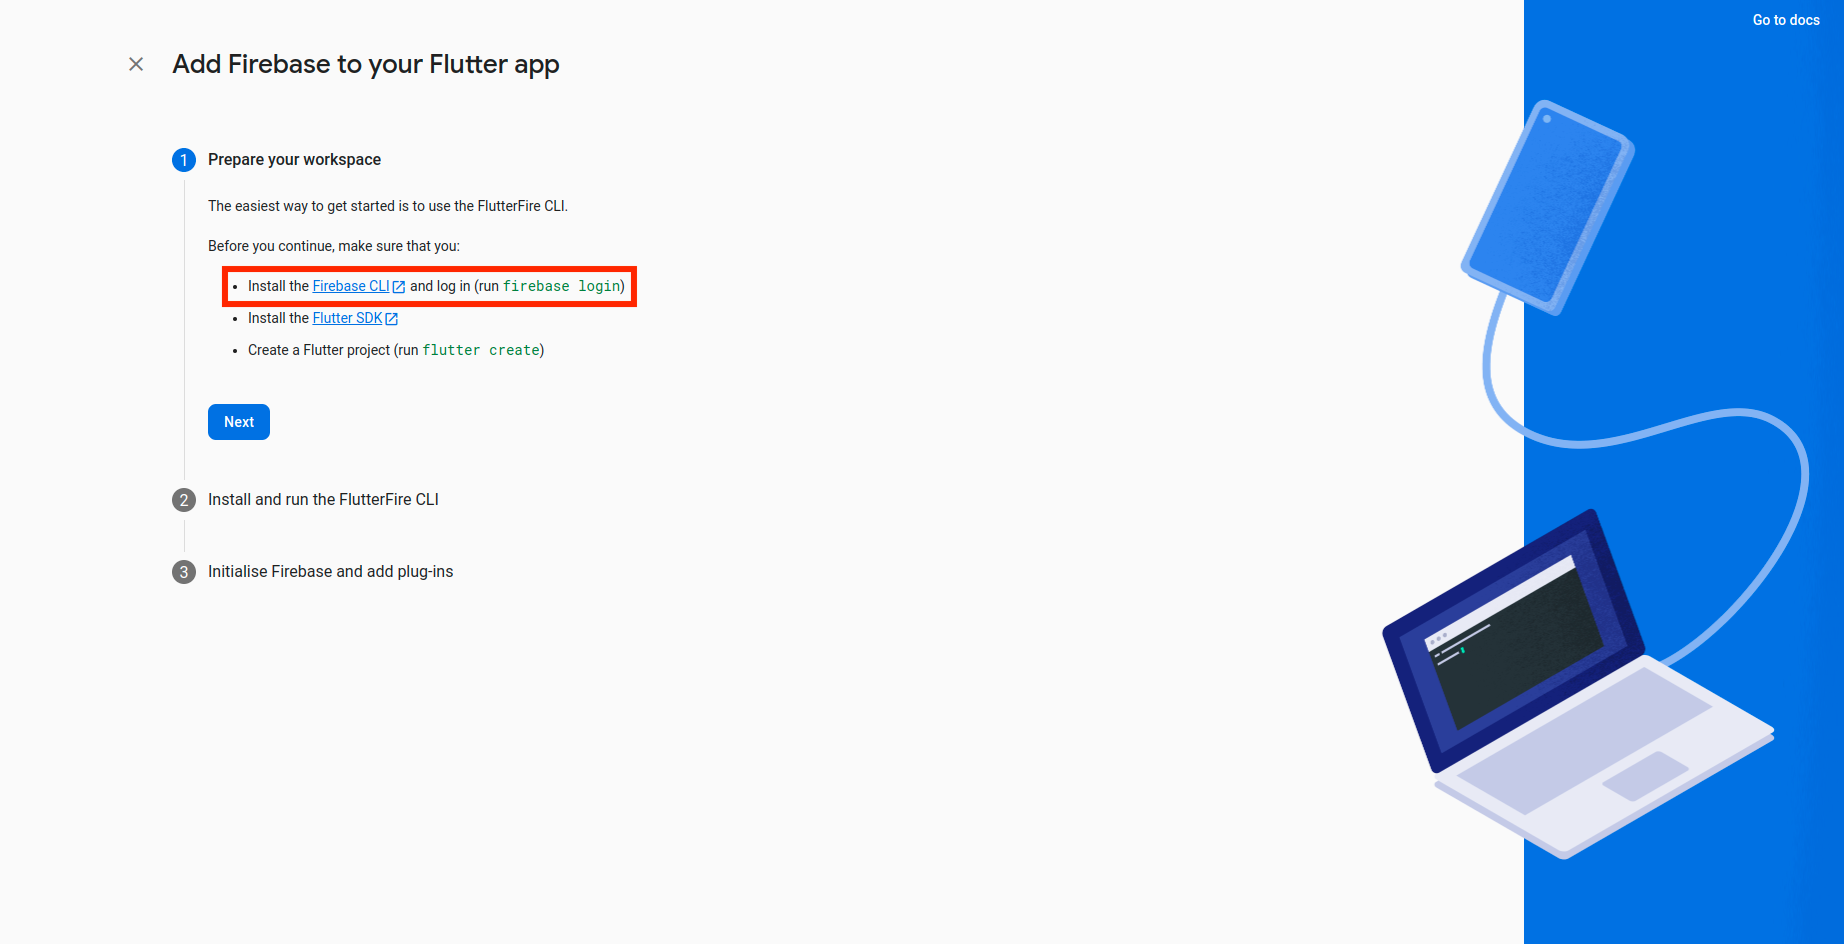 Visit firebase website : https://firebase.google.com/docs/cli
for full integration guide.
Visit firebase website : https://firebase.google.com/docs/cli
for full integration guide.
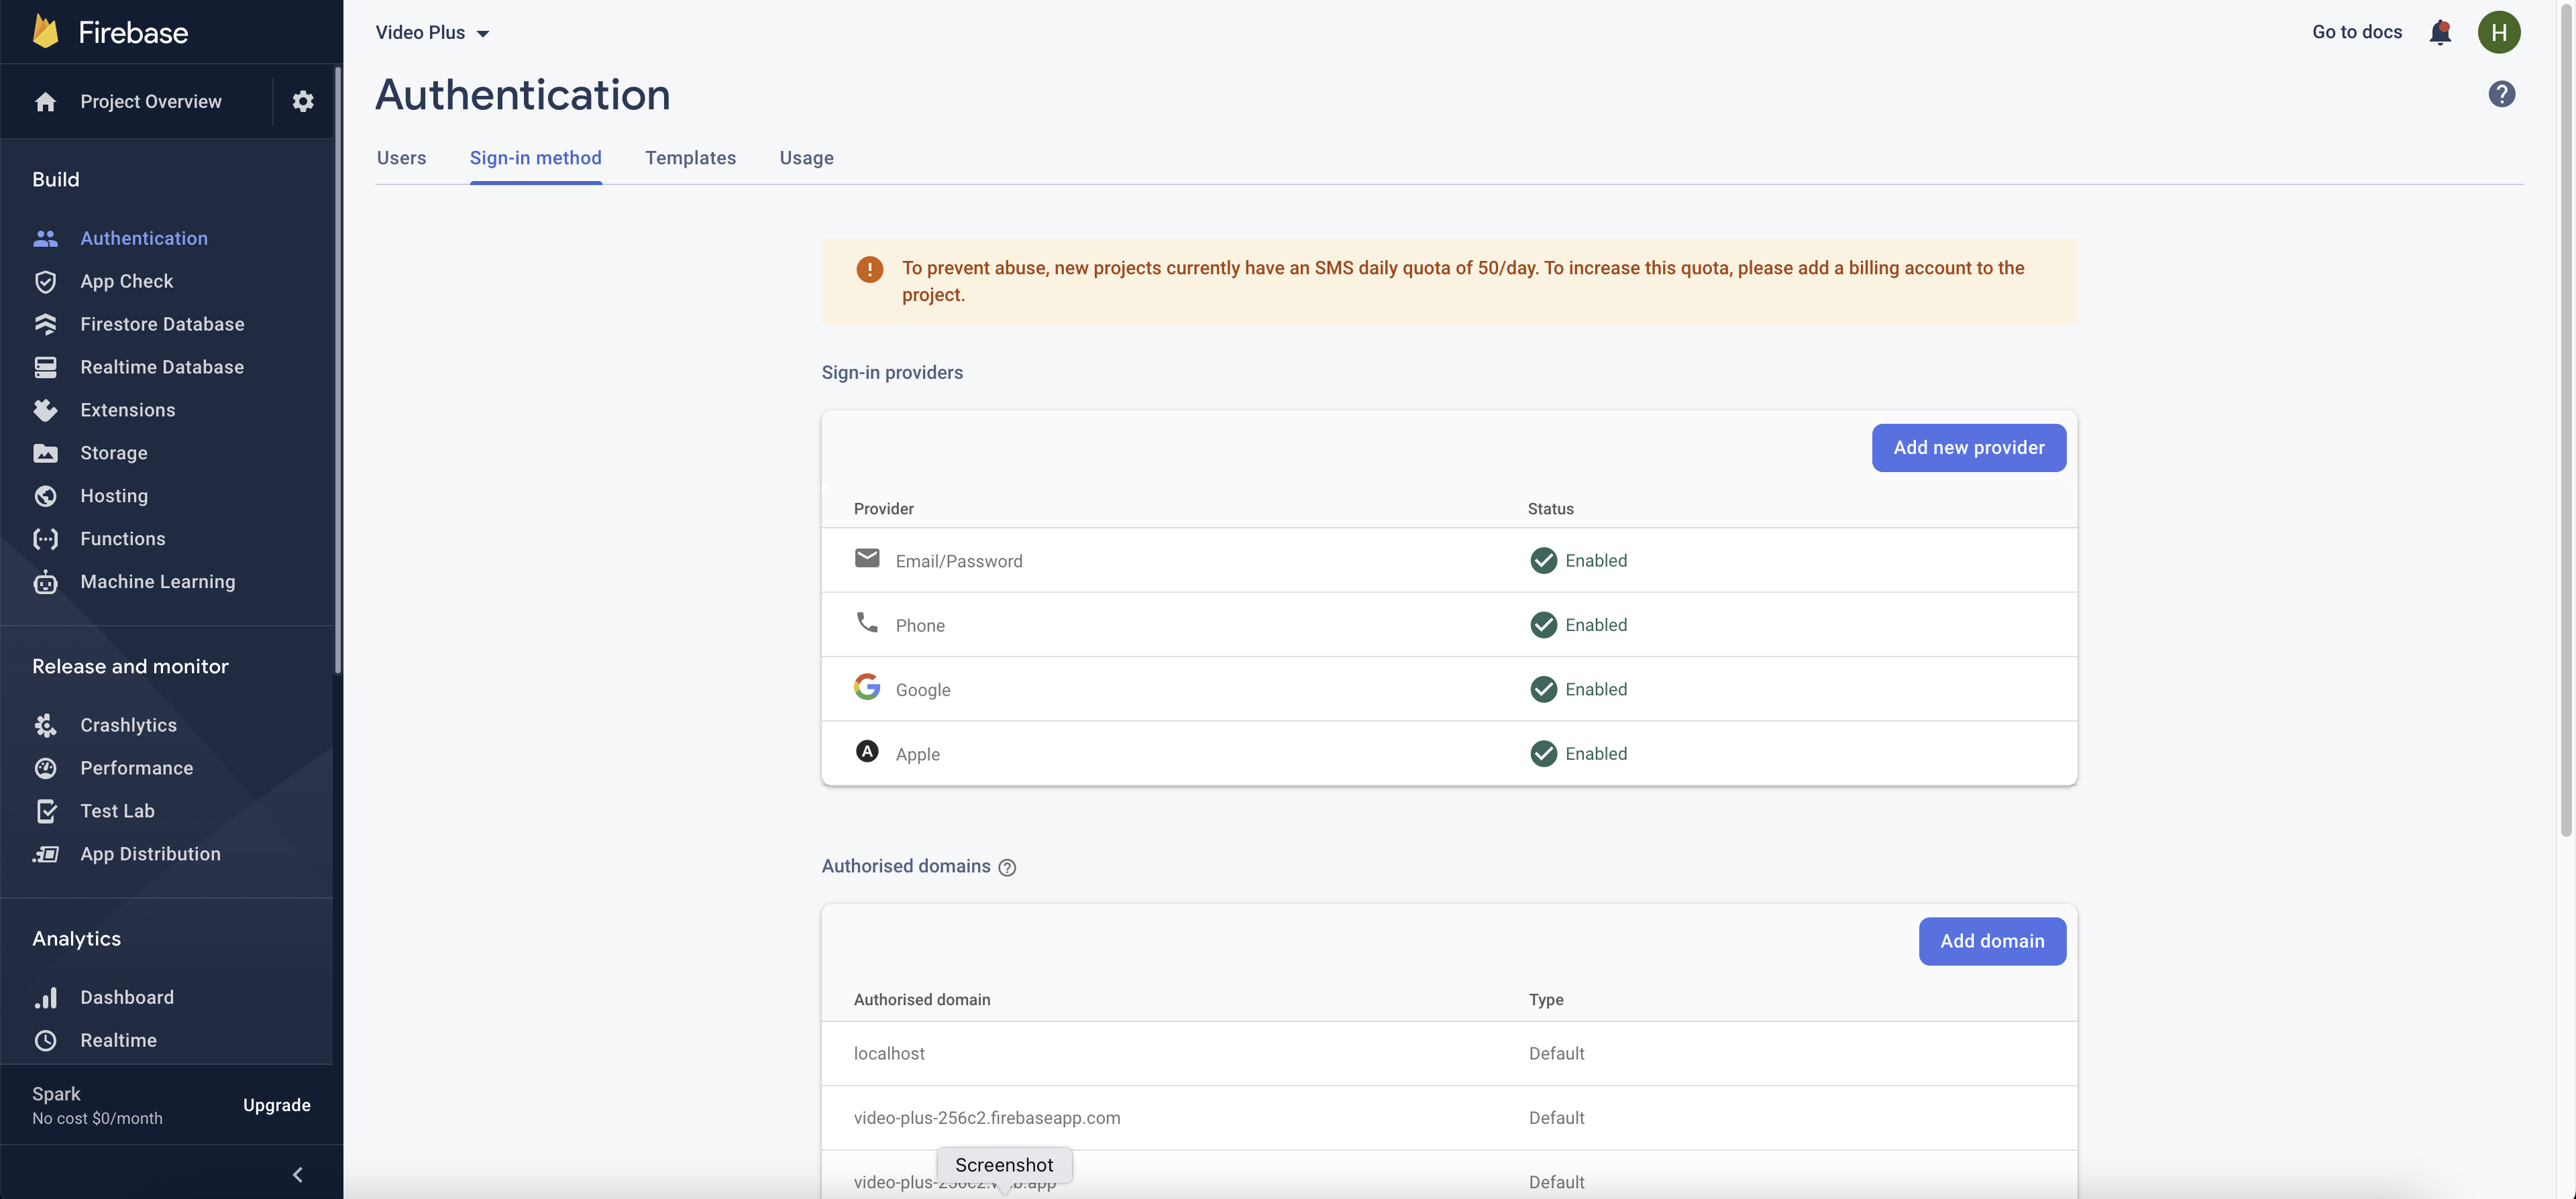
How to enable firebase auth
- Go to firebase project.Click on authentication menu and goto sign-in method. Enable all the
authentication method mention in below image
- If your are using google sign-in you need to enable OAuth APIs that you want to use using https://console.developers.google.com/ .Enable people api and make sure you've filled out all required fields in the console for OAuth consent screen. Otherwise, you may encounter APIException errors.
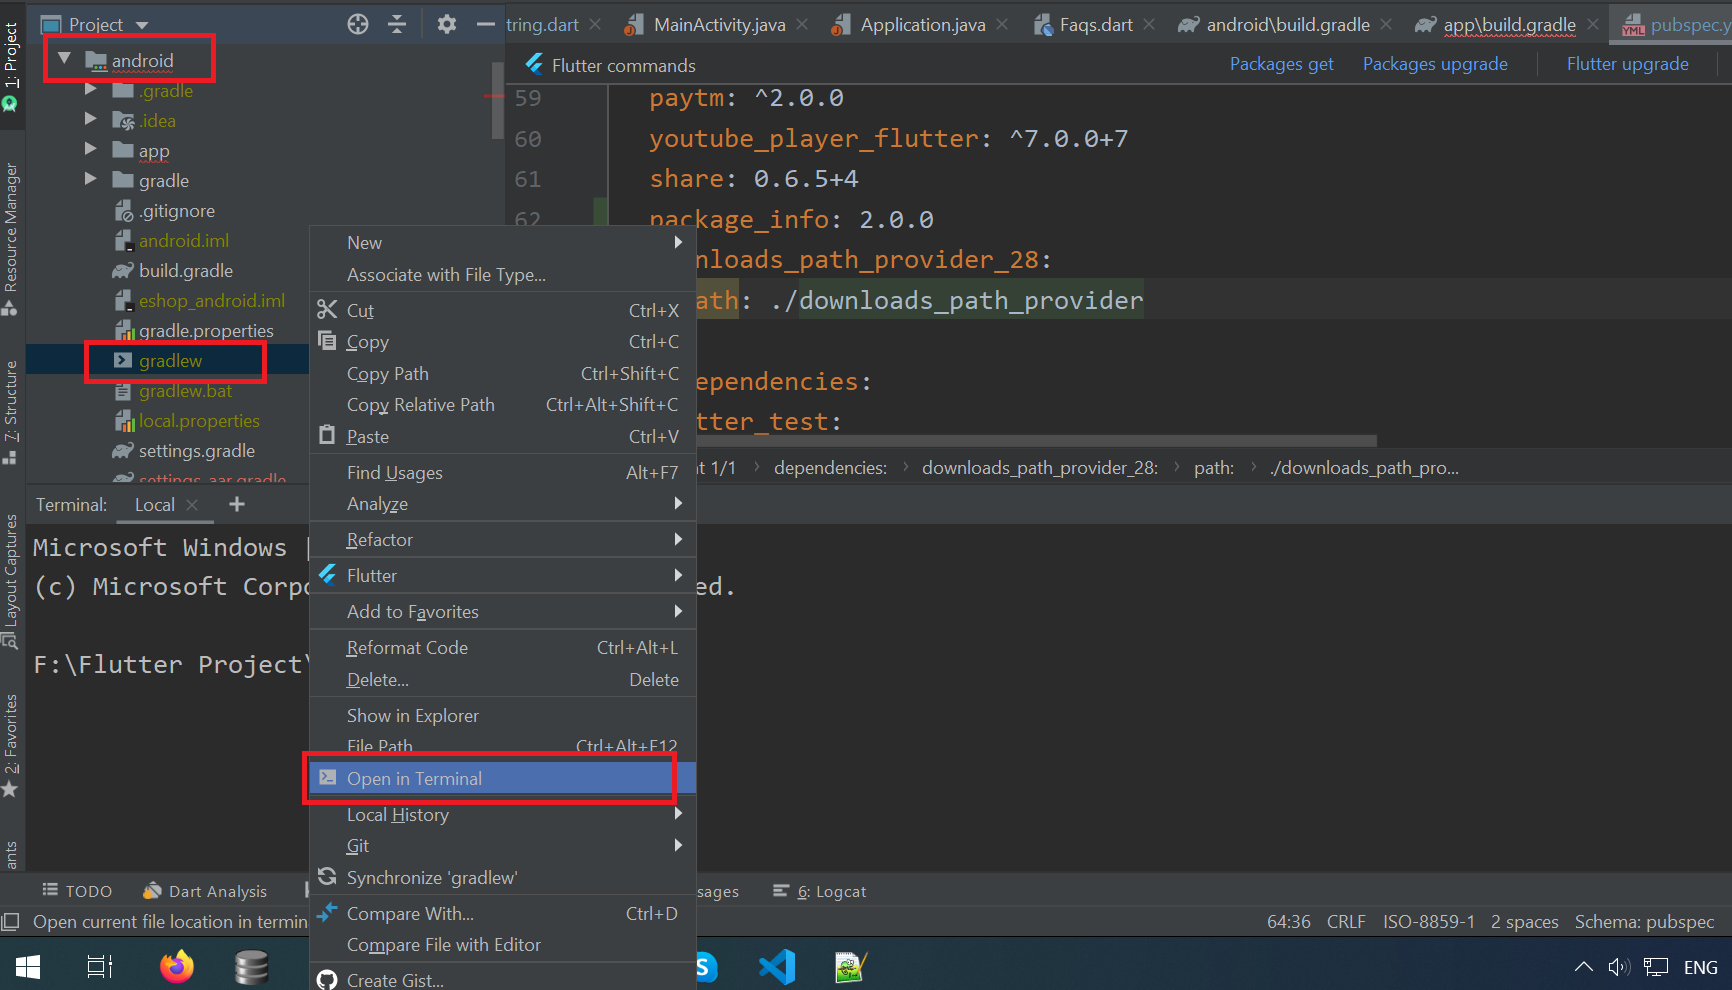
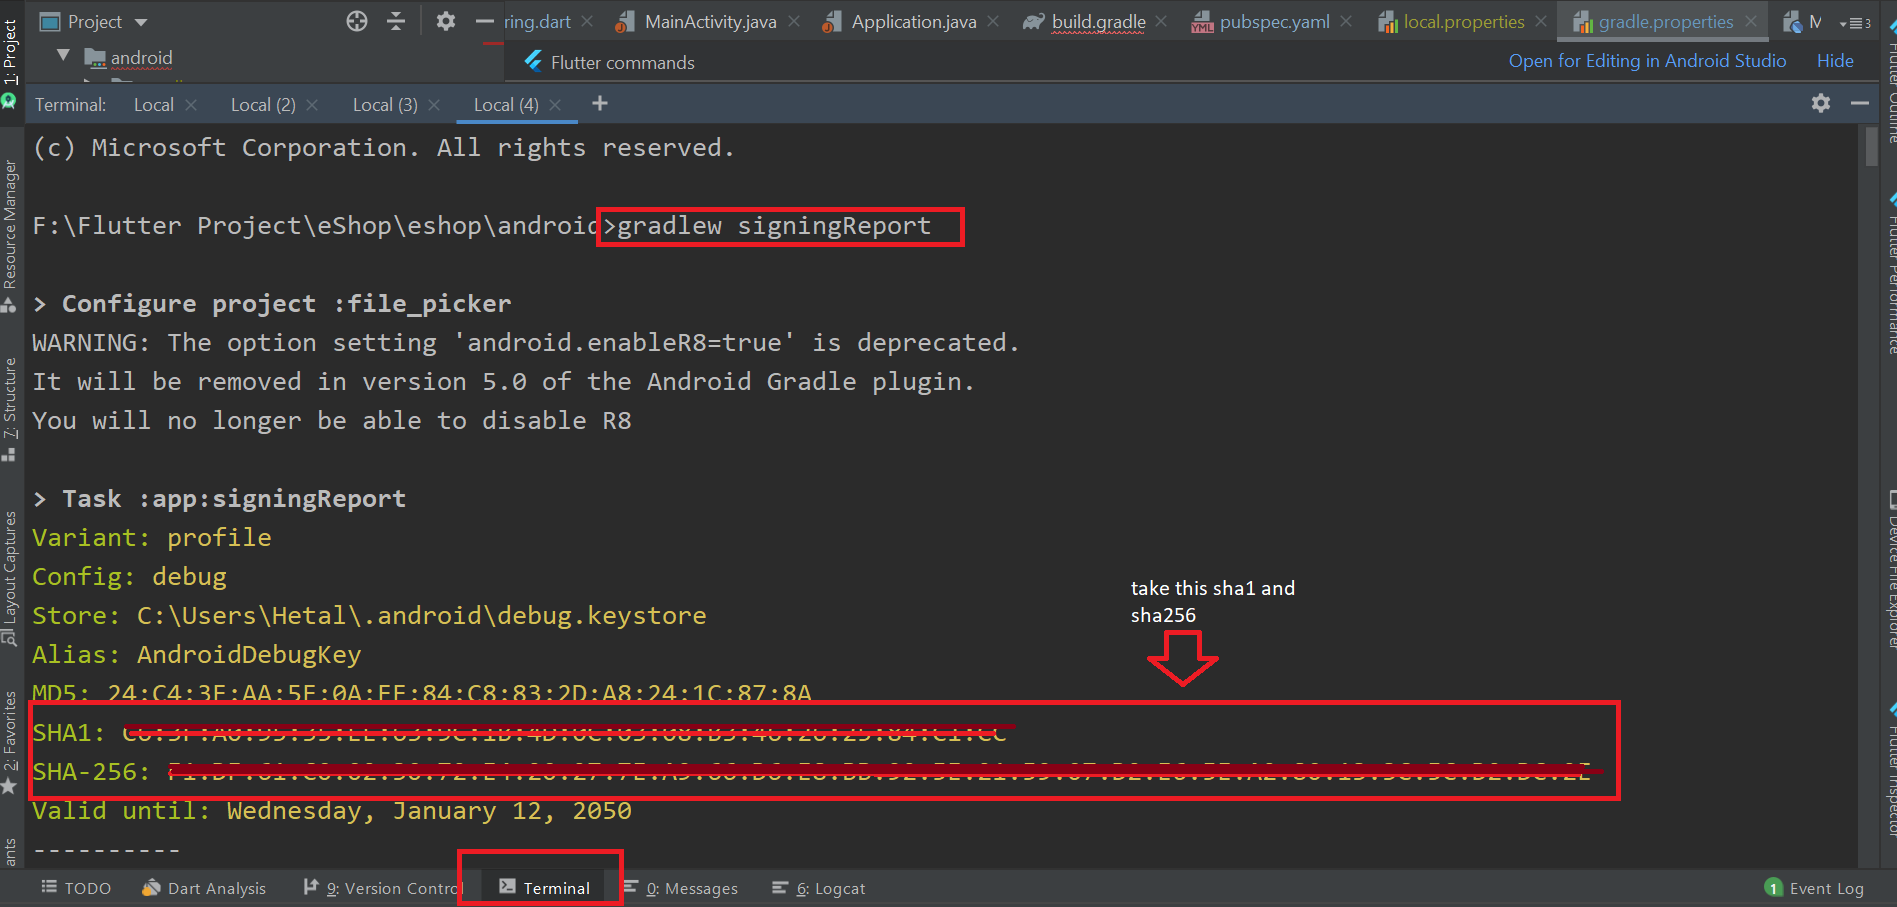
- Now, we have to add sha1 and sha256 key in firebase, for that perform below given step for that you can do one of the below method
- Go to the android folder. Right click gradlew file and select Open in Terminal as shown in below image.
- Go to the terminal view and paste- gradlew signingReport as shown in below
- for mac it should be ./gradlew signingReport
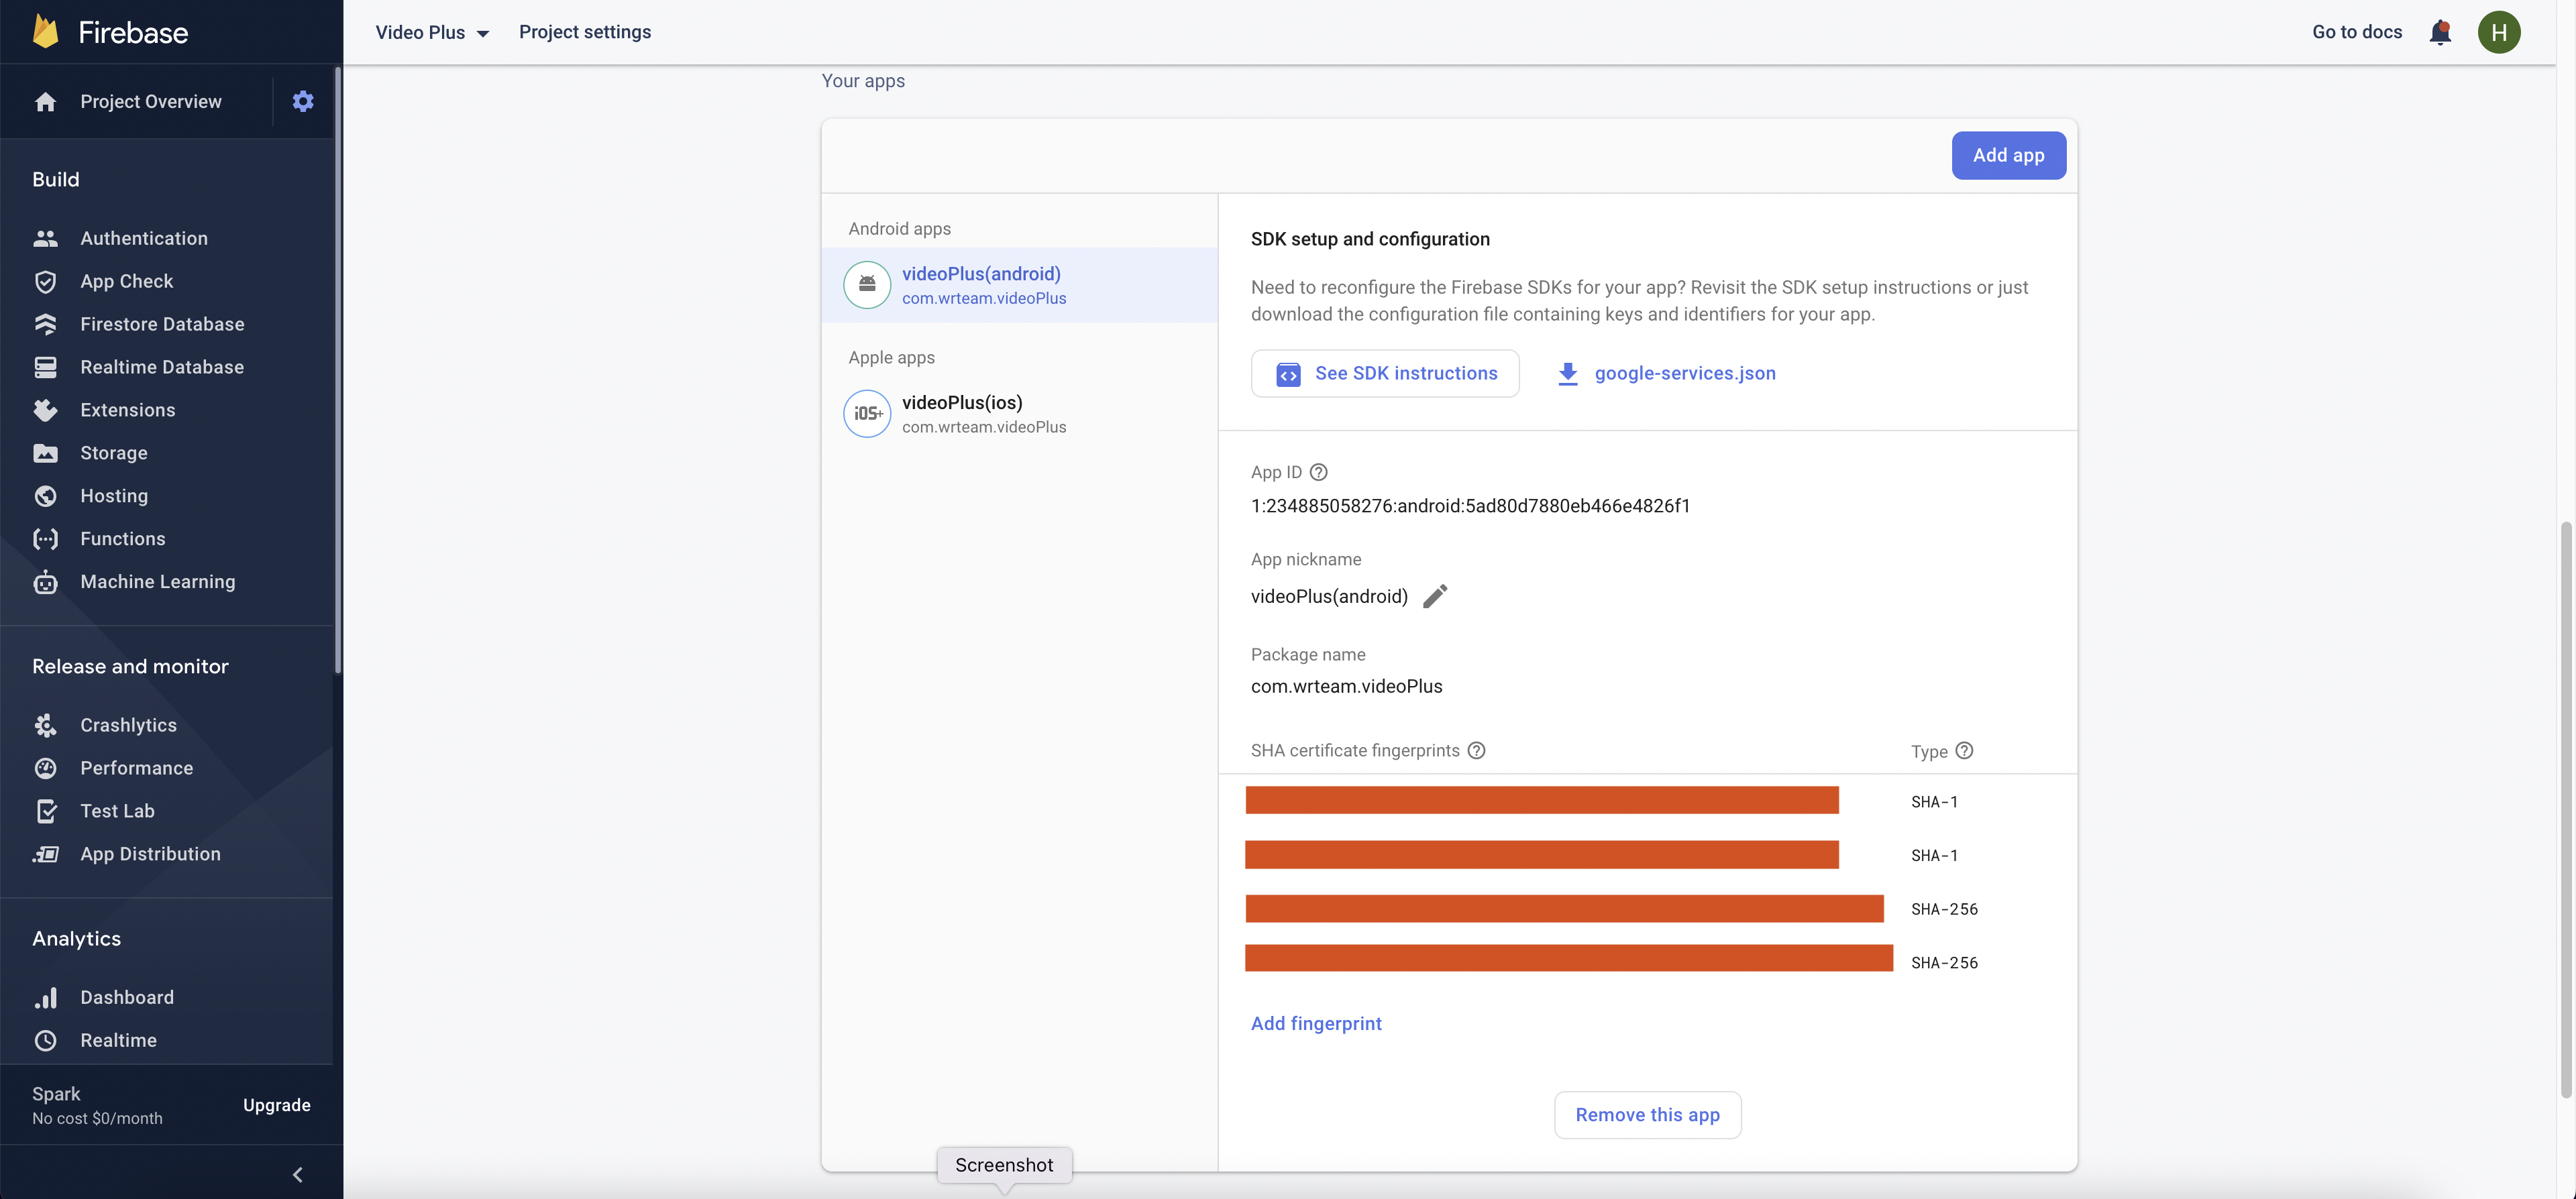
- Please add sha-256 key as shown in below image. Go to project settings -> your apps -> android apps
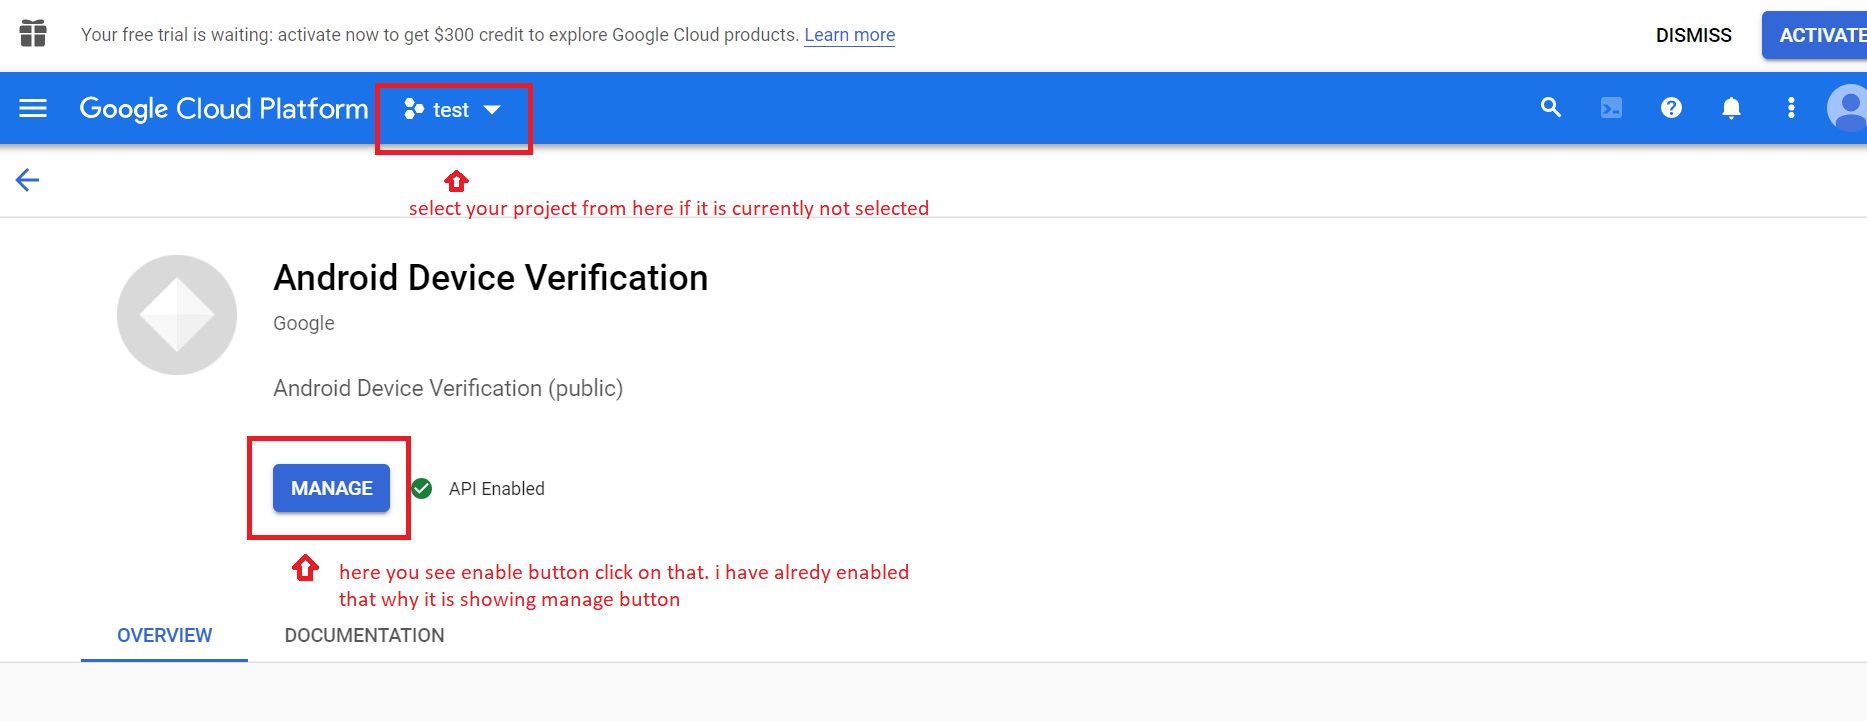
- now enable SafetyNet for use with Firebase Authentication.In the Google Cloud Console, enable the Android DeviceCheck API for your project.first make sure your correct project is selected then press enable button.
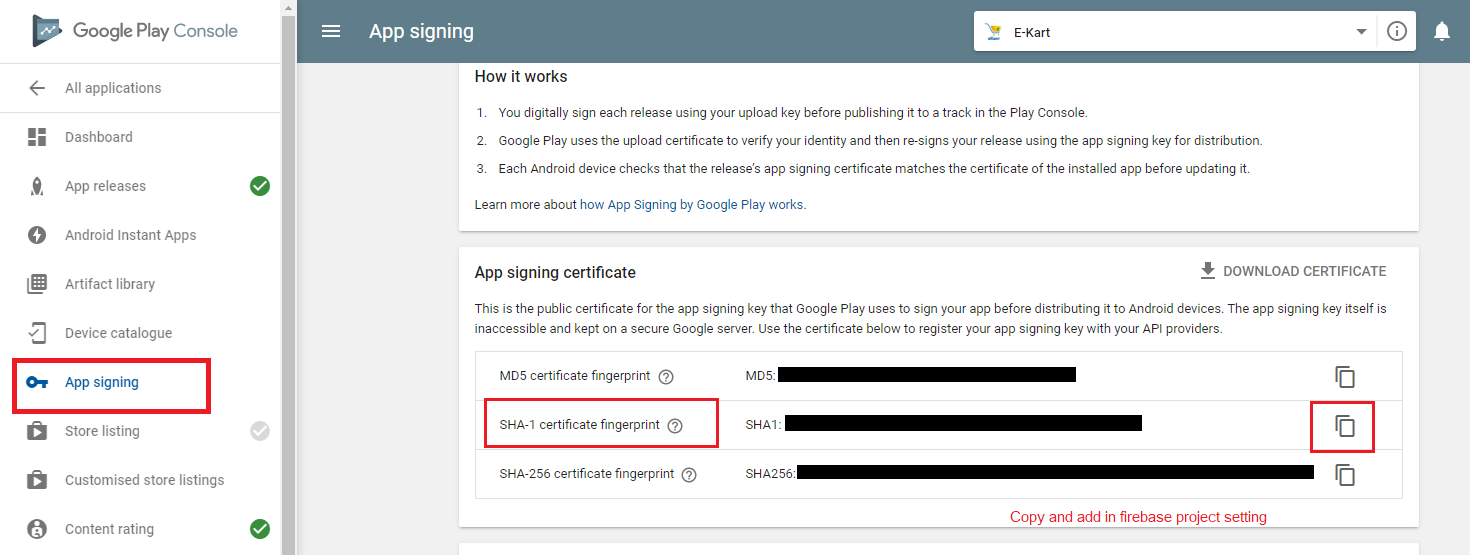
- When we are releasing apk then we need to add release sha in firebase panel otherwise otp will not work.
- after release you can get sha from play console here
Remember:
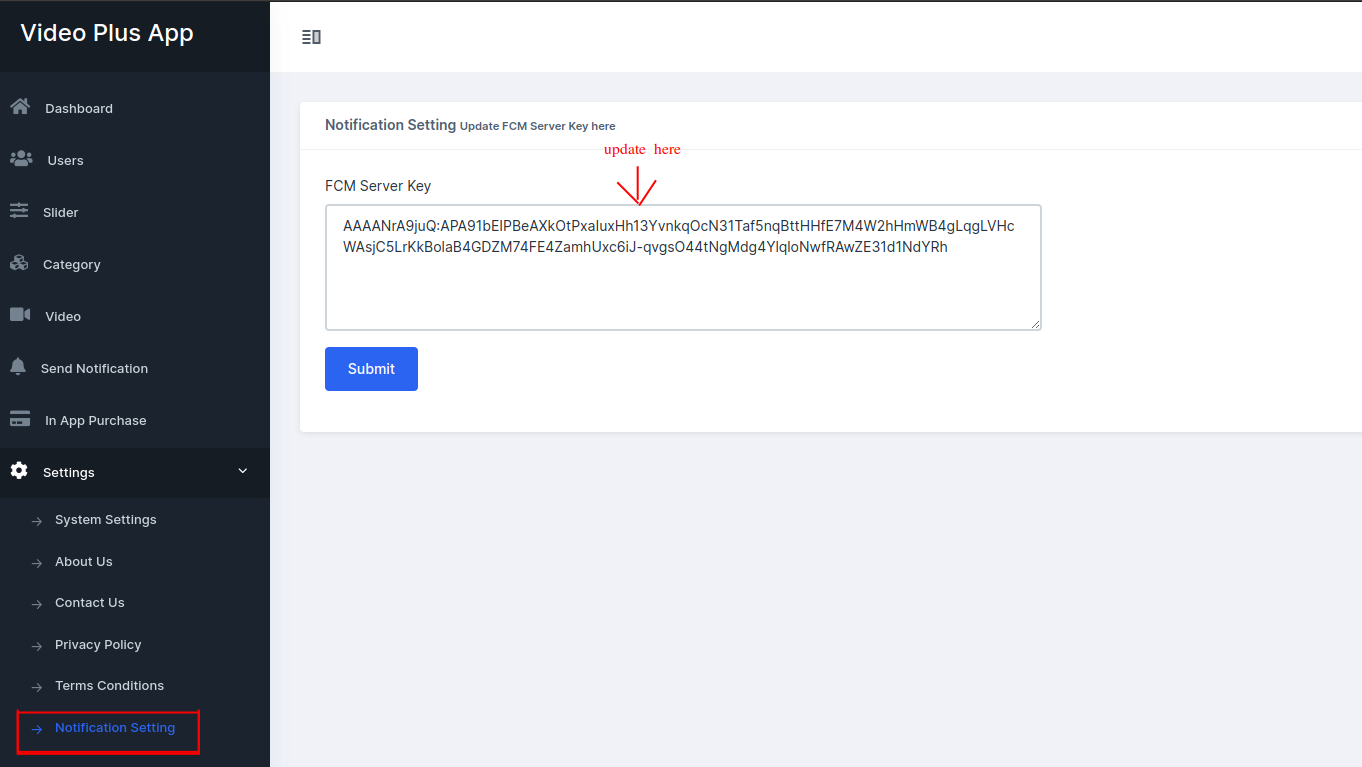
How to set Notification
- Get server key from your
firebase project and
set in panel.
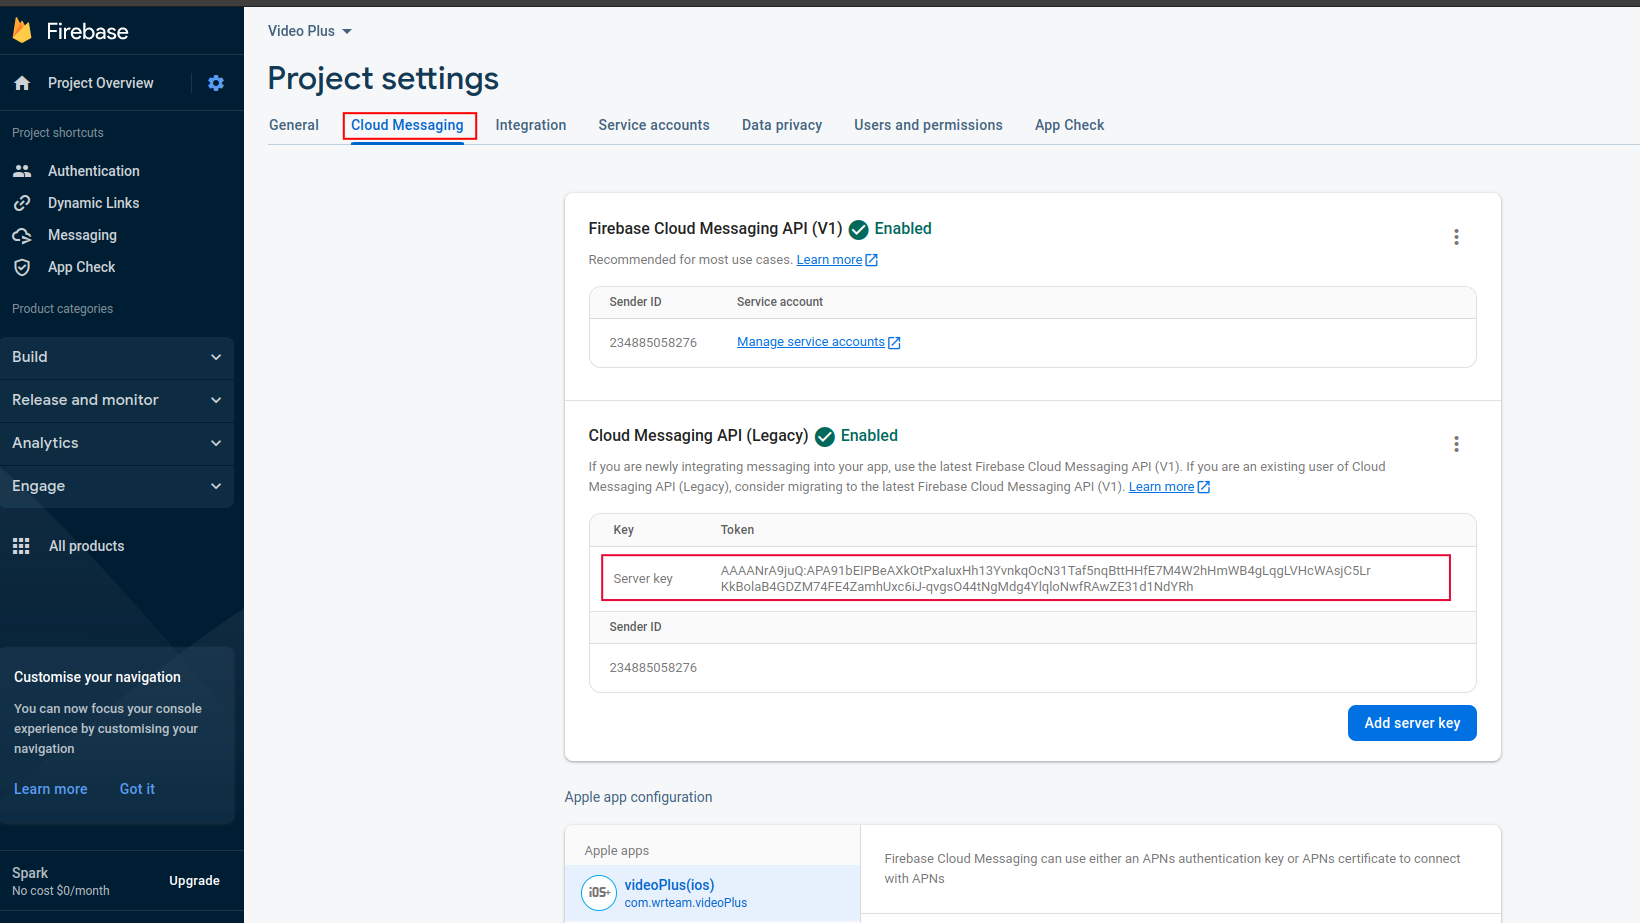
- now add in admin panel
How to change application name
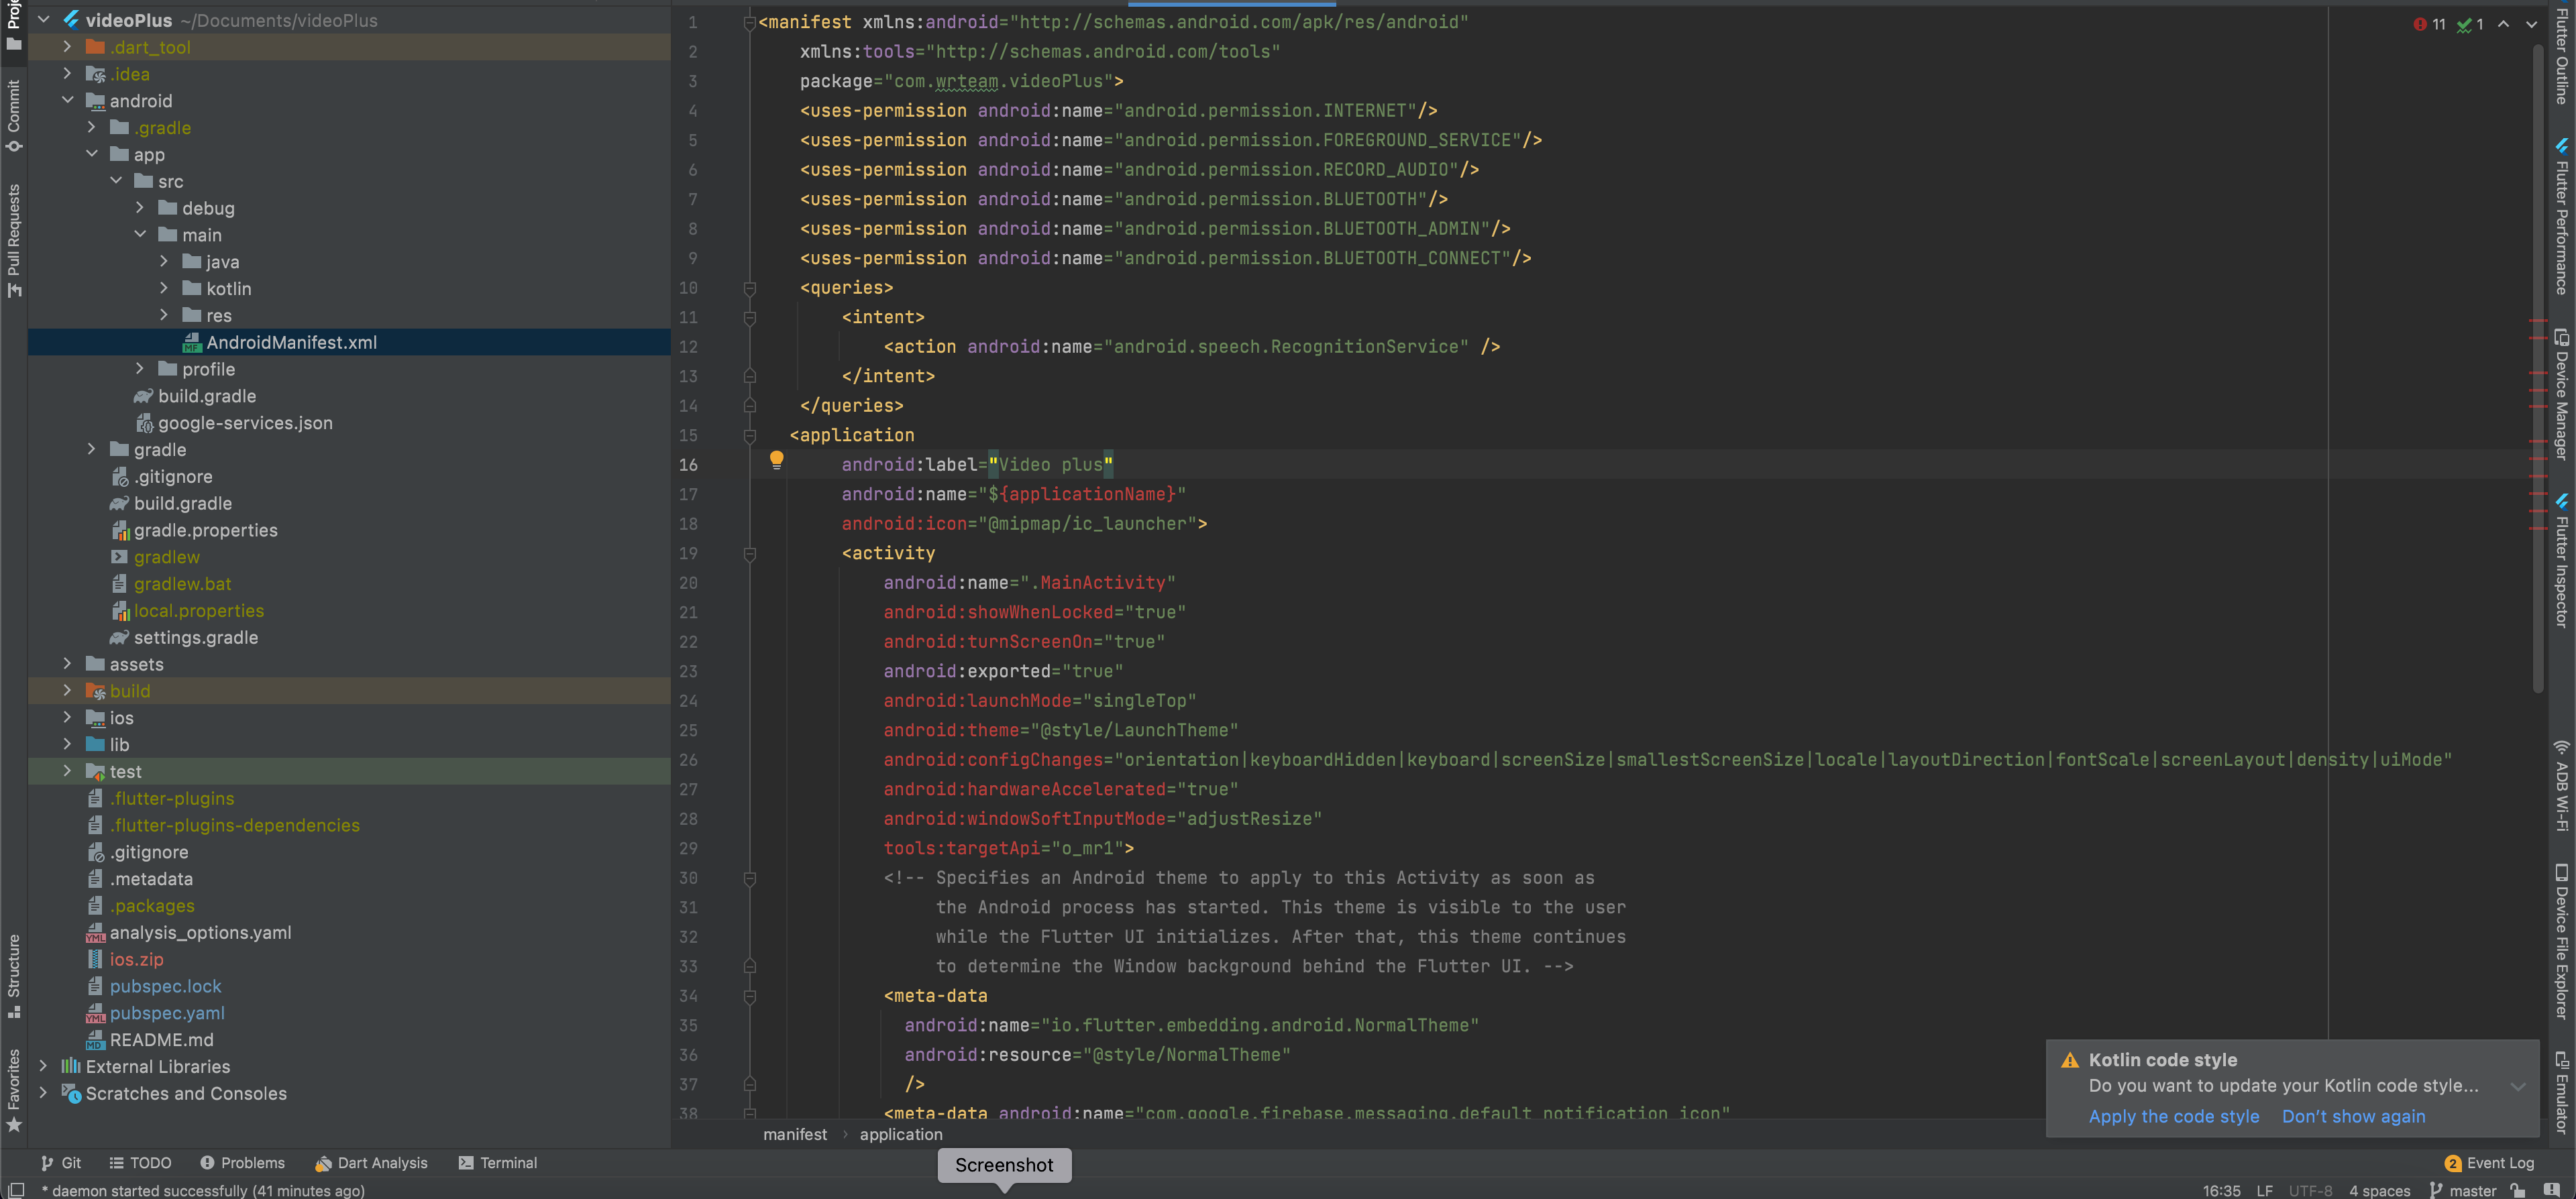
- Change application name for your android application. Go to android/app/src/main/AndroidManifest.xml
and change name
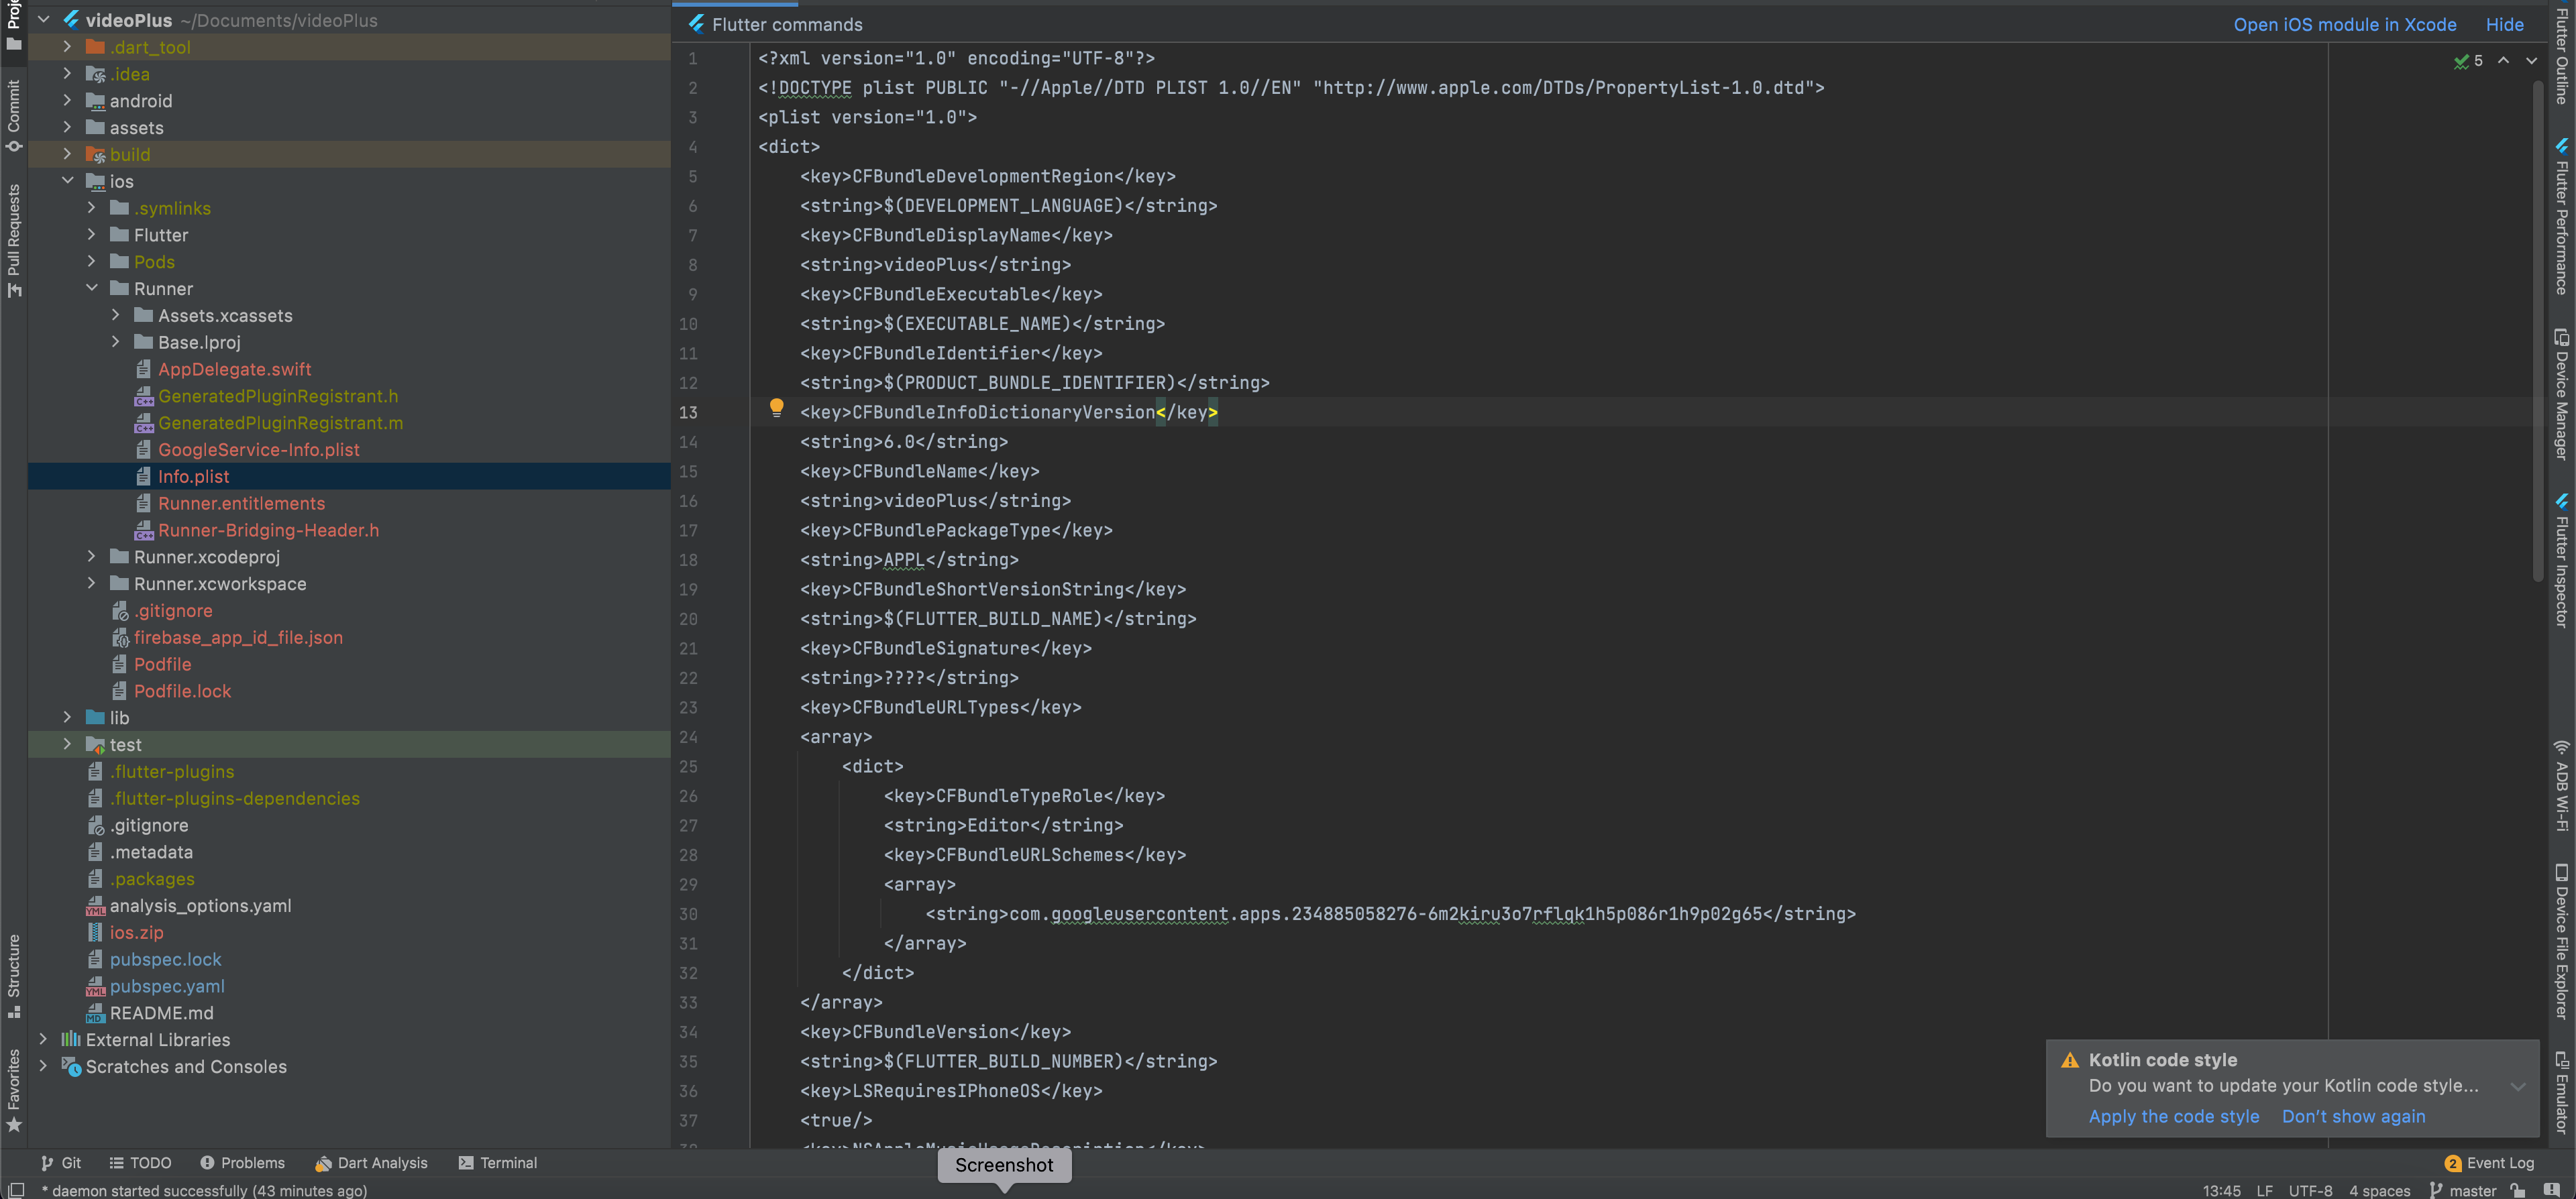
- Change application name for your ios application. Go to ios/Runner/Info.plist and change name
How to change application logo
- Change application name for your android application. Go to android/app/src/main/AndroidManifest.xml
and change name
- Change application name for your ios application. Go to ios/Runner/Info.plist and change name
How to change application colors
-
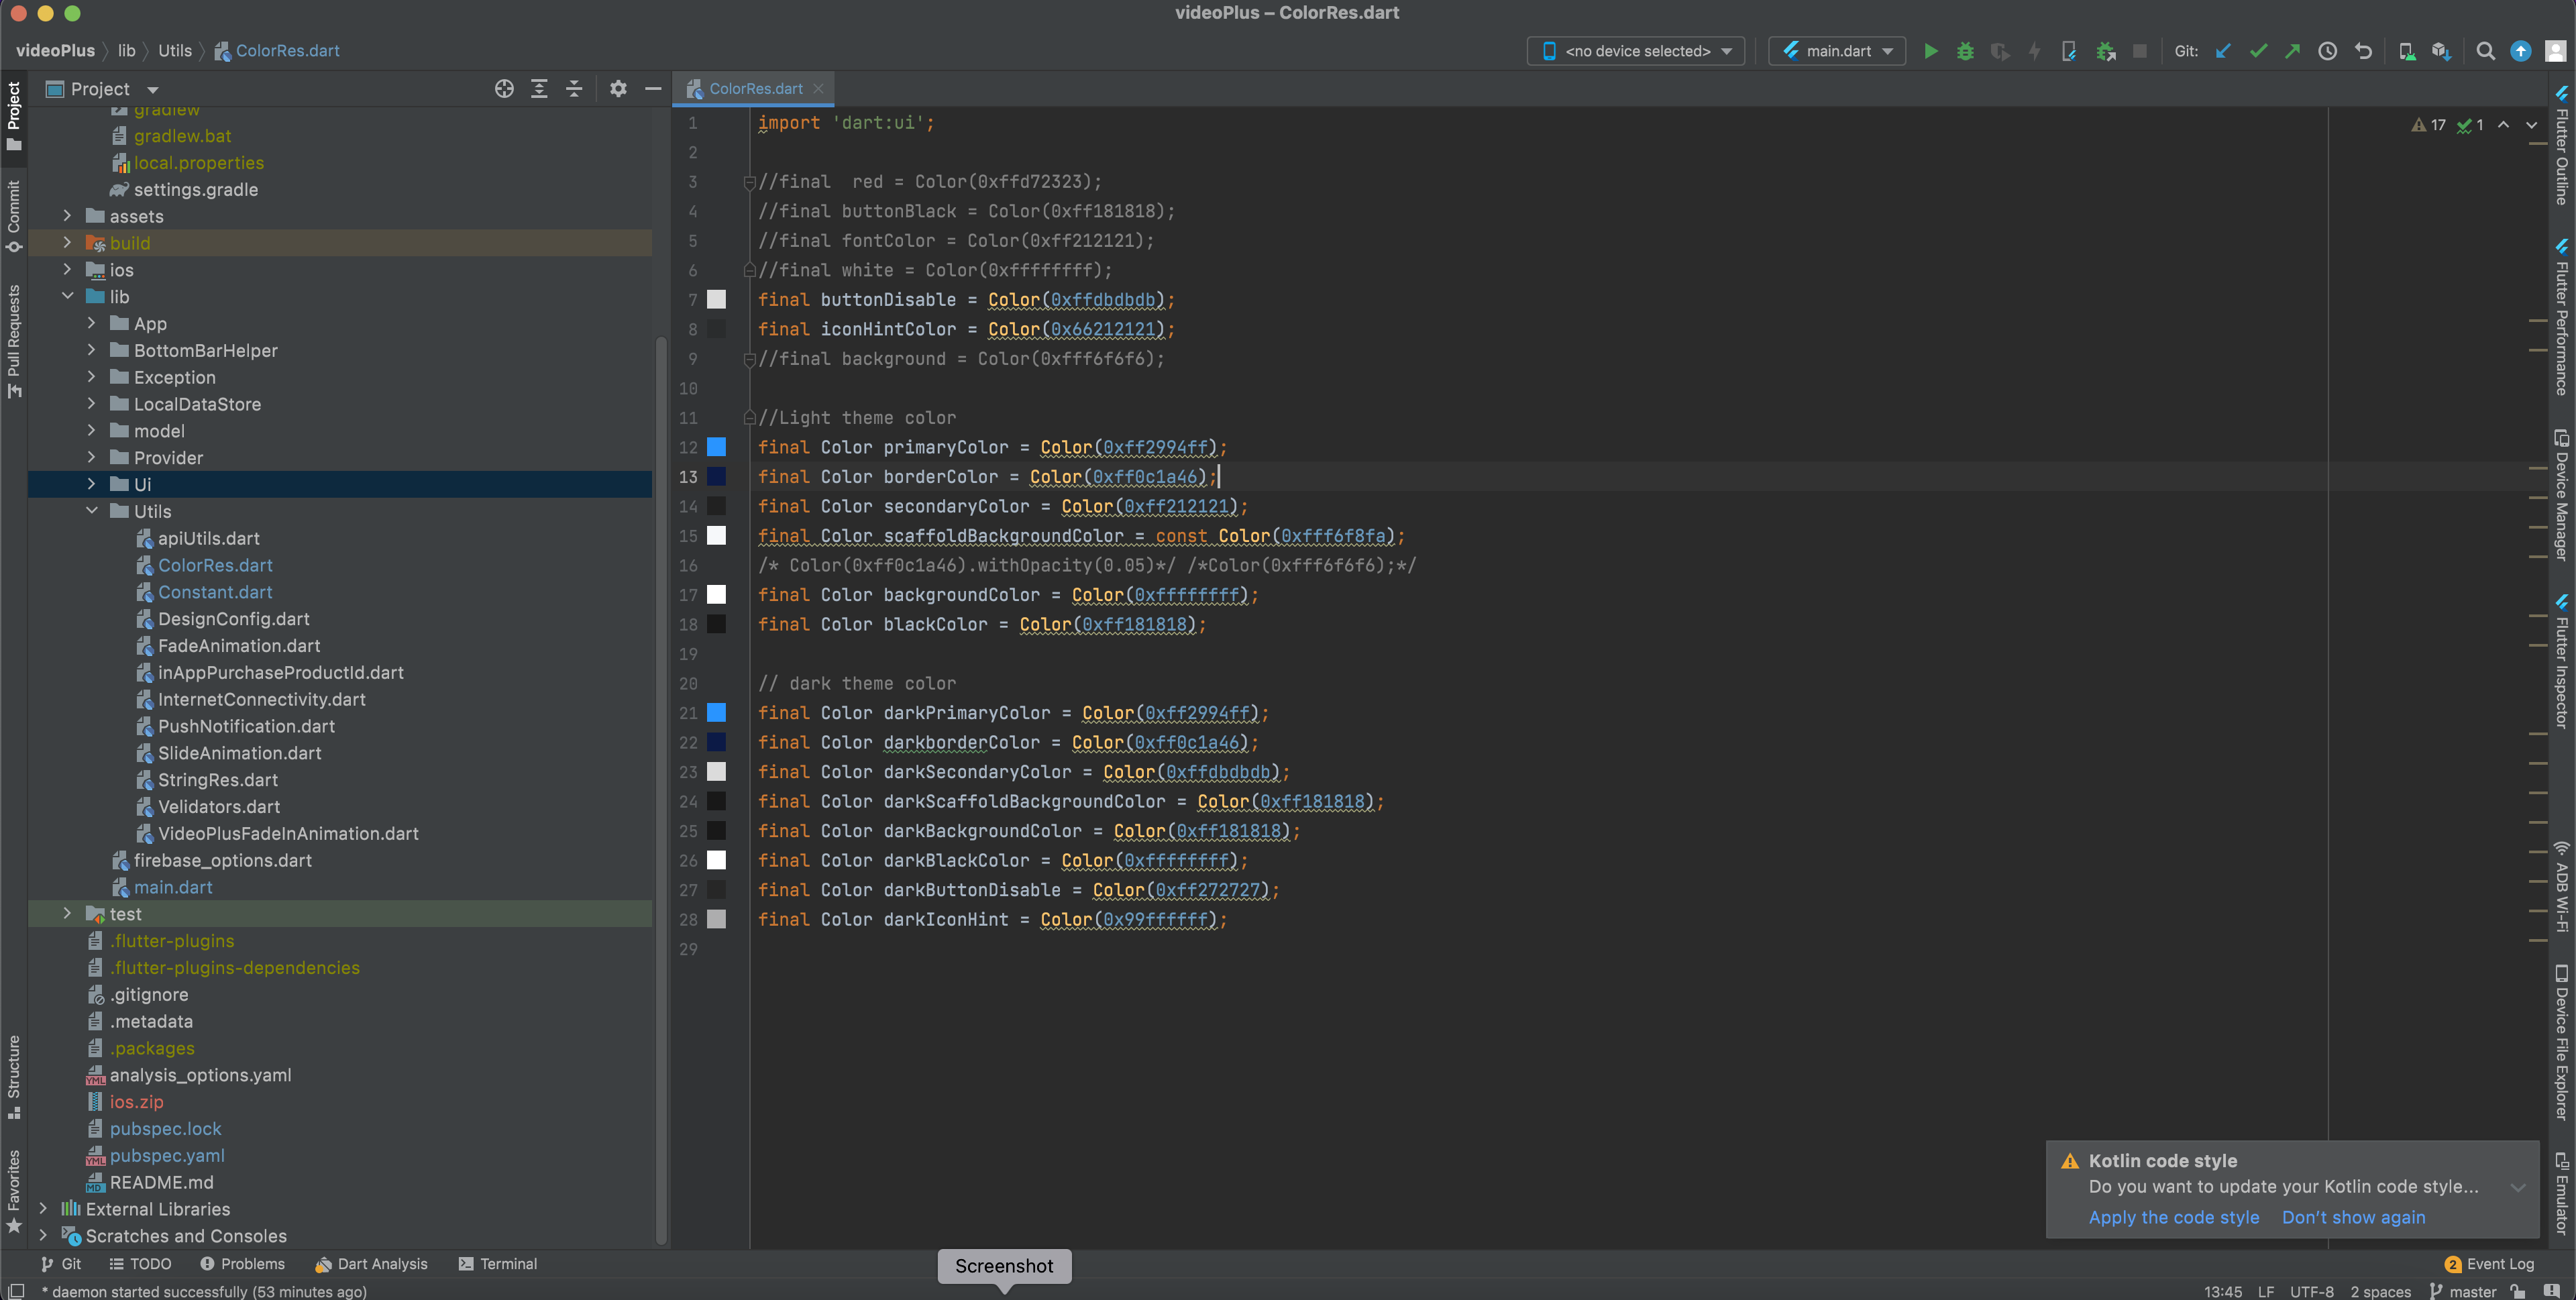
Add your colors in lib/ui/Utils/colors.dart and do not change the color variables name
How to change application font
-
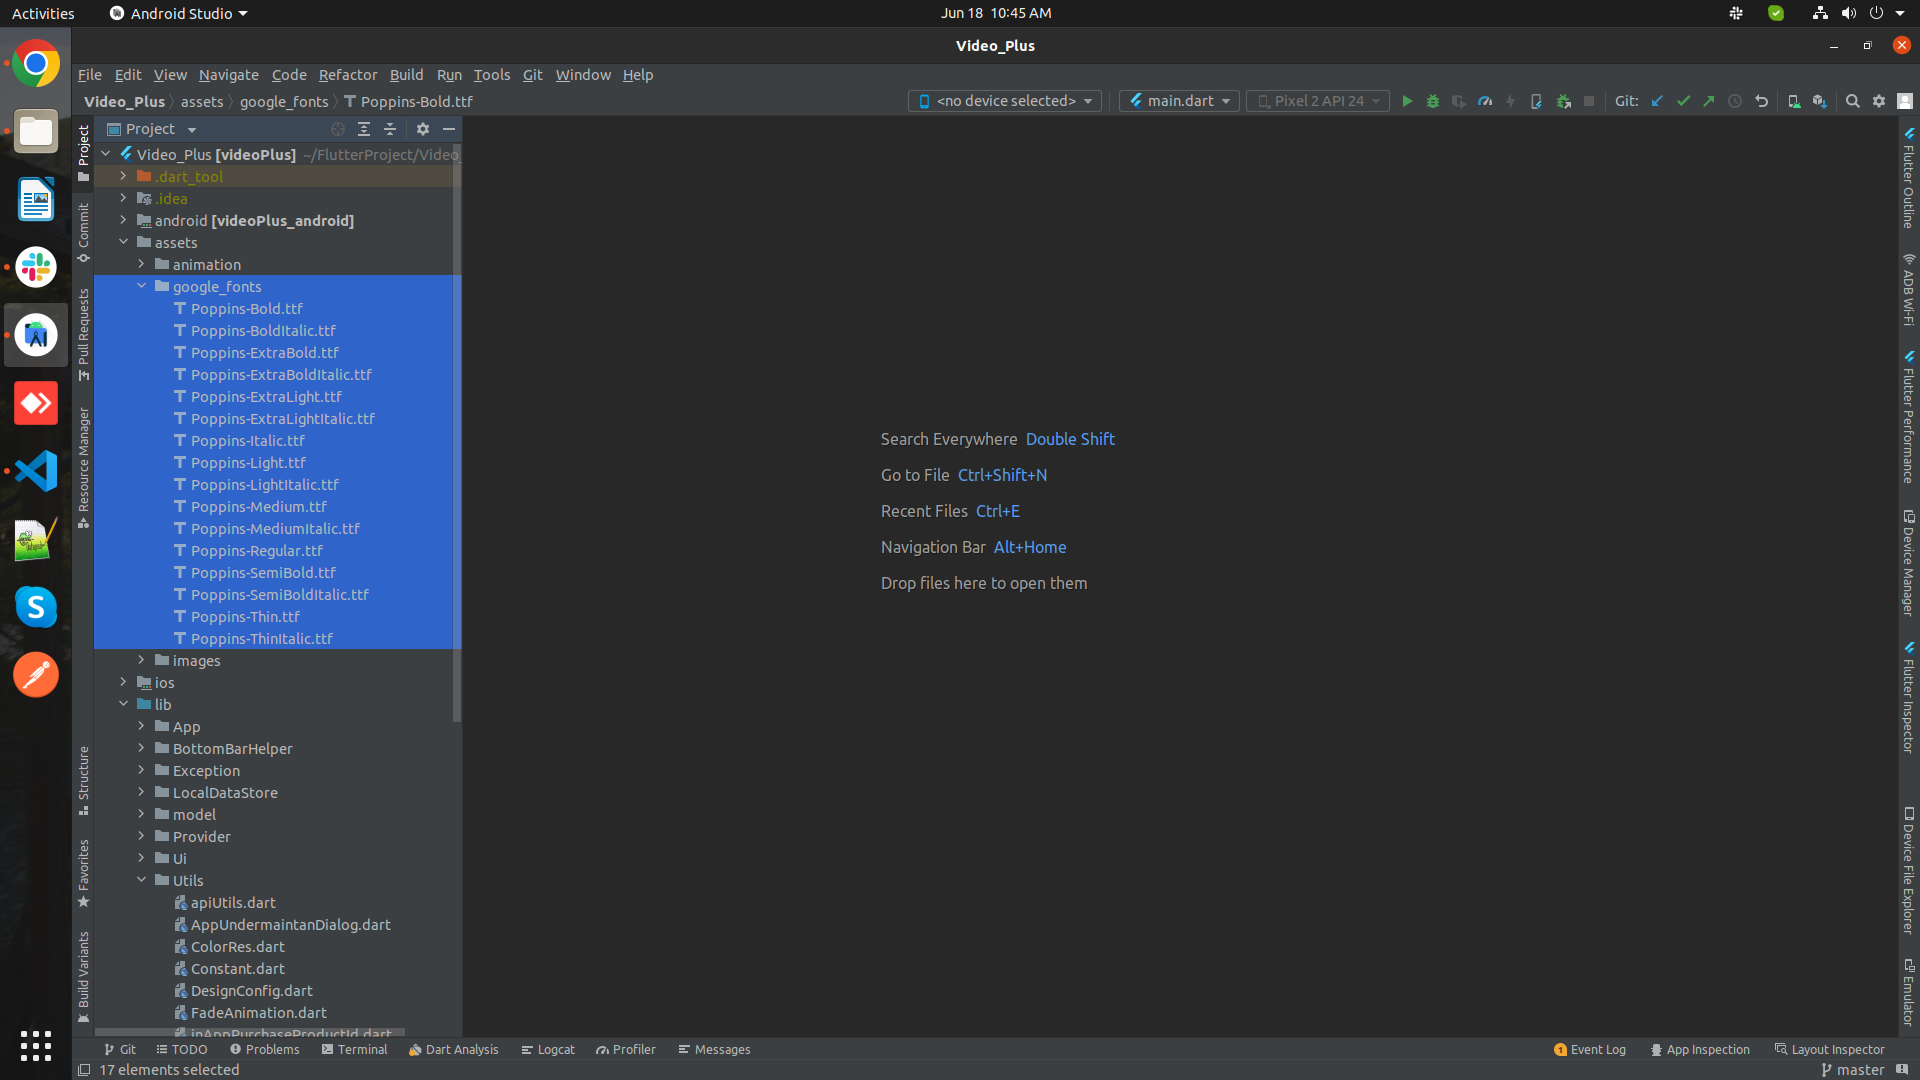
Go to assets/google_fonts/ and add .tff files of fonts.
How to change application version
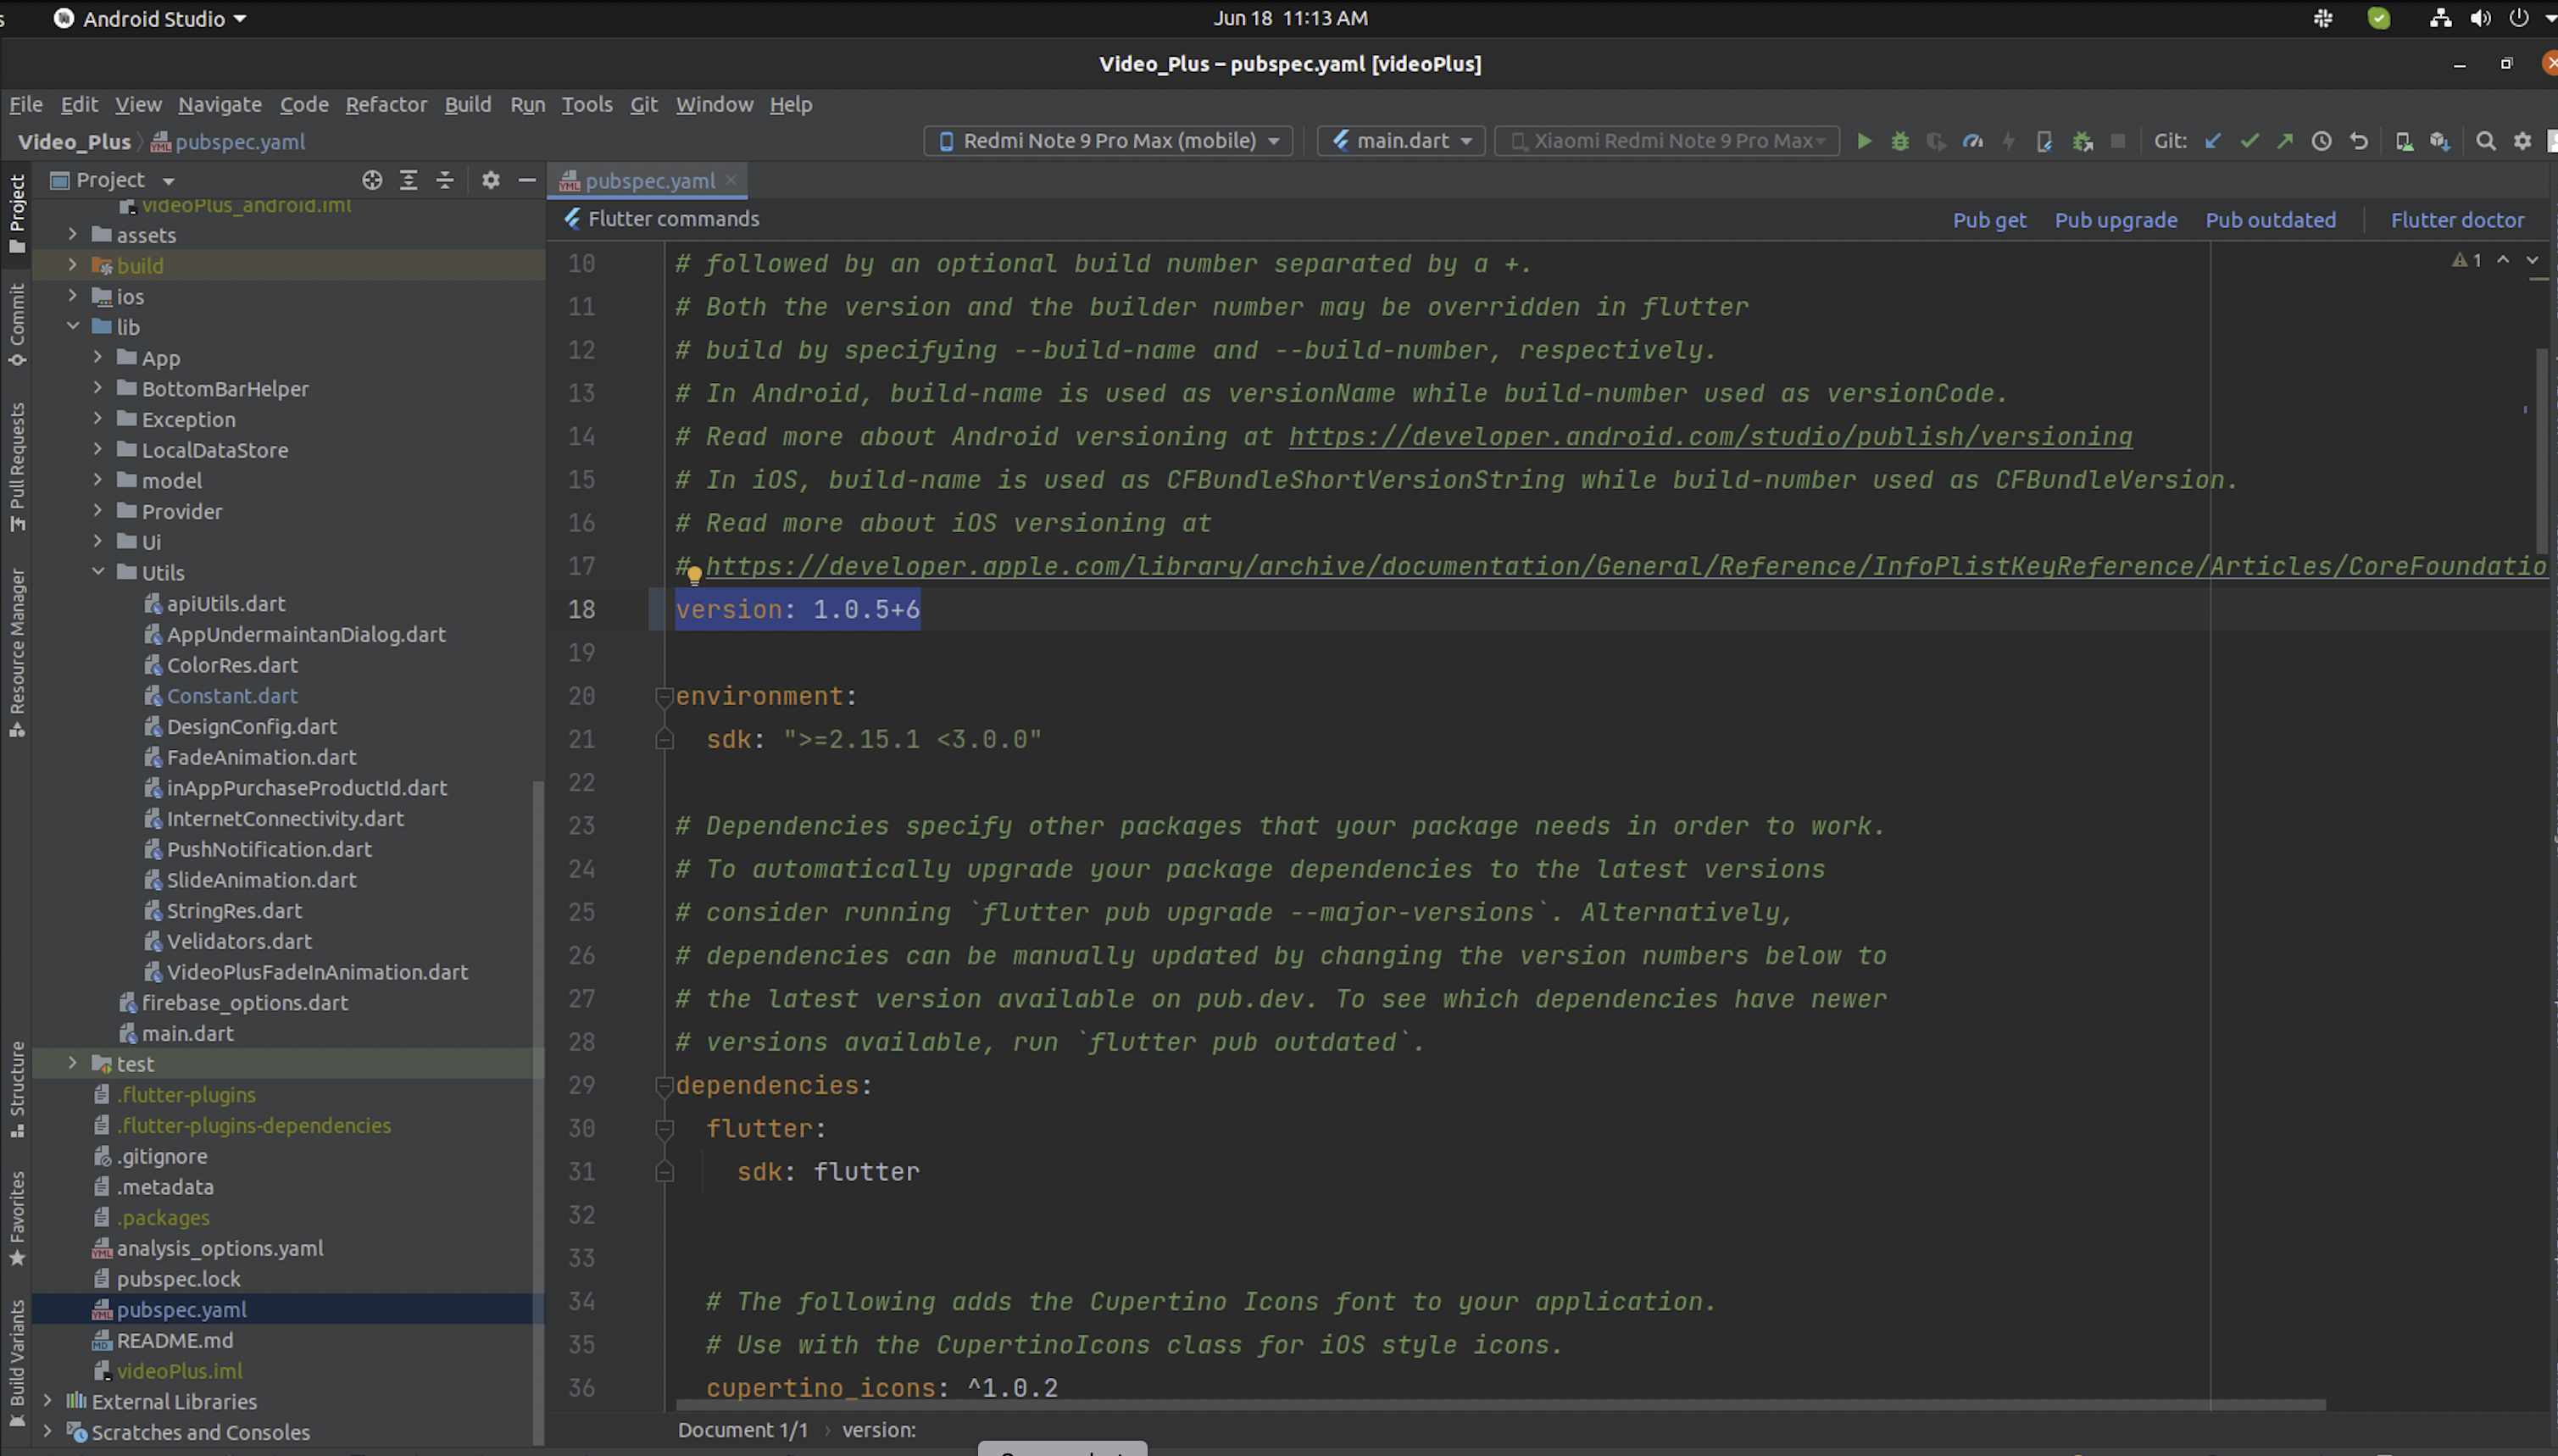
- go to pubspec.yaml EX.Update version:A.B.C+X in pubspec.yaml.
- Do not forget to execute flutter packages get, flutter build or flutter run after this step
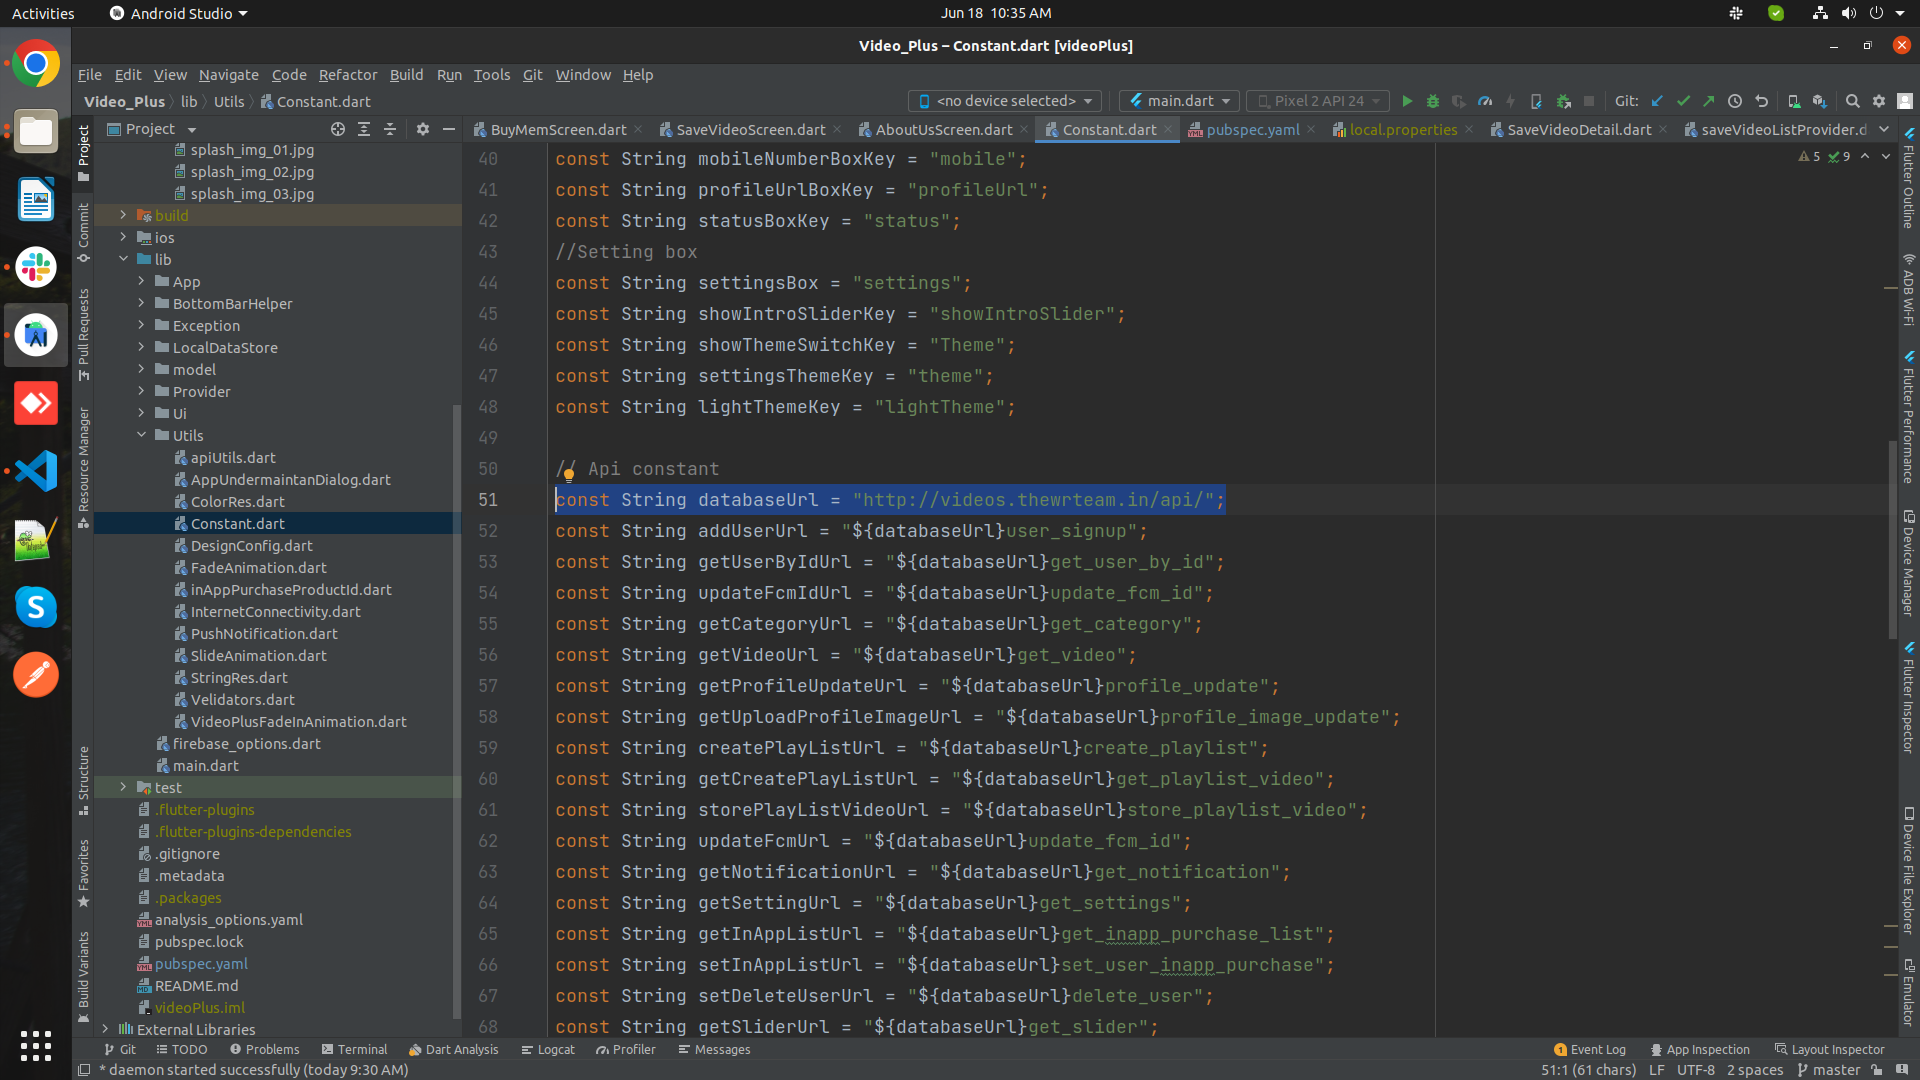
How to change database url
-
Go to lib/utils/constants.dart and make changes shown in below image
How to change application logo
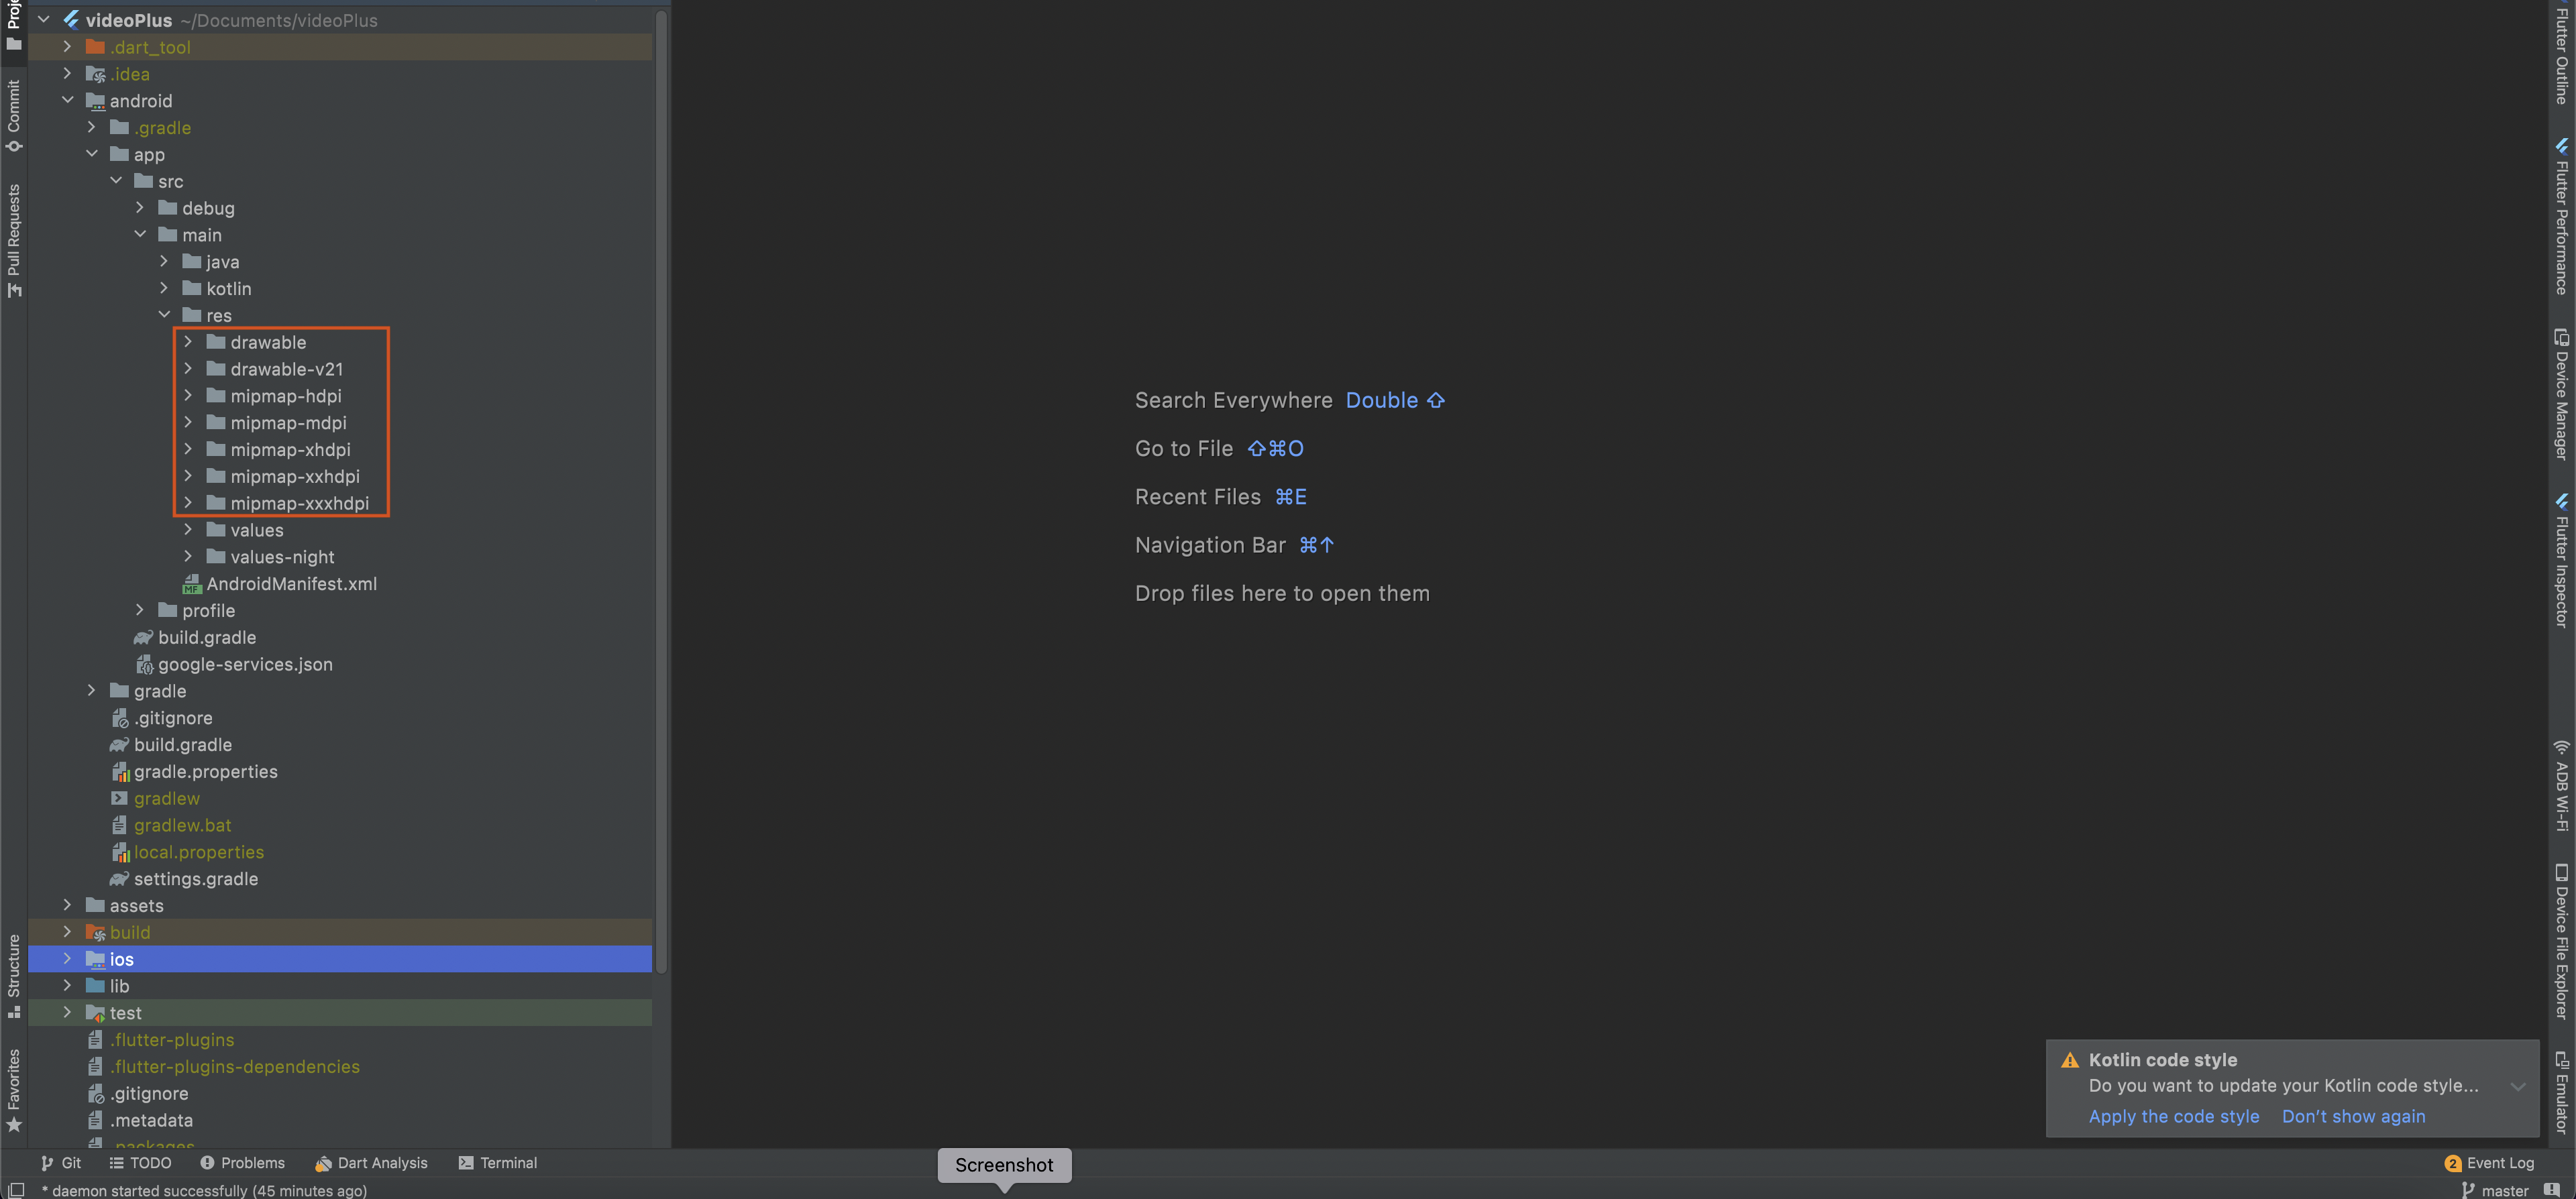
- For Android For Android, open android > app > src > main > res and add here your logo according to
device screen size

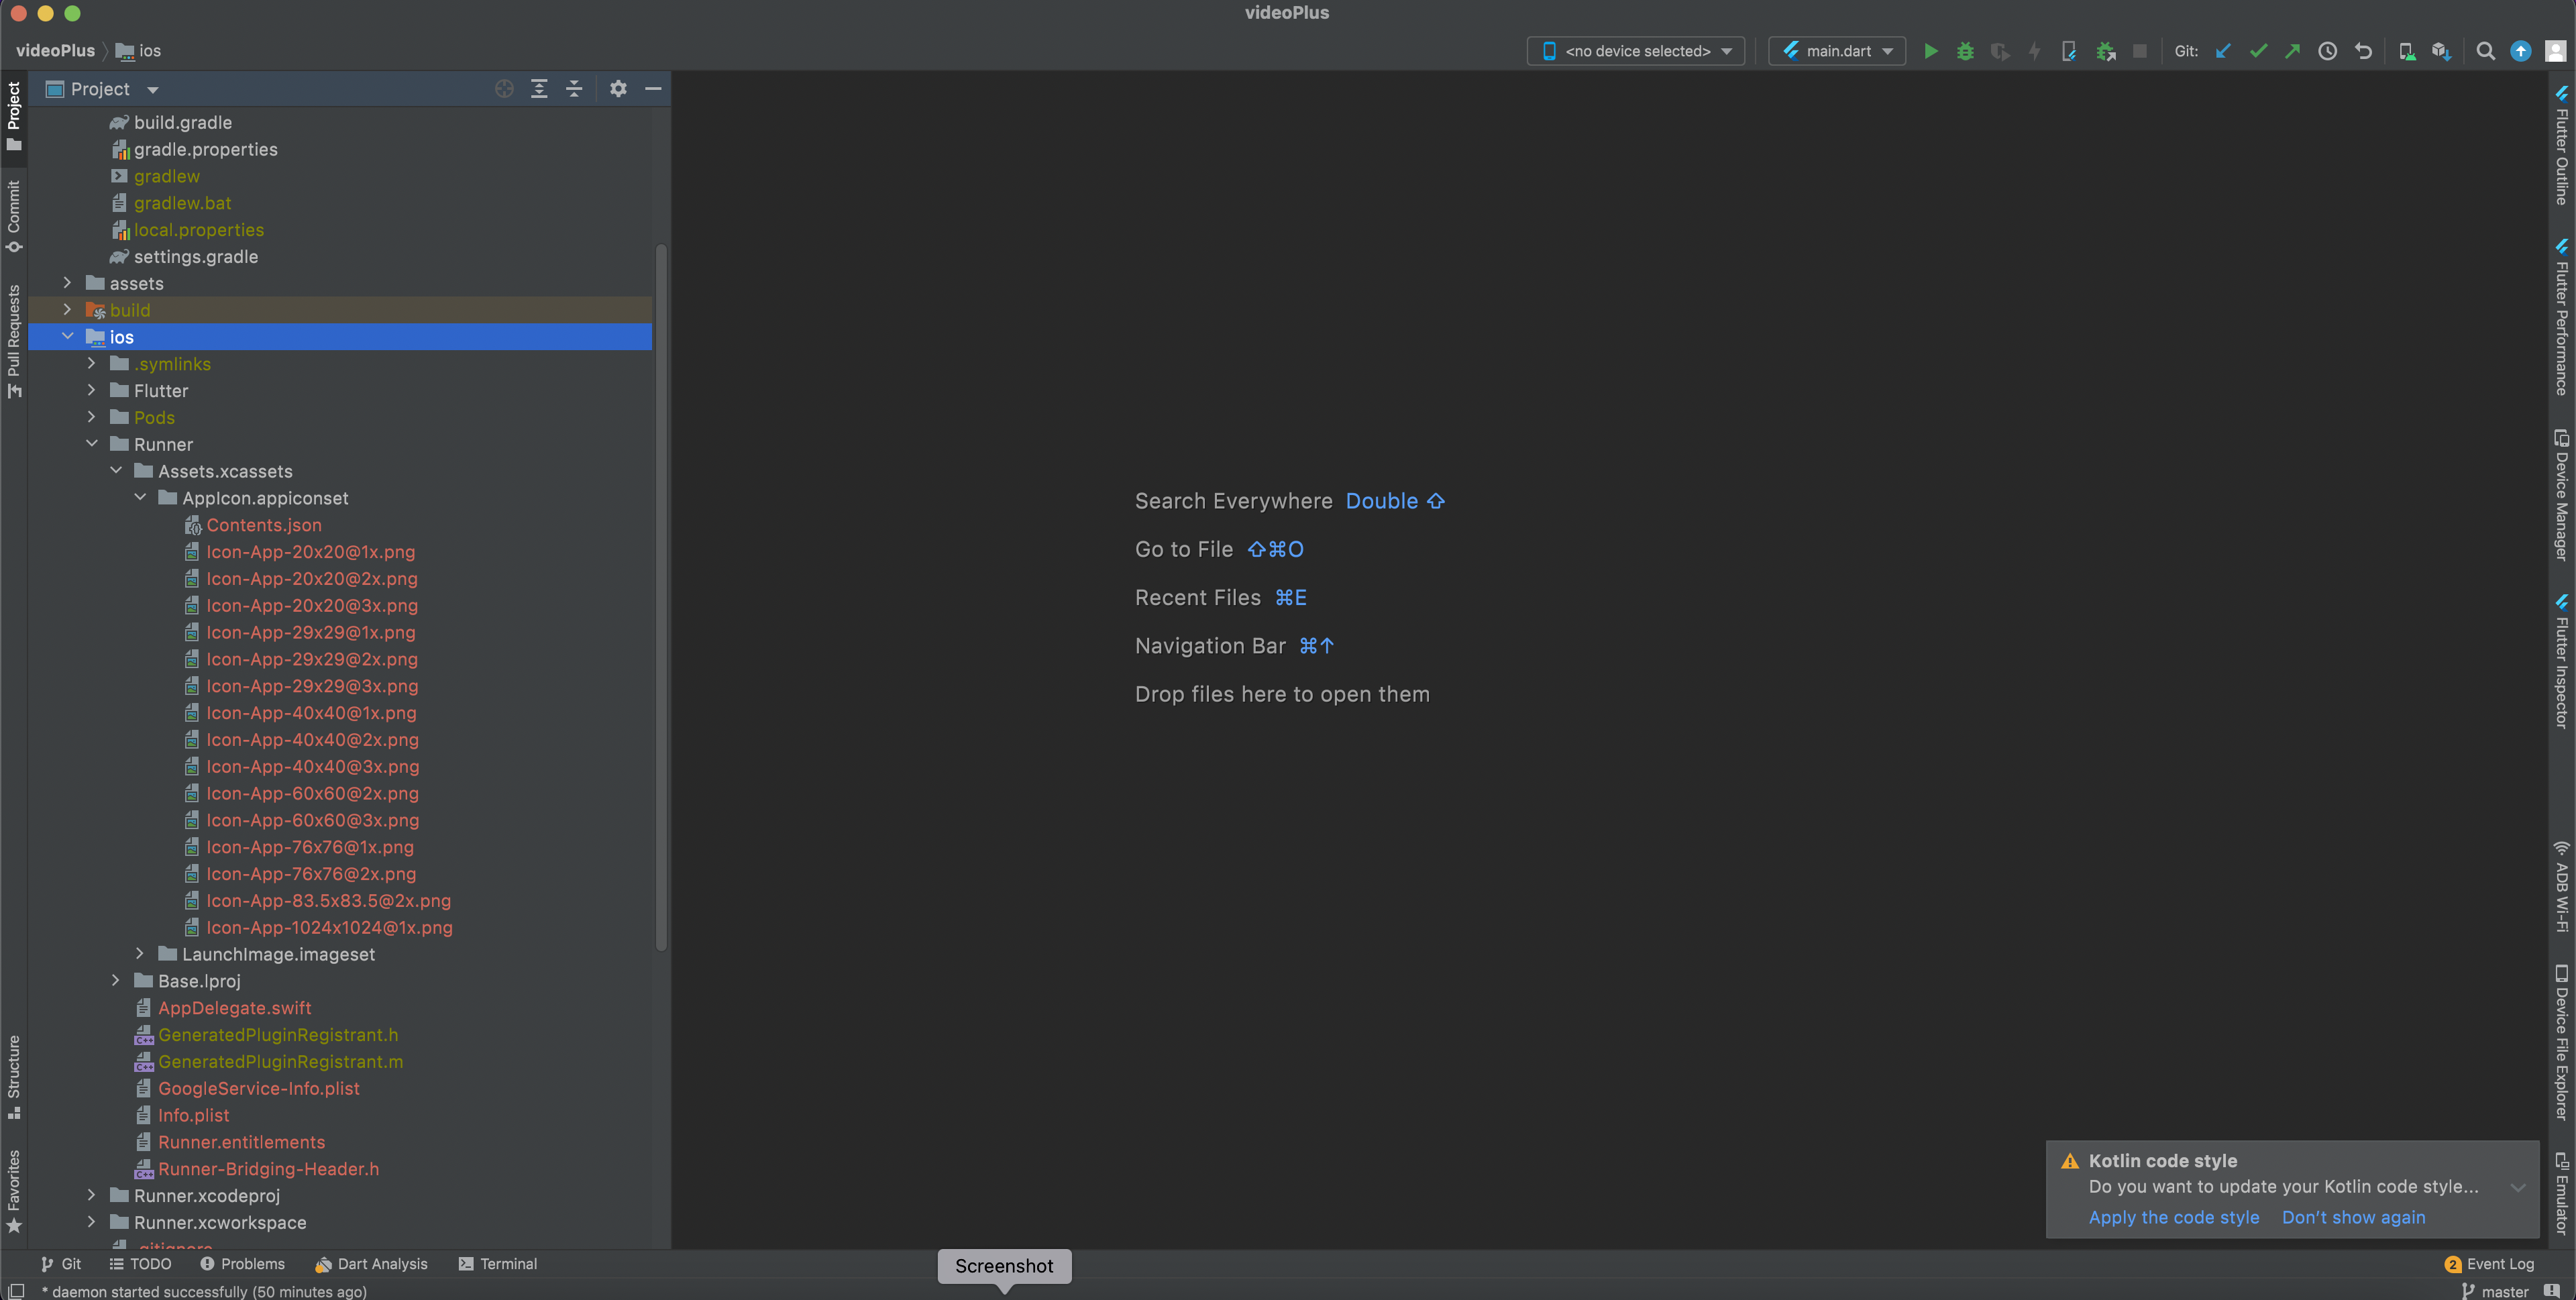
- For IOS open ios > Runner > Assets.xcassets > AppIcon.appiconset here and add your logo according to
diffrent size.

How to create dynamic links for share products from app?
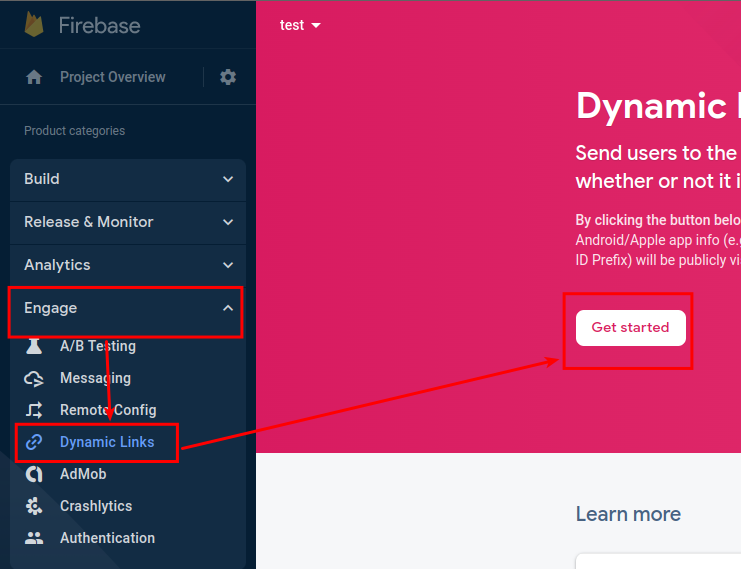
- Open your firebase console.
- From left side pane go to engage section in that select Go to Dynamic Links.
- For creating a domain for the link, click on the Get Started button.
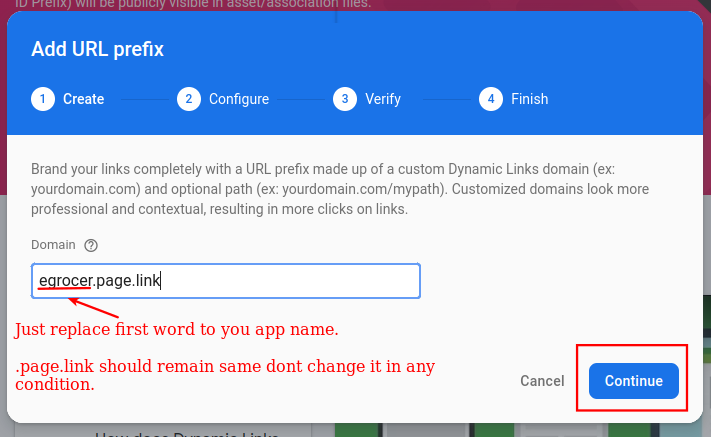
- Then, create a URL prefix. A URL prefix is a domain name that uses the dynamic links.
- Create a domain or use the google provided domain and press the continue button as shown in image below. you can use yourappname.page.link which is unique and available.you can also choose from below suggestion.
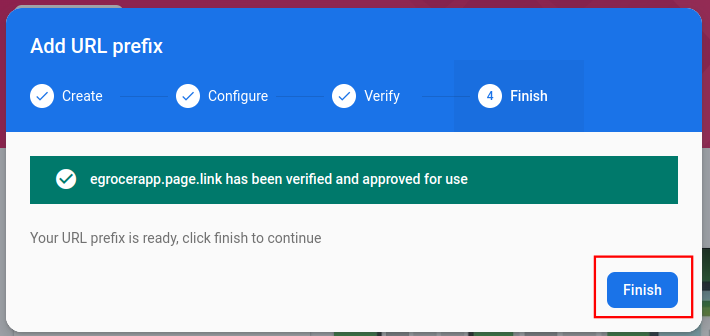
- After that press continue and then verify.if your domain created successfully then press finish button.
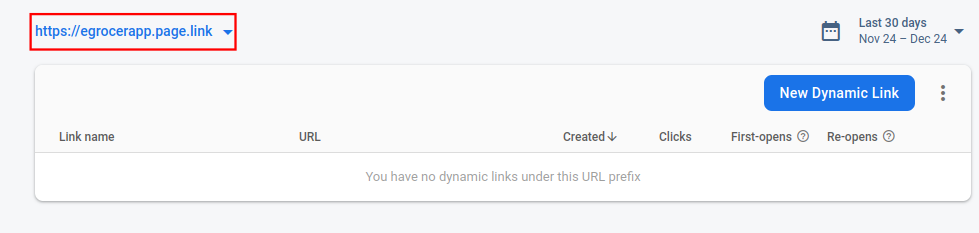
- Now copy your url prefix as shown below
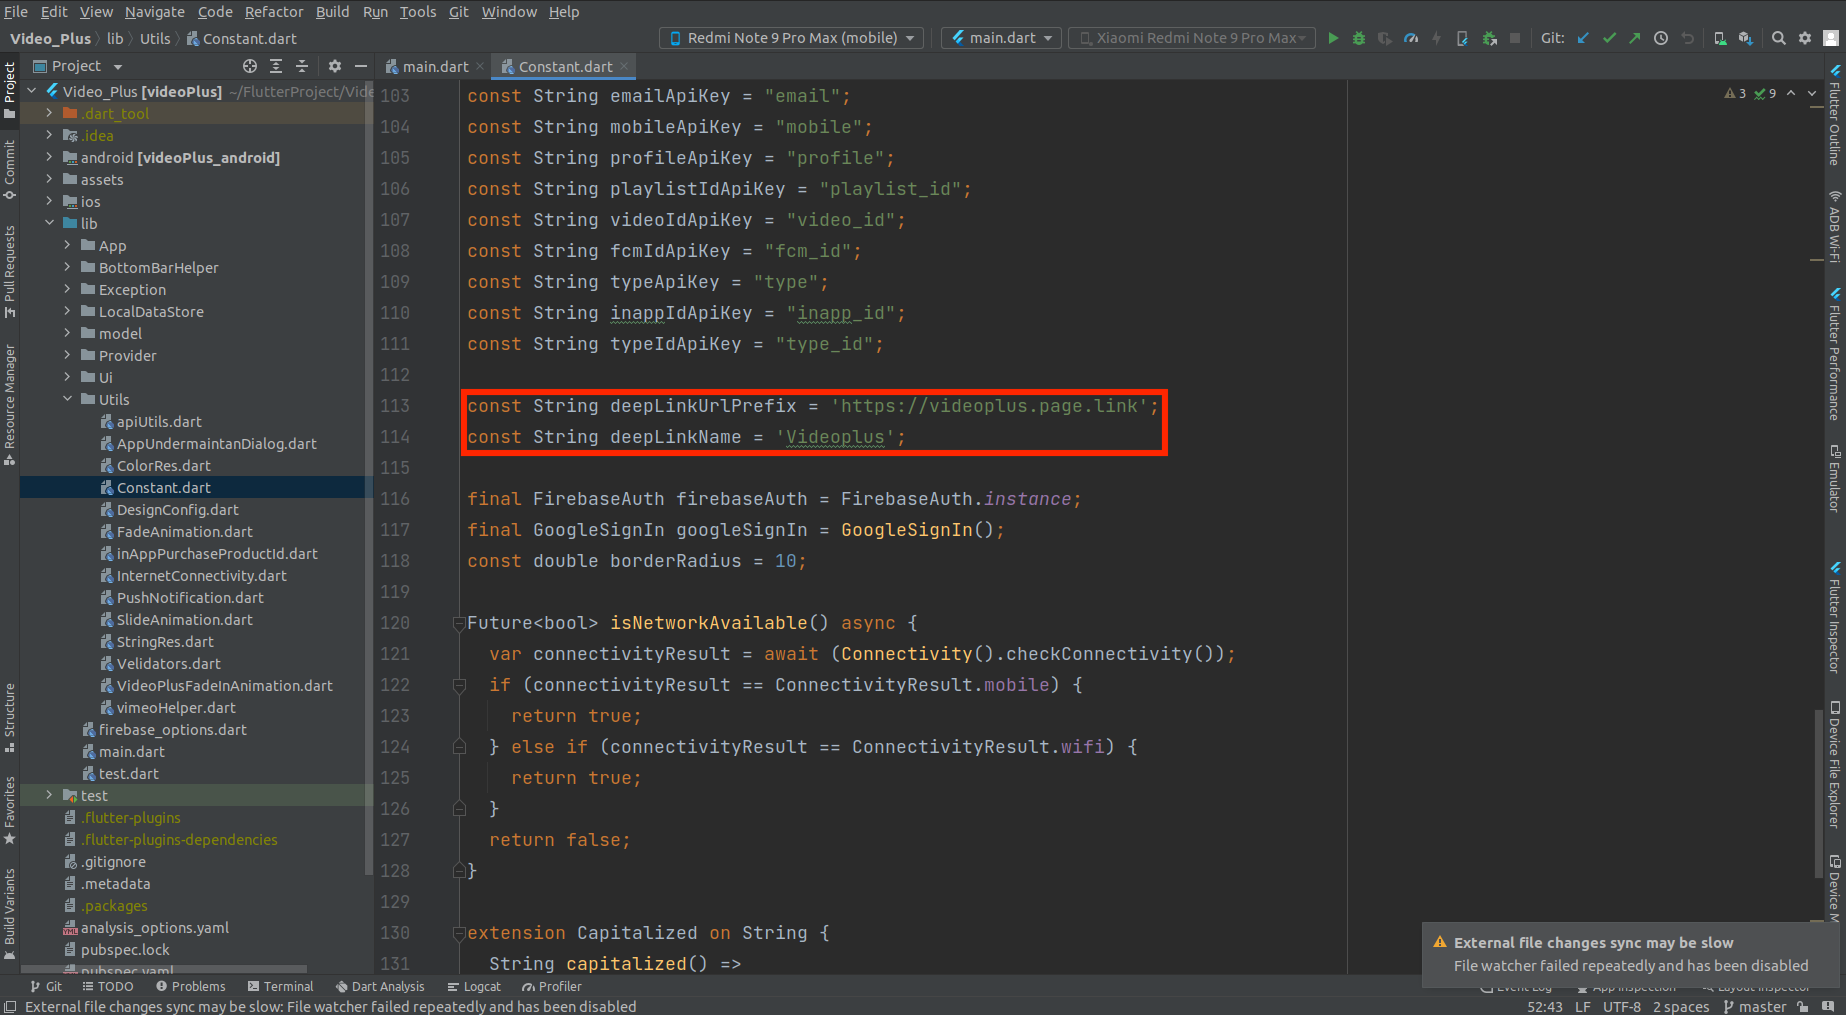
- Paste in constant file
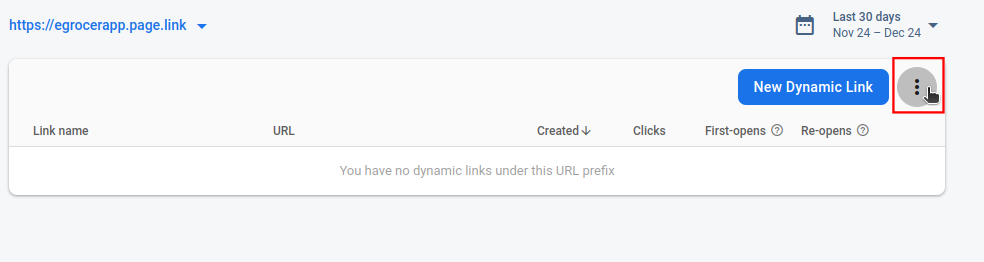
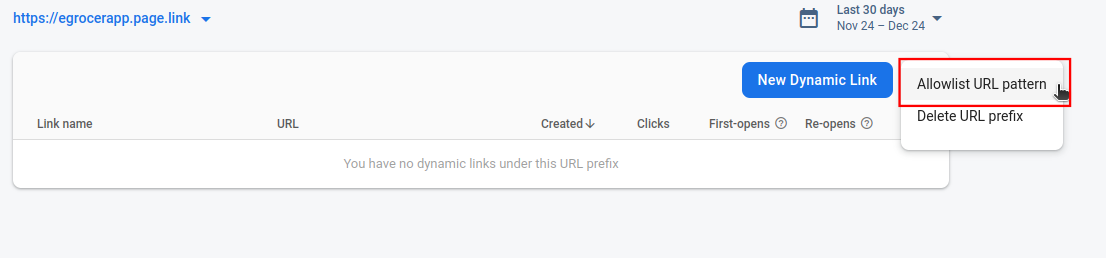
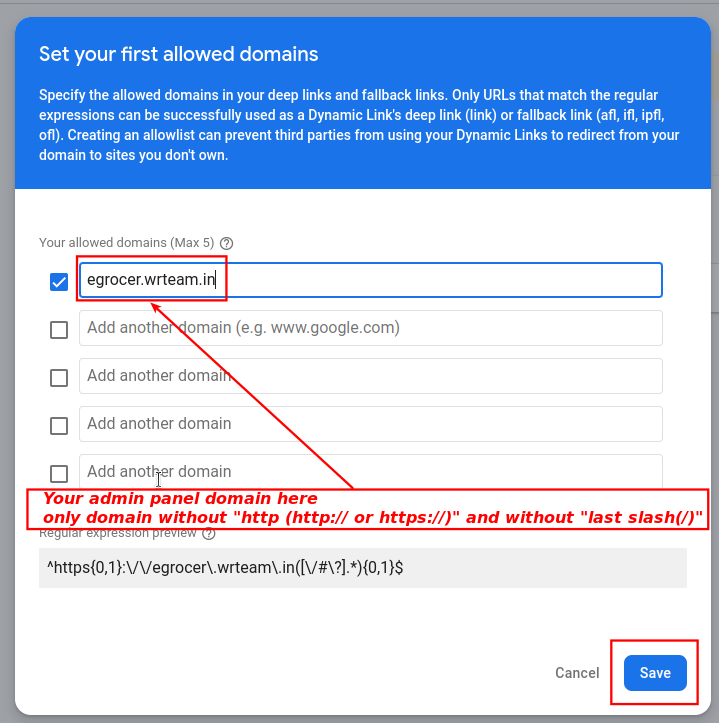
- Add your domain to allowlist url patter for activate the dynamic links for your admin panel and app.
- Now for ios below step is needed
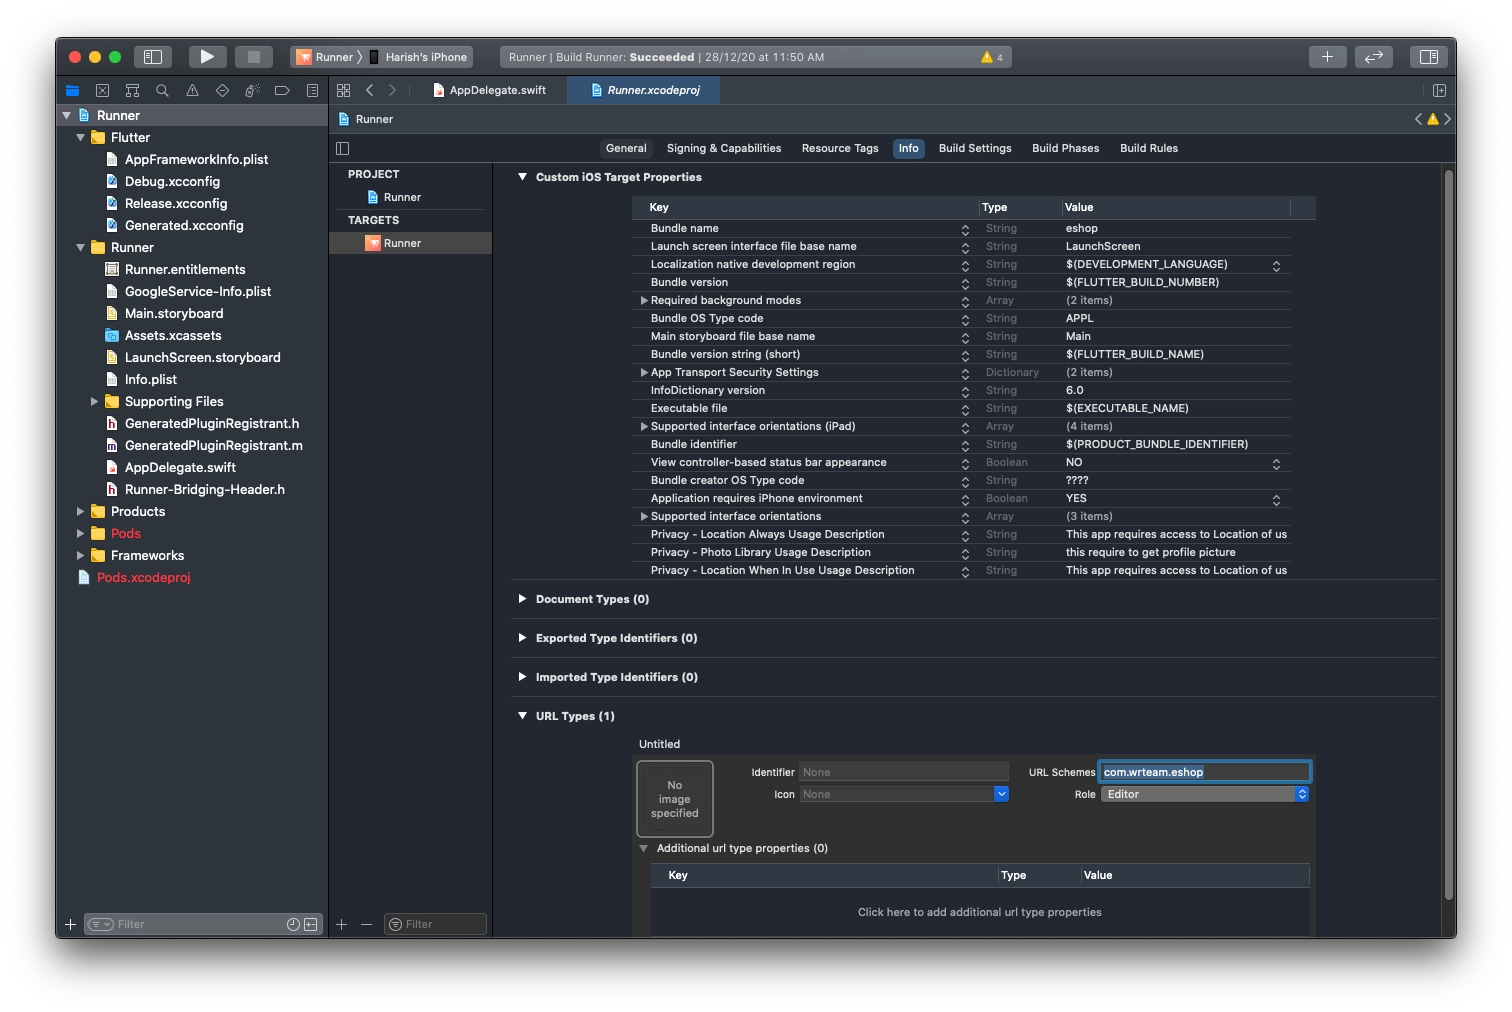
- Create a new URL Type to be used for Dynamic Links. Set the Identifier field to a unique value and the URL Schemes field to be your bundle identifier, which is the default URL scheme used by Dynamic Links.
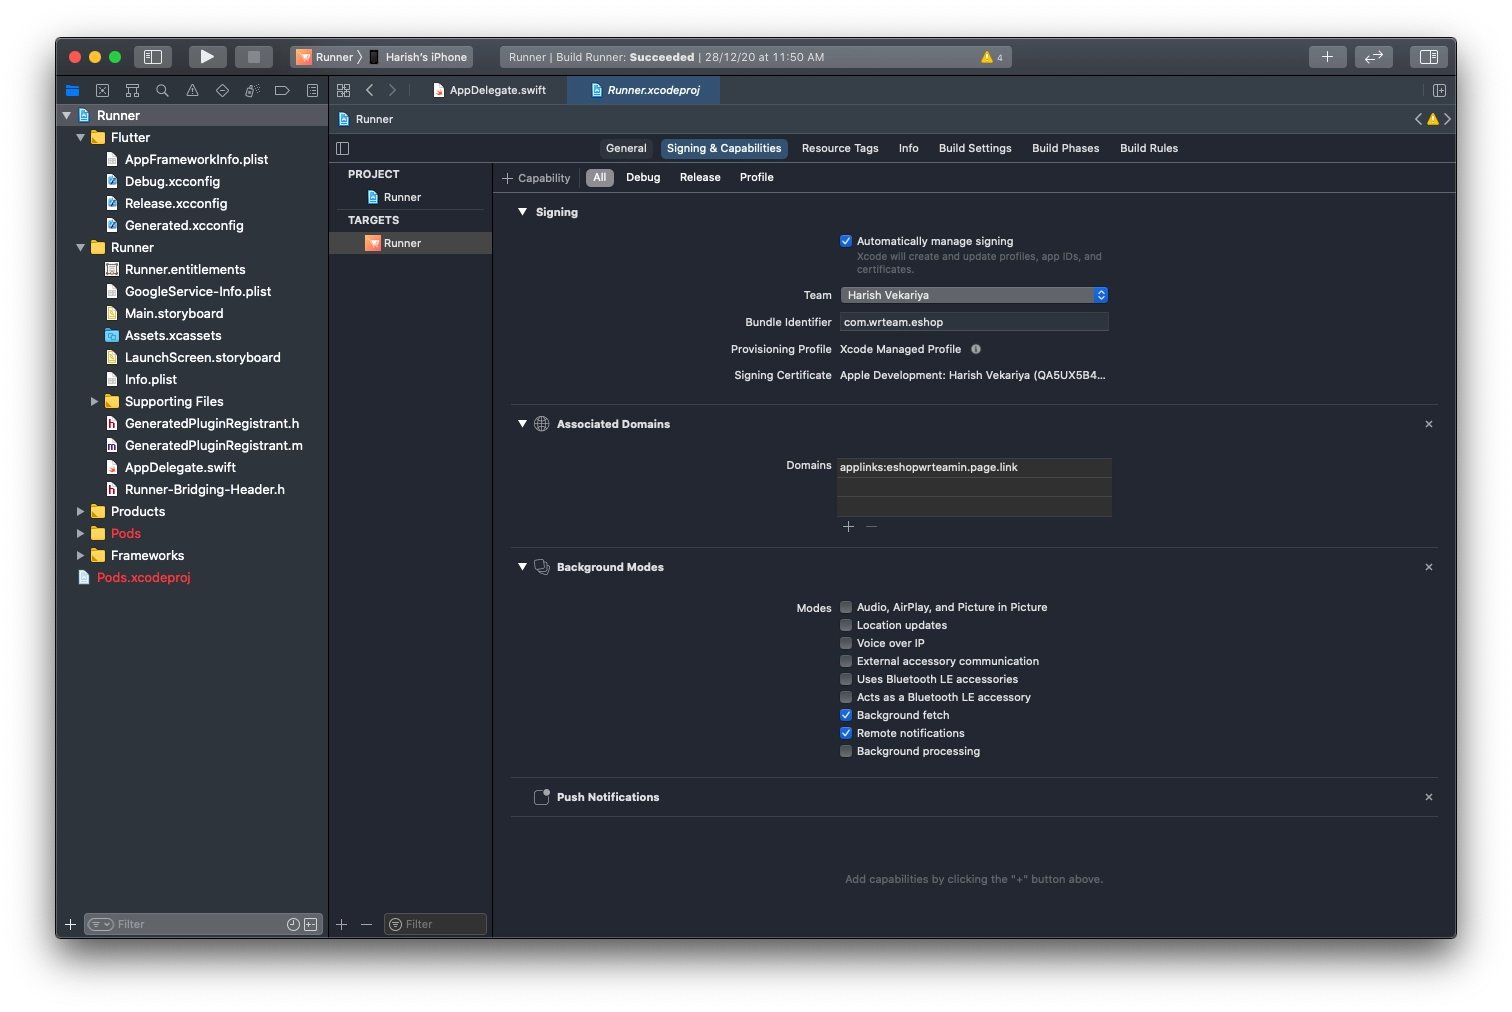
- In the Capabilities tab of your app's Xcode project, enable Associated Domains and add the following to the Associated Domains list: applinks:YOUR_URL_PREFIX Remember not to include https:// or any slashes or paths in your prefix
- In the Info tab of your iOS app's Xcode project:
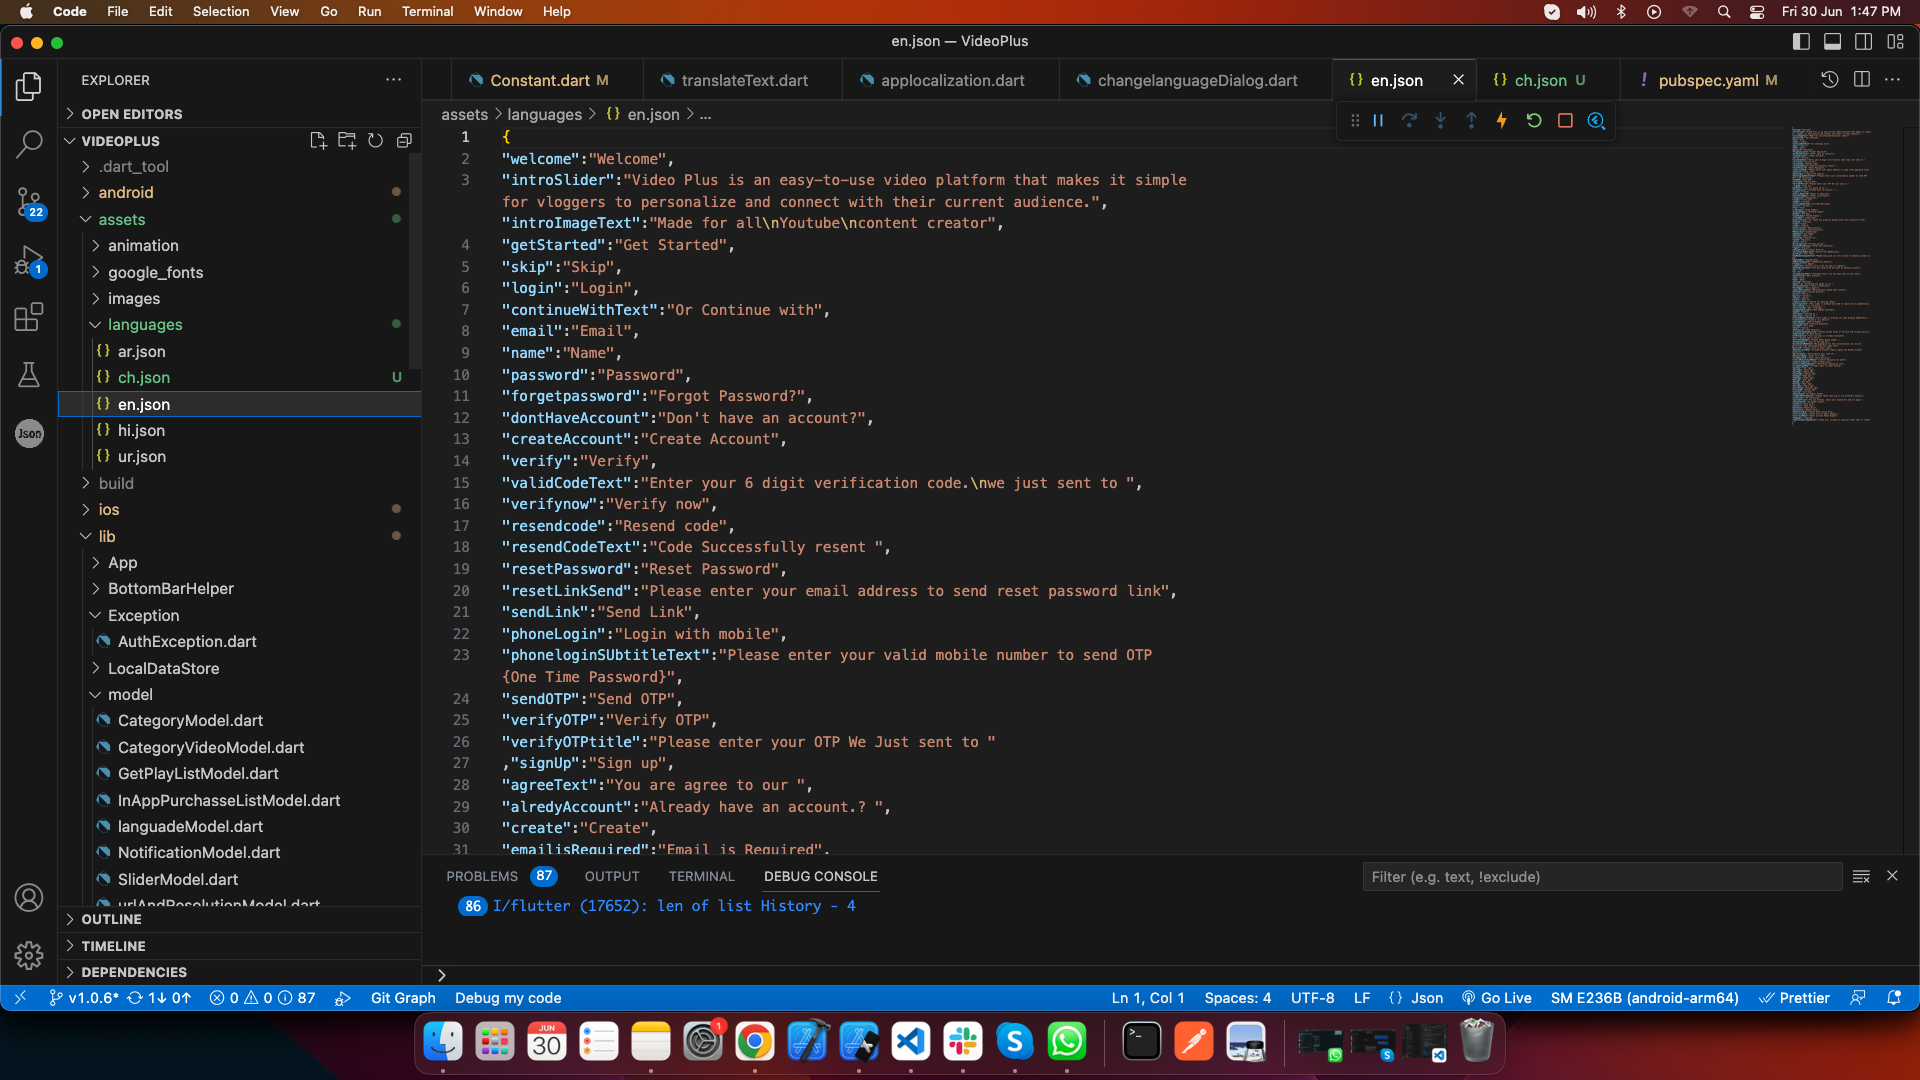
Add More Language
- To add the language name and language code, you should go to the constant.dart file located in the utils folder. Once you have located the file, simply include the necessary language name and language code.
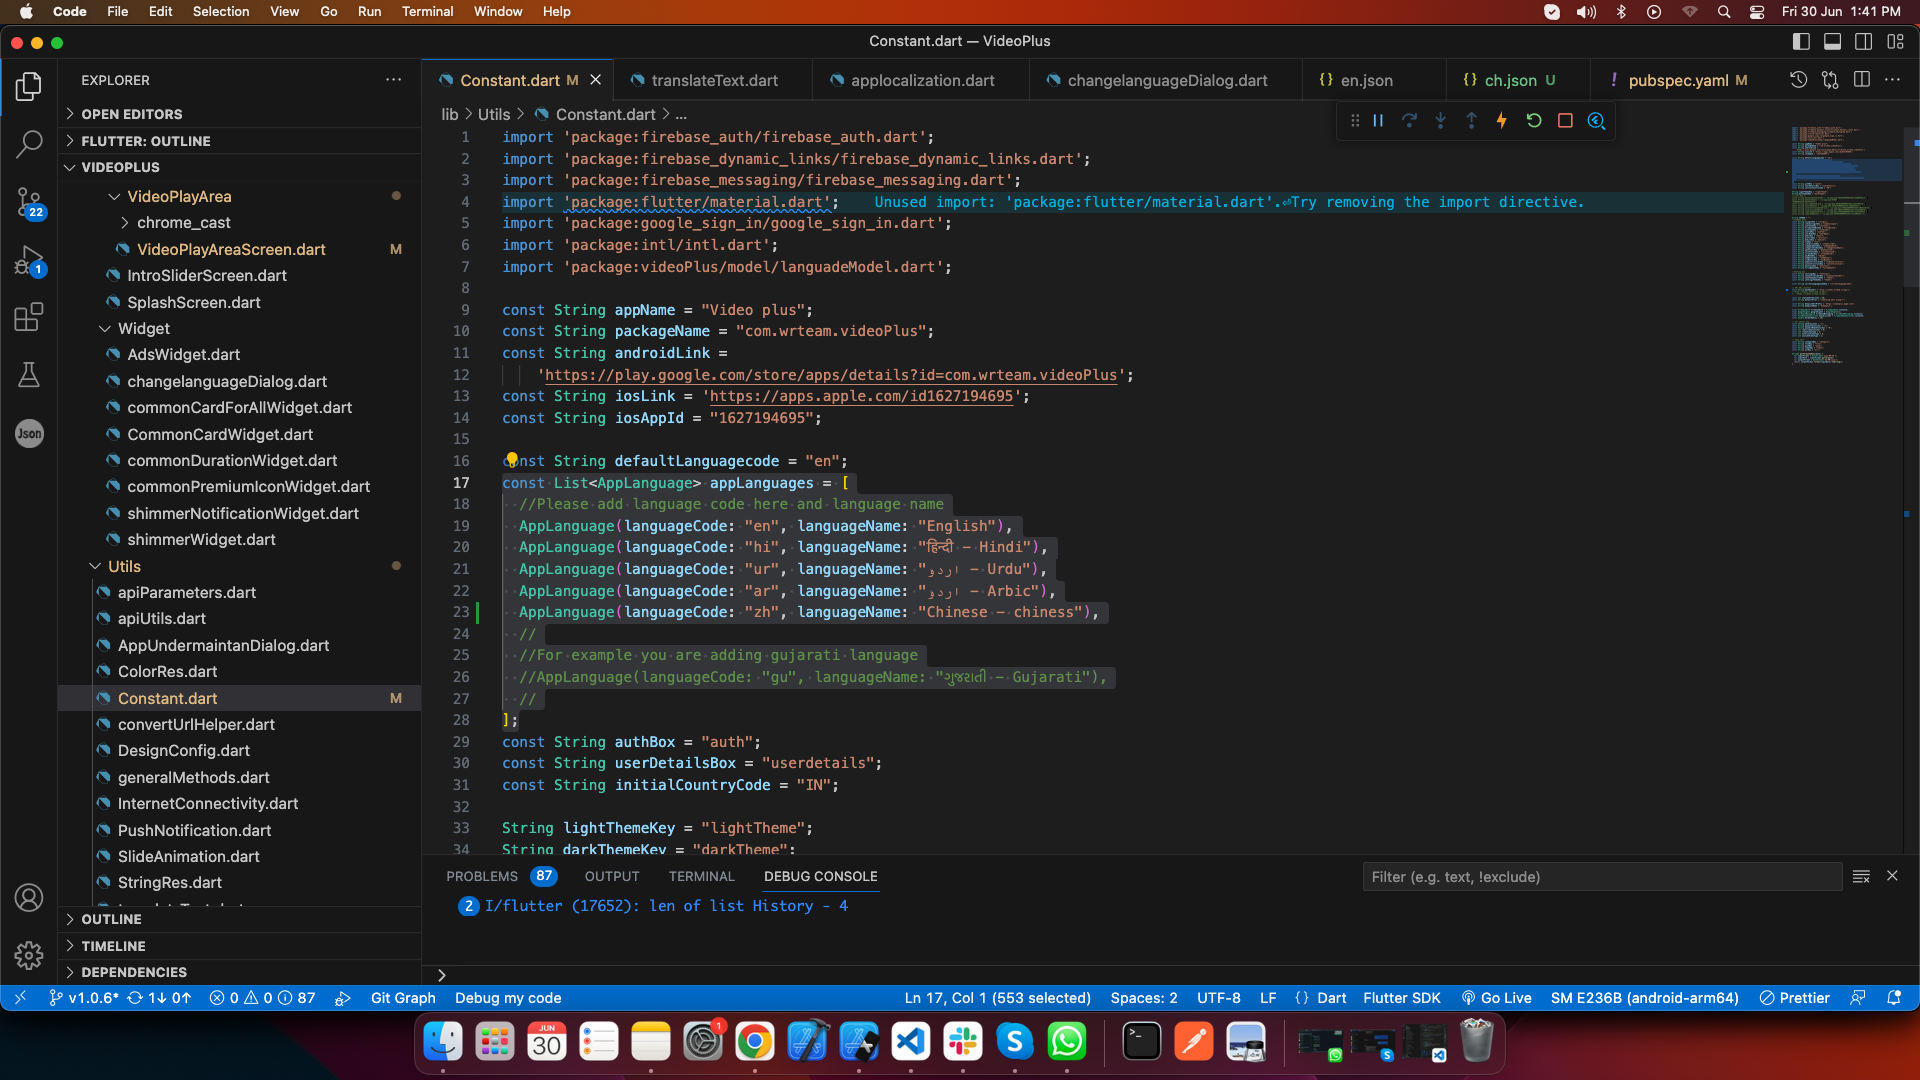
- Please ensure to add a JSON file for the respective language, making sure that the file name corresponds to the language code. For instance, if the language code is "ur," the file name should be "ur.json".
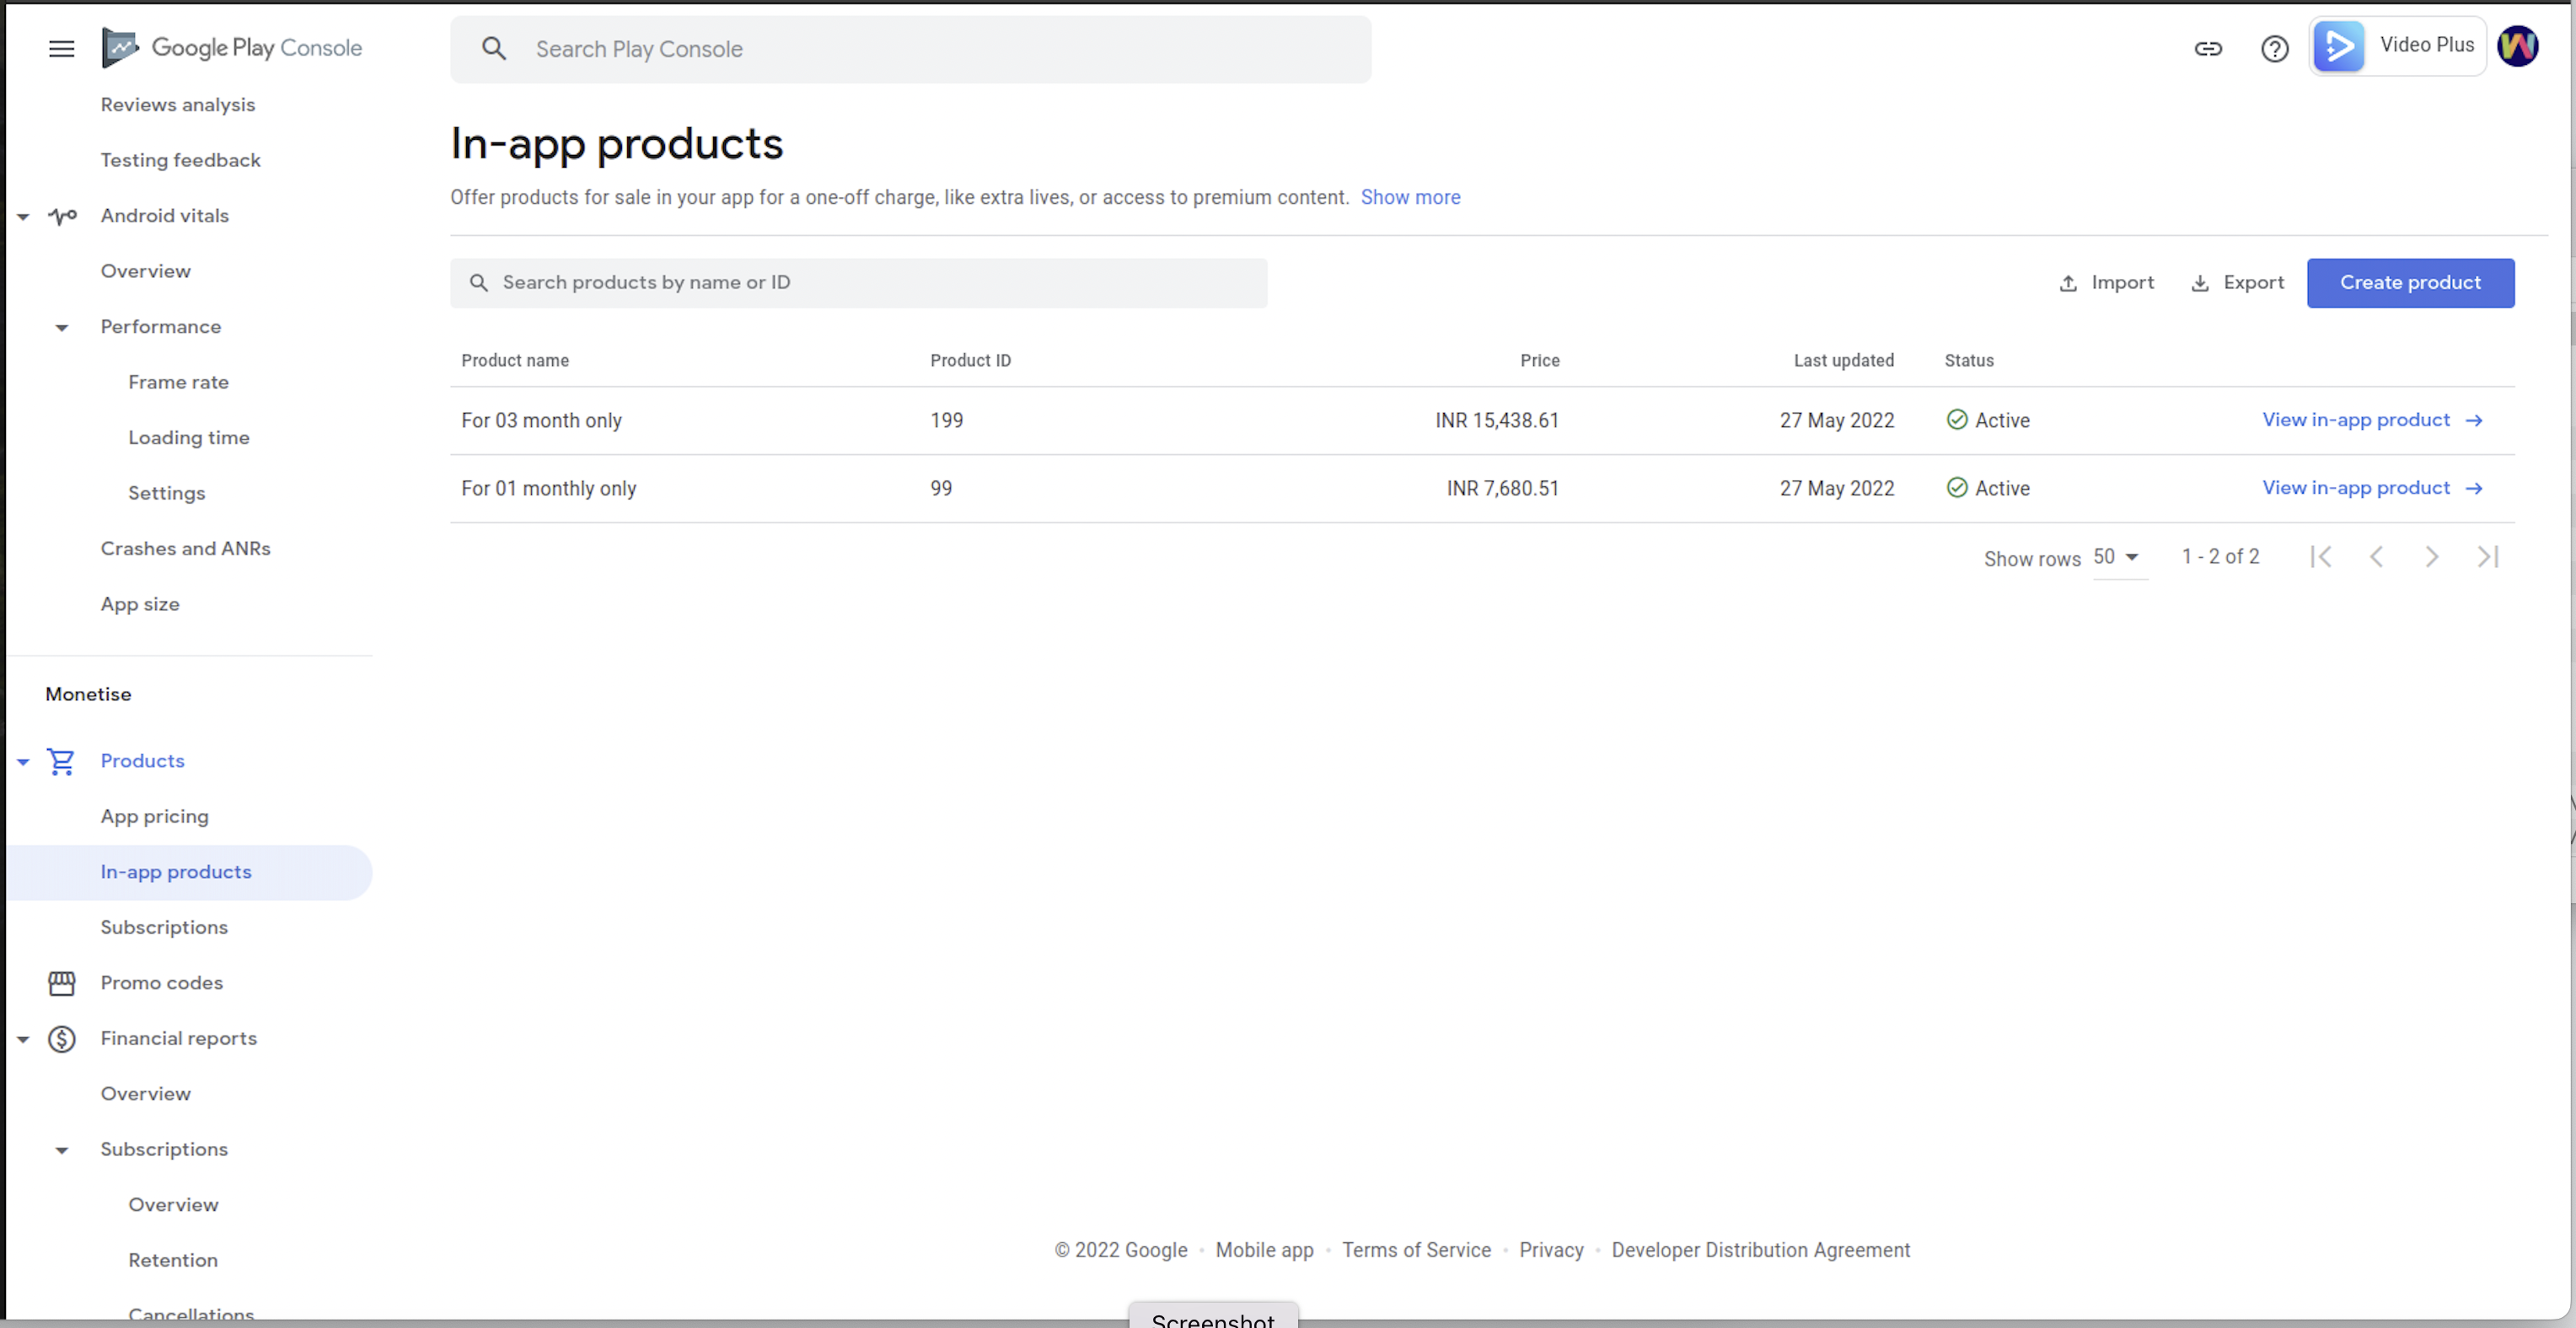
How to configure in-app purchase
- Configure in-app purchase for android applicaiton.
Upload your application in playstore and create in-app products for your applicaiton as shown in
below image.
Id of in-app products (consumable product) in apple and play store must be same.
Support
Its our pleasure to serve our service and support. please contact our support team.
Head of Customer Support : Janki Bhatti Skype Name : janki Bhatti
To help our customers, we constantly be in touch with every customer if they need any assistance regarding our product. We offer our customers a support from Mon – Fri 9.00am to 6.00pm IST (GMT +5.30) – We are a Team located in India – Asia.
Typically we reply our customers for all the questions and queries within 24 hours of time via comments, support forum or emails.
Contact Us
WRTeam has creative and dedicated group of developers who are mastered in Apps Developments and Web Application Development with a niche in delivering quality solutions to customers across the globe. Contact us today to find out how we can help you or for freelance work.
Visit Us : https://wrteam.in
Mail Us : support@wrteam.in
Thank you very much.